Getting Started
Introduction
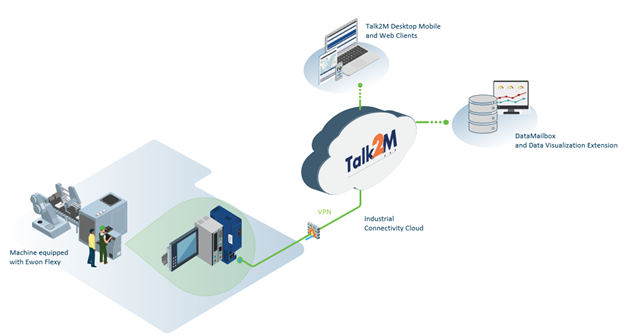
Your Ewon Flexy can be configured to read and log data from a wide variety of industrial devices including most PLCs.
These data can be exported to the DataMailbox, a temporary cloud-based data repository within Talk2m.
From the DataMailbox, the data can be imported into the data visualization extension for longer term storage and data visualization.
What is DataMailbox ?
The DataMailbox is a temporary data buffer within the Talk2m industrial cloud. On a scheduled or event driven basis, an Ewon Flexy can push its locally logged historical data to the DataMailbox through its existing Talk2m connection. Once the data are stored in the DataMailbox, they can be retrieved by external applications through a simple HTTP based API or moved to longer term storage in the data visualization extension for Talk2m.
Like all the Talk2m features, the DataMailbox is designed with both ease and security in mind. It’s easy because no programming on the Ewon Flexy is required; configuration is managed through the Ewon Flexy’s web interface. It’s secure because the IoT application only ever queries the DataMailbox; it never needs to directly access the Ewon Flexy or its network. And since the data export occurs through the Ewon Flexy’s existing Talk2m connection, there is no need to make any additional changes to the firewall on the network.
The DataMailbox is also designed to be reliable and efficient. When the Flexy sends data to the Data Mailbox, only the new records since the last successful synchronization are sent. This mechanism ensures that if a synchronization isn’t successful for some reason, for example because of a network connectivity issue, records won’t be missed, but when it is successful, records aren’t duplicated.
Share Data through the Data Visualization Extension of Talk2m
When you link an Ewon Flexy from your Talk2m Pro account to a machine in the data visualization extension, you are granting permission to copy data for that Flexy from the DataMailbox to longer term storage. If you have other applications using the DataMailbox, the data will continue to be available in the DataMailbox as usual.
If you enable the Real Time Data feature for your machine in the data visualization extension, the Ewon Flexy will be directly queried on a periodic basis for its most recent tag values. These queries happen through the Flexy's existing Talk2m connection; no changes to the network's firewall rules are required.
Data Visualization
With this Data Visualization Extension for Talk2m, you will gain valuable insights about your machines and will be able to:
- Create Dashboards to present your machine data to your users.
- Configure both automated and manual Alarms and Events to create a history of important events for your machine.
- Use Expressions to make tag values more meaningful to a user or combine the information from one tag with that of another.
- Create Reports.
- Invite Users and grant them access to a specific Group with a Role that gives the user different permissions.
Prepare Your Ewon Flexy
Make sure your Ewon Flexy is ready for data visualization and check if your Ewon Flexy is:
Connected to Talk2m.
Reading tags from your industrial equipment.
Logging tags from your industrial equipment.
Configured to send historical data to the DataMailbox.
If you will use the Real Time Data feature of the data visualization extension, we recommend making a dedicated user on your Ewon Flexy for this feature. This user must not have rights to change your Ewon device's configuration.
Configure your Ewon Flexy to read tags:
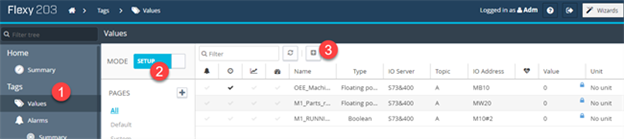
To configure your Ewon Flexy to read tags from your industrial equipment, you must configure the correct IO Servers for your PLC types and then configure the tags.
IO Servers tell the Ewon Flexy what kinds of PLCs it will be communicating with and over what protocol.
Notice
You can configure multiple IO Servers if you are communicating with different types of PLCs.
Once the appropriate IO servers for your application are configured, you can configure your tags on your Flexy which represent specific data elements from your PLC.
To learn more about configuring IO Servers and tags, follow our Flexy e-learning course.
Select the Time Zone of your Ewon Flexy:
We recommend to configure a Time Zone and enable the NTP in your device to avoid timestamps discrepancies.
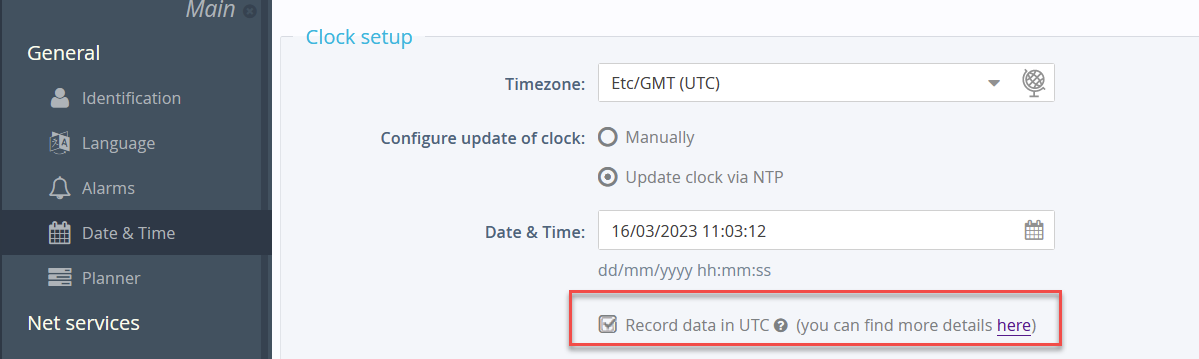
Go to the Main menu, click on General.
Select Date & Time.
In the Clock Setup section, you have several options we recommend you to enable.
Select the Time Zone that applies to your device.
In the Configure Update of Clock option, select Update Clock via NTP to enable the synchronization.
In the Date & Time option, check if the time for your Ewon device is correct.
Notice
Check the option Record Data in UTC to force the device to push its historical data using UTC timestamps.
Click on Save.
Configure Historical Logging for a Tag:
You can configure Historical Logging for a Tag on the tag’s configuration page by checking the box marked “Historical Logging Enabled".
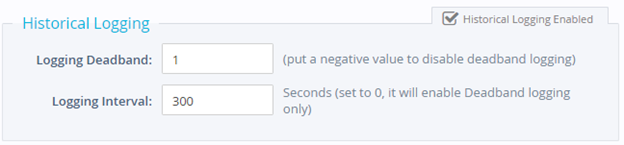
Then use the dead band and interval fields to determine when to log this tag. The dead band field allows you to log when a value changes by a particular amount while the interval field allows you to log at a particular frequency. You can use these two logging criteria either independently or together to make sure you record the information that is important for your application.
To learn more about configuring Logging Tags, follow our Data Logging e-learning course.
Export Data to the DataMailbox:
To configure your Ewon Flexy to export data to the DataMailbox, use the Data Management feature.


Select Talk2m API from the drop-down menu.
Check the Historical Data checkbox to enable data export to the Data Mailbox.
You can restrict which tags’ historical information is sent by using tag groups.
Note
Leaving all the tag groups unchecked will send the historical records of all tags.
In the DataMailbox upload interval field, enter the frequency with which the Ewon Flexy should synchronize with the DataMailbox. The default frequency is once an hour, but this can be modified based on your application.
If you want an alarm to trigger an upload to the DataMailbox as well, check the Upload on Alarm checkbox.
This feature allows data to be synchronized on an event basis and not just on a time interval.
Create a Local Data User:

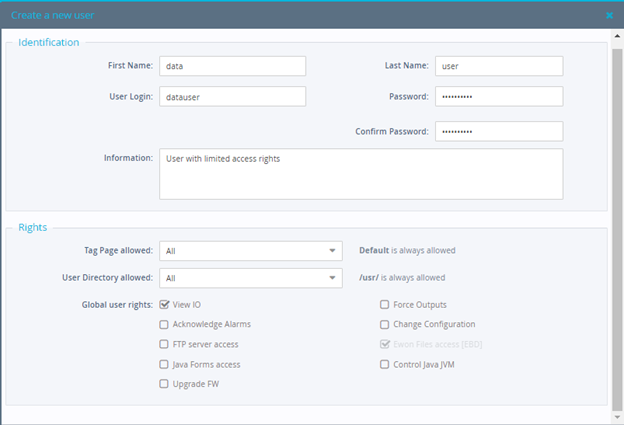
If you want to use the real time data feature of the data visualization extension, we recommend making a dedicated user on your Ewon Flexy for this feature.
Notice
The user should have rights to view IO (read tags) and have Ewon files access (EBD), but they should not have rights to change the configuration.
Prepare Your Talk2m Pro Account
As part of the process of linking your Ewon Flexy to the data visualization platform, you will need to enter valid user credentials for your Talk2m account. We recommend that you create a dedicated user for this with limited remote access rights (only M2web access rights).
You can do this by using the Groups feature of your Talk2m Pro account.
Create a Group:
Through Ecatcher, log into your Talk2m Pro account as a user with administrator rights.
Navigate to the Groups screen and click the Add button to add a new group.
Give your group a name and optionally a description.
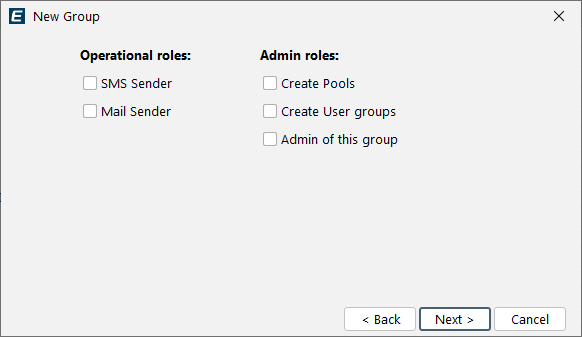
Notice
Do not give the group any operational roles, administrative roles, or roles on groups.
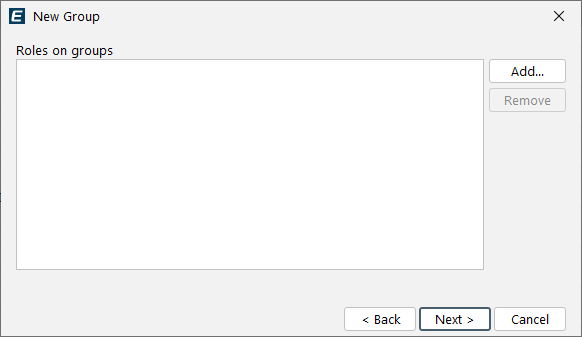
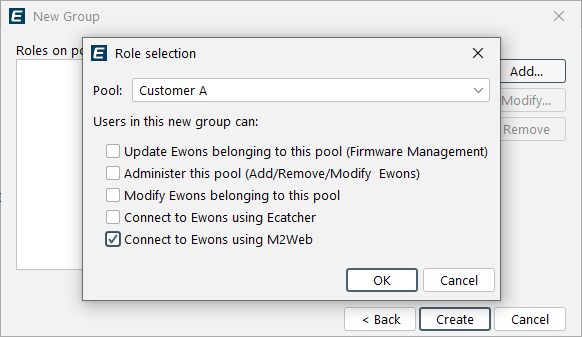
Select an Ewon Pool that this group has access to and limit the access to M2web access.
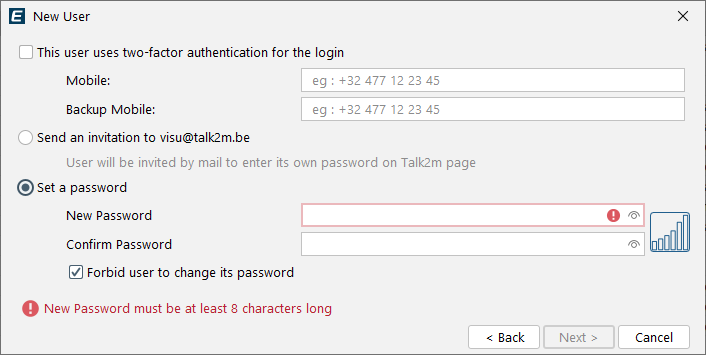
Create a New User:
Tip
We recommend to create a specific Admin user for Talk2m visualization account.
Through Ecatcher, log into your Talk2m Pro account as a user with administrator rights.
Navigate to the Users screen and click the Add button to add a new user.
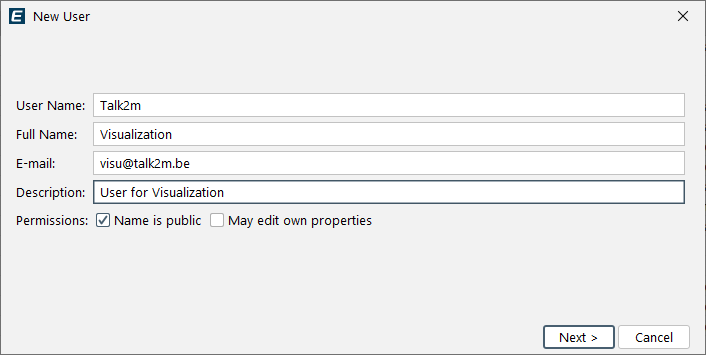
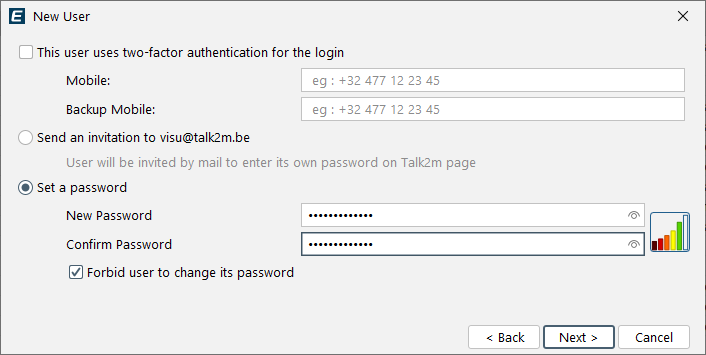
Give this user a name, email address, and password.

Warning
Do not enable 2 Factor Authentication for this user.
Add the user to the group we just created and click create.

Create an API Token:
Through Ecatcher, log into your Talk2m Pro account as a user with administrator rights.
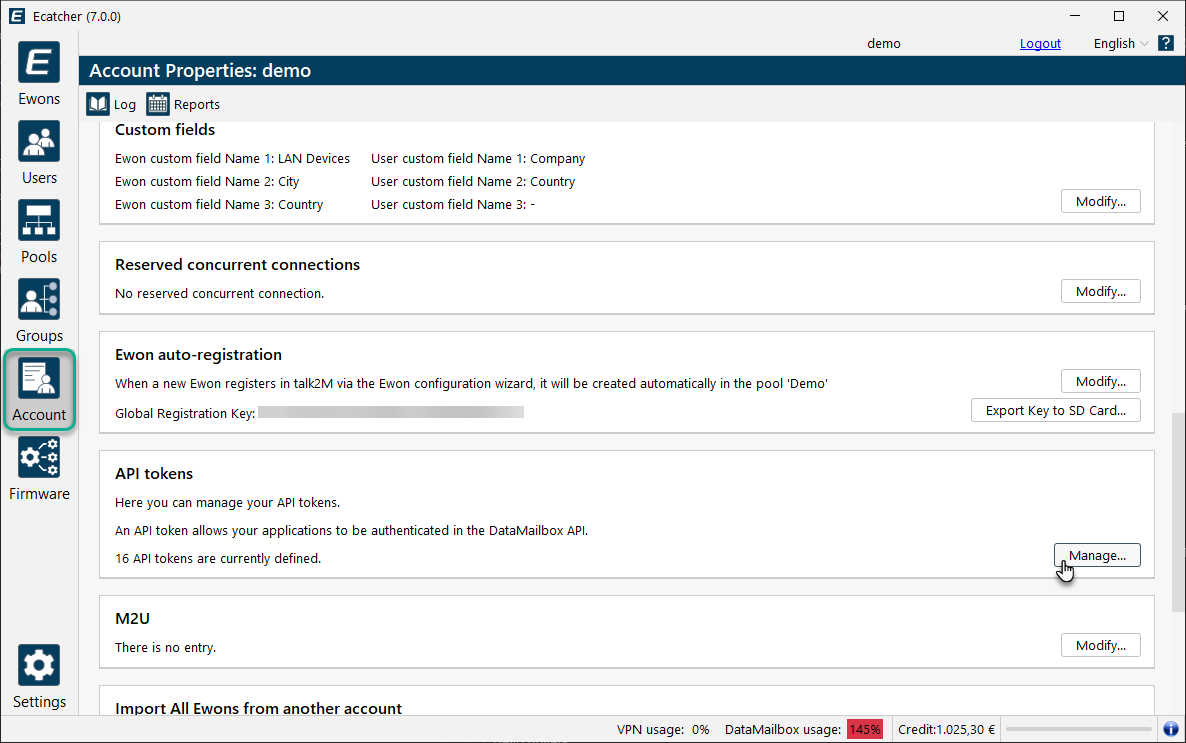
Navigate to the Account screen and click on the Show Advanced Settings link.
Click the Manage button in the API tokens section
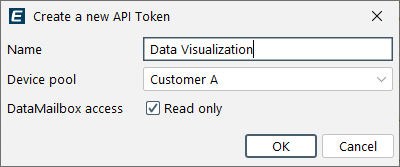
Click the New Token button to create a new API token.
Give the token a name and select the Device pool for this API token. Click OK to create the API token.
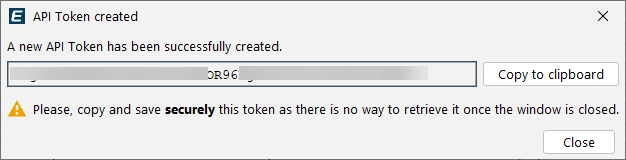
When the new API token dialog appears, copy the token. Securely save this token. You cannot retrieve it from Ecatcher once you have closed the dialog window.
Notice
You will need the token each time you add a new machine in the visualization platform.