Server and connector setup
Check out this article to learn how to parametrize your BACnet objects by adding the BACnet connector in the i4scada Studio.
To proceed with i4BACnet configuration, open Studio and under Signals area select by means of right-clicking, the Server List entry. Select the New Server option:
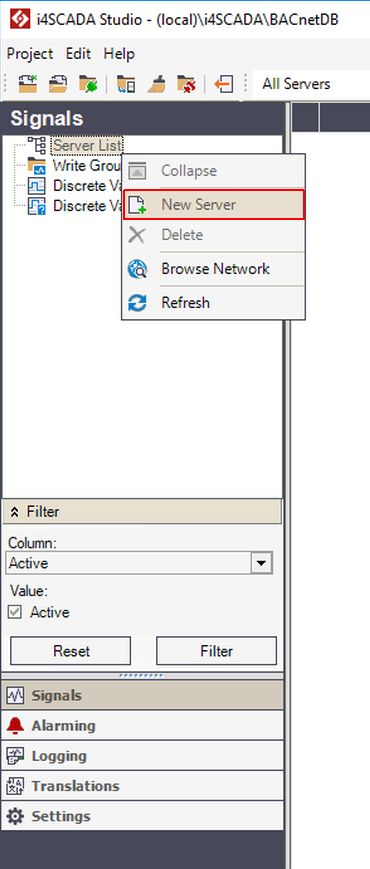
Create new Server
Enter the Server name. For a server running on the same machine (localhost) use the server name "."

New Server
Right-click the newly created server and select the New connector option. An additional list is displayed containing multiple connectors. Click on the BACnet.Connector option.
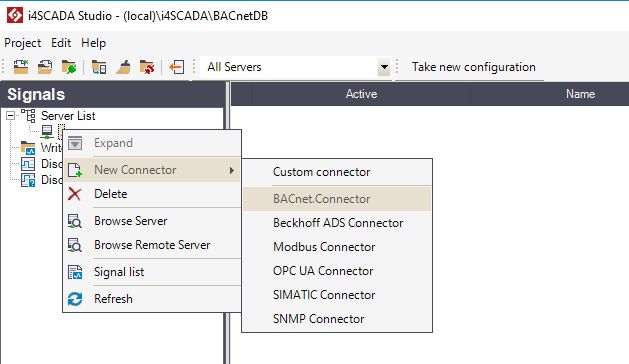
Click on the BACnet.Connector
Once the BACnet Connector option is clicked, a new BACnet Connector is created under the server. Additionally, the Connector configuration panel appears on the screen:
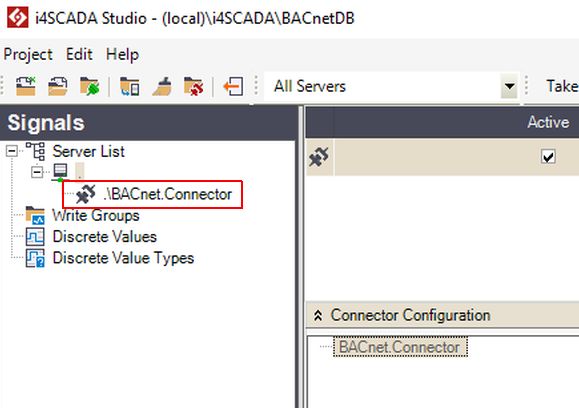
BACnet Connector - Configuration panel
Prior to adding the Broker URL and proceeding with the connector configuration, make sure that the service configuration, points to the BACnet Broker URL.
Start the BACnet Service and BACnet Broker separately if they are not located on the same machine. Otherwise, it is sufficient to start the BACnet Service and Broker will start automatically.