Setting the command priority for a BACnet Signal in i4scada
The scope of this tutorial is to guide you on how to give priority to controls where conflicting control situations may occur.
BACnet uses command priority to assign different levels of priorities to command entities throughout a system. The scope of this process is to give priority to controls where conflicting control situations may occur.
There are sixteen levels of priority in BACnet, known as the priority array, which consists of commands or NULLs. The active command is the one with the highest priority (lowest array priority level) with a non-Null value. If a priority level holds a value of NULL, then the next non-NULL object is assigned to the object.
The scope of the present tutorial is to describe the necessary settings enabling the command priority of a BACnet Signal, to level 8, which is the standard setting for Manual Operator. If a priority level has not been specified when attempting to command a property, the priority level will be by default set to level 16, which is the lowest priority.
Setting the command priority in i4scada Studio
In order to set the command priority in i4scada Studio, please follow the below-described steps:
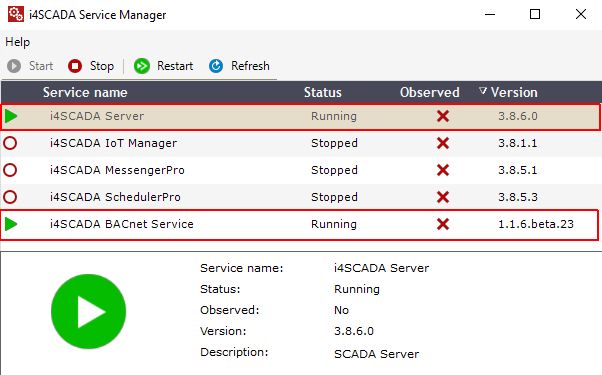
Start the i4scada Server and check that BACnet Server is also running.
Open the i4scada Studio application.
Configure the BACnet Connector as described in the previous article.
When reaching the Signals configuration step, import a present-value property of a BACnet Object.
Note
For the present tutorial, we shall also import a "priority-array" property of the BACnet Object, that will be used exclusively for testing the command priority settings.

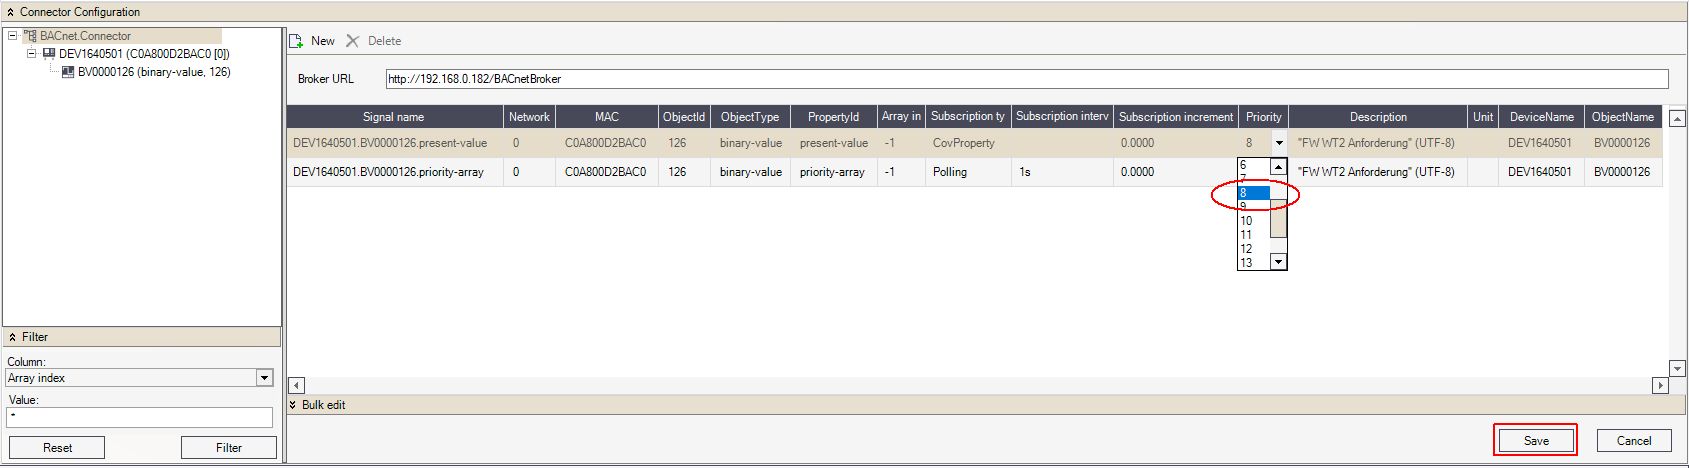
In the BACnet Connector Configuration area, update the Signal Priority of the "present-value property and set it to value 8.
Make sure to preserve your changes, by clicking the Save button.
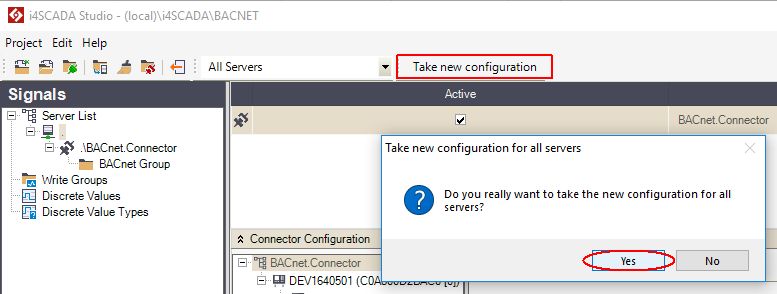
In order to bring the Server up to date, you can either restart the i4scada Server in Service Manager or click on the Take new configuration toolbar button.
Testing the command priority setting
To visually check the command priority settings, please organize the below-described steps:
Make sure that the i4scada and BACnet Servers are running, under the Service Manager application.
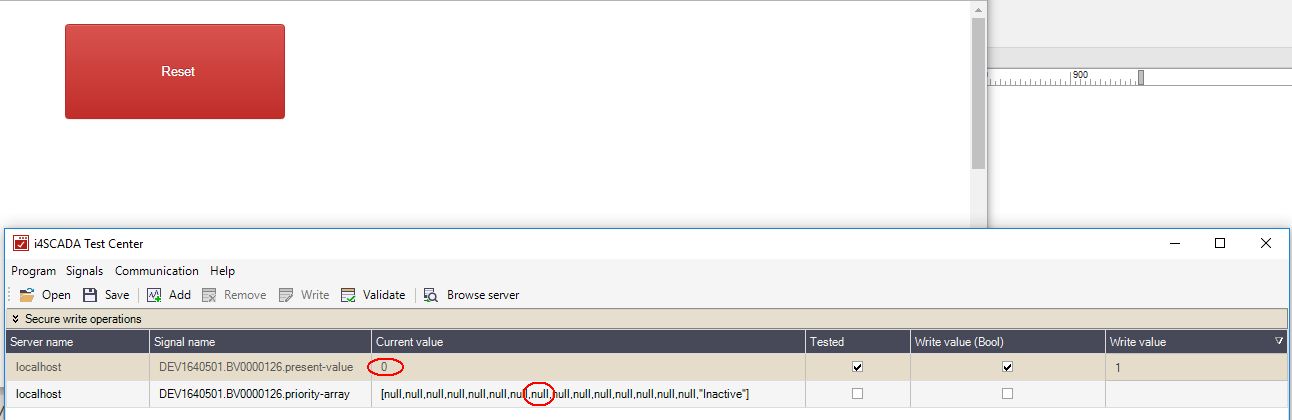
Open the i4scada Test Center.
Add the present-value and priority-array Signals.

The properties are added to the list with their current values. The "priority-array" Signal value is commanded by the "present-value" Signal value.
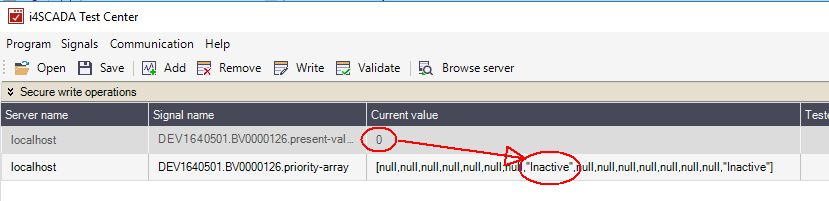
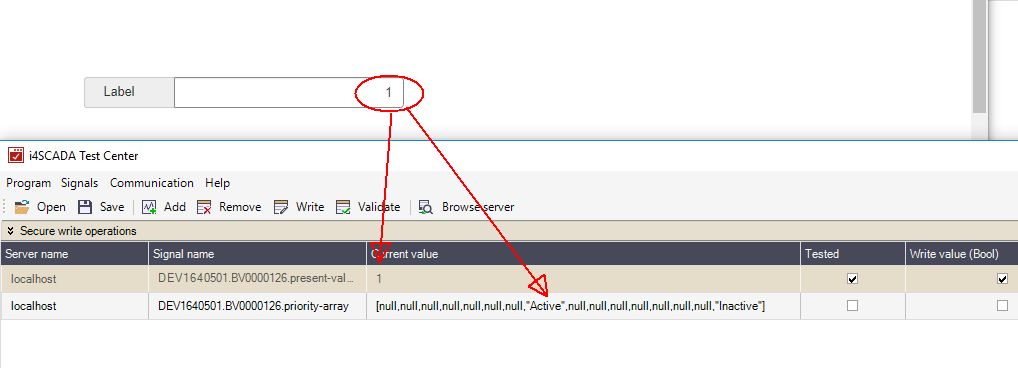
Enter value "1" in the Write value cell of the "present-value" Signal.
The Current value of both "present-value" and "priority-array" Signals is updated.

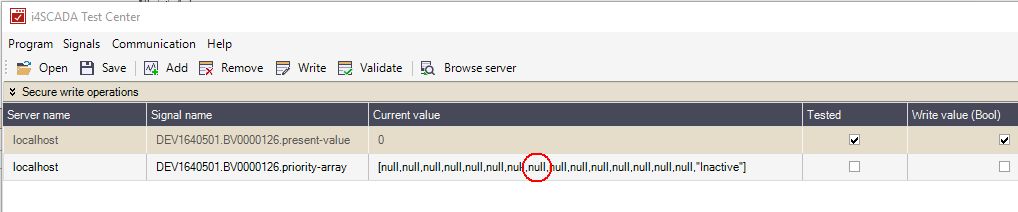
To reset the "priority-array" value, delete everything in the Write column of the "present-value" Signal and hit enter. You will recognize that the "priority-array" Signal value is set to NULL.

Setting the command priority in i4scada SmartEditor
In order to set the command priority of a binary-value BACnet Signal, in the i4scada SmartEditor, we shall use the Studio Project created within the previous tutorial.
Open the i4scada SmartEditor application. By default, an empty project page is opened.
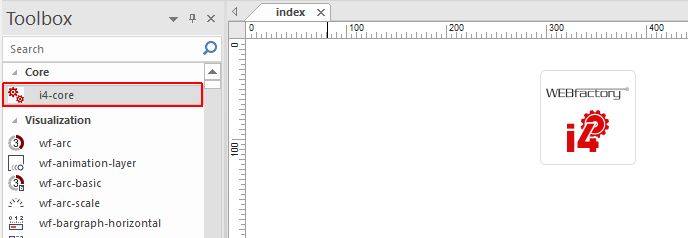
Drag the i4-core extension and drop it to your project page.
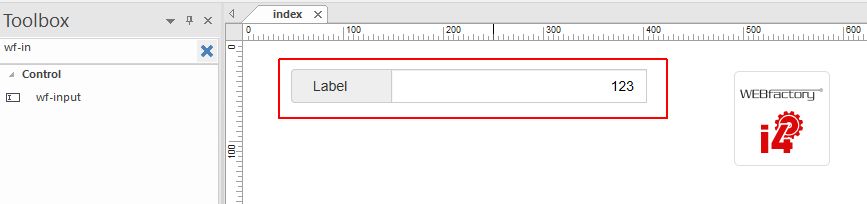
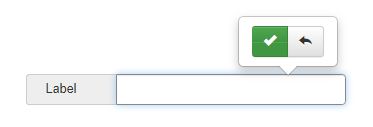
Next, drag a wf-input extension and position it on your project page.
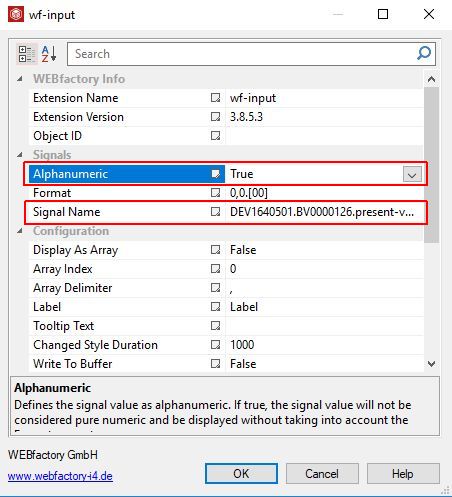
Open the Object Properties panel, of the wf-input extension and organize the following changes:
Set the Alphanumeric property to value True;
Set the "present-value" BACnet Signal Name.
Testing the command priority setting
In order to check the previously organized settings, proceed with the following steps:
Make sure that the i4scada and BACnet Servers are running, under the Service Manager.
Proceed, by publishing the i4scada SmartEditor project.
Open the published project in your preferred browser.
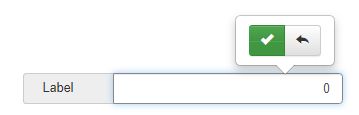
The wf-input extension displays the current value of the "present-value" Signal.

Alternatively, you can open the i4scada Test Center application and follow up your run-time changes as follows:
Change the value of the wf-input from 1 to 0 and confirm the change.
The Current Value of both present-value and priority-array properties have been updated accordingly. The change can be seen in the i4scada Test Center application.

Change the value of wf-input from 0 to 1 and confirm the change.
Checking the Current Value field in i4scada Test Center will reflect the change.
As a final step, the command priority can be reset by clearing all the values in the wf-input and confirming the change.
The changes are visible in the i4scada Test Center application. The Current Value of the priority-array property is reset to NULL.
Resetting the command priority for a BACnet Signal in i4scada SmartEditor
In order to reset the command priority of a BACnet Signal, in i4scada SmartEditor, the following steps need to be organized:
Open the i4scada SmartEditor application. By default, an empty project page is opened.
Drag the i4-core extension and drop it to your project page.
Next, drag a wf-button extension and position it on your project page.
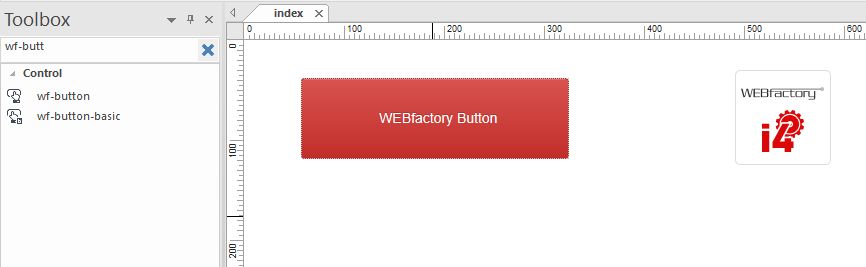
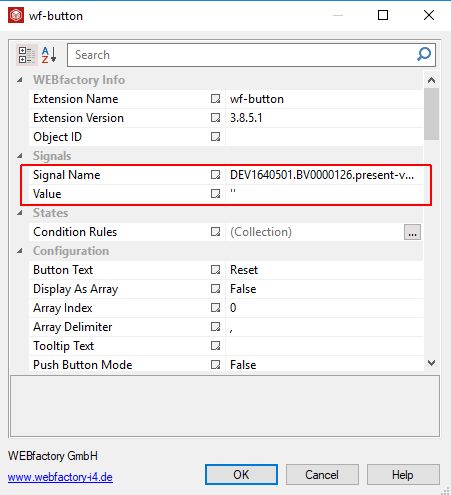
Open the Object Properties panel, of the wf-button extension and organize the following changes:
Add the present-value BACnet Signal Name;
Set the Value property to '' (two apostrophes without a space between them).
Testing the command priority setting
Let's check how the previous settings work! In this regard, we will again use the i4scada Test Center application, to visually follow up the changes.
Make sure that the i4scada and BACnet Servers are running, under the Service Manager.
Proceed, by publishing the wf-button i4scada SmartEditor project.
Open the published project in your preferred browser.
The wf-button extension is displayed.
Open the i4scada Test Center application and follow up your run-time changes as follows:
The present-value and priority-array Signals have a current value of 1 / Active.

Click the run-time wf-button extension.

Check again the current value of the Signals, in the i4scada Test Center application. The current value was updated for both of the Signals, from 1 / Active to 0 / NULL.