Account
The Account page is divided into different sections:
Account Information:
Displays the general account information.
Click on the Modify... button to change the account information.
Security Policy:
Displays the Password Policy and the Two-Factor Authentication settings applied to your Talk2m account.
Password Policy
For example: Minimum 8 characters. At least one special character.
Click on the Modify password policy ... button to configure the Password Policy settings for all users of your account.
Two-Factor Authentication Policy:
Displays if the Two-Factor Authentication is enabled or not and which users have the option activated.
For example: Two-factor authentication is enabled for: jft, John Smith[jsm].
Click on the Modify 2-Factor Authentication policy... button to display the Two-Factor authentication details and change the settings. You will be able to:
Enable the Two-factor authentication by default for all new users.
Allow the Remember this PC option.
Determine an automatic expiration date for the Remember this PC option.
The expiration date begins when the user decides to activate the 2-factor authentication and checks the Remember this PC option.
More information about two factor authentication can be found in the Two-Factor Authentication section.
Credit & Contract:
Displays the current credit balance of your Talk2m account. It also displays the number of concurrent connections of your Talk2m account.
Note
Concurrent connection = one user connected to an Ewon through Ecatcher.
Multiple concurrent connections are only available for light and pro accounts
Click on the Credit and payments... button to display the monthly Credit and Payments reports
Click on the Contract details... button to display the Contract Details.
Contacts:
Lists the contact people encoded for this Talk2m account.
The contact information will be used for server maintenance announcements or mailings of other important information.
Click on the Modify... button to add other contacts.
Notice
Clicking on Show advanced settings... will display further sections:
Custom fields:
Displays the 3 custom fields names linked to each user and each Ewon. Click on the Modify... button to change the names of the custom fields.
Reserved Concurrent Connections:
Displays the number of reserved connections and for which user group they have been reserved.
This option will assign and reserve one or several concurrent connections for a designated group. This means members of other groups will not be able to use all of the concurrent connections. Some will be kept available for members of the designated group.
For example: 1 concurrent connection (out of 3) is reserved for members of group 'Maintenance.
Click on the Modify... button to change the number of reserved concurrent connections.
Ewon Auto-Registration:
Displays the Global Registration Key (GRK) for the account.
Click on the Modify... button to configure the auto-registration feature or to generate a new key.
Click on Export Key to SD card... to save the key for use later.
See the Ewon Auto-Registration section for more information.
API Tokens:
Displays information about how many API tokens are current defined for the Talk2m account.
Click the Manage... button to add, delete, or update the API tokens.
See the Talk2m API section for more information about API tokens.
M2U:
Displays the defined M2U links.
Click on the Modify... button to encode and specify the M2U links.
Import All Ewons from another account:
Provides an easy way to bring your Ewons from one or more free accounts to your Talk2m Pro.
Just follow the process by clicking Import all Ewons Wizard... (information of your free+ account are required)
Notice
Only Ewons with an active registration status can be imported.
Privacy:
It is possible to locate your Ewons based on their WAN connectivity. The Ewons will then appear in the Map view of Ecatcher and in the Map view of M2web.
Geolocation can be enabled or disabled for all Ewons on the account from the Privacy section.
In accordance to the Terms of Service for Talk2m, under some circumstances, automatic security patch upgrades (ASPU) may be applied to your Account and to all Devices with a new software version containing a security patch.
If remote management is disabled in the Privacy section, these patches will not be applied automatically.
More information can be found in our Talk2m - Terms of Use.
M2web Logo Program:
Customize the look and feel of the M2web portal.
This option allows you to personalize your M2web portal with custom colors and images and authorize the implementation of the M2web login form on a custom web page. For more information, please check our AUG-0060-00 - M2web Logo Program.
Credit & Contract
The Credit & Contract section displays the contract details and current credit balance of your Talk2m account.
Below, see an example of the credit balance in a Talk2m pro Account:

Notice
Depending on your plan, you can find more accurate details in our Talk2m pricing Plans section.
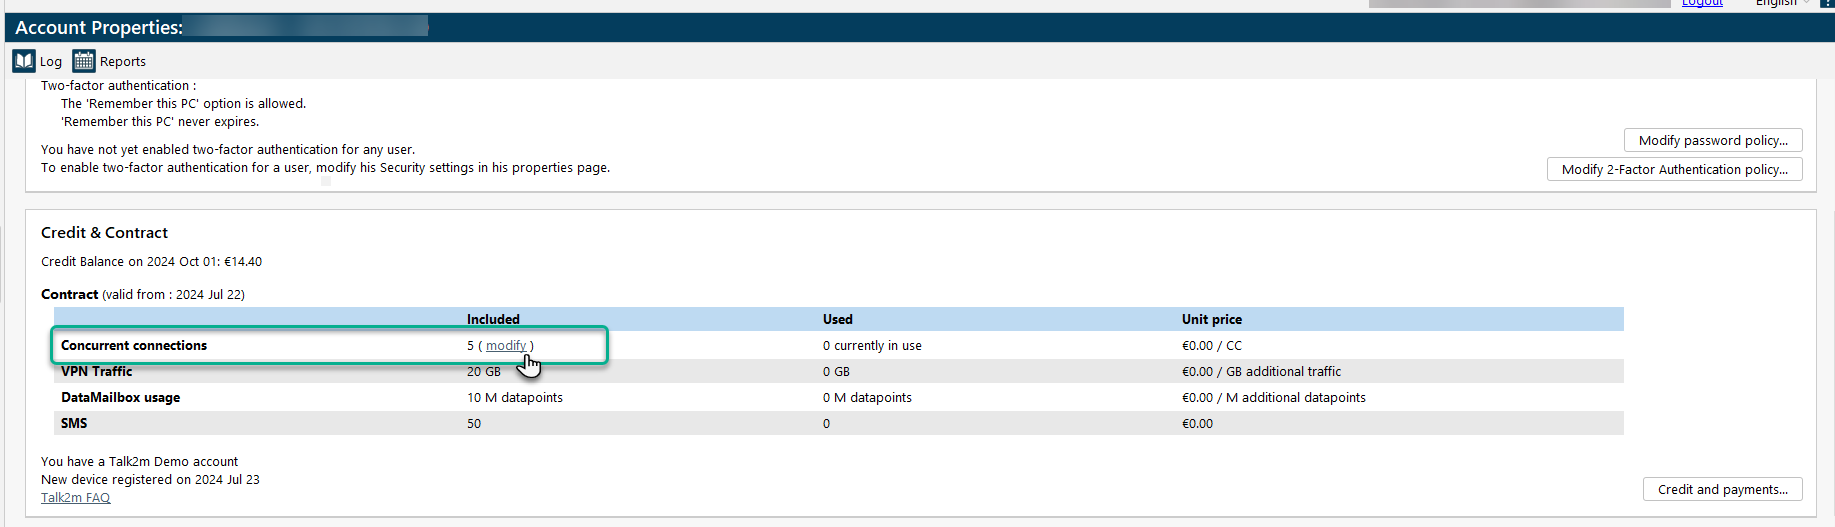
This section also displays the number of concurrent connections available in your Talk2m light/pro account.
Included concurrent connections concerns the users connected through Ecatcher desktop application.
Used concurrent connections concerns the users connected through Ecatcher mobile and desktop.
You can increase or decrease the number of concurrent connections for your Talk2m account by clicking on the Modify link in the table. See Concurrent connections for more information.
A concurrent connection = one user connected to an Ewon through Ecatcher
On an account with 5 concurrent connections, 5 different users can connect to different (or to the same) Ewon simultaneously with Ecatcher.
Click on the Credit and payments... button to display the Credit and Payment reports.
Click on the Talk2m FAQ... link to be redirected to the FAQ Section about our products & solutions.
Credit and Payments
The Credit and Payments window allows you to open the connection and consumption reports for each month.
You can find your contract details in the table that displays contract information concerning your Talk2m account.
You'll find information here about:
Account Type
SMS price
VPN Traffic included
DataMailbox Usage
The reports for the current month are also available. The reports for past months can be downloaded in 3 different formats:
|
|
|


Click on the Account option.
Scroll down to the Credit and Contract section.
On the lower right corner, clck on the Credit and Payments... button.
Click on the blue arrow to select the report format and start the download.
Notice
You can make payments to purchase additional SMS packages on this screen.
Concurrent connections
With a Talk2m light/pro account, multiple users can make Ecatcher connections to the same or different Ewons at the same time.
These simultaneous Ecatcher connections are referred to as concurrent connections.
Concurrent connections refer ONLY to Ecatcher connections. Simultaneous connections through M2web and Ecatcher mobile are unlimited.
You can change the number of concurrent connections of your Talk2m account at any time.
Important
Change made in this area may affect your contract and the price.
In the combo box, you can change the number of concurrent connections for your account.
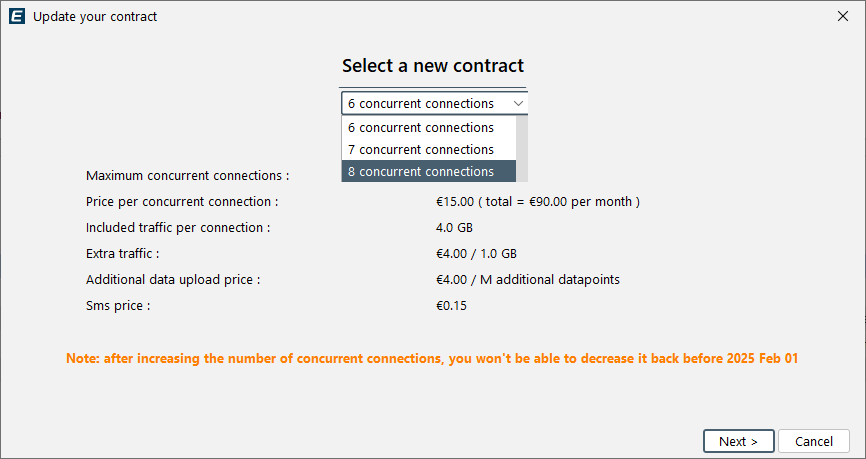
The transition to a higher number of concurrent connections will be immediate. Decreases are only applied after the current number of concurrent connections has been in effect for at least three months.
This page is also a reminder of your active contract. You can see on it:
Maximum Concurrent Connections
Price per connection
Included Traffic (per month)
Price for extra traffic
Maximum concurrent connections (per month)
SMS Price
Mail Price
Custom Fields
Ecatcher allows adding custom information to each Ewon and to each user.
You have at your disposal 3 custom fields for Ewons and 3 other custom fields for users.
These custom fields are displayed inside the Ewons list and user list.
They can also be used to sort or to filter out specific Ewons or users.
You can specify the names given to these 6 custom fields (3 for Ewons and 3 for users) under the advanced settings section of the account page.
To set up your Custom Fields specification:
Click on the Account option from the left menu.
Click on Show advanced settings... link.
Go to the Custom fields section and click on Modify....

Security Policy
The Security Policy defines the password syntax requirements for all users of the account.
Only members of the Administrators group can edit the Password policy.
To set up your Password Policy:
Click on the Account option from the left menu.
Go to the Security Policy section.
Click on the Modify password policy... button.
You can select between different password enforcements:
- the password length between 6 to 45 characters
- including at least one letter
- including at least one digit
- including at least one special character
- including at least one digit or one special character
- password expiration after xx days (between 10 to 970 days)
- user must create at least xx different successive passwords (between 1 to 999)
Important
If the admin user changes the Password Policy while users have already been created, their existing passwords remain valid even if they do not meet the new policy.
The new policy will apply only to new users or if the existing user changes his password.
Log
The account logs reflect all different actions and events of your Talk2m account.
To display the logs of your account:
Click on the Log button on the top of the window.
Beneath the title Log, you will see a button Switch to detailed logs or Switch to raw logs as there are two ways to check the logs:
The detailed logs:
With this view, you will be able to sort your events based on different parameters

Click on the column title to sort by that field.
Right-click on the column title to select the columns to display.
You can use the Filters button to filter the displaying logs by message type such as User messages or Errors.
The Export button saves the current log as a file. The raw log will be saved as a text file while the detailed log will be saved as a .csv file.
The raw logs:
You will be able to see the plain text information retrieved from Talk2m. This view doesn't offer any customization.

The information will always be presented in the same way:
The day the event occured.
The time.
The name of the Ewon or User triggering the event.
Whether this event was triggered by an Ewon or a User.
The event itself (Connection/disconnection of user, Wake up of an Ewon...).
Reports
The Reports menu allows you to open the connection and consumption reports for each month.
The upper section displays the current month's reports in PDF format.
The lower part allows you to open the reports of past months. These reports can be downloaded in 3 different formats:
|
|
|


Click on the blue arrow next to the log.
Select the report format and start the download.
Ewon Autoregistration
There are two ways to use the Ewon autoregistration feature:
By running the Talk2m Connection wizard on the Ewon and using a unused Ewon name during this wizard.
The Ewon will then be added automatically to the selected Ewon Pool set in the Talk2m account.

The Global Registration Key (GRK) can also be used to automatically link an unregistered Ewon to a Talk2m account.
The GRK needs to be exported to an SD Card and this SD Card can then be put in the card slot of an Ewon that isn't linked to a Talk2m account.
Click on the Modify button to:
- Enable/Disable the auto-registration feature. The feature is enabled by default.
- Specify to which Ewon pool Ewons should be added during auto-registration.
- Renew the Global Registration Key. This will revoke the existing GRK and generate a new one.
For more information, check the Autoregistration Export section.
Autoregistration Export
The Autoregistration Export option copies the Global Registration Key (GRK) to an SD Card or USB drive.
This SD Card or USB drive can then be inserted into an unregistered Ewon to automatically link this Ewon to the Talk2m account.
Click on Export Key to SD Card to start the process.

Select the destination path on the USB Stick/SD-Card and write a description if needed.

Notice
This description will appear in the description column from the Ewons list view.
For more details on how to use the SD card / USB drive with the Ewon, please refer to the AUG-0062-00: Easy Commissioning via SD Card & USB Drive.
Approve an Ewon
When the Global Registration Key (GRK) is used to add an unregistered Ewon to a Talk2m account, an approval is needed to fully integrate the new Ewon.

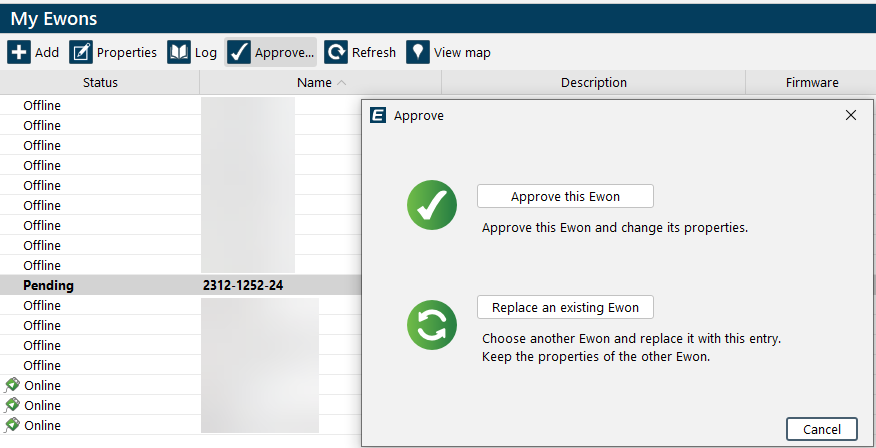
Click on the Approved button to add an imported Ewon into the Talk2m account.
Two choices are available :
Approve this Ewon: The Ewon is added to the Talk2m account and is ready to be connected (if online).
You will be prompted to enter the properties for the Ewon. See Add an Ewon section.
Replace an existing Ewon: The existing but unused Ewon in the Talk2m account is replaced by the newly imported Ewon.
The properties of the old Ewon are transferred to the new Ewon.
M2U
M2U is a secure communication channel that allows you to push data a third-party server using HTTPS.
Beginning with Ewon firmware 11.1s0, Ewons can push data directly over HTTPS.
This functionality should be used instead of M2U. M2U remains for backwards compatibility.
Learn how to use the Ewon to perform direct HTTPS push via our Developer Website.
Privacy
The Privacy frame in the Account tab is used to set:

The Geolocation:
By default, the Geolocation for the Ewons on the Talk2m account is enabled.
To deactivate this feature, click on the Disable geolocation button. By deactivating the geolocation, you disable the option for every Ewon in the account. To deactivate the geolocation for a single Ewon, you can go to the Ewon's Configuration Web Interface.
The Automatic Security Patch Upgrade (ASPU):
The ASPU is the application of automatic security patch upgrades (ASPU) to your Ewon devices.
The purpose of applying security patches is to guarantee our global security level of Services and to protect Talk2m global network and its users.
More information can be found in our Talk2m - Terms Of Use.
M2web Logo Program
The M2web Logo Program allows you to customize the appearance of the M2web portal with your own colors, images and style.
The process is based on 3 files:
welcome.png:
The picture located on the left of the login form.
logo.png:
The picture in the banner on top of the page.
skin.ini:
The file that contains all parameters to style your page.
You can also learn how to access the M2web portal via a login / access form implemented directly on your personal web pages.
For more info about this feature, please check the AUG-0060-00 - M2web Logo Program document.
Import Ewons from Another Account
The Ewon import wizard within Ecatcher eases the import of Ewons from another Talk2m account.

Note
Valid Administrator credentials for the source Talk2m account are required as part of the import process.
Only Ewons associated with Serial Numbers will be imported.
The Settings of the source account (user lists, pools, and permissions) are not imported.
Warning
Note that only free accounts can be imported.
If you want to import pro (or pro trial) accounts to another pro, then open a support ticket to downgrade them to free
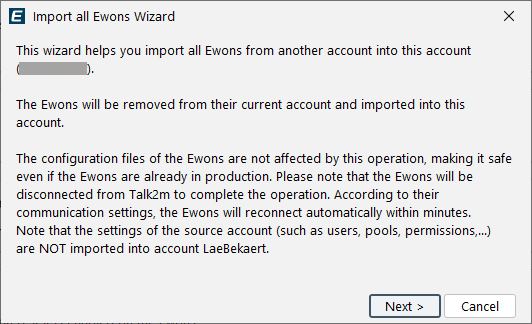
On the wizard start window, a brief text appears explaining how the Ewons will be moved from one account to another and that they will briefly disconnect. Click Next.
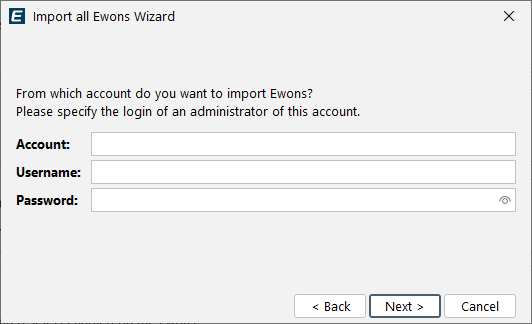
On the second window, specify your Administrator credentials of the Talk2m account from where you want to import the Ewons.
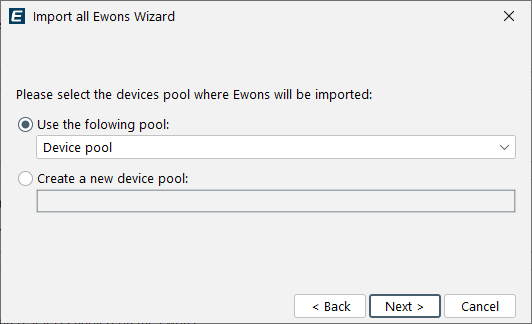
On the third screen, specify the Ewon pool where the Ewons should be imported. You can also create a new Ewon pool for the imported Ewons.
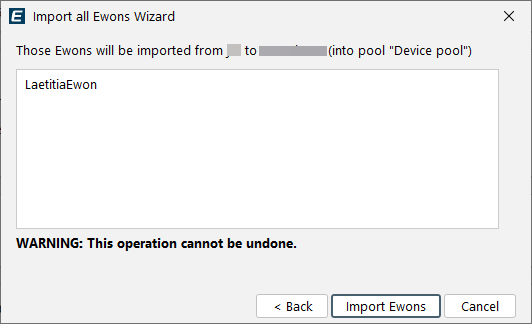
Ecatcher will now list the Ewons which will be imported.
Click Import Ewons to start the Ewon import. Since this process cannot be undone, you will be asked to confirm the import one more time.
Once the import is finished, a window will show the result of the procedure.
You can finish the configuration inside Talk2m of those imported Ewons such as linking an Ewon to another Ewon Pool, and specifying the LAN devices and LAN device firewall of this Ewon.
Notice
The Talk2m account logs of both Talk2m accounts will contain related message.
Inside the destination account: Ewon [XXXX] has been moved from account [YYYYYY].
Inside the source account: Ewon [XXXX] moved to account [ZZZZZ].
Warning
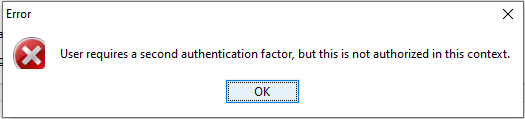
If the source account uses Two-Factor Authentication as a security enforcement. The import will not be possible.
Pease remove this security enforcement from the source account before importing the Ewons.