Welcome
Ecatcher Online Help
Ecatcher Online Help is a smart helper that will display in your browser relevant help based on your current screen in Ecatcher.
You can access the online help by clicking on the help icon (upper right of the program screen) or by pressing F1.
Of course, if you prefer you can browse the left side menu of the helper to make an overview tour of all the sections.
Ecatcher language
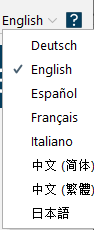
The Ecatcher software is available in different languages.
Use the language selection list on the top right side of the Ecatcher window to change the language.
Ecatcher must be restarted to apply the new language.
Ecatcher Login window
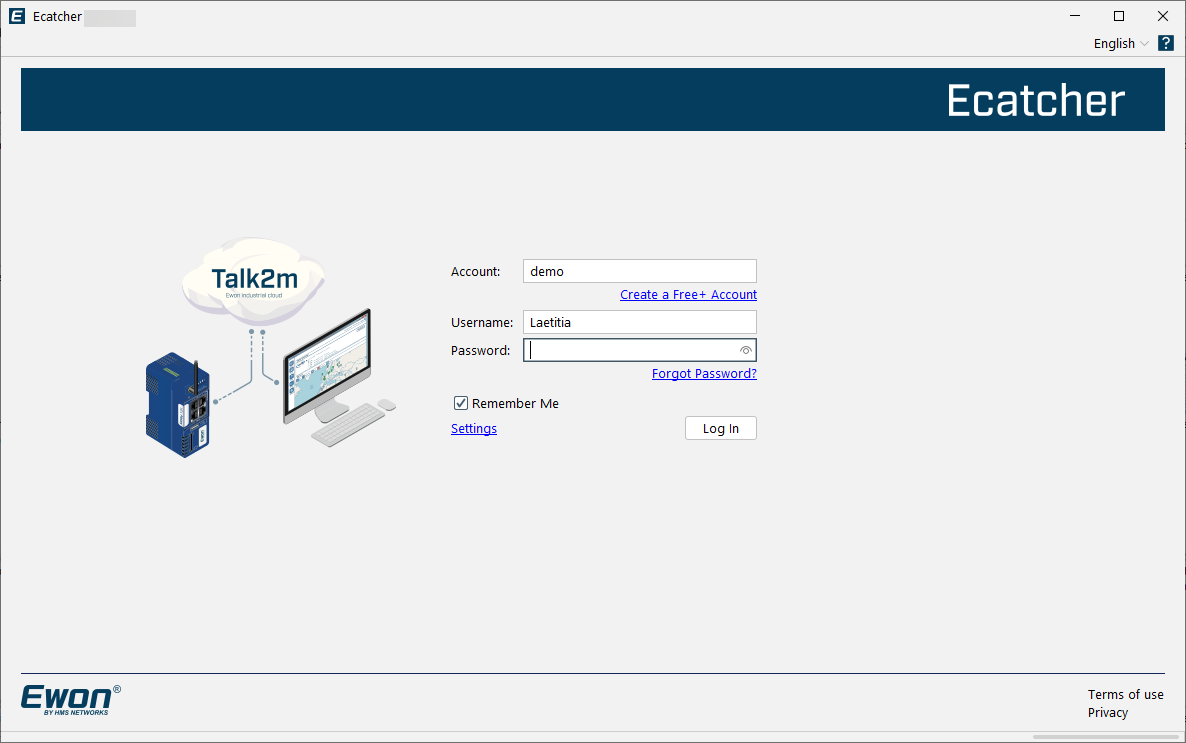
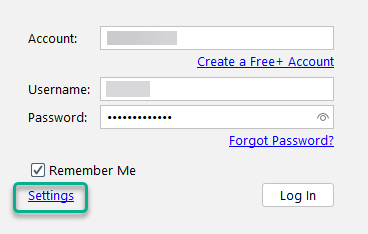
To log in to your Talk2m account, specify the Account name and enter your Username and Password.
If you do not have a Talk2m account yet, use the Create a free Account link just beneath the Account field to create your own Talk2m account.
The Remember Me option will store the account and username to display them again on the next Ecatcher login.
If you forgot your password, then use the Forgot Password? link just under the Password field to request a new one.
User Lockout
Ecatcher temporarily disables a user account if too many unsuccessful log in attempts are made with the same username.
If someone fails to log in to a Talk2m account more than 10 times, the user account will be disabled for several minutes.
When a user is blocked, an email is sent to his email address and to the admin of the account. This email explains the reason of the lockout and how to unlock it: a recovery is possible by resetting the password by either the admin or the user himself.
Ecatcher Internet connection
By default Ecatcher is configured to establish the VPN Internet connection in "Auto Detect" mode.
This means that Ecatcher will first try to establish the VPN connection in UDP mode. If a UDP connection is not possible then Ecatcher will try to connect in TCP mode.
If this also fails, Ecatcher will display a message asking if you need to configure a Proxy Server for your Internet connection.
If you need to encode a Proxy on your PC to get an Internet access, then click on the Settings link next to the Log In button.
This will open the Ecatcher Connection Settings window to set up the Proxy server.
Ecatcher Menus
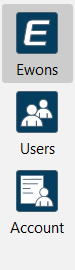
Once connected to your Talk2m account, use the left side menu of the Ecatcher window to:
 |
|
The top menu of the Ecatcher window is a contextual menu:
For example, when the Ewons page is displayed, the upper menu will contain following buttons:

Ecatcher Banner

The Ecatcher banner is a easy way to communicate additional information to you.
The content behind the banners is provided by the Ewon Technical Services and is designed to help you discover advanced or new features from Ecatcher & Talk2m.
Important
The Ecatcher banner can not be hidden and shows the newly added technical campaign.
On the other hand, light and pro plans allow you to hide the banner.
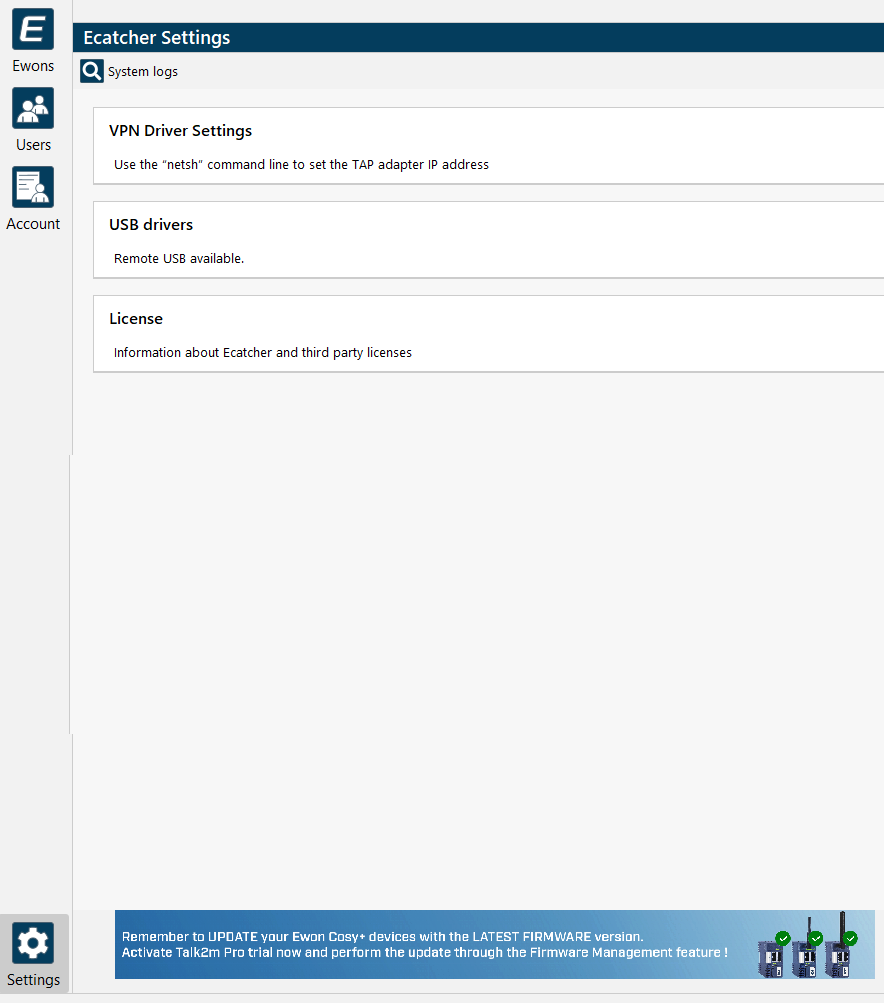
Connection Settings
The Ecatcher settings window is available when you are not logged in to your Talk2m account from the Settings link.
Once you have logged in to your account, the settings window is available from the Settings option in the lower left corner of Ecatcher.
 | OR |  |
Connection & Proxy Settings (Available only from the Settings option on the login screen)

This option displays the current settings of the connection to the Talk2m server.
By default, Ecatcher connects to Talk2m using TCP port 443. The VPN connection auto-detects UDP port 1194 or TCP port 443.
Click on the Modify... button if you want to change these settings or encode Proxy Server information.
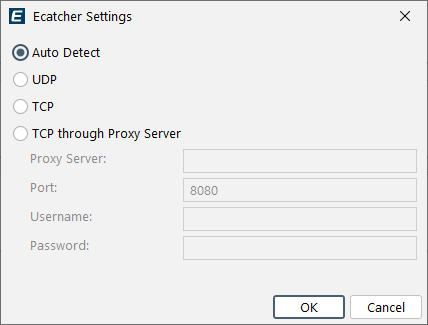
The different states are:
Auto Detect: Ecatcher determines automatically the needed configuration.
UDP: Ecatcher is forced to establish the VPN connection only in UDP mode using port 1194.
TCP: Ecatcher is forced to establish the VPN connection only in TCP mode using port 443.
TCP through Proxy Server: Ecatcher connects through a Proxy server. For this kind of configuration, you need to specify domain, port and Proxy account information.
Notice
If you use a NTLM Proxy server, to specify the domain, use following syntax for the Username: domain\user
VPN Driver Settings

By default, uses the netsh Windows command to set the IP address and the netmask of the TAP-Win32 interface.
Click on the Modify... button if you want to change this behavior.
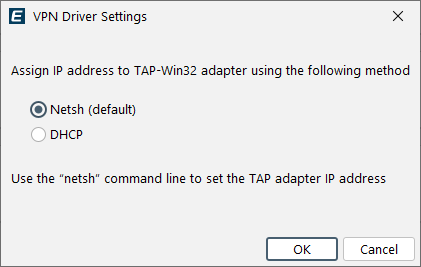
The different options are:
Netsh
DHCP
When connecting to an Ewon, if you receive an error such as "Cannot connect to Talk2mServer:>FATAL:NETSH:command failed" or "VPN tunnel error: Cannot assign IP address to TAP-Win32 adapter" or experience other issues, we recommend switching to DHCP mode.
USB Drivers

The Ecatcher settings also display whether or not the USB drivers are installed to permit remote access to USB devices.
If the USB drivers are not installed and you need to connect to remote USB devices, reinstall Ecatcher.
Important
Make sure the checkbox “Enable USB over IP feature” is checked.
License
This option displays all information about the third party licenses used by Ecatcher and Talk2m.
They can also be found in the Ecatcher Settings > License section: