i4connected platform deployments
Here is a collection of step-based tutorials guiding you through the i4connected platform project deployment methods. Check them out to learn more details about these specific processes.
Important
When publishing i4designer projects to an i4connected environment, translations will not be automatically handled, at the level of i4connected.
Translations should be part of the i4connected application, inside the "application" namespace.
Deploying a project via FTP
Check out this article and learn how to configure the i4connected and i4designer environments in order to enable the FTP to publish method.
Important
Prerequisites for this guide:
An FTP Site is preconfigured and accessible through the internet;
The i4connected environment should be active and publicly available.
In order to organize this process please follow the below-described steps:
In order that the communication between the i4connected and the i4designer endpoints is enabled, please organize the following steps, on the machine where the i4connected server is running:
Login to the i4designer application.
In the Projects Management area of the Control Center, click on the Show connection-token button corresponding to the project that needs to be published.
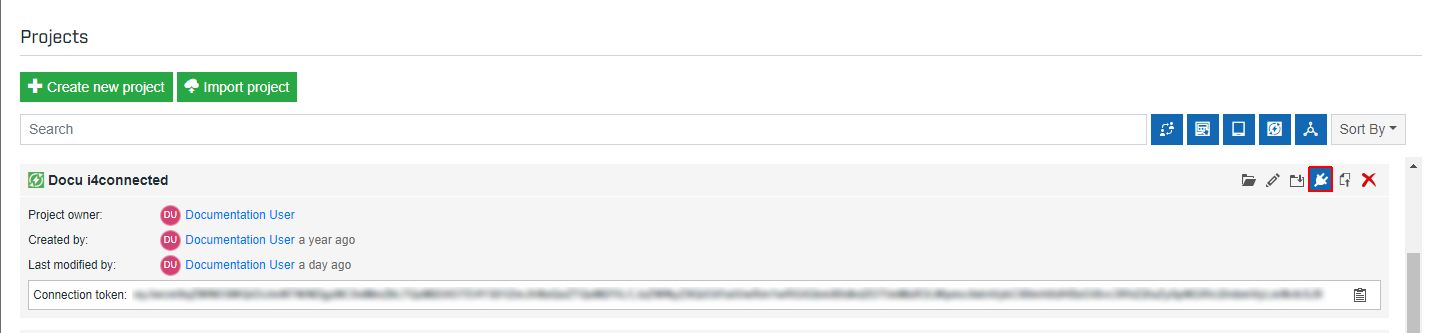
The i4connected Connection token is exposed.
Click on the Copy connection-token button to copy it to your clipboard.
Next, log into the i4connected application and paste the copied code to an Application Mapping.
Tip
For more details on i4connected Application Mappings, please also visit our i4connected Knowledge Base.
Further on, the i4designer settings required for the FTP publish method are as follows:
Open an i4connected platform project and go under the Deployments menu of the global actions area.
On the left side of the screen, the FTP configuration panel is displayed. Start filling in your FTP Site settings.
Tip
For more details about the FTP configuration settings, please also check the description provided by the Publish project over FTP article.
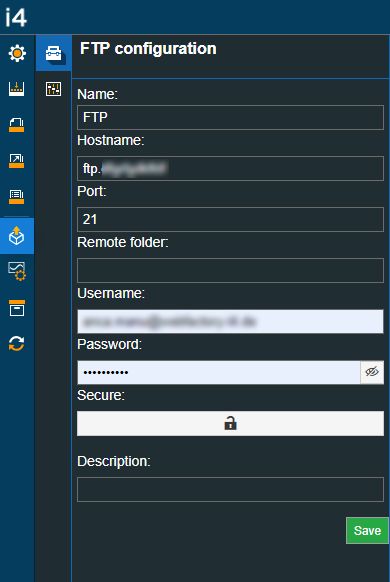
Click the Save button to preserve your changes.
Now, let's build and deploy the i4designer project:
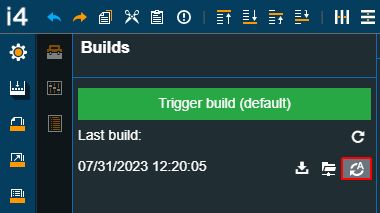
When the i4designer project is ready for a first publish, click on the Builds menu, under the global actions area.
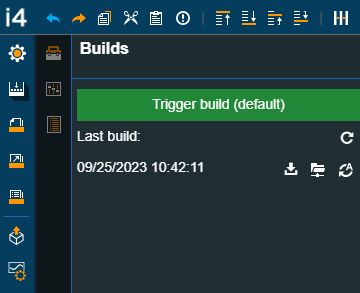
Click on the Trigger build button and wait for the success toast message to be displayed.
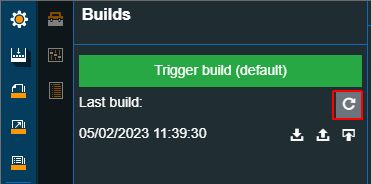
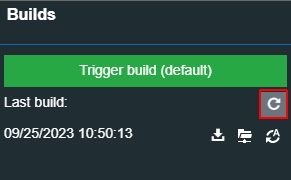
Refresh the list of builds to make sure that the last version of your project is built.
Click on the Publish over FTP button to directly deploy your project. Wait for the confirmation toast message indicating that the project was successfully published.
Last but not least, let's check the project visualization in the i4connected portal:
Open the i4connected portal and open the Application Mapping.
Your i4designer project visualization is opened.

Automatically deploying a project via the Active publishing method
The easiest method to deploy and visualize i4connected projects is Automatic publish. Check out this article and learn how to do it by yourself!
Important
Prerequisites for this guide:
the i4connected environment should be active and publicly available if the Active publishing method is used.
As described by the Automatic publish an article it only takes a few mouse clicks to transfer an i4connected visualization to the system of the respective plant, without interrupting the running operation. To guide you through this process, please organize the below-described steps:
In order that the communication between the i4connected and the i4designer endpoints to be enabled, please organize the following steps:
Login to the i4designer application.
In the Projects Management area of the Control Center, click on the Show connection-token button corresponding to the project that needs to be published.
The i4connected Connection token is exposed.
Click on the Copy connection-token button to copy it to your clipboard.
Next, log into the i4connected application and paste the copied code to an Application Mapping.
Tip
For more details on i4connected Application Mappings, please also visit our i4connected Knowledge Base.
Further on, the i4designer settings required for the Automatic publish method is as follows:
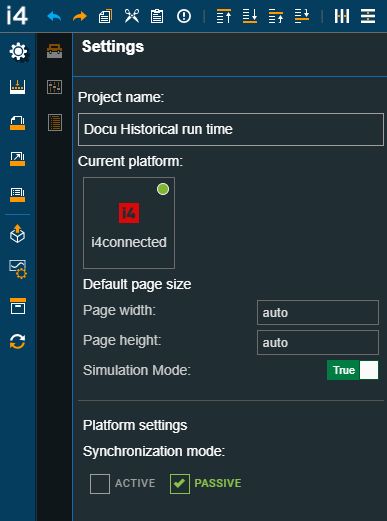
Open an i4connected project with the Designer and go to the Settings menu.
In the Settings panel fill in the Project settings as follows:
Tip
For more details about the i4connected Project settings please also refer to the i4connected Platform article.

Select the Active Synchronization mode.
Fill in the i4connected environment URL, followed by the suffix /your API path.
Fill in the user name and password of the i4connected environment.
Go to the Deployments menu in the global actions area and select the desired Profile. In this view, proceed as follows:
Update the Build profile and fill in the API URL pointing towards the aimed i4connected environment followed by the suffix /your API path.
Press the Enter keyboard button to preserve and apply this change.

Add the Authority URL pointing towards the aimed i4connected environment, followed by the suffix /your identity path.
Press the Enter keyboard button to preserve and apply this change.

Now, let's build and deploy the i4designer project:
When the i4designer project is ready for a first publish, click on the Builds menu, under the global actions area.
Click on the Trigger build button and wait for the success toast message to be displayed.
Refresh the list of builds to make sure that the last version of your project is built.
Click on the Automatic publish button to directly deploy your project. Wait for the confirmation toast message indicating that the project was successfully published.
Last but not least, let's check the project visualization on the i4connected portal:
Open the i4connected portal and open your Application.
Your i4designer project visualization is opened.
Automatically deploying a project via the Passive publishing method
Check out this article and learn more details about the passive publishing method available when deploying i4connected projects.
As described by the Automatic publish article it only takes a few mouse clicks to transfer an i4connected visualization to the system of the respective plant - without interrupting the running operation. In order to guide you through this process, please organize the below-described steps:
In order that the communication between the i4connected and the i4designer endpoints are enabled, please organize the following steps:
Login to the i4designer application.
In the Projects Management area of the Control Center, click on the Show connection-token button corresponding to the project that needs to be published.
The i4connected Connection token is exposed.
Click on the Copy connection-token button to copy it to your clipboard.
Next, log into the i4connected application and paste the copied code to an Application Mapping.
Tip
For more details on i4connected Application Mappings, please also visit our i4connected Knowledge Base.
Further on, the i4designer settings required for the Automatic publish method is as follows:
Open an i4connected project with the Designer and go to the Settings menu.
Select the Passive synchronization mode.
Go to the Deployments menu in the global actions area and select the desired Profile. In this view, proceed as follows:
Update the Build profile and fill in the API URL pointing towards the aimed i4connected environment followed by the suffix /your API path.
Press the Enter keyboard button to preserve and apply this change.
Add the Authority URL pointing towards the aimed i4connected environment, followed by the suffix /your identity path.
Press the Enter keyboard button to preserve and apply this change.
Now, let's build and deploy the i4designer project:
When the i4designer project is ready for a first publish, click on the Builds menu, under the global actions area.
Click on the Trigger build button and wait for the success toast message to be displayed.
Refresh the list of builds to make sure that the last version of your project is built.
Click on the Automatic publish button to directly deploy your project. Wait for the confirmation toast message indicating that the project was successfully published.
Last but not least, let's check the project visualization on the i4connected portal:
Open the i4connected portal and open your Application.
Your i4designer project visualization is opened.