i4designer States tutorials
Check out these articles and learn how to manage i4designer components allowing you to insert visual states controlled by signal values.
Some of the i4designer Components support visual states controlled by signal values. After configuring a Component's visual states these will be triggered by comparing a signal value to a constant or a different signal value.
States can be configured in a Component's properties under the States category, or by pre-defining State assets.
These articles will guide you through a set of steps describing the following use-cases:
Managing Assets Library
Learn how to set up an Assets Library for your i4designer project and what steps are needed in order to make sure that state assets can be reused.
As there are many i4designer Components that allow usage of visual states, you can set up an Assets Library and reuse the predefined templates as many times as needed.
Open an i4designer project in design mode.
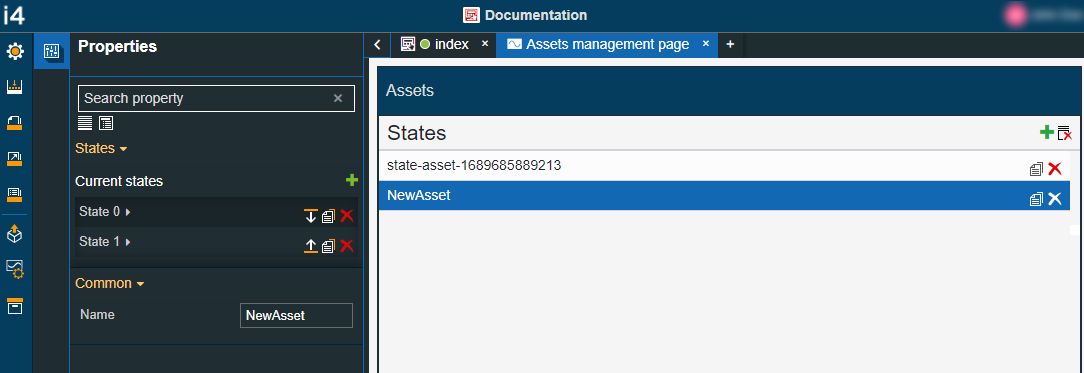
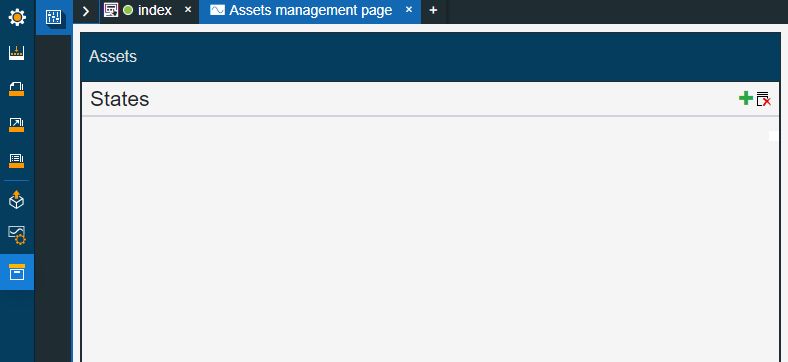
Click on the Assets management menu, in the global actions area.
On the Assets management page, click on the Add asset button.
A new state asset is added to the Assets management page. By default, the system generates a name for the new state asset.
Click on the newly created state asset in order to expand the Properties panel.

If desired, change the State asset name, by typing the desired textual information in the Name field.

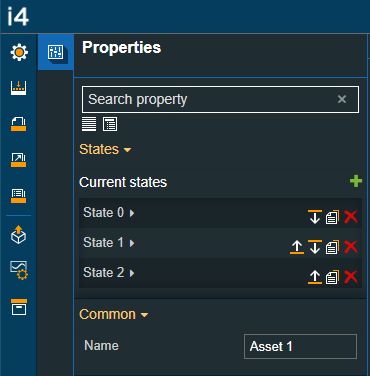
Next, click on the Add new state button under the Current state's property.
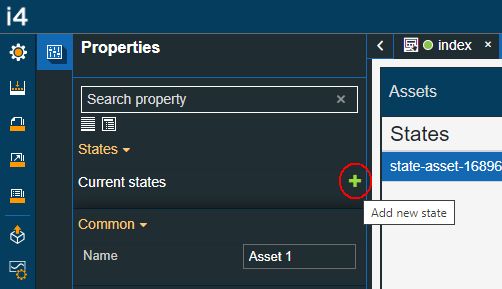
Start configuring the States as desired.
Tip
For more details about the States configuration please also visit our tutorial "Testing states updates in signal simulation mode".
Now, the newly created State asset can be reused for your component's States.
Loading States from Assets Library
Check out this article and learn how to use Assets from the Library when building your i4designer projects.
In order to load states from the Project's Assets Library, please follow the steps described below:
Open an i4designer project in design mode.
Double click on a Component using states, in order to open its Properties panel. For this tutorial, we shall use the Sensor component.
Scroll through the Component's properties to identify the States category.

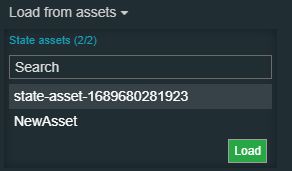
Click on the Load from assets property. The list of Assets available in the Library is displayed.
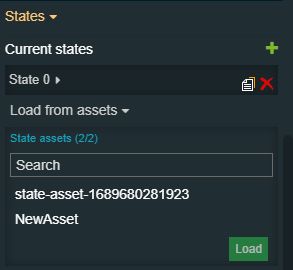
Select the desired State asset and click the Load button.
The loaded Asset States are applied to the Component. The same State Asset can be reused for other Components as well.
Saving States to Assets Library
Learn how to save states to the Assets Library page, after you have configured them for your i4designer Components.
While designing your project you might need to configure some States for components supporting them. What if the configured States can be reused for other components, hence saving you a lot of time?
Please follow these steps in order to preserve and reuse States for other Components in your project:
Open an i4designer project in design mode.
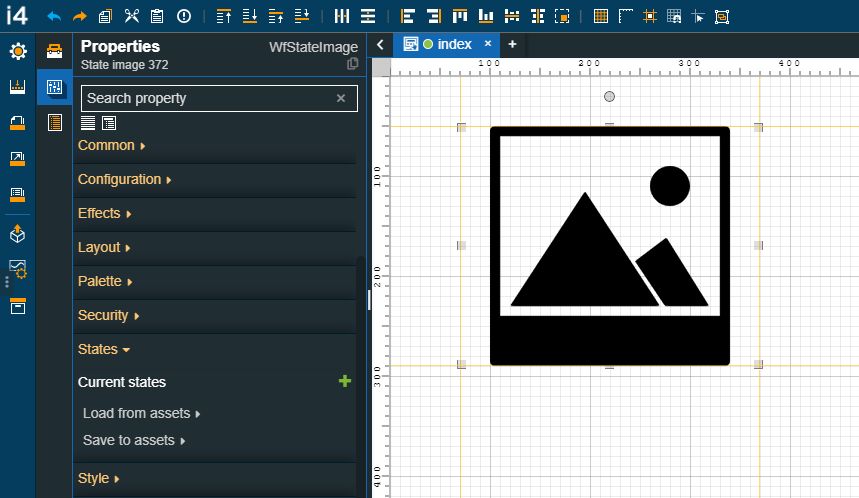
Double click on a Component using states, in order to open its Properties panel. For this tutorial, we shall use the State Image component.
Scroll through the Component's properties to identify the States category.
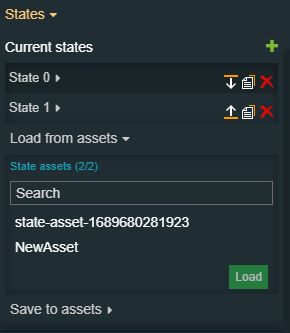
Add as many states as needed for configuring the Component. For this tutorial, we shall add two new states.
Start configuring each state as desired.
Tip
For more details about the States configuration please also visit our tutorial "Testing states updates in signal simulation mode".
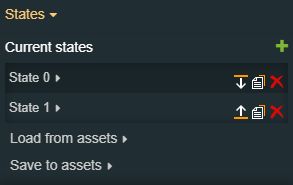
As soon as the States have been configured click on the Save to assets property.
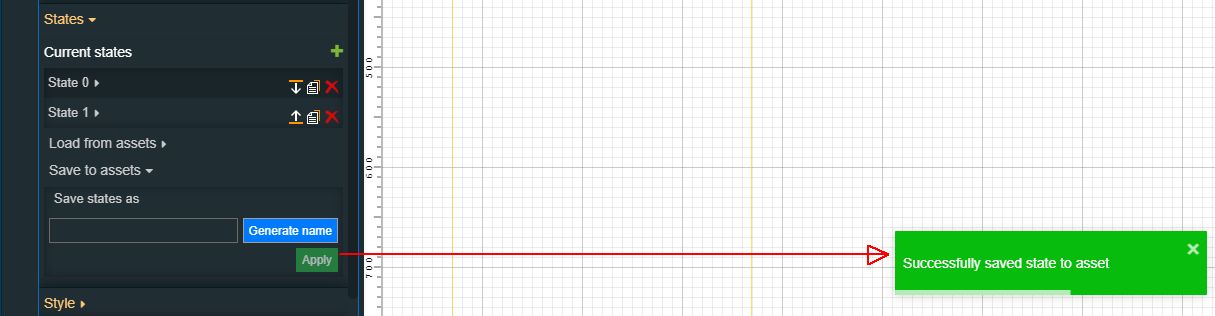
The Save states as area is displayed, allowing you to either generate a name or type in a name for the new State asset.
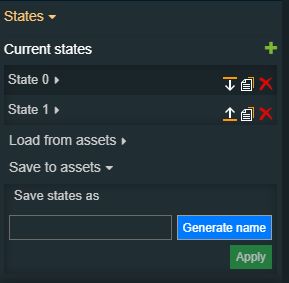
By clicking the Apply button saves the previously configured states to your Assets Library.
Next, go ahead and check the Assets Library, under the Assets management menu.