i4designer Pages management tutorials
Check out this article and learn more details about the management of an i4designer project page, by following these step-based tutorials, carefully prepared for you!
When creating big-scale visualizations, the i4designer users can define a multi-layered project, by means of project pages. Besides the basic project pages, i4designer also allows the users the possibility to add responsive pages, based on breakpoints and a default page link.
Adding new pages to a Project
Check out this article and learn how to start building your i4designer Project page structure, in just a few easy steps, by following up the described steps.
This tutorial will guide you through the steps required to customize a page structure, of your i4designer Project.
Log into the i4designer Control Center and open a new project. The project is opened in Designer, having by default only one page (the "index" page).
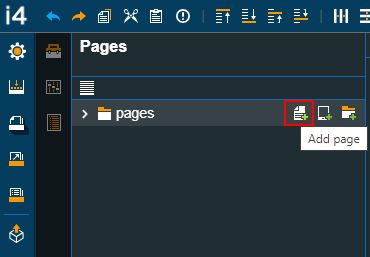
To start defining your Project page structure, switch to the Pages menu of the global actions area.
In the Pages panel select the pages node and click on the Add file button. A new page, with a system-generated name, is added to the page's structure.
To customize the name of the pages hover them and click the Rename button.
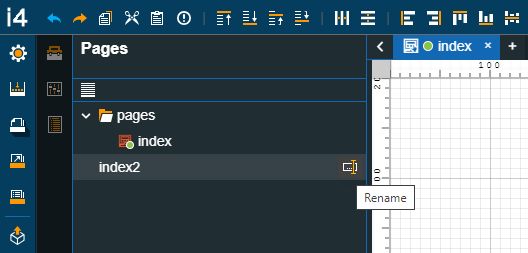
After filling in the desired page names hit the Enter keyboard button. The changes are applied and pages are alphabetically ordered in the page structure.
Note
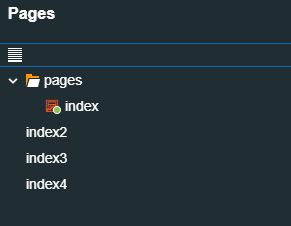
For this tutorial, we added three new pages, as follows: "page1", "page2" and "page3".
Adding new responsive pages to a Project
Check out this article and learn how to manage your i4designer projects, while using responsive pages, in order to check the project's run-time resolution.
A Responsive page is basically a placeholder for certain breakpoints, allowing the users to check a project page run-time resolution, while the user is still in design mode.
This tutorial will guide you through the usage of Responsive pages, providing more details about the design-time properties.
Note
After adding the new pages, as described by the previous tutorial, let's proceed with populating each new page with a different component, as follows:
Add the Gauge component, on the "index" page.
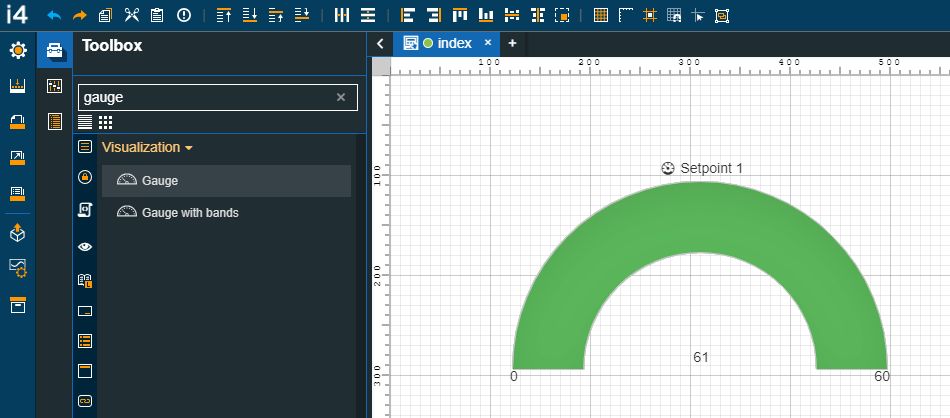
Index page
Add the Signal value component, on the next page.

page1
Add the Image component, on the third page.
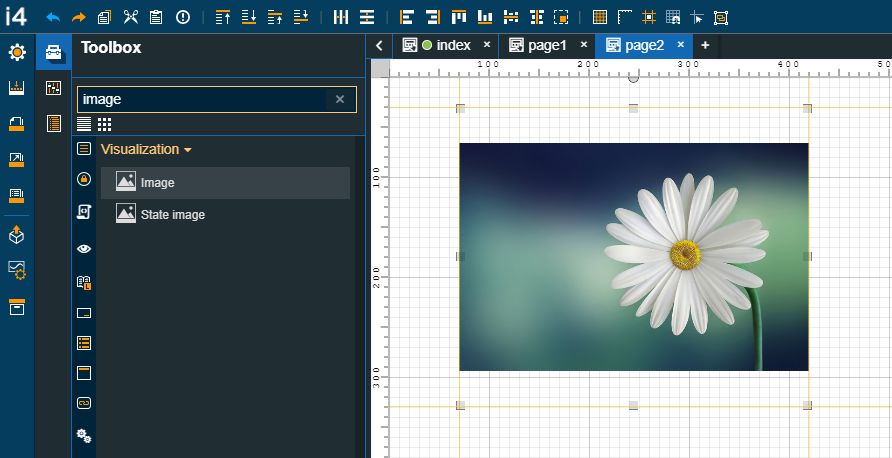
page2
Add the Link button component, on the fourth page.

page3
After setting up the project page, return to the Pages menu and hover over the page's node.
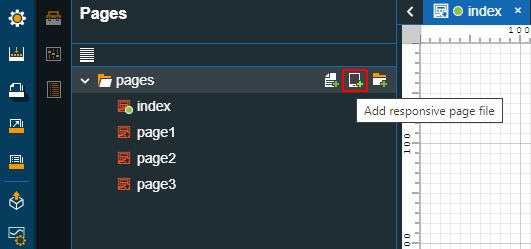
Click on the Add responsive page file button. A new responsive page, with a system-generated name, is added to the page's structure.
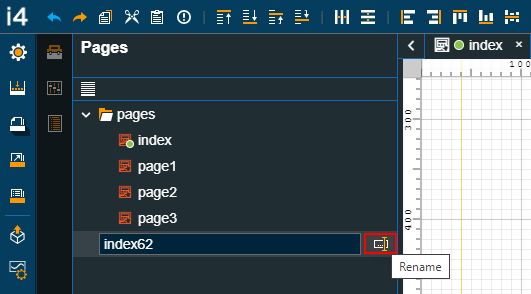
To customize the name of the responsive page, hover it and click the Rename button. Click the Rename button, fill in the desired page name, and hit the Enter keyboard button.
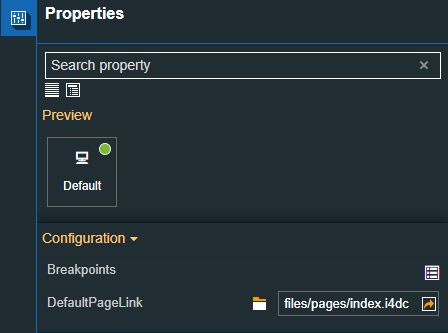
After renaming the new Responsive page, select it from the pages list. The Responsive page Properties panel is opened.
Note
The new Responsive page is, by default, set to display the default project, which in our case is the "index" page. To change the default page link, the user can click the Open file explorer button and choose another page from the page's structure.
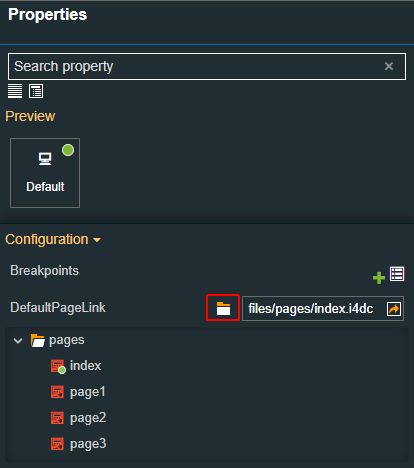
For the present tutorial, we will leave the DefaultPageLink as it is.
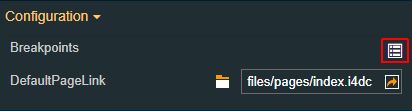
Click on the Expand array list button, associated with the Breakpoints property.
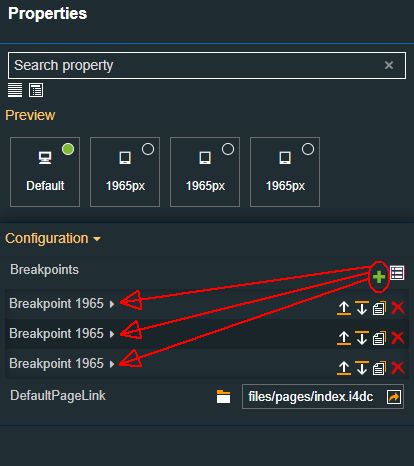
Next, we will add three new breakpoints for our Responsive page, as follows:
Tip
At the level of Responsive page functionality, the scope of Breakpoints is to define a set of conditions, used to determine the following aspects of that page:
Width - sets the run-time page resolution, measured in pixels.
Page link - sets a direct link to an internal project page or to an external page.
Is external - toggles between internal and external page. If the toggle button is set to True, the page set at the Page link property will be considered external.
Page parameters - allows the user the possibility to parse custom parameters, by filling in the following parameter properties:
Parameter name - sets the name of the parameter;
Parameter value - sets the value of the parameter. The value added here will be the value displayed at run-time, by a project component, when the Breakpoint width is reached.
Click on the Add new item button, in order to add three Breakpoints.
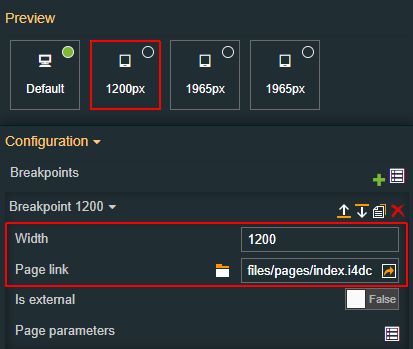
Expand the view of the first Breakpoint and change its Width property to 1200 pixels. Next, click on the Open file explorer button, and change the Page link to point to "page1".
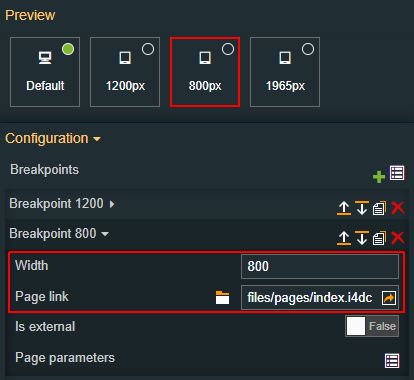
Expand the view of the second Breakpoint and change its Width property to 800 pixels. Next, click on the Open file explorer button, and change the Page link to point to "page2".
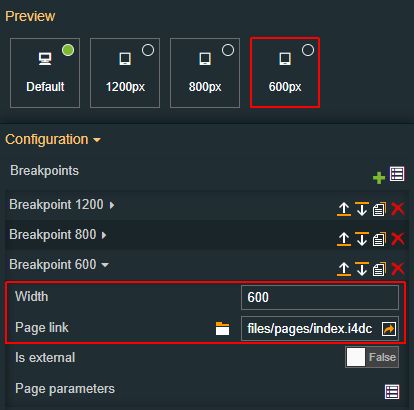
Expand the view of the third Breakpoint and change its Width property to 600 pixels. Next, click on the Open file explorer button, and change the Page link to point to "page3".
Make sure that your changes are saved.
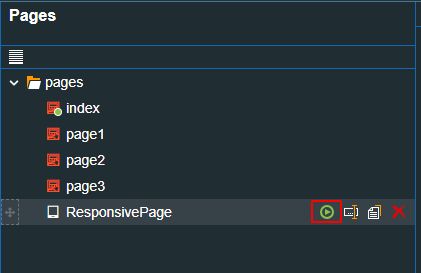
Next, return to the Pages menu entry and hover over the Responsive page, in the pages structure view.
Click on the Set startup page button.
Tip
By default, the "index" page is the project startup page. For this tutorial, we shall change this setting and make our Responsive page a startup page.
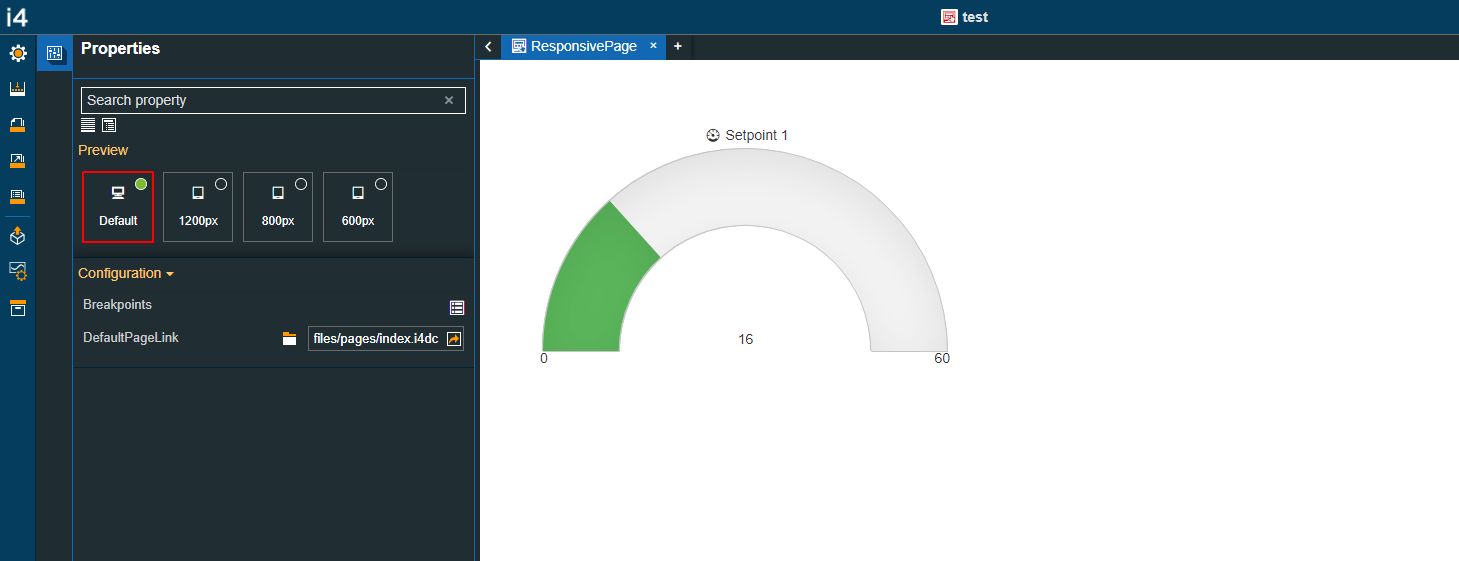
After going through the above-listed steps, we can now check the design-time behavior of our new Responsive page, by selecting it from the page structure.
The Default responsive page is set to display the "index" page.
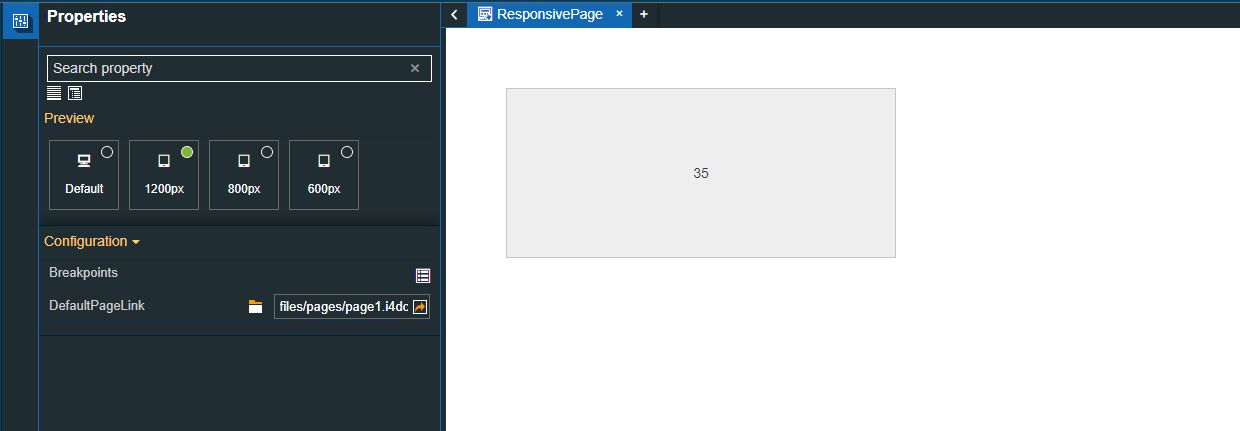
By clicking on the 1200px button, the second project page is displayed. The resolution of the drawing surface is updated accordingly.
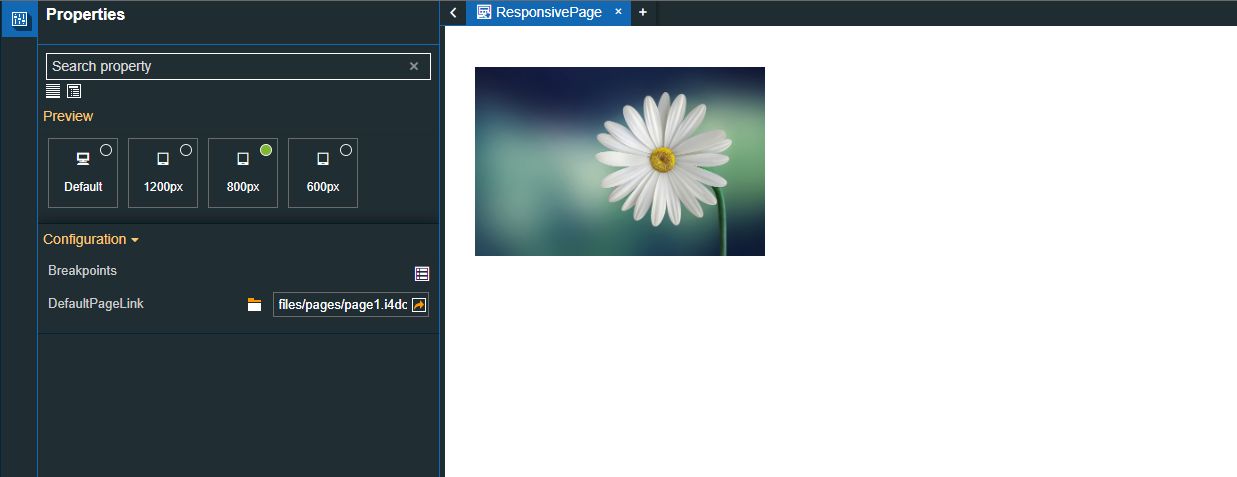
By clicking the 800px button, the third project page is displayed. The resolution of the drawing surface is updated accordingly.
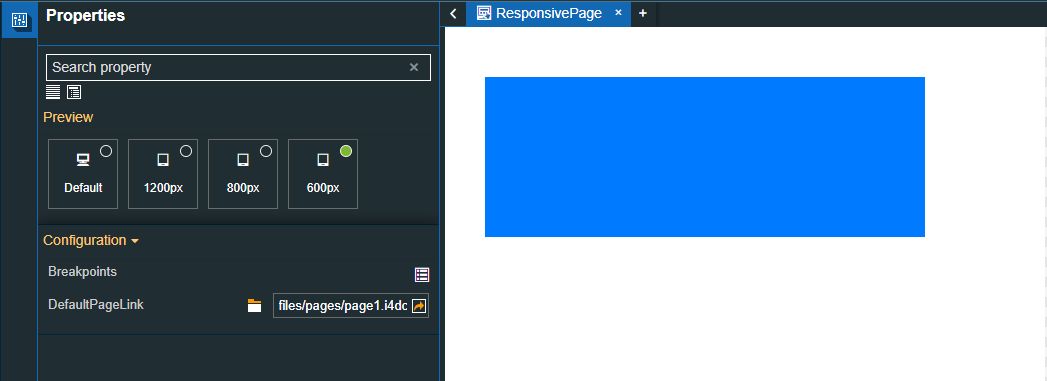
By clicking the 600px button, the fourth project page is displayed. The resolution of the drawing surface is updated accordingly.
Finally, trigger a project build and proceed with publishing your project, to the desired target environment.
Tip
For more details about the available project publishing methods, depending on your target environment, please also visit the dedicated tutorials, here.
Now let's check the run-time project visualization
Access the target environment and open your project visualization.
By default, the index project page is displayed.
If changing the browser resolution, when reaching a width of 1200 pixels, the second project page is displayed.
If the resolution is adjusted to 800 pixels, the third project page is displayed.
And finally, the fourth project page is displayed, when reaching a 600 pixels width resolution.