Adding a view model to the i4scada App Template
Learn how to create a view model for your new view, in the i4scada App Template, by following the steps in this tutorial.
A view model is a component that contains the logic that drives its corresponding view. Earlier you created a new view, now you will learn how to create its corresponding view model.
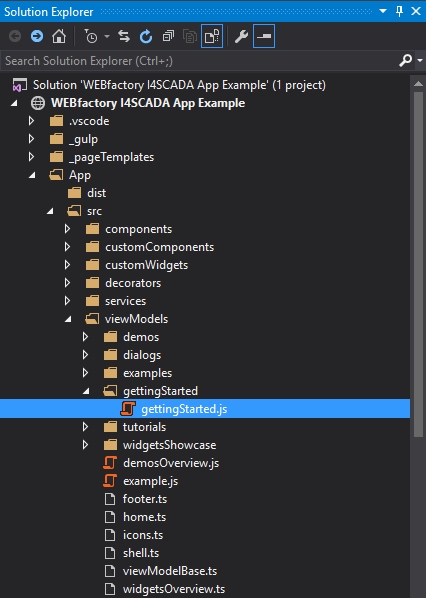
In the Solution Explorer, navigate to App > src > viewModels and expand the views folder.
Add a new folder named gettingStarted inside the viewModels folder, using the same procedure as before (right-click on the viewModels folder, Add > New Folder).
Inside the new gettingStarted folder, add a new JavaScript file named gettingStarted.js, using the same procedure as before (right-click on the gettingStarted folder, Add > JavaScript file).

"gettingStarted.js" file
When using the MVVM pattern, the naming convention of the views and view models is crucial. The model must have the same name as the view and must exist in the same folder as the view. The folder structures of the views and viewModels folders must be identical.
The new gettingStarted.js view model will be opened automatically. Add the simplest view model code inside:
define(
function () {
    var gettingStarted = function () {
        var self = this;
        //Example for a viewmodel
    };

    return gettingStarted;
});
The view model corresponding to the previously created view is now complete. Next, we will create the navigation route for our new view.