Managing Access Groups
An Access Group can gather up multiple access rights, with the scope to ensure a secured i4scada User Manager Studio project.
i4scada Access Groups provide the possibility to assign Access authorizations to the Authorization groups. The Access Groups panel is accessible under the drop-down list of the main toolbar of the User Manager interface.
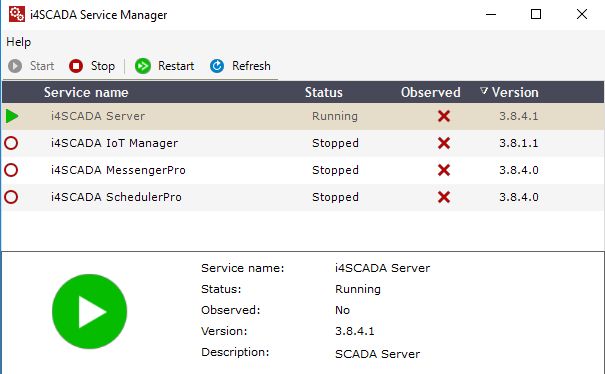
Before starting to work with the i4scada Studio User Manager, make sure that the i4scada Server is running. To start the i4scada Server open i4scada Service Manager.

i4scada Server running
The list of all database Access Groups is displayed, considering the rights of the currently logged in user.

Access Groups panel
The Access Groups list is split up into following columns:
Name - The name of listed Access Group
Description - The custom description of the listed Access Group.
Actions - this last column is an atypical one. In Actions column, the actual user management actions are available. The available actions for a listed Access Group are: Clone
 , Change password
  , Edit
  and Delete
  .
.
Columns of the Access Group list can be sorted and filtered. Users can organize simple search actions.
Once the Access authorizations are defined, they can be assigned to Access groups. Any number of Access authorizations can be assigned to an Access group.
Custom access combinations can be created using the Access groups. Consequently, Access groups are assigned to Authorization groups and copy the enabled Access Authorizations previously defined.
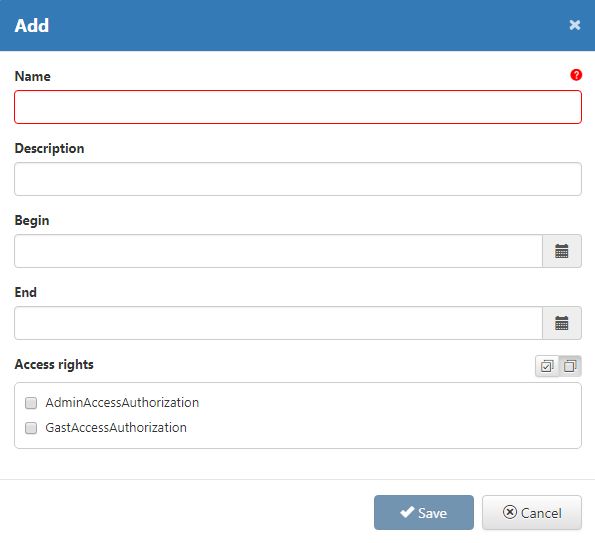
User Manager allows the possibility to add new Access Groups, by clicking the  button, in the secondary toolbar. The Add dialog is opened, allowing the user to introduce the following information, for the new Access Group:
Name - the name of the Access Group
Description - The custom description of the listed Access Group. Allows possibility to input specific information about the Access Group
Begin - Defines the start time, when the new Access Group will start being active. The selection is organized from the time selector activated by icon
 . The available options in the time selector are hour, minute, and second.
 End - Defines the end time, when the new Access Group will stop being active. The selection is organized from the time selector activated by icon
 . The available options in the time selector are hour, minute, and second.
 Access rights - The Access rights field, features a multi select option that contains all Access Authorizations available in the project database. This list also displays at the top right side, a select / unselect button, which eases the selection process.

Add new Access Group
After all desired information about the Project Authorization has been introduced user can proceed via Save or Cancel:
 button - the dialog will be closed and the changes saved in the database, for future use. Saving a new Access Group will automatically update the list, making the changes immediately visible.
 button - the dialog will be closed and the changes discarded.
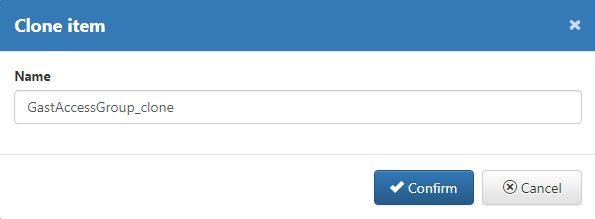
An existing Access Group can be cloned, by clicking the  button, in Actions are of the item to be cloned. The clone button opens the Clone item dialog, where the name of the selected element is copied and the suffix "_clone" is added. The name of the Access Group clone can also be manually added.

Clone Access Group
To save the new clone, press Confirm button and to leave dialog without saving, simply press the Cancel button.
 button - the dialog will be closed and the changes saved in the database, for future use. The new Access Group will be immediately visible in the list view.
 button - the dialog will be closed and changes are discarded.
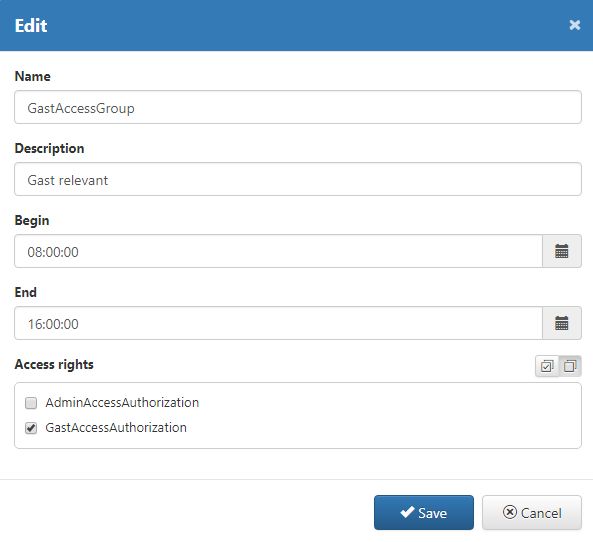
Listed Access Groups can be edited, by clicking the  button, in the Actions area, of the element to be updated. The Edit dialog allows changes at the level of Name, Description, Begin time, End time, and Access Rights of the selected Access Group.

Edit Access Group
Edit dialog provides the following options:
 button - closes the Edit dialog and preserves all changes made. Changes are also immediately available in the list view.
 button - closes the dialog and discards all changes.
Access Group can be deleted via  button, in Actions area of the element to be removed. Clicking the Delete button opens a confirmation dialog, where the following options are available:
 button - the confirmation dialog is closed and the selected Access Group is removed from the list.
  button - the confirmation dialog is closed and all intended changes are discarded.

Delete Access Group