i4scada integration with i4designer
Check out this article and learn more details about the latest i4scada feature, allowing its users to easily publish and use i4designer projects.
Since version 3.8.11, i4scada users can easily deploy i4designer project visualizations, on their i4scada machine.
In order to automatically publish an i4designer project visualization on your i4scada machine, a few configurations of the i4scada environment are required.
Configuring the i4scada environment
Check out this article and learn how to configure your i4scada machine in order to be able to publish i4designer project visualizations.
Note
The i4designer automatic deployment method has been made available for the i4scada environments, since version 3.8.11 of i4scada.
In order to configure the location for the i4designer project files, please follow the steps described below:
Open a File Explorer window and navigate to the wwwroot folder.
Add a new folder. For this tutorial, we shall name it "i4designer".

After performing these steps, you have successfully configured the location where your i4designer project files will be parsed.
i4designer Project settings
Check out this article and learn how easy it is to establish the communication between your i4scada machine and the i4designer environment.
Each i4designer project needs to be capable of communicating with the i4scada Server, to be able to access your online visualization.
To establish the communication between your i4scada machine and the i4designer environment, please proceed as follows:
Open i4scadaStudio tool.
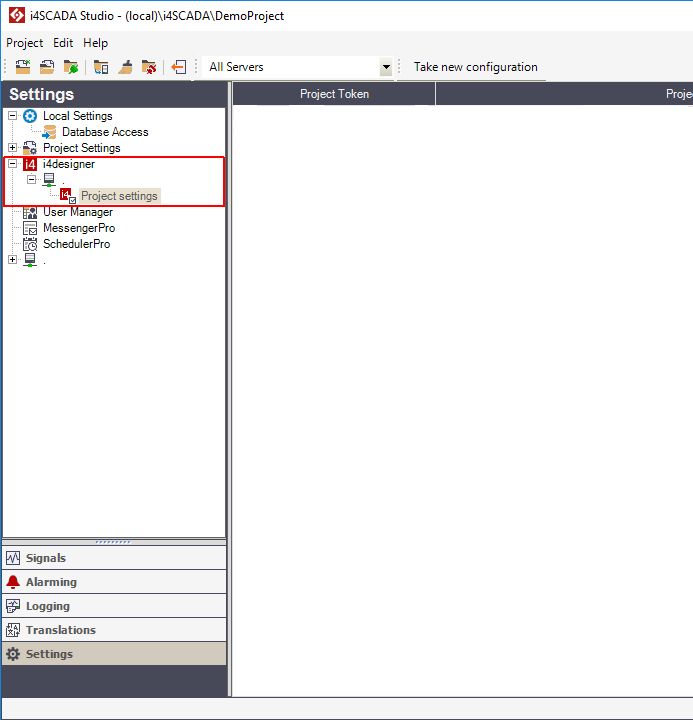
Switch to the Settings section and expand the i4designer node, until reaching the Project settings node.
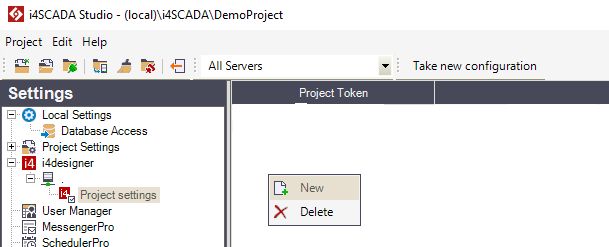
Right click within the Project settings empty panel and select the option New.
The Project settings panel is updated and allows you to fill in the Project Token and the Project Path. Proceed as follows:

Fill in the Project Token after copying it from the i4designer application.
Tip
Each i4designer project has an allocated connection token. This can be easily copied from the i4designer Control Center, as visible in the screenshot below.
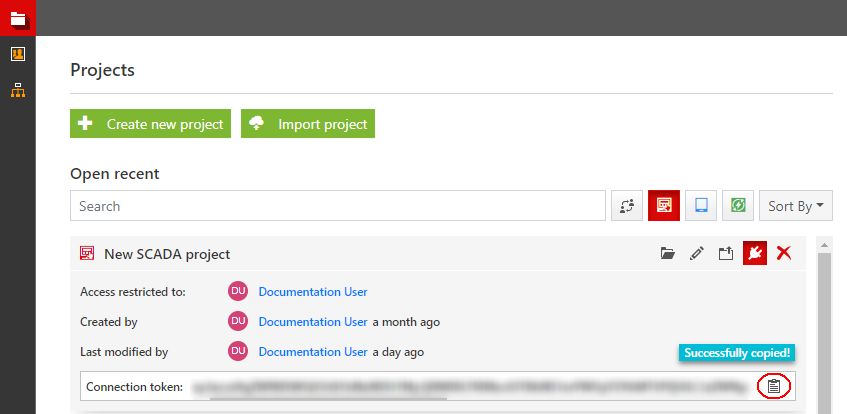
For more details about the i4designer connection token, please also visit our i4designer online documentation.
Fill in the Project Path by selecting the path pointing towards the i4designer files location folder, created as described by the previous tutorial.
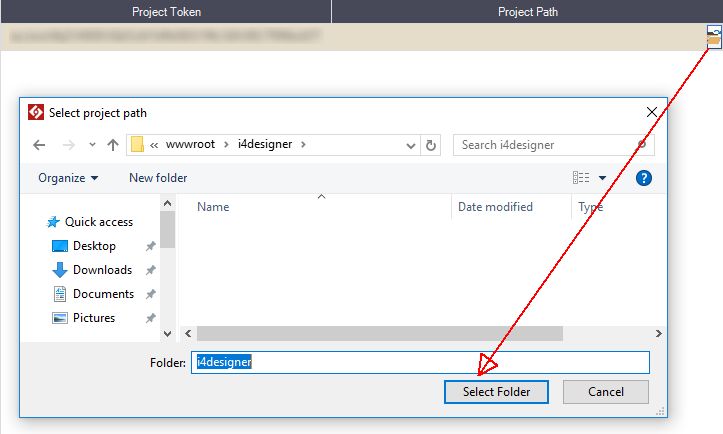
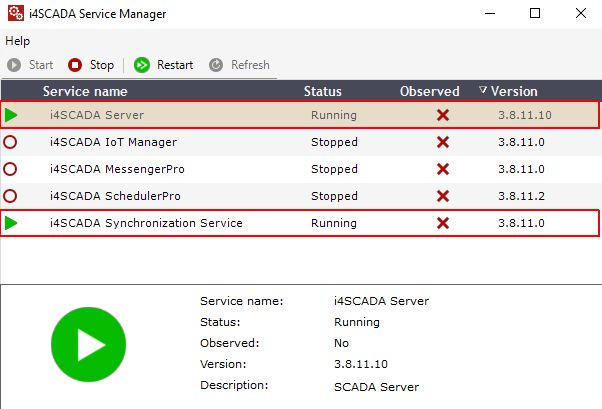
After filling in the i4designer Project settings, you should restart the Server and the Synchronization Service.
Warning
Both i4scada Server and i4scadaSynchronization Service need to be in status RUNNING, when publishing i4designer projects.
Additionally, these two services need to be enabled, when synchronizing i4scada Signals, to a i4designer project. For more details about Signals synchronization, please visit the i4designer Knowledge Base and read the dedicated article, here .
Important
Each new i4designer project needs to be made available, as described by this tutorial, under the i4scadaStudio tool.
