Managing User Actions
The User Actions panel lists all management and activity events organised by users, providing detailed information upon the exact time and involved users.
The User Actions panel can be accessed, from drop-down list located in main toolbar of User Manager interface. The list is restricted to display only those User Actions that the logged in user has access to see.
The User Actions list is split up into following columns:
Time column displays the timestamp when the action took place. The time field indicates the year, month, day, hour, minute and second.
Event column is represented by the actual action that took place. The logged events are split into two types:
Management events - "User created", "User is deleted", "User is modified", "User password is changed".
Activity events - "User logs in", "User logs out" and "User writes signal".
Text column is simply the textual information that describes the event.
User name column is given by the name of the user involved in the event.
Affected user name column indicates the name of the user affected by the event. This column may or may not have a value, depending on the actual event.

User actions panel
Each user action is marked by a specific icon, which is displayed in the list view, as follows:
Icon | Description |
|---|---|
| User is created |
| User is deleted |
| User is modified |
| User password is changed |
| User writes signal. These action is logged ONLY if the Signal(s) defined at level of i4scada Studio have value "Log user activities" marked as True. |
| User logs in |
| User logs out |
Each of the above User actions columns can be sorted increasingly / decreasingly. Only one column can be sorted at a time. The sorted column is marked with a pointing up / down arrow, indicating the sorting direction.
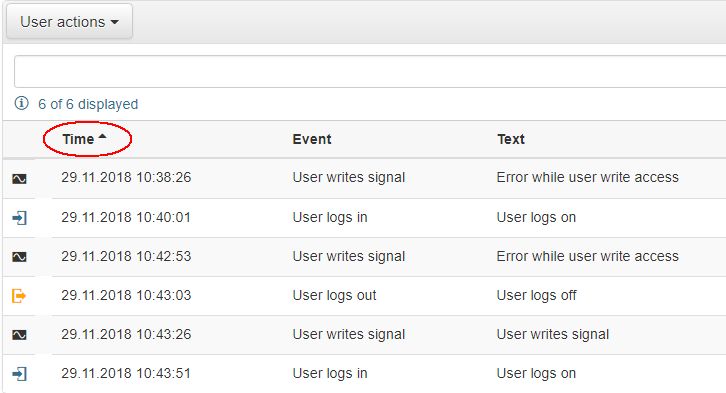
Sorted User action column
Given the potential large amount of actions in the list view, the search field allows possibility to search for actions, by Event and Text.

User actions search
Auto refresh is a toggle button that will trigger the control to refresh the list content at a certain predefined time interval.

Auto refresh button
The auto refresh interval can be configured at design time, by entering desired value in wf-user-manager Object Property "Update rate".
There are two available auto refresh states: On or Off. The default state of this option can also be configured at design time. At run-time, the state of the Auto refresh option can be manually managed:
 - Auto refresh is toggled off. List will not be automatically updated.
 - Auto refresh is toggled on. List will be automatically updated.
The list of User actions can also be filtered on basis of time interval, by clicking toolbar button  .
.
The Time interval dialog is opened, allowing user to select the time window in which the user is interested, choosing from below options:
Custom range - user can customize the time range, by selecting Time range from and Time range to, from a specialized pop-up window.
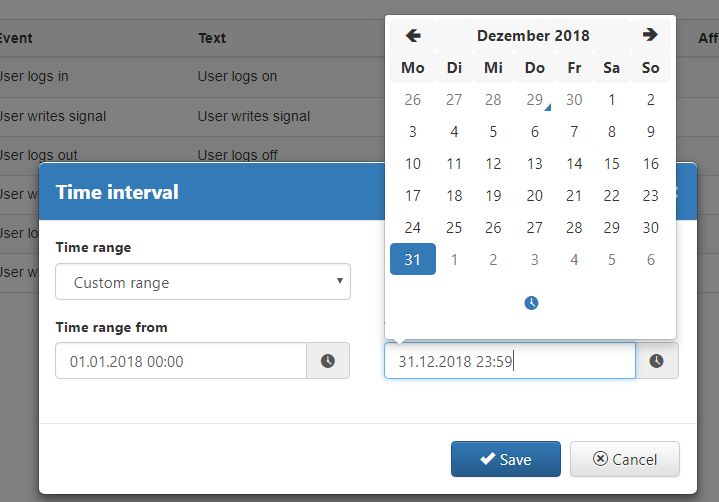
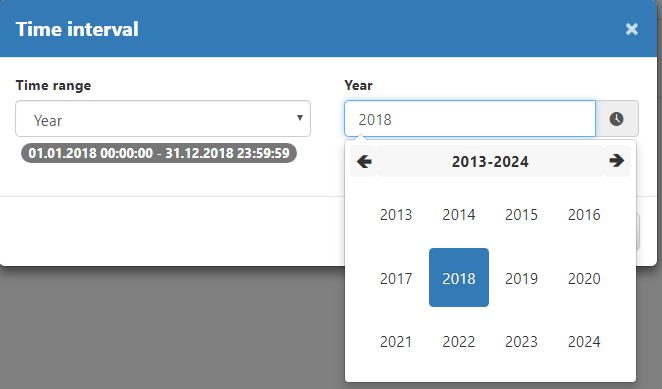
Year - user can select the desired Year as time range, from a specialized pop-up window.
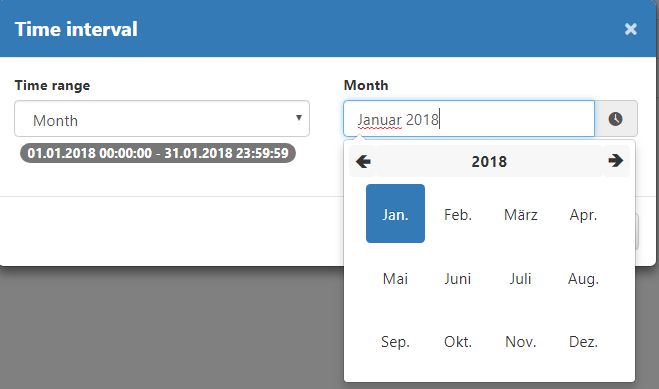
Month - user can select the desired Month as time range, from a specialized pop-up window.
Week - user can select the desired Week as time range, from a specialized pop-up window.
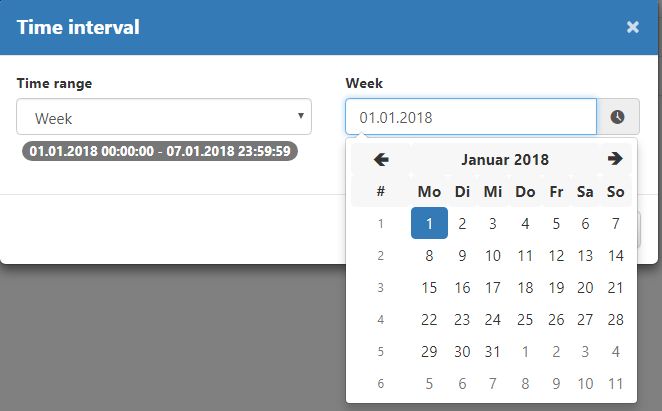
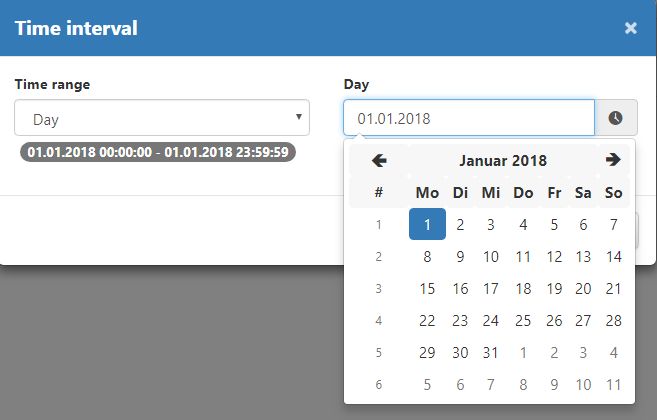
Day - user can select the desired Day as time range, from a specialized pop-up window.
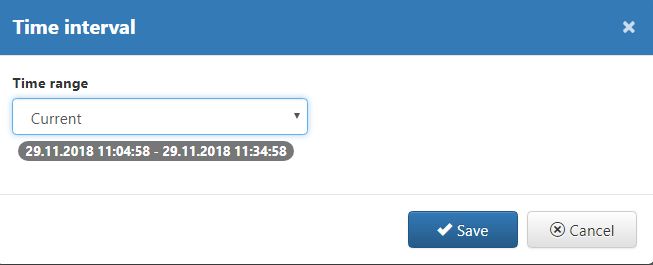
Current - user can select current time as a range. Time frame of 30 minutes is calculated automatically and requires no further selection.
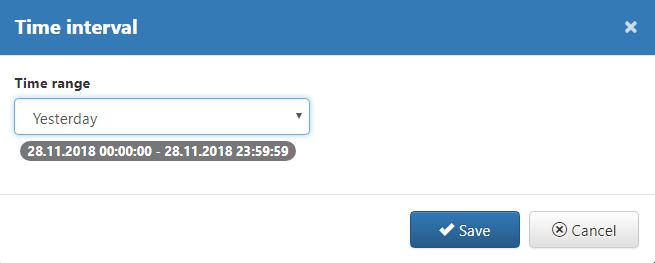
Yesterday - user can select the day before current one. Time frame of 24 hours is by calculated and set.
Current day - user can select current day as time range. Time frame of 24 hours is by calculated and set.
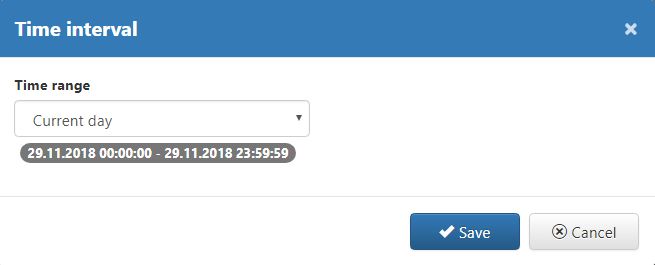
Once the desired time frame selection is done, user may actually apply the filter, by clicking  button. To close the Time interval dialog and apply no filter, user can select button
  .
.
User actions list allows possibility to apply a specialized filter, by clicking toolbar button  . The Filter dialog is opened:
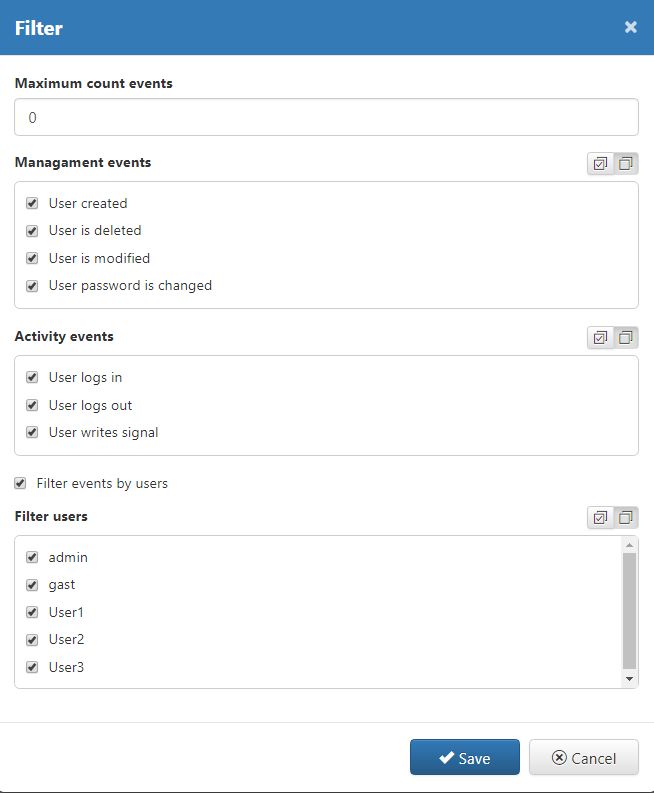
Filter dialog
The filter dialog features following selections:
Maximum count events - defines the amount of User activities displayed in list. By default, value is set to 20.
Management events
User created - shows activities of type "User created"
User is deleted - shows activities of type "User is deleted"
User is modified - shows activities of type "User is modified"
User password is changed - shows activities of type "User password is changed"
Activity events
User logs in - shows activities of type "User logs in"
User logs out - shows activities of type "User logs out"
User writes signal - shows activities of type "User writes signal"
Filter events by users - if check-box is enabled, the list of all database users is displayed, allowing selection of desired user activities.
To apply filter, click the  button. To close the Filter dialog and apply no filter, click the button
  .
.
The Filter and Time interval settings can be saved and reused, in the Configurations manager, available in Studio User Manager toolbar, by clicking button  .
.
The Configurations Manager button opens the dialog with same name, where user can see 3 TABs:
Save - After applying either a Filter or a Time interval, to the User Actions list, by visiting Configurations manager under TAB Save, user can preserve the previously applied filters.
Inserting a new name for the saved configuration is required.
To preserve the configuration press
 button and to discard the configuration and close the dialog, press button

Save configuration
Load - All previously saved configurations can be reused, in Configurations Manager, under TAB Load.
To load a saved configuration simply click the Load button
 . The filtering configuration is immediately applied to the list of User Actions.
By enabling option "Show only own configurations" the list is updated to display only those configurations defined by the currently logged in user.
to close the Configuration Manager, without any further actions, click button
 .
.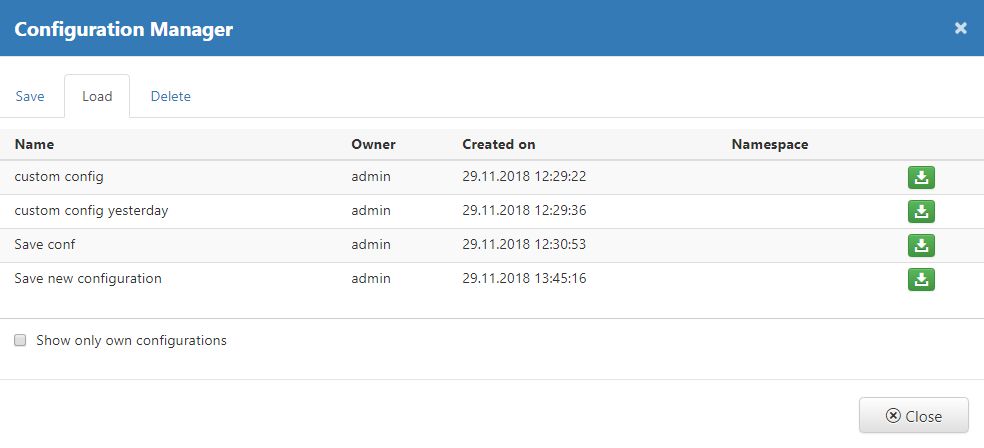
Load configuration
Delete - Configurations Manager allow possibility to remove previously saved configurations, under TAB Delete.
To remove a listed configuration press the Delete button
 .
.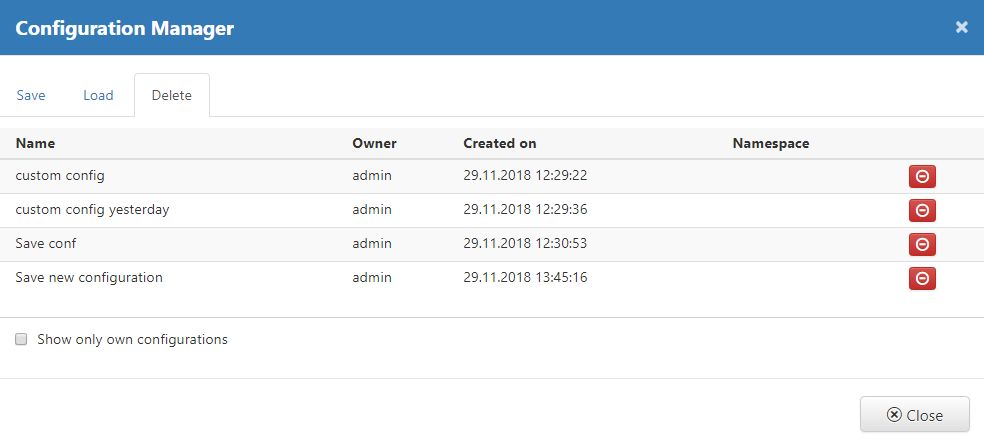
Delete configuration
System opens a confirmation dialog where available options are Yes (proceed with deletion) and No (do not delete).
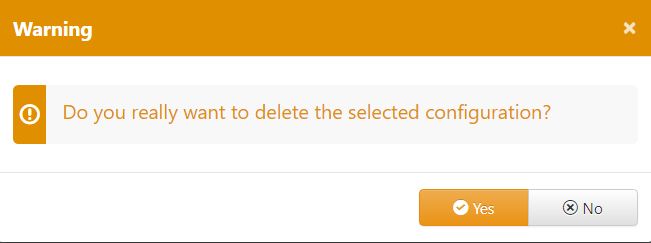
Confirm deletion


