HTML User Manager at run-time
Fully customizable and easy-to-use, the HTML User Manager provides you with the possibility to grant predefined system authorizations to your users.
The goal of the present article is to describe the main functions of the HTML User Manager and to explain their interactions, as follows:
A published project including HTML User Manager consists of at least two elements: the login button and the actual user manager layout.
Tip
A complete use case can be found in the SmartEditor Tutorials section, under Design, publish and view a HTML User Manager project.
The HTML User Manager accessibility depends on the logged-in user System Authorizations:
Administration authorization (full rights)
Operator authorization (limited service rights)
Login authorization (login and view rights, guest user)
If there is no user logged in, the HTML User Manager lists will be empty, and no user management actions will be available.
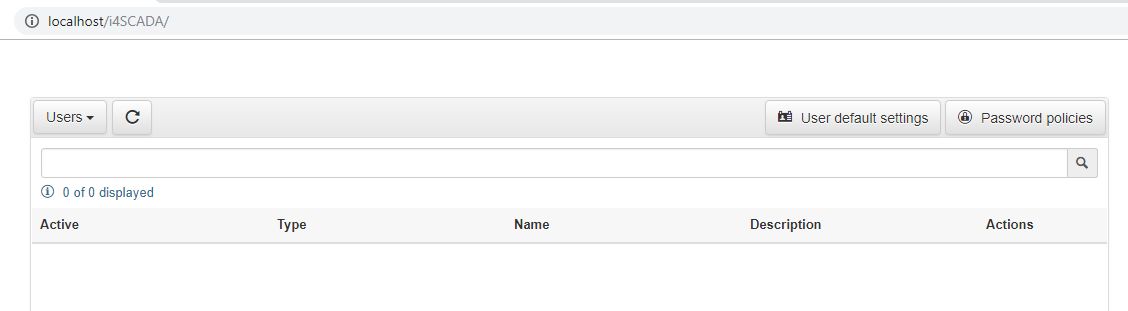
HTML User Manager at run-time (no logged in User)
Visual structure
Do not fumble! Read this article and learn your way through the various options of the i4scada SmartEditor User Manager.
At run time, the HTML User Manager features a set of functions, divided into regions, as follows:
The main toolbar
The main toolbar consists of the following toolbar options:

Main toolbar
the panel selector - allows users to select the desired panel to be displayed. By default, the selection is set to Users, but by unraveling the drop-down list, further options are available, such as: Authorization groups, Project authorizations, Access groups, Access authorizations, User actions.
the refresh button - allows users to manually refresh the list.
the User default settings button - allows the definition of a set of default parameter values that each new user will have regardless of their type. By selecting the toolbar button, the default user settings will be opened in a pop-up dialog. The dialog allows displaying and changing of the settings values. The user can at any point Save the changes, or leave the view, without saving, via the Cancel button.
Active - enables the user to take actions in the system. If this option is not checked, the user cannot log in or perform any actions in i4scada visualizations.
Description - represents the custom description of the user. This field can be used to specify particular details about the user.
User level - displays the level of the user. Users can be split into multiple user levels for easier management. The default value is set to 0, which is the minimum value. No lower values can be added.
Auto log off interval - The log off timer for idle users. If the amount of time specified here passes while the user is idle (performs no action while logged in an i4scada visualization), the user will be logged off. When returning from the idle state, the user must log in again. The default value is set to 0, which is the minimum value and also represents no Auto log off. No lower values can be added.
Max failed logons - Specifies the number of failed login attempts that can be made before blocking the user. If the user tries and fails to log in more than the number of times specified here, the system will automatically block him for one minute. After the first minute, the user can try to log in again. If the next attempt fails, the user will be blocked for the next 2 minutes, and so on. For each consecutive failed login attempt, the block time will be increased to a maximum of 30 minutes. If the user performs a successful login, the failed login attempts and the block time will be reset. If the i4scada Server is stopped while a user is blocked, the user will be allowed to attempt to login directly when the Server starts. If the attempt fails, the user will be blocked again and the block time increases from the previous increment.
Multiple logons - if enabled, the user is able to log on simultaneously in the same i4scada visualization from different locations.
Log activities - if enabled, all the user's login and logout actions are stored as events in the database and can be checked in the panel User actions.
Privileged writing - If enabled, it allows the user to take ownership of the write groups configured with restricted access, even if they are currently owned by another user.
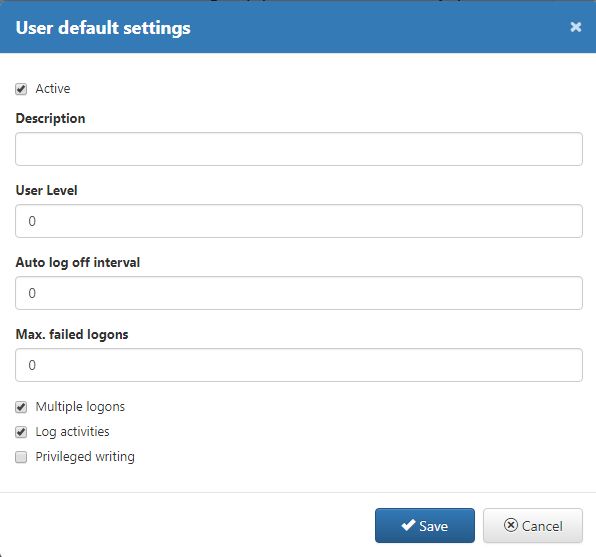
User default settings dialog
the Password policies button - allows the definition of a set of password constraints that a new password will have to meet. Clicking the toolbar button, a pop-up dialog is opened, displaying and allowing changes. The user can at any point Save the changes, or leave the view, without saving, via the Cancel button.
Enforce password history - The number of password renewal cycles, during which a password cannot be repeated. The default value is set to 0, which is the minimum value. No lower values can be added.
Min. password length - The minimum number of characters of the password. The default value is set to 0, which is the minimum value. No lower values can be added.
Max. password age (days) - The number of days until the user is forced to change the password. If the Enforce password history is set to a number of renewal cycles other than 0, the user will not be able to reuse the password until that number of cycles pass. The default value is set to 0, which is the minimum value. No lower values can be added.
Must contain digits - If enabled, the password must contain at least one digit.
Must contain upper case chars - If enabled, the password must contain at least one upper case character.
Must contain lower case chars - If enabled, the password must contain at least one lower case character.
Must contain special chars - If enabled, the password must contain at least one special character.
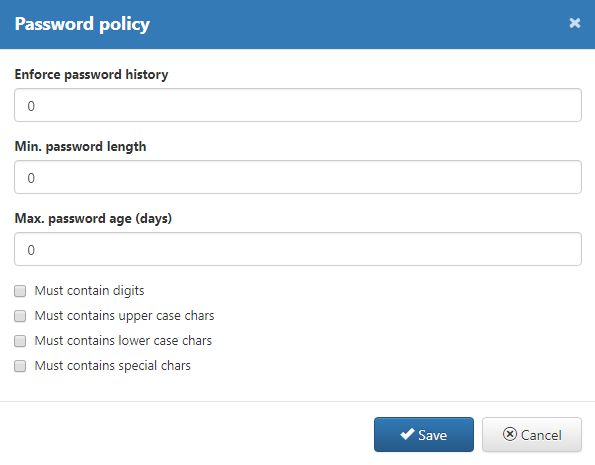
Password policy dialog
The secondary toolbar
The following toolbar options can be found in the secondary toolbar:
The secondary toolbar
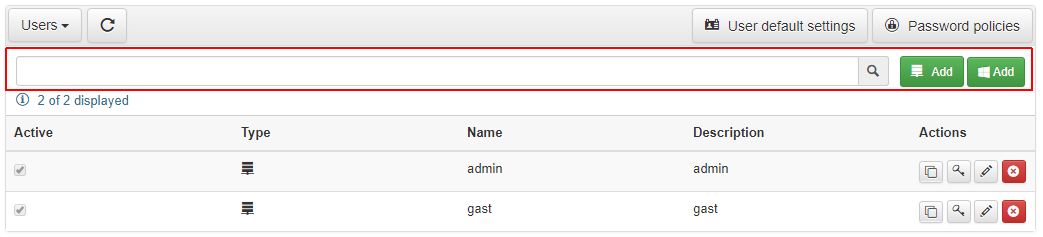
the search field - allows the user to search for list items.
the Add i4scada (normal) user button - allows the creation of a new normal user. By selecting the button, a pop-up dialog is opened. More details about the Add i4scada user function can be found in the upcoming chapter Users.
the Add domain user button - allows the creation of an Active Directory user. By selecting the button, a pop-up dialog is opened. More details about the Add domain user function can be found in the upcoming chapter Users.
The information area
The information area presents information about the number of items available in the list.
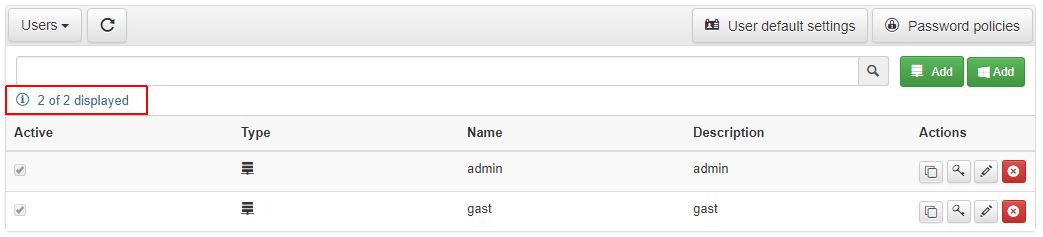
The information area
The list view
The list view is the main area of the User Manager, where the following information can be found:
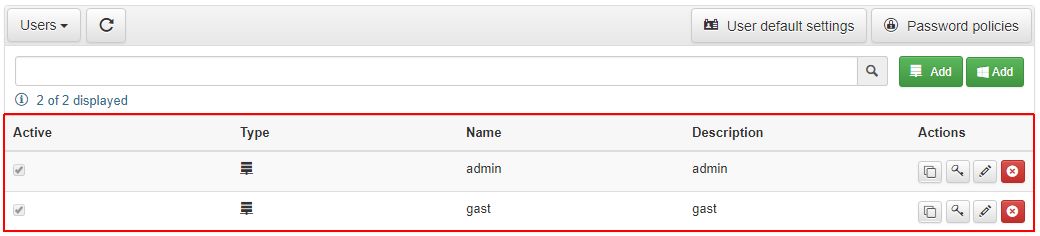
The list view
the actual items view
items actions area - in this area, the user can manage the listed Items via options:
Clone item (available for all Item panels, except for User actions panel)
Change password (available only for users panel)
Edit item (available for all Item panels, except for User actions panel)
Delete item (available for all Item panels, except for User actions panel)
Users
Set up the actors in your i4scada SmartEditor User Manager project. Gather up more knowledge about the potential responsibilities of your users.
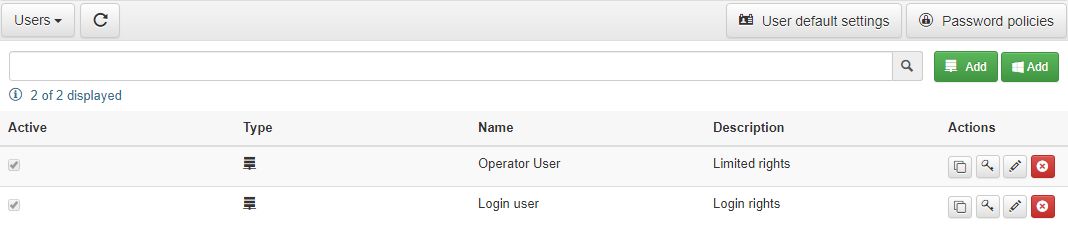
The Users panel, of the HTML User Manager, displays the entire list of database users. The list will reveal only the users to which the logged in user has access to see. The security protocol which is enforced in the web services will be obeyed.
The list is split up into following columns:
Active - if the checkbox is enabled, the listed user is active.
Type - depending on the displayed icon, listed users may be either i4scada users
 or domain users
  .
.Name - the name of the user
Description - the description of the user
Actions - this last column is an atypical one. In Actions column, the actual user management actions are available. The available actions for a listed user are: Clone
 , Change password
  , Edit
  and Delete
  .
.
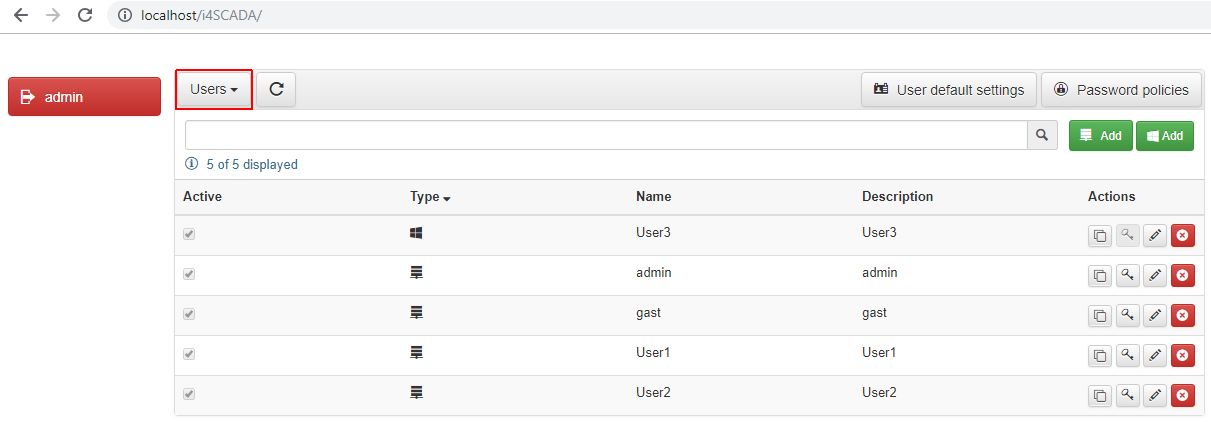
Users panel
The first 4 columns can be sorted ascending / descending, by clicking on the column description. A sorted column will display a /an up / down pointing arrow, indicating the sorting direction. Only one column can be used to sort the list.
The Actions column is not sort-able.
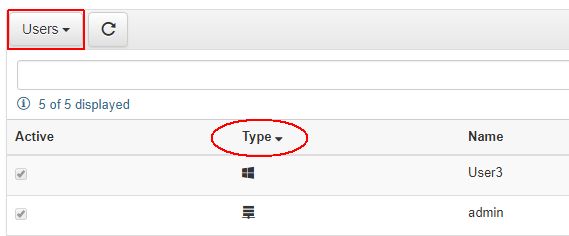
Sorted column
The search function allows user to filter the list by Name. Starting to type in the search field, will minimise the list items, on basis of the entered search criteria.
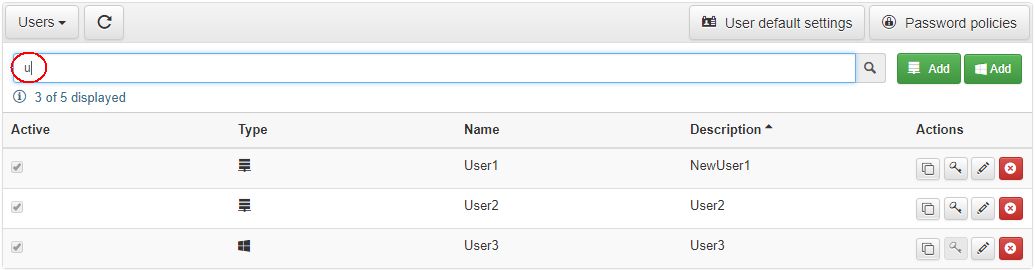
Users list filtered by Name
TIP
For a step-based tutorial on this subject, please visit Manage users in the HTML User Manager.
Even though the distribution of the user's rights (system authorisations) can be customised, as desired, by design, there are 3 types of users:
Administrator users (Full rights)
Operator users (Limited service rights)
Login users (Login and view rights, guest users)
Administrator users
The Administration users are equipped with the full rights set, which allow them Login, View, Edit and Administration rights. By design, the below listed UserManager specific System authorisations are available for the Administrator users:
UserManager Login
UserManager Operator
UserManager Administration
UserManager edit access groups
UserManager edit alarm groups
UserManager edit alarm types
UserManager edit scheduler locations
UserManager edit write groups
The Administrator users can view, edit , delete and add new System users (including other Administrators), Authorization groups, Project authorizations, Access groups and Access authorizations.
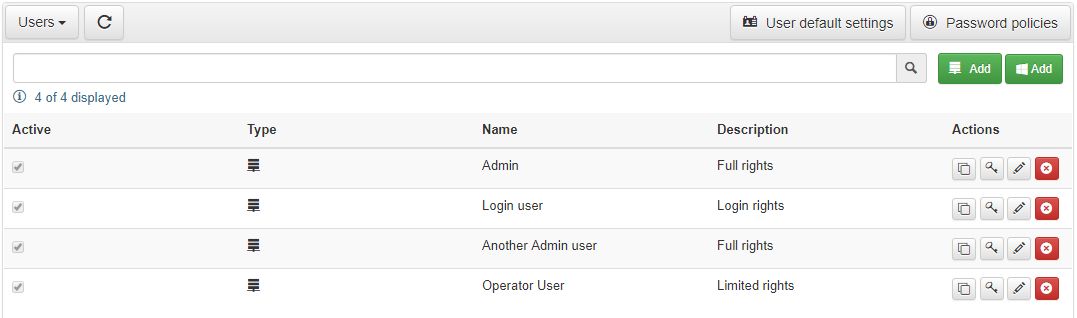
The List of users of an Administrator user
Further on, when adding and editing Authorization groups, the Administrator user has access to all the Project and System Authorizations, Write Groups, Access groups, Scheduler Locations, Alarm Types and Alarm Groups.
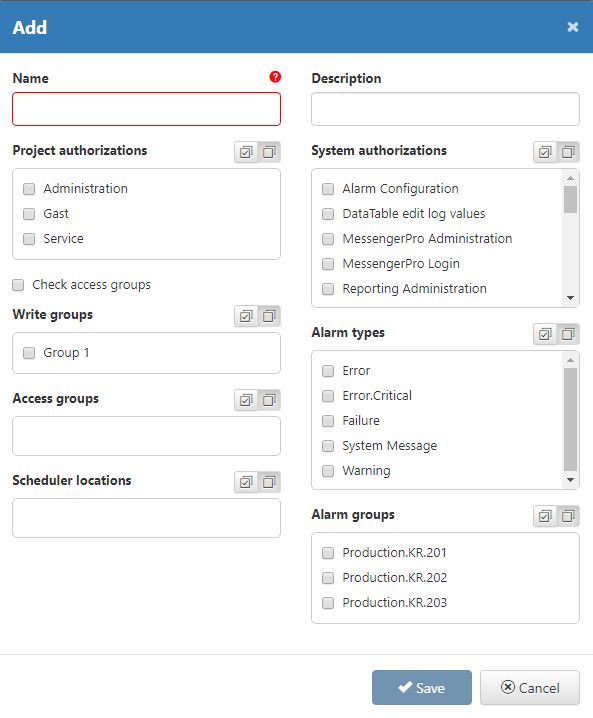
The Add Authorization Group panel, of an Admin user
Under the User Actions panel , the Administrator user has access to all the user's logged actions, including the actions of other Administrator users.
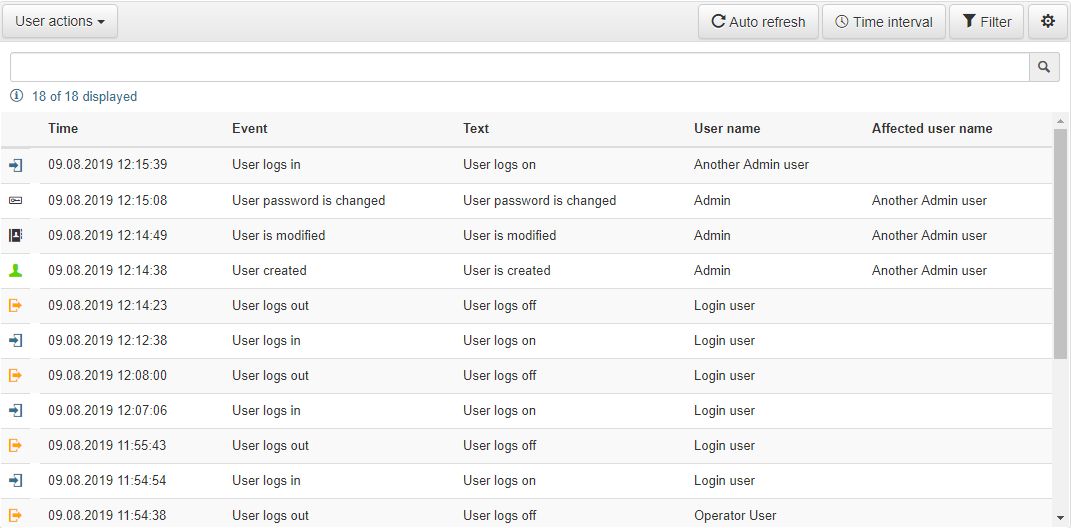
The User Actions of an Administrator user
Operator users
The Operator users provide a set of limited permissions, which allow them Login, View and Edit rights. In comparison with the Administrators, the Operators can only view the users on the same level as themselves or on a lower one. The same level restriction is applied for Authorization groups, Project authorizations, Access groups and Access authorizations.
The List of users available for an Operator user
By design, the below listed UserManager specific System authorisations are available for the Operator users:
UserManager Login
UserManager Operator
Even though the Operator users can create new Users, Authorization groups, Project authorizations, Access groups and Access authorizations, the amount of settings available in the Add / Edit Authorization groups panel, is limited. The Operator will only be able to manage the Project and System Authorizations that are configured for his / her own user.
The Add Authorization Group panel of an Operator user
The User Actions panel of an Operator user will be populated with own actions and the actions of users on a lower level. The actions of Administrator users will not be displayed in the Operator's list.
The User Actions panel of an Operator user
Login users
The Login or Guest users permissions are limited, meaning that guests don not have permissions to view, edit or delete other users, than the own user and others that are on the same level as themselves.
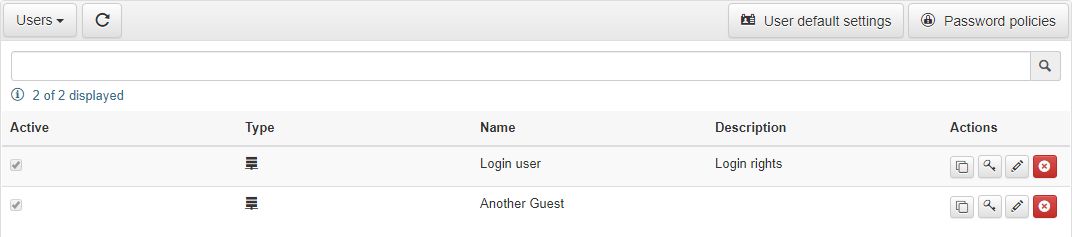
The List of users available for a Guest user
The only UserManager specific System Authorization granted to the Guest user is the UserManager Login.
The Add new User permission is not available for a Guest user and the amount of edit rights is limited. Unlike the Operator users who can add new Authorization groups, Project Authorizations, Access Groups and Access Authorizations, the Guest user is only allowed to organise small changes at level of the listed entities.
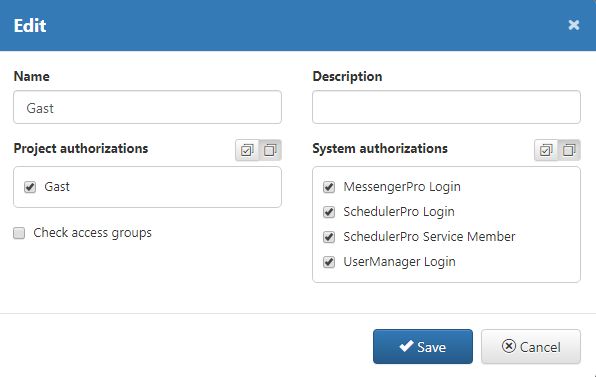
The Edit Authorization Group panel of a Guest user
The list of User Actions of a Guest user is populated with all the actions that affect his / her own user, or other users on the same level as themselves.
The User Actions panel of a Guest user
Management of i4scada user
Check out this article to learn how to properly manage the i4scada users and decide which of these settings correspond to your expectations.
As previously indicated, the i4scada users can be recognized in the HTML User Manager interface, by the symbol .
Add a new i4scada user
By clicking the  button, system will open the Add user dialog. The following fields are available:
Name - The name of the user. This field is highlighted in red color, indicating that field is required.
Description - The custom description of the user. This field can be used to specify particular details about the user.
Authorization groups - The authorization groups field, features a multi select option that contains all available entities. This list also display at the top right side, a select / unselect button.
Active - Enables the user to take actions in the system. If this option is not checked, the user cannot log in or perform any actions in i4scada visualizations.
Multiple logons - If active, the user is able to log on simultaneously in the same i4scada visualization from different locations.
Log activities - If enabled, all the user's login and logout actions are stored as events in the database.
Privileged writing - If enabled, it allows the user to take ownership of the write groups configured with restricted access, even if they are currently owned by another user.
Password expires - If enabled, the user's password will expire after the time period specified in the Max. Password Age option of the Password Policy dialog.
User level - Displays the level of the user. Users can be split in multiple user levels for easier management.
Auto log off interval - The log off timer for idle users. If the amount of time specified here passes while the user is idle (performs no action while logged in an i4scada visualization), the user will be logged off. When returning from the idle state, the user must log in again.
Max. failed logons - Specifies the number of failed login attempts that can be made before blocking the user. If the user tries and fails to log in more than the number of times specified here, the system will automatically block him for one minute. After the first minute, the user can try to log in again. If the next attempt fails, the user will be blocked for the next 2 minutes, and so on. For each consecutive failed login attempt, the block time will be increased to a maximum of 30 minutes. If the user performs a successful login, the failed login attempts and the block time will be reset. If the i4scada Server is stopped while a user is blocked, the user will be allowed to attempt to login directly when the Server starts. If the attempt fails, the user will be blocked again and the block time increases from the previous increment.
Failed logons - Displays the number of failed login attempts that the selected users has. This value can be reset by an Administrator.
First name - The first name of the user.
Last name - The last name of the user.
Company - The company name.
Plant - The name of the plant or factory.
Personnel number - The serial number of the employee.
Maintenance forecast - The number of days to display the maintenance reminder before the maintenance is scheduled.
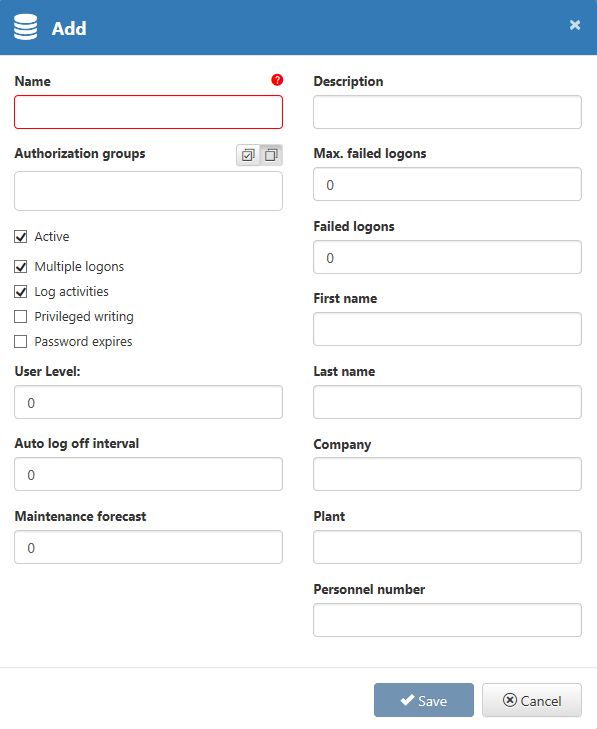
Add user
As you might have recognized, during the creation of the user, the password cannot be set. The password will be set only after the user is saved and maintained in the list, by means of Change password action.
After filling in all desired information, the Add user dialog may be closed by clicking either the Save button or the Cancel button:
 button - the dialog will be closed and the changes saved in the database, for future use. Saving a new i4scada user will consequently update the list of users, making the changes immediately visible.
  button - the dialog will be closed and the changes are discarded.
Clone an i4scada user
By clicking the Clone button in the Actions column, for a listed user, the Clone item dialog is opened. The name of the original user is copied and the suffix "_clone" is added by default.
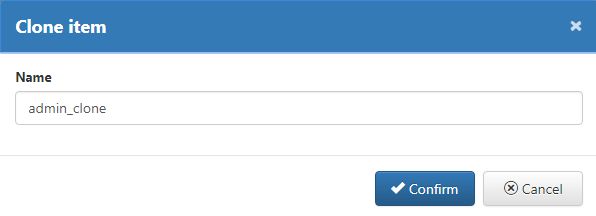
Clone user
The clone name can be also manually added, by typing the name in the text field.
The clone dialog allows user either to Confirm the clone or Cancel.
 button - the dialog will be closed and the changes saved in the database, for future use. Saving an i4scada user clone will consequently update that list of users, making the changes immediately visible.
- button - the dialog will be closed and changes are discarded.
Change password of an i4scada user
The Change user password function is available in the Actions column, by clicking button. The Change password dialog is opened, featuring following settings:
New password
Password confirmation
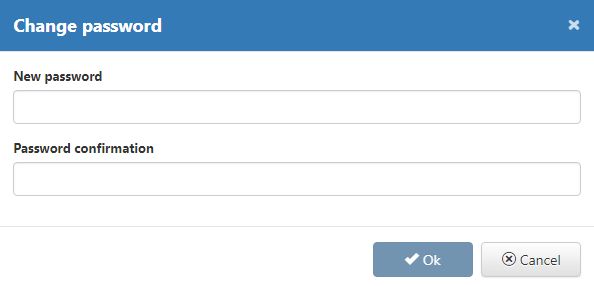
Change password dialog
WARNING
The new password and the password confirmation must be the same.
To close the Change password dialog, user has two options:
 button - button OK becomes active, only when the new password and password confirmation are the same. Pressing the OK button, closes the dialog and saves the changes in the database.
 - button - the dialog will be closed and changes are discarded.
Edit an i4scada user
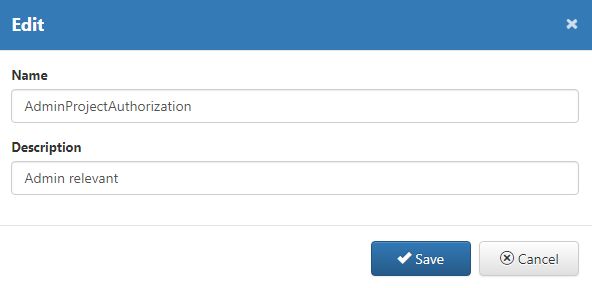
The existing i4scada users can be updated, by clicking the button in user Actions column. Once the button is selected, the Edit dialog opens. All the fields available in Add new i4scada user section, of current article, are available for updates.
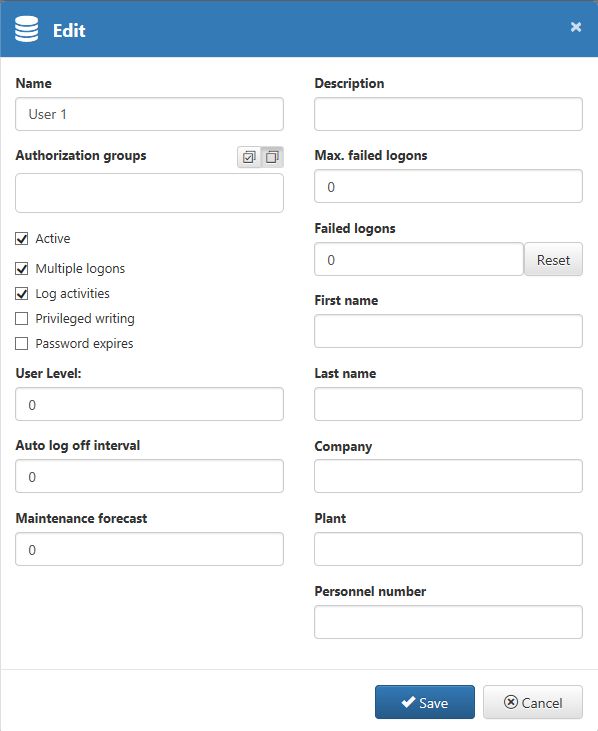
Edit user dialog
After all the desired changes in the Edit dialog have been made, the user can decide to Save or Cancel:
- button - the dialog will be closed and the changes saved in the database, for future use. The user changes shall be immediately applied to the concerning user(s).
- button - the dialog will be closed and changes are discarded.
Delete an i4scada user
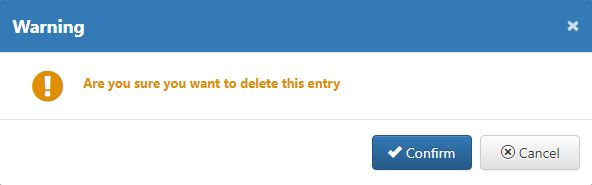
In order to delete an i4scada user, select the button, in Actions column of the user to be removed. The Warning dialog is opened, asking for confirmation.
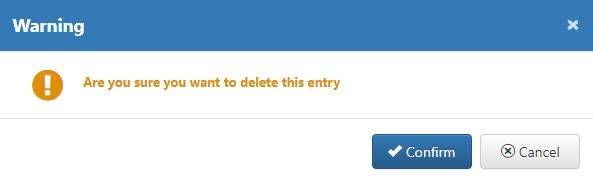
Warning deletion dialog
The Warning dialog allows user to either Confirm the deletion or Cancel the action:
- button - the dialog will be closed and the deletion is performed. The deleted user is immediately removed from the users list.
- button - the dialog will be closed and changes are discarded.
Management of domain users
Take full advantage of the service security features of Microsoft Active Directory Domain Services and create your domain users, as described by this article.
The domain or Active directory users are recognizable in the HTML User Manager interface, by the symbol .
Add a new domain user
By clicking the  button, the Add user dialog is opened. The following setting fields are available:
Name - The name of the user. This field is highlighted in red color, indicating that field is required.
Description - The custom description of the user. This field can be used to specify particular details about the user.
Authorization groups for this user will be matched to domain authorization groups. There have to be authorizations groups defined in i4scada which match the domain authorization groups. The membership of the groups is administrated via the Active Directory domain.
Multiple logons - If active, the user is able to log on simultaneously in the same i4scada visualization from different locations.
Log activities - If enabled, all the user's login and logout actions are stored as events in the database.
Privileged writing - If enabled, it allows the user to take ownership of the write groups configured with restricted access, even if they are currently owned by another user.
User level - Displays the level of the user. Users can be split in multiple user levels for easier management.
Auto log off interval - The log off timer for idle users. If the amount of time specified here passes while the user is idle (performs no action while logged in an i4scada visualization), the user will be logged off. When returning from the idle state, the user must log in again.
First name - The first name of the user.
Last name - The last name of the user.
Company - The company name.
Plant - The name of the plant or factory.
Personnel number - The serial number of the employee.
Maintenance forecast - The number of days to display the maintenance reminder before the maintenance is scheduled.
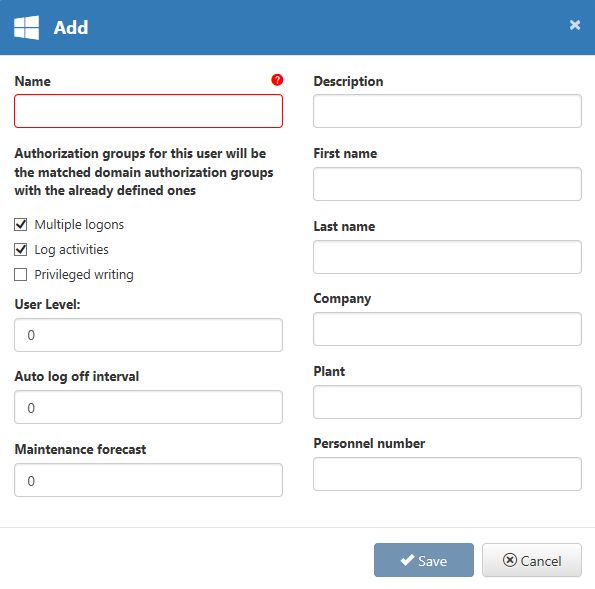
Add domain user
As we are dealing in this case with a domain user, the password is stored in the Active directory and cannot be maintained in HTML User Manager. Hence, the actions button is inactive.
After filling in all the desired information, the Add user dialog can be closed by clicking either the Save button or the Cancel button:
- button - the dialog will be closed and the changes saved in the database, for future use. Saving a new i4scada user will consequently update the list of users, making the changes immediately visible.
- button - the dialog will be closed and the changes are discarded.
Clone a domain user
Cloning of an existing domain user is possible by clicking the button, in Actions column of the user. The name of the selected user is copied and the suffix "_clone" is added. The name can be further changed, as desired, in the Clone item dialog.
Clone domain user
The Clone dialog offers user with possibility to either Confirm or Cancel the cloning action:
- button - the dialog will be closed and the changes saved in the database, for future use. Saving a domain user clone will consequently update that list of users, making the changes immediately visible.
- button - the dialog will be closed and changes are discarded.
Edit a domain user
An existing domain user can be further updated, in the HTML User Manager interface, by clicking the button, in the Actions column of the respective user. The Edit dialog allows update of all user settings, that are featured in section Add a new domain user of the present article.
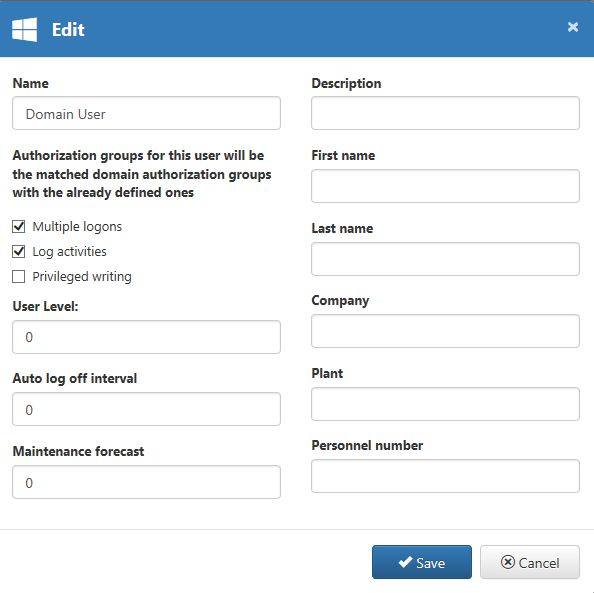
Edit domain user
After all desired changes in the Edit dialog have been made, the user can decide to Save or Cancel:
- button - the dialog will be closed and the changes saved in the database, for future use. The user changes shall be immediately applied to the concerning user(s).
- button - the dialog will be closed and changes are discarded.
Delete a domain user
The deletion of a domain user is performed via the button, in the Actions column of the user to be deleted. By clicking the Delete button, the Warning dialog is opened, where user is required to confirm the deletion.
Warning deletion dialog
The Warning dialog allows the user either to Confirm deletion or to Cancel the action:
- button - the dialog will be closed and the deletion is performed. The deleted user is immediately removed from the users list.
- button - the dialog will be closed and changes are discarded.
Authorization Groups
Authorization Groups ensure a secure access to the i4scada SmartEditor User Manager features. Learn how to manage them like a pro.
The Authorization Groups panel displays the list of all available Authorization groups in the database.
Tip
For a step-based tutorial on this subject, please visit Manage Authorization groups in HTML User Manager .
The list is restricted to display only those Authorization groups that the logged in user has access to see.

Authorization groups list
Authorization groups list is split up into following columns:
Name - the name of the listed authorization group
Description - the description of the listed authorization group
Check access groups - shows if the Check access groups option is enabled or disabled, for the listed item.
Actions - this last column is an atypical one. In the Actions column, the actual user management actions are available. The available actions for a listed Authorization Group are: Clone
, Edit and Delete .
Columns Name, Description and Check access groups can be sorted ascending or descending. Only one single column can be sorted at a time and the sorted column will be marked with an up / down pointing arrow, indicating the sorting direction.
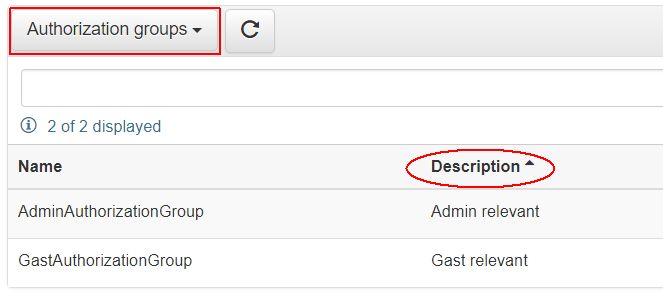
Authorization Groups sorted column
Searching for Authorization groups is also possible, by tying the desired search criteria in the search field.
Note
Search considers only the name of the listed authorization groups.
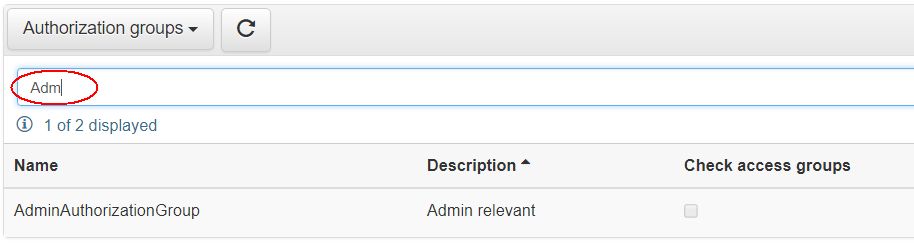
Authorization groups list filtered by name
Add new authorization groups
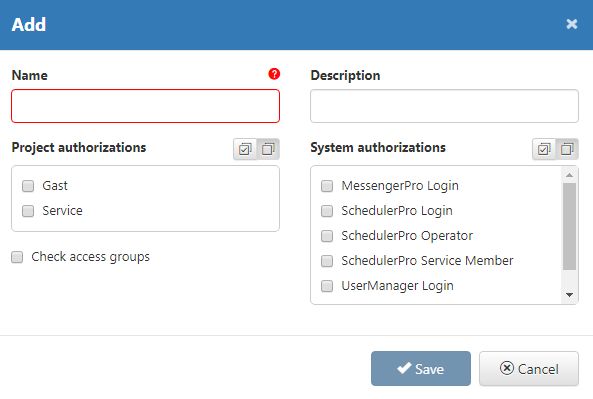
In order to add new authorization groups, in the HTML User Manager, the selection of the  button is necessary. Selecting the Add button opens the Add dialog, where following settings may be organized:
Name - The name of the Authorization group. This field is required.
Description - The custom description of the Authorization group. Allows possibility to insert particular details about the Authorization group.
Check Access groups - If the Check access groups button is checked, the user will be granted the authorization group permissions only if the access conditions specified in the access authorizations are met.
Project Authorizations - The Project Authorizations field, features a multi select option that contains all entities available in the project database. This list also displays at the top right side, a select / unselect button.
System Authorizations - The System Authorizations field, features a multi select option that contains all entities available in the project database. This list also displays at the top right side, a select / unselect button.
Write groups - The Write groups field, features a multi select option that contains all entities available in the project database. This list also displays at the top right side, a select / unselect button.
Alarm Types - The Alarm types field, features a multi select option that contains all entities available in the project database. This list also displays at the top right side, a select / unselect button.
Alarm groups - The Alarm groups field, features a multi select option that contains all entities available in the project database. This list also displays at the top right side, a select / unselect button.
Access Groups - The Access Groups field, features a multi select option that contains all entities available in the project database. This list also displays at the top right side, a select / unselect button.
Scheduler locations - The Scheduler locations field, features a multi select option that contains all entities available in the project database. This list also displays at the top right side, a select / unselect button.
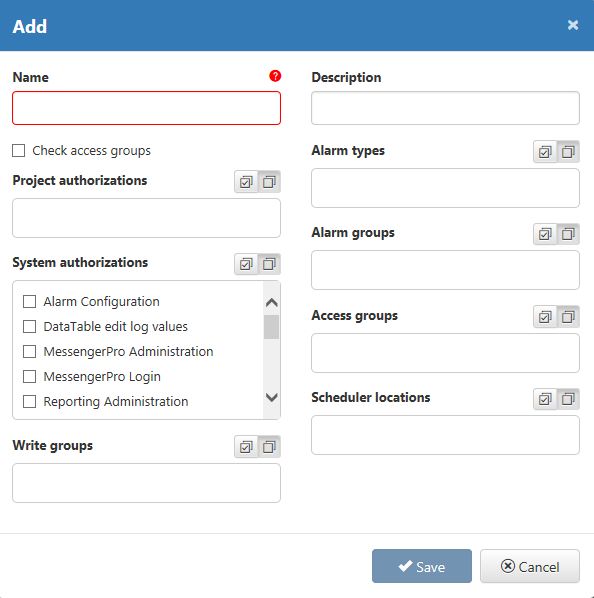
Add new Authorization Group dialog
After filling in all the desired information, user can either Save or Cancel the previous action.
- button - the dialog will be closed and the changes saved in the database, for future use. Saving a new Authorization group will consequently update the list, making the changes immediately visible.
- button - the dialog will be closed and the changes are discarded.
Clone authorization groups
A simpler alternative to adding a new Authorization group, is by cloning an existing one. To clone an Authorization group, select the button. Once the button is clicked, the Clone item dialog is opened. The name of the original item is copied and the suffix "_clone" is added by default. The Authorization group name can also be manually defined.

Clone Authorization group
The clone dialog allows user either to Confirm the clone or to Cancel.
- button - the dialog will be closed and the changes saved in the database, for future use. Saving an Authorization group user clone will consequently update that list of users, making the changes immediately visible.
- button - the dialog will be closed and the changes are discarded.
Edit authorization groups
All existing Authorization groups, may be updated, by means of the action Edit, of the button . The Edit Authorization group dialog, allows the user to change all fields enumerated in above section Add new authorization groups of the present article.
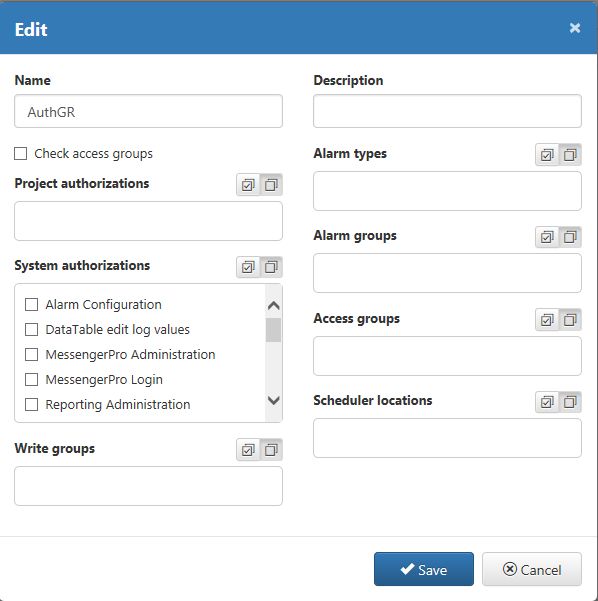
Edit Authorization groups
After all the desired changes in the Edit dialog have been made, the user can decide to Save or Cancel:
- button - the dialog will be closed and the changes saved in the database, for future use. The Authorization groups changes shall be immediately applied to the concerning item.
- button - the dialog will be closed and changes are discarded.
Delete authorization groups
The deletion of an Authorization group is possible by clicking the Actions button , of the element to be removed. The Warning dialog is opened, asking for confirmation.
Warning deletion dialog
The Warning dialog allows the user to either Confirm deletion or to Cancel the action:
- button - the dialog will be closed and the deletion is performed. The deleted Authorization group is immediately removed from the list.
- button - the dialog will be closed and changes are discarded.
Project Authorizations
Assign permissions to your users or create new ones. Check out this article for more details on how to manage your Project Authorizations.
The Project Authorizations panel is accessed from the main toolbar drop-down list.
Tip
For a step-based tutorial on this subject, please visit Manage Project Authorizations in HTML User Manager.
The list of Project Authorizations displays only the items that the logged in user has access to see.
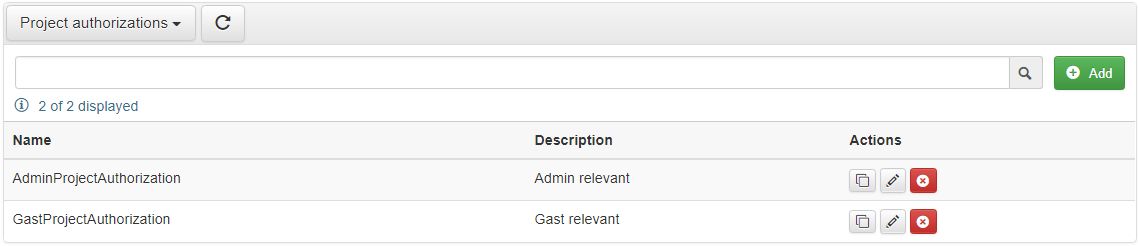
Project Authorizations panel
The list of Project Authorizations is split up into the following columns:
Name - The name of the listed Project Authorization.
Description - The custom description of the Project Authorization. Allows possibility to add specific information about the Project Authorization.
Actions - this last column is an atypical one. In Actions column, the actual user management actions are available. The available actions for a listed Project Authorization are: Clone
, Change password , Edit and Delete .
The Name and Description columns can be sorted ascending / descending. Only one single column may be sorted at a time and the sorted column is marked by a up / down pointing arrow, indicating the sorting direction.
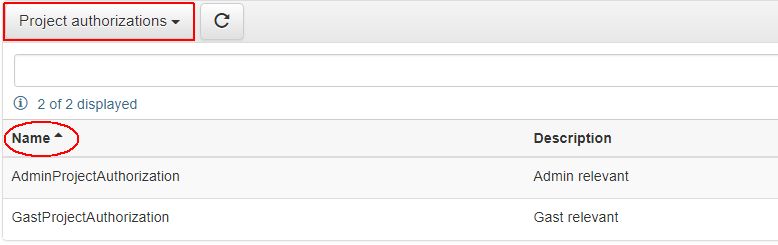
Project Authorization sorted column
Using the Search function allows the user to filter the list by Name. Starting to type in the search field, will minimize the list items, on basis of the entered search criteria.
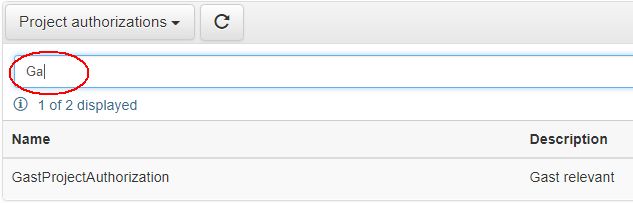
Search after Project Authorizations
Add new Project Authorization
In order to add new Project Authorizations, in the HTML User Manager, the selection of the button is necessary. Selecting the Add button opens the Add dialog, where following settings may be organized:
Name - the Project Authorizations name
Description - the Project Authorization custom description. Allows adding particular details about the Project Authorization.
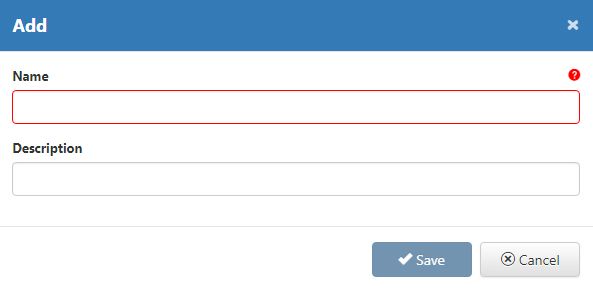
Add Project Authorization
After all the desired information about the Project Authorization has been entered you may proceed with Save or Cancel:
- button - the dialog will be closed and the changes saved in the database, for future use. Saving a new Project Authorization will consequently update the list, making the changes immediately visible.
- button - the dialog will be closed and the changes discarded.
Clone Project Authorization
By selecting the button, the Clone item dialog is opened. The selected project Authorization name is copied and the suffix "_clone" added, to constitute the clone. The name of the new clone may be also manually defined.
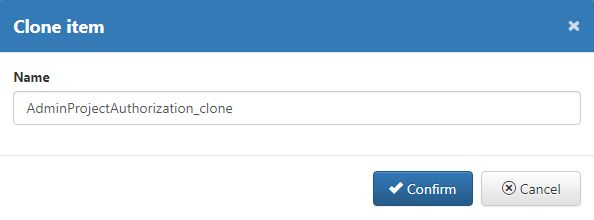
Clone Project Authorization
Further on, the Clone item dialog allows either to Confirm the clone or to Cancel.
- button - the dialog will be closed and the changes saved in the database, for future use. The new Project Authorization will be made available in the list view, immediately.
- button - the dialog will be closed and changes are discarded.
Edit Project Authorization
The existing Project Authorizations may be at any point updated, by clicking the Actions button . The Edit dialog is opened, allowing changes at level of Name and Description of the selected Project Authorization.
Edit Project Authorization
To confirm the changes and close the Edit dialog, press button . In case you desire to discard the changes and leave the edit mode, press button .
Delete Project Authorization
Project Authorizations can also be deleted by selecting the button, in the Actions column for the item to be removed. A confirmation dialog is opened.
Delete Project Authorization
The confirmation dialog allows either to Confirm or to Cancel the deletion.
- button - leads to the deletion of the selected Project Authorization. The item is removed from the list.
- button - closes the confirmation dialog and the item is not deleted.
Access Groups
Distribute your users in Access Groups and define the time schedules at which they should be active. All you need to know can be found in this article.
The Access Groups panel is accessible under the drop-down list of the main toolbar of the HTML User Manager interface.
Tip
For a step-based tutorial on this subject, please visit Manage Access Groups in HTML User Manager.
The list of all database Access Groups is displayed, considering the rights of the currently logged in user.
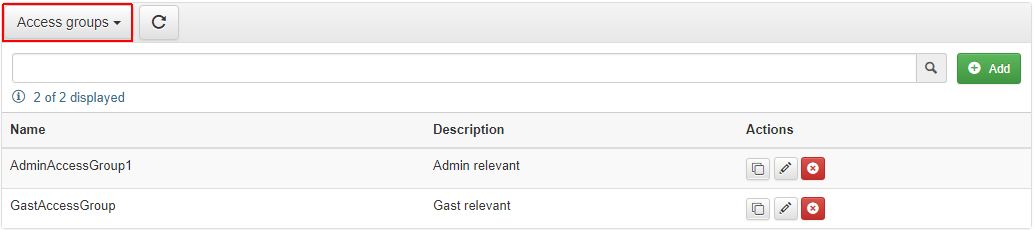
Access Groups panel
The Access Groups list is split up into the following columns:
Name - The name of listed Access Group
Description - The custom description of the listed Access Group.
Actions - this last column is an atypical one. In Actions column, the actual user management actions are available. The available actions for a listed Access Group are: Clone
, Change password , Edit and Delete .
The columns Name and Description are sortable. Sorting is done ascending / descending. A sorted column is marked with a down / up pointing arrow, which indicates the sorting direction.
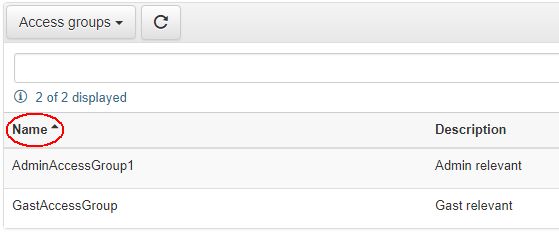
Access Groups sorted column
The search field displayed in the secondary HTML User Manager toolbar, allows possibility to filter the Access Groups list, by Name. Starting to type in the search field, will minimise the list items, on basis of the entered search criteria.
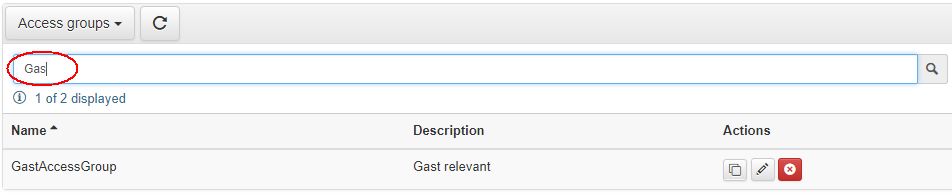
Search after Access Groups
Add Access Groups
Custom access combinations can be created by using the Access Groups. Scope of the Access Groups is to provide possibility to assign Access Authorizations, which restrict locations from where the system can be accessed.
The HMTL User Manager allows possibility to add new Access Groups, by clicking the button, in the secondary toolbar. The Add dialog is opened, allowing the user to introduce the following information, for the new Access Group:
Name - the name of the Access Group
Description - The custom description of the listed Access Group. Allows possibility to input specific information about the Access Group
Begin - Defines the start time, when the new Access Group will start being active. The selection is done with the time selector activated by icon
 . The available options in the time selector are hour, minute and second.
 End - Defines the end time, when the new Access Group will stop being active. The selection is done with the time selector activated by icon
. The available options in the time selector are hour, minute and second. Access rights - The Access rights field, features a multi select option that contains all Access Authorizations available in the project database. This list also displays at the top right side, a select / unselect button, which eases the selection process.
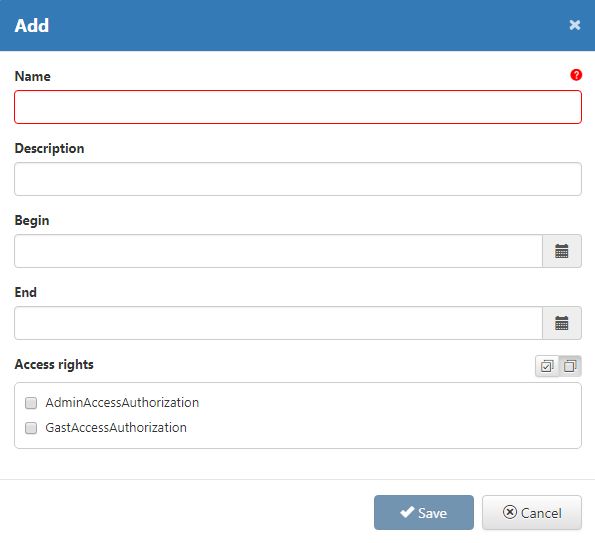
Add new Access Group
After all the desired information about the Project Authorization has been entered the user can proceed via Save or Cancel:
- button - the dialog will be closed and the changes saved in the database, for future use. Saving a new Access Group will automatically update the list, making the changes immediately visible.
- button - the dialog will be closed and the changes discarded.
Clone Access Groups
An existing Access Group can be cloned, by clicking the button, in the Actions column of the item to be cloned. The Clone button opens the Clone item dialog, where the name of the selected element is copied and the suffix "_clone" is added. The name of the Access Group clone can also be manually added.
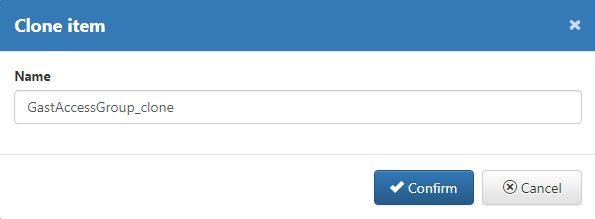
Clone Access Group
To save the new clone, press the Confirm button and to leave dialog without saving, simply press the Cancel button.
- button - the dialog will be closed and the changes saved in the database, for future use. The new Access Group will be immediately visible in the list view.
- button - the dialog will be closed and changes are discarded.
Edit Access Groups
Listed Access Groups can be edited, by clicking the button, in the Actions area, of the element to be updated. The Edit dialog allows the user to change Name, Description, Begin time, End time and Access Rights of the selected Access Group.
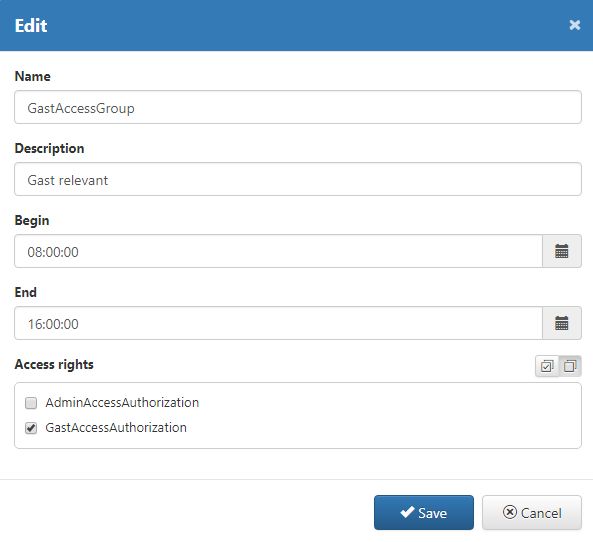
Edit Access Group
The Edit dialog provides the following options:
- button - closes the Edit dialog and preserves all changes made. Changes are also immediately available in the list view.
- button - closes the dialog and discards all changes.
Delete Access Groups
Access Group can be deleted via the button, in the Actions column of the element to be removed. Clicking the Delete button opens a confirmation dialog, where following options are available:
- button - the confirmation dialog is closed and the selected Access Group is removed from the list.
- button - the confirmation dialog is closed and the Access Group is not deleted.
Delete Access Group
Access Authorizations
Take one step at a time! Read this article and decide over the means to validate your users access. Learn how to manage the i4scada Access Authorizations.
Access Authorizations restrict the location from where the system can be accessed (either via computer name or via IP address). Access authorizations are grouped in Access Groups.
Tip
For a step-based tutorial on this subject, please visit Manage Access Groups in HTML User Manager.
To see the Access Authorizations panel, select the respective option from the primary toolbar drop-down list, of the HTML User Manager. The panel lists all database Access Authorizations, structured into following columns:
Name - The Access Authorization name.
Description - The Access Authorization custom description.
Access via - The type of access indicated by icons:
 (via computer name) and
  (via IP address)
Actions - this last column is an atypical one. In Actions column, the actual management actions are available. The available actions for a listed Access Authorization are: Clone
, Edit and Delete .
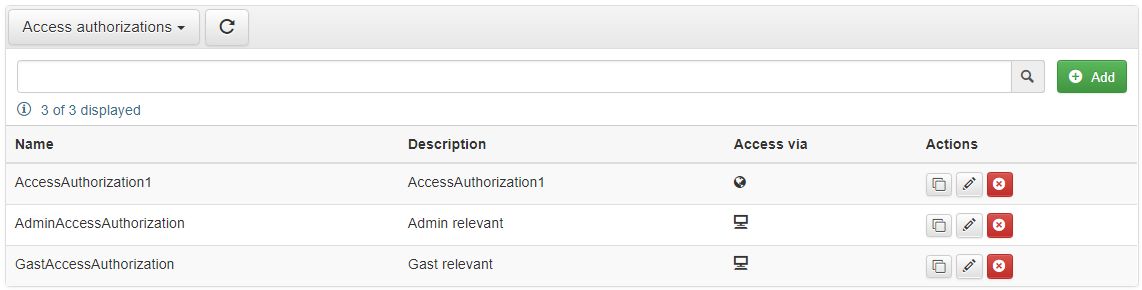
Access Authorizations panel
The columns Name, Description and Access can be sorted ascending / descending. Only one column can be sorted at a time and the sorted column is marked with an up / down pointing arrow, which indicates the sorting direction.

Sorted Access Authorizations column
To find Access Authorizations easier, the search field, in secondary toolbar of the HTML User Manager, can be used. By typing in the search field the desired search criteria, the listed is filtered by Name.
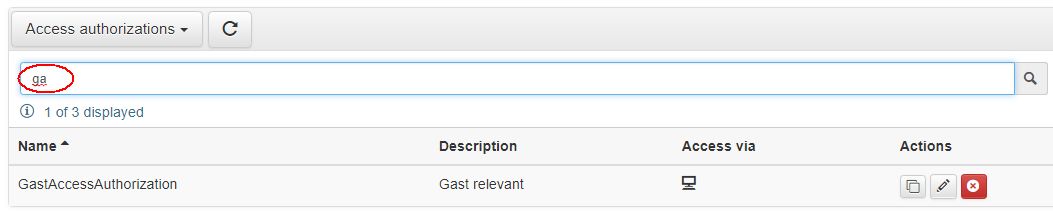
Filtered Access Authorizations
Add new Access Authorizations
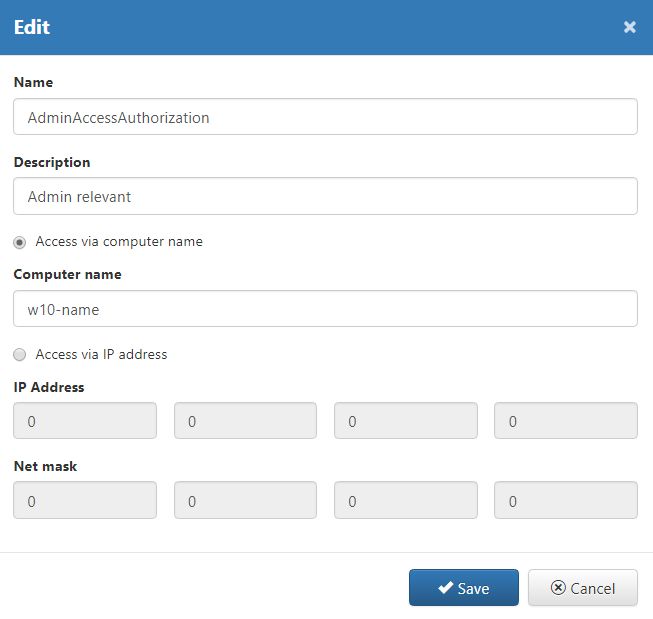
In order to add a new Access Authorization in the HTML User Manager, select the button. The Add dialog is opened where following fields are available, for definition of a new Access Authorization:
Name - The Access Authorization name.
Description - The custom description of the Access Authorization. Allows possibility to insert particular details about the Access Authorization.
Access via Computer name - Access Authorization, uses the computer name to validate the access.
Computer name - The computer name is required.
Access via IP address - Access Authorization, uses the IP to validate the access. If this setting is enabled, the "Access via computer" setting will be automatically disabled.
IP Address - the IP Address is required
Net mask - the Net mask enables the selection of a whole subnet.
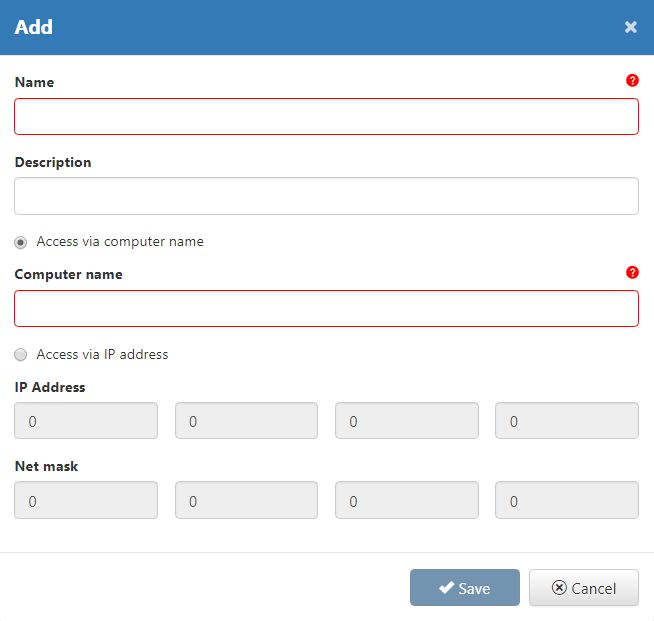
Add new Access Authorization
After all desired settings have been entered the user can either Save changes or Cancel.
- button - the dialog will be closed and the new Access Authorization will be saved. The new elements will be immediately added in the list view.
- button - the dialog will be closed and the changes discarded.
Clone Access Authorizations
Cloning an existing Access Authorization is possible by selecting the Actions toolbar option . Once the option is selected, the Clone dialog is opened. The name of the clone is constructed from the selected Access Authorization name and the suffix "_clone":
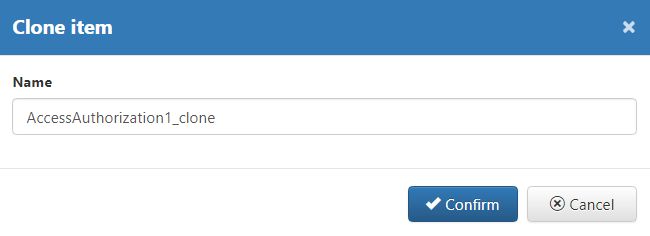
Clone Access Authorization
The actual name of the clone may also be manually defined.
To proceed with the Access Authorization clone, the user can either Confirm or Cancel the action.
- button - the dialog will be closed and the changes saved in the database, for future use. Saving a new Access Authorization will consequently update the list, making the changes immediately visible.
- button - the dialog will be closed and the changes discarded.
Edit Access Authorizations
The existing Access Authorizations can be further updated, by selecting the toolbar option . By clicking this button, the Edit dialog is opened, where all the previously presented Access Authorization fields may updated: Name, Description, Access via computer name and Access via IP Address.
Edit Access Authorization
To confirm the changes and close the Edit dialog, press the button . In case you desire to discard the changes and leave the edit mode, press the button .
Delete Access Authorization
The HTML User Manager allows deletion of Access Authorizations, by selecting option , in Actions column of the item to be removed. Once the Delete option is selected, a confirmation dialog is opened, allowing user either to Confirm or Cancel.
- button - leads to the deletion of the selected Access Authorization. Item is removed from the list.
- button - closes the confirmation dialog and the Access Authorization is not deleted.
User Actions
The i4scada SmartEditor User Manager offers a history tracking of all your users actions. Learn how to effortlessly find out who did what and when!
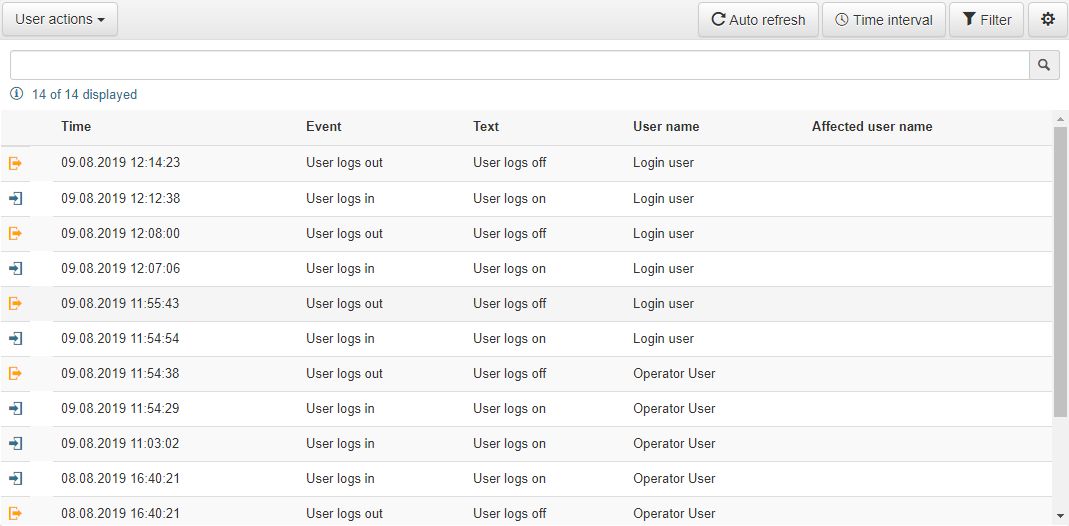
The User Actions panel can be accessed, from the drop-down list located in main toolbar of the HTML User Manager interface. The list is restricted to display only those User Actions that the logged in user has access to see.
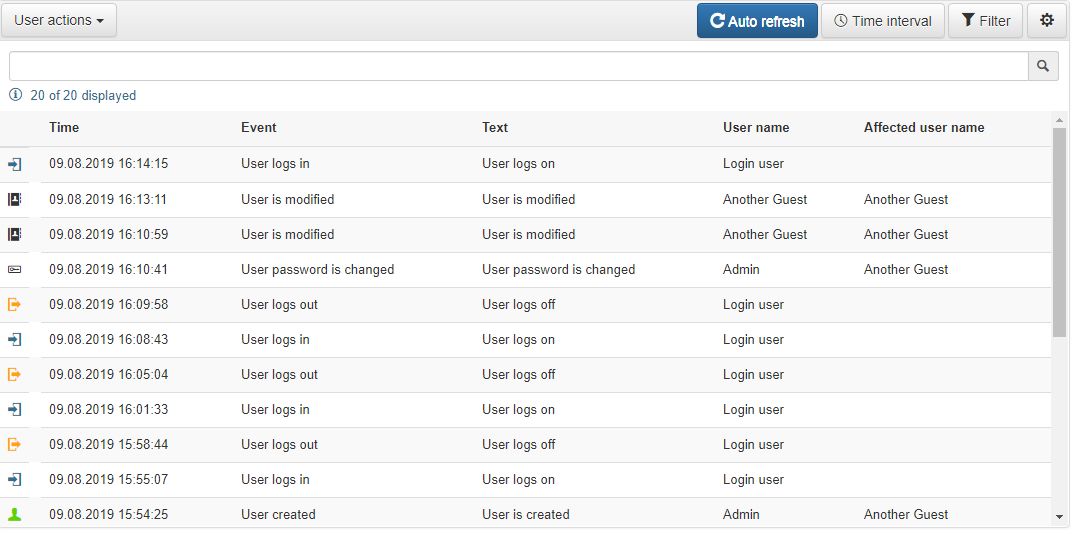
The User Actions list is split up into following columns:
The Time column displays the timestamp when the action took place. The time field indicates the year, month, day, hour, minute and second.
The Event column is represented by the actual action that took place. The logged events are split into two types:
Management events - "User created", "User is deleted". "User is modified", "User password is changed"
Activity events - "User logs in", "User logs out" and "User writes signal"
The Text column is simply the textual information that describes the event.
The User name column shows the name of the user invoicing the event.
The Affected user name column indicates the name of the user affected by the event. This column may or may not have a value, depending on the actual event.
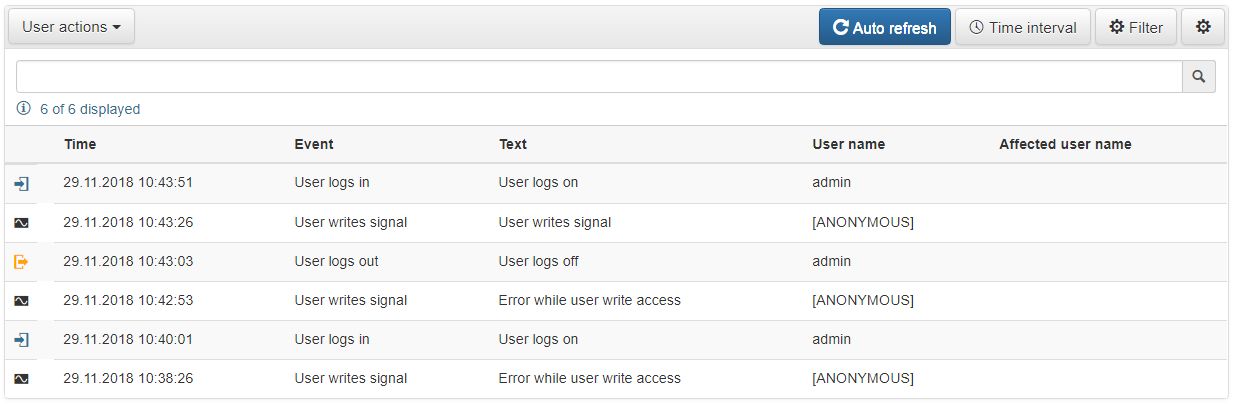
User actions panel
Each user action is marked by a specific icon, which is displayed in the list view, as follows:
Icon | Description |
|---|---|
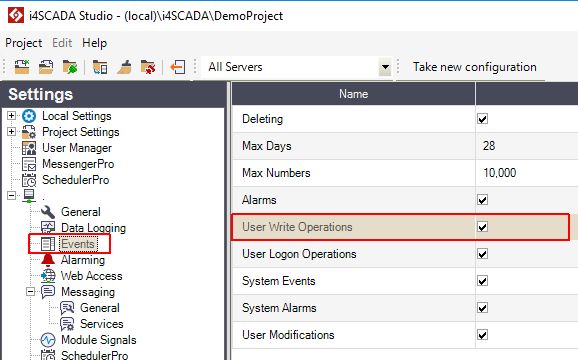
| User is created. These actions are logged ONLY if the following Studio settings are organized: 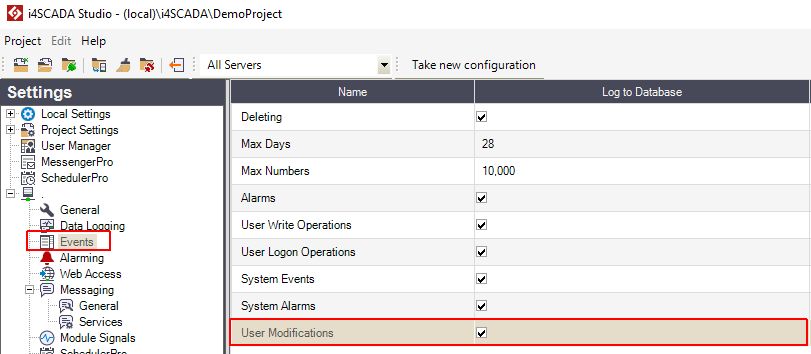 |
| User is deleted. These actions are logged ONLY if the following Studio settings are organized: |
| User is modified. These actions are logged ONLY if the following Studio settings are organized: |
| User password is changed. These actions are logged ONLY if the following Studio settings are organized: |
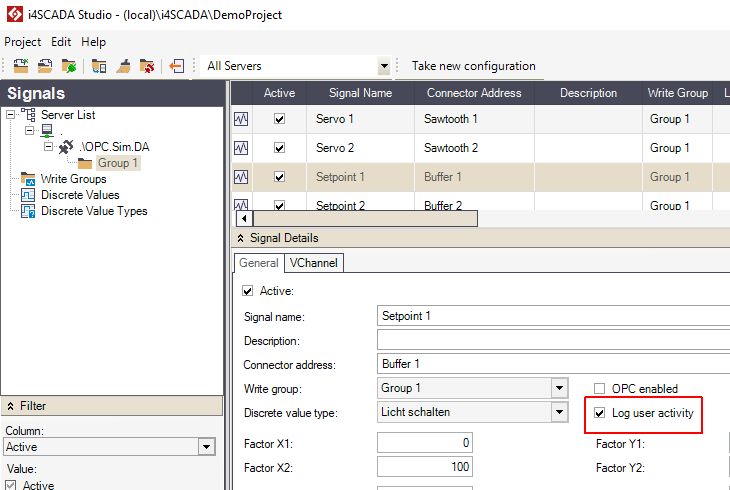
| User writes signal. These actions are logged ONLY if the following Studio settings are organized:
|
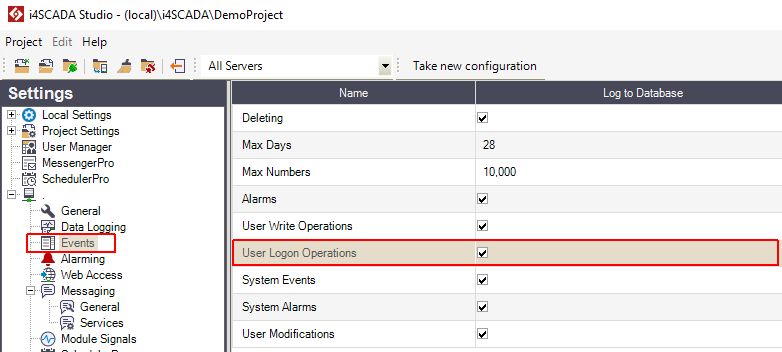
| User logs in These actions are logged ONLY if the following Studio setting is organized:
|
| User logs out These actions are logged ONLY if the following Studio setting is organized:
|


The below table provides information upon the visibility of the User actions, based on the user rights level:
User action | Administrator user | Operator user | Login user |
|---|---|---|---|
User is created | Yes, for all system users. | Yes, if the User or Affected user is an Operator or Login user. | Yes, if the User or Affected user is a Login user. |
User is deleted | Yes, for all system users. | Yes, if the User of Affected user is an Operator or Login user. | Yes, if the User or Affected user is a Login user. |
User is modified | Yes, for all system users. | Yes, if the User or Affected user is an Operator or Login user. | Yes, if the User or Affected user is a Login user. |
User password is changed | Yes, for all system users. | Yes, if the User or Affected user is an Operator or Login user. | Yes, if the User or Affected user is a Login user. |
User writes signal | Yes, for all system users. | Yes, if the User or Affected user is an Operator or Login user. | Yes, if the User or Affected user is a Login user. |
User logs in | Yes, for all system users. | Yes, if the Affected user is an Operator or Login user. | Yes, if the User or Affected user is a Login user. |
User logs out | Yes, for all system users. | Yes, if the Affected user is an Operator or Login user. | Yes, if the User or Affected user is a Login user. |
Each of the above User actions columns can be sorted ascending / descending. Only one column can be sorted at a time. The sorted column is marked with an up / down pointing arrow, indicating the sorting direction.
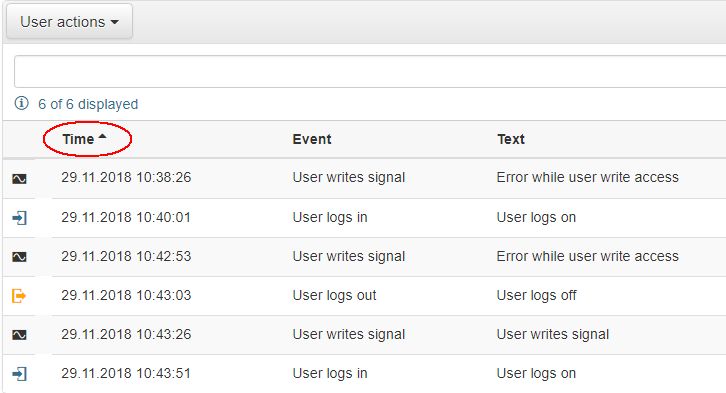
Sorted User action column
Given the potential large amount of actions in the list view, the search field allows possibility to search for actions, by Event and Text.

User actions search
Translation placeholders for User actions texts
The texts represent the basic information describing the User Actions events. The user can enhance the texts to display a more detailed information, by using the following translation placeholders:
##EVENTTYPE##
##EVENTTIME##
##EVENTTIME2##
##USERNAME##
##CLIENTMACHINE##
##SERVERNAME##
##SIGNALNAME##
##SIGNALDESCRIPTION##
##SIGNALUNIT##
##OPCITEMNAME##
##CONNECTOR##
##SIGNALGROUP##
##ALARMTEXT##
##ALARMGROUP##
##ALARMTYPE##
##ACKNOWLEDGETEXT##
##SIGNALNEWVALUE##
##SIGNALOLDVALUE##
##RESULTCODE##
Changing the translation texts can be organised in the i4scada Studio application, under the Translations section.
Tip
For more details regarding the management of translation placeholders, please also visit the step based tutorial here.
Auto refresh User actions list
Auto refresh is a toggle button that will trigger the control to refresh the list content at a certain predefined time interval.
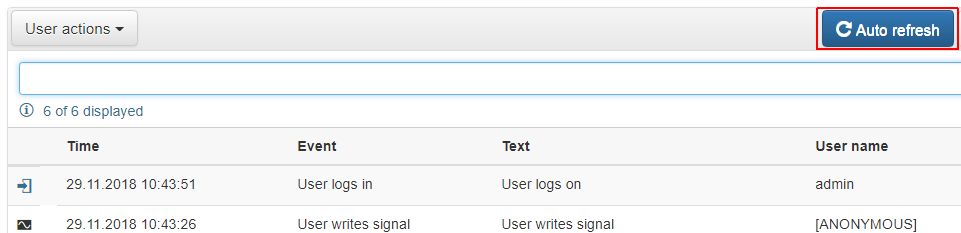
Auto refresh button
The auto refresh interval can be configured at design time, by entering desired value in wf-user-manager Object Property "Update rate".
There are two available auto refresh states: On or Off. The default state of this option can also be configured at design time. At run-time, the state of the Auto refresh option can be manually managed:
 - Auto refresh is toggled off. The list will not be automatically updated.
 - Auto refresh is toggled on. The list will be automatically updated.
Set Time interval
The list of User actions can also be filtered on basis of time interval, by clicking toolbar button  .
.
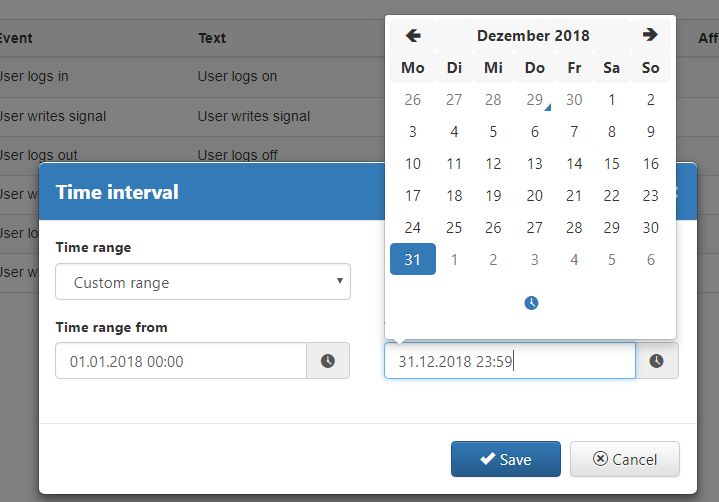
The Time interval dialog is opened, allowing the user to select the time window in which the user is interested, choosing from below options
Custom range - user can customize the time range, by selecting Time range from and Time range to, from a specialised pop-up window.
Year - user can select the desired Year as time range, from a specialized pop-up window.
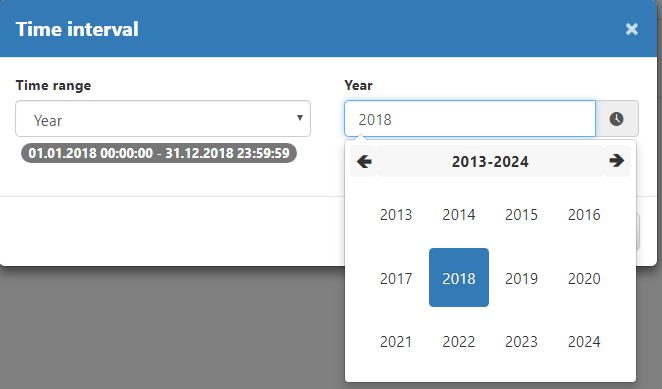
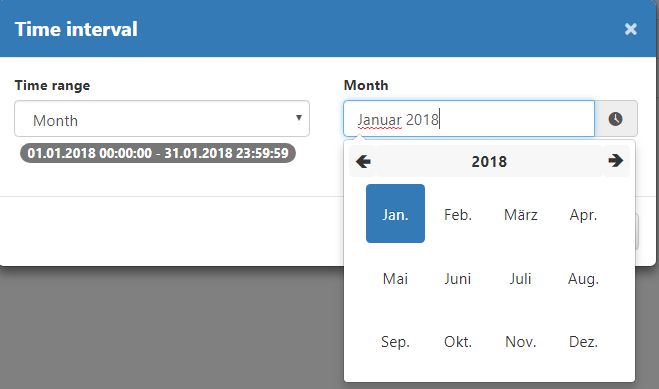
Month - user can select the desired Month as time range, from a specialized pop-up window.
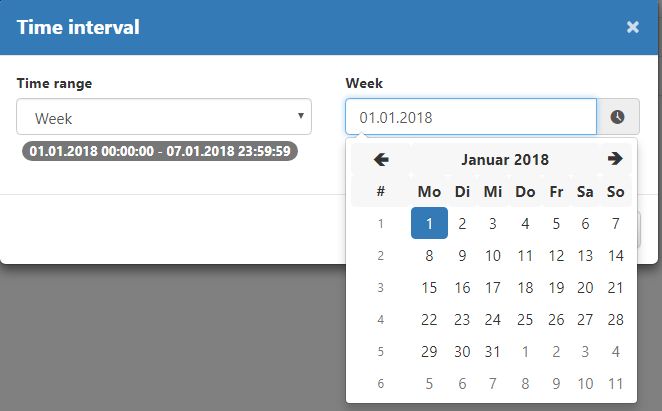
Week - user can select the desired Week as time range, from a specialized pop-up window.
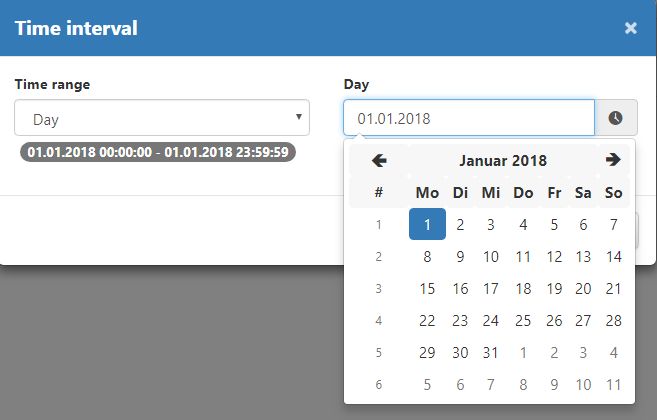
Day - user can select the desired Day as time range, from a specialized pop-up window.
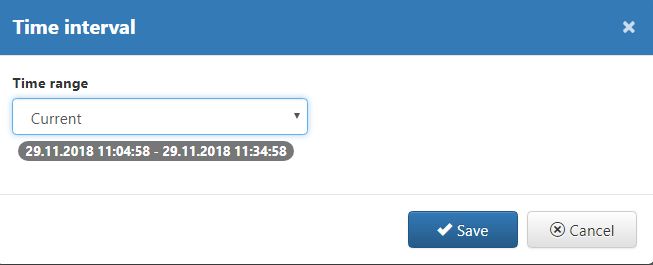
Current - user can select current time as a range. Time frame of 30 minutes is calculated automatically and requires no further selection.
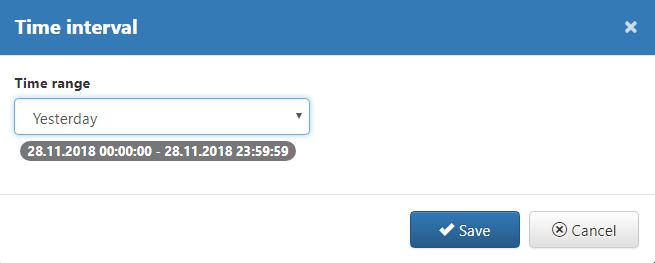
Yesterday - user can select the day before current one. Time frame of 24 hours is by calculated and set.
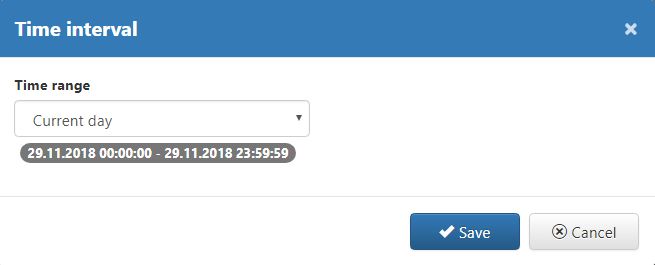
Current day - user can select current day as time range. Time frame of 24 hours is by calculated and set.
Once the desired time frame selection is done, the user applies the filter, by clicking button. To close the Time interval dialog and apply no filter, user can select button .
Filter of User actions list
The users having the System authorization Show User Related Filtering In OperationDiary set, will be able to apply a specialised filter to the User actions list, by clicking the toolbar button  . The Filter dialog is opened:
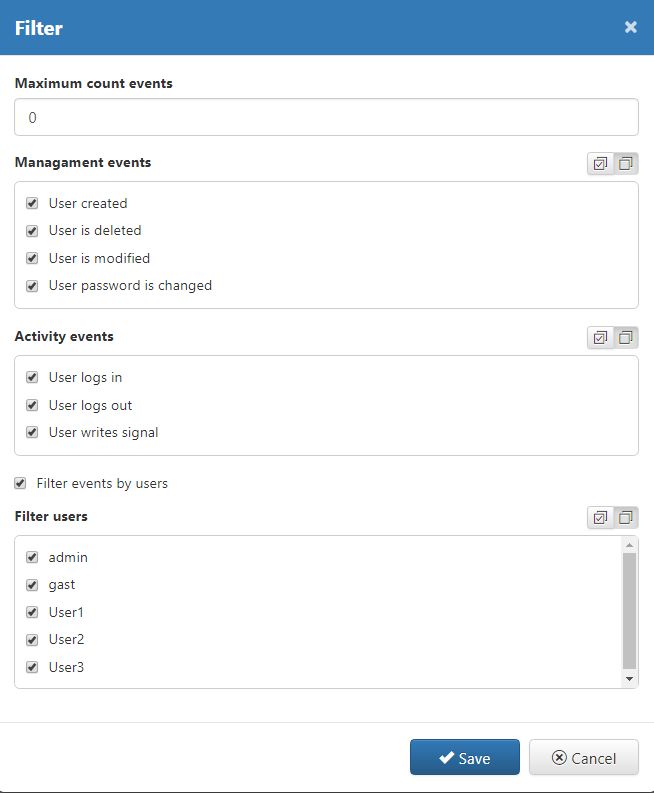
Filter dialog
The filter dialog features following selections:
Maximum count events - defines the amount of User activities displayed in list. By default, the value is set to 20. This filter option is available for all the users, regardless of the System authorizations that they are granted with.
Management events
User created - shows activities of type "User created"
User is deleted - shows activities of type "User is deleted"
User is modified - shows activities of type "User is modified"
User password is changed - shows activities of type "User password is changed"
This filter option is available only for the users having System authorization Show User Related Filtering In OperationDiary.
Activity events
User logs in - shows activities of type "User logs in"
User logs out - shows activities of type "User logs out"
User writes signal - shows activities of type "User writes signal"
This filter option is available only for the users having System authorization Show User Related Filtering In OperationDiary.
Filter events by users - if check-box is enabled, the list of all database users is displayed, allowing selection of desired user activities.
This filter option is available only for the users having System authorization Show User Related Filtering In OperationDiary.
To apply filter, click the button. To close Filter dialog and apply no filter, click button .
Note
Users that do not have the Show User Related Filtering In OperationDiary System authorization, will not be granted permission to configure all the filtering options.

Filter restricted for users without authorization
Configurations manager
The Filter and Time interval settings can be saved and reused, in the Configurations manager, available in the HTML User Manager toolbar, by clicking the button  .
.
The Configurations Manager button opens the dialog with same name, where user can see 3 TABs:
Save - After applying either a Filter or a Time interval, to the User Actions list, by visiting the Configurations manager under the TAB Save, the user can preserve the previously applied filters.
Inserting a new name for the saved configuration is required.
To preserve the configuration press the
 button and to discard the configuration and close the dialog, press the button
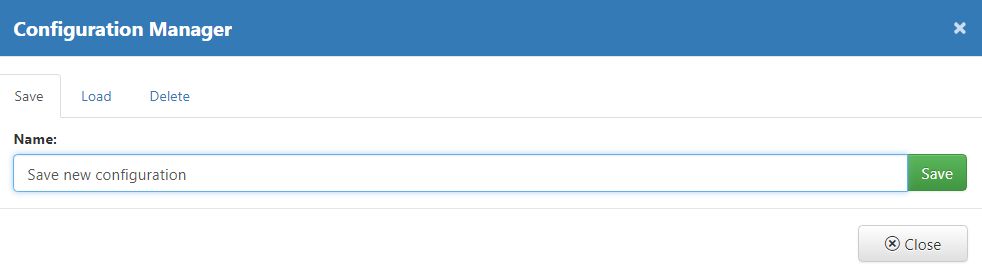
Save configuration
Load - All previously saved configurations can be reused, in the Configurations Manager, under the TAB Load.
To load a saved configuration simply click the Load button
 . The filtering configuration is immediately applied to the list of User Actions.
By enabling the option "Show only own configurations" the list is updated to display only those configurations defined by the currently logged in user.
to close the Configuration Manager, without any further actions, click button
.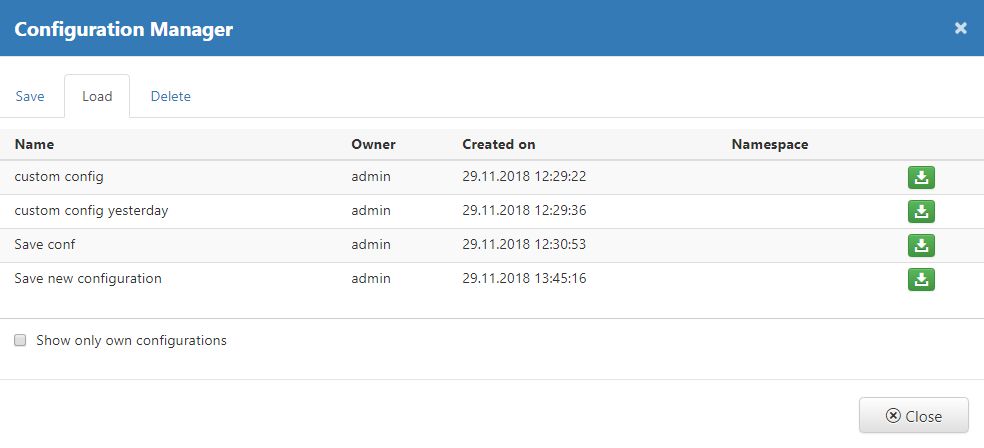
Load configuration
Delete - the Configurations Manager allow user to remove the previously saved configurations, under the TAB Delete.
To remove a listed configuration press the Delete button
 .
.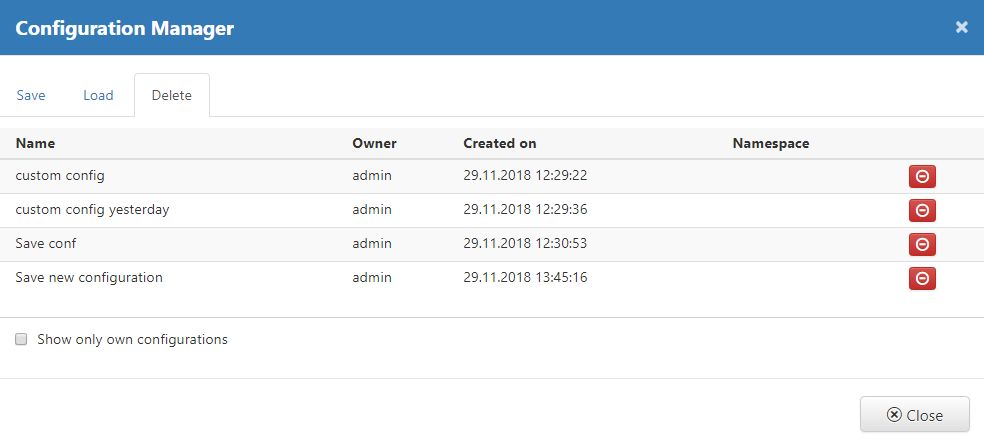
Delete configuration
A confirmation dialog is opened where the available options are Yes (proceed with deletion) and No (do not delete).
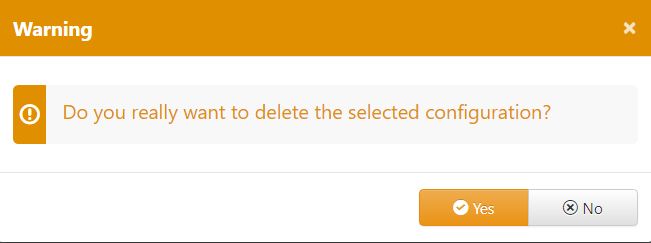
Confirm deletion