Managing Users
This article provides instructions on how to manage i4scada users. It also covers topics such as user types and the available actions.
This section is dedicated to the management of users within the i4scada Studio application.
Before starting to work with the i4scada Studio User Manager, make sure that the i4scada Server is running. To start the i4scada Server open i4scada Service Manager.
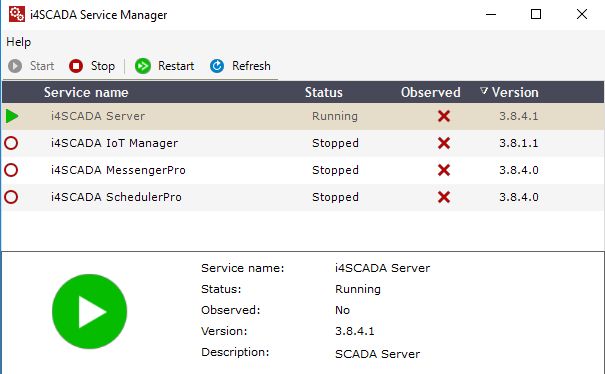
i4scada Server running
The list displays all the existing project users. The list of users is split up into the following columns:
Active - if the checkbox is enabled, the listed user is active.
Type - depending on the displayed icon, listed users may be either i4scada users
 or domain users
  .
.Name - the name of the user
Description - the description of the user
Actions - this last column is an atypical one. In the Actions column, the actual user management actions are available. The available actions for a listed user are: Clone
 , Change password
  , Edit
  and Delete
  .
.
i4scada can accept logins from two types of users: local users (normal user) and domain users (ActiveDirectory User).
The ActiveDirectory Users can log in Ewon by HMS Networks using their Windows Domain credentials, and their properties will be partially shared between Active Directory and Ewon by HMS Networks .

List of existing users
Selection of the user type is done at user creation, by deciding between the two Add buttons:  and
and  . Regardless of the selected Add option, the Add dialog features the same User information fields.
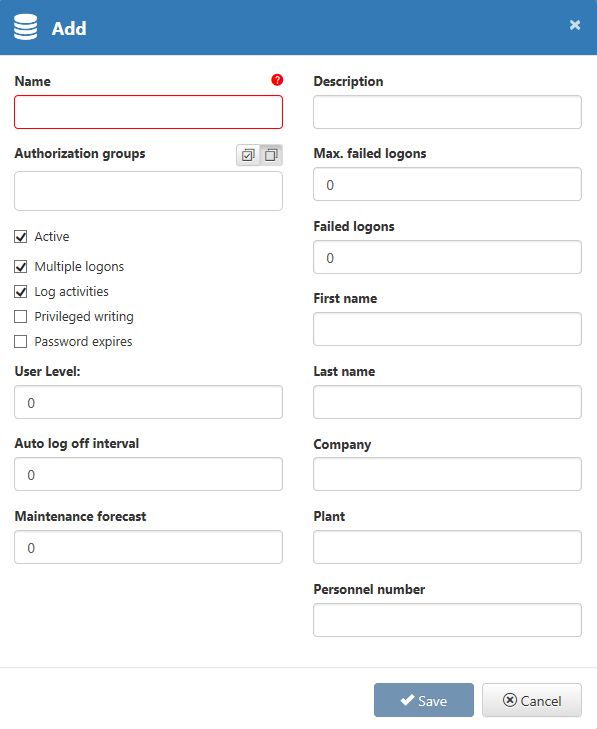
Add User dialog
Following settings fields are available when adding a new User:
Name - The name of the user. This field is highlighted in red color, indicating that field is required.
Description - The custom description of the user. This field can be used to specify particular details about the user.
Authorization groups - The authorization groups field, features a multi select option that contains all available entities. This list also displays at the top right side, a select / unselect button.
Active - Enables the user to take actions in the system. If this option is not checked, the user cannot log in or perform any actions in i4scada visualizations.
Multiple logons - If active, the user is able to log on simultaneously in the same i4scada visualization from different locations.
Log activities - If enabled, all the user's login and logout actions are stored as events in the database.
Privileged writing - If enabled, it allows the user to take ownership of the write groups configured with restricted access, even if they are currently owned by another user.
Password expires - If enabled, the user's password will expire after the time period specified in the Max. Password Age option of the Password Policy dialog.
User level - Displays the level of the user. Users can be split into multiple user levels for easier management.
Auto log off interval - The log off timer for idle users. If the amount of time specified here passes while the user is idle (performs no action while logged in an i4scada visualization), the user will be logged off. When returning from the idle state, the user must log in again.
Max. failed logons - Specifies the number of failed login attempts that can be made before blocking the user. If the user tries and fails to log in more than the number of times specified here, the system will automatically block him for one minute. After the first minute, the user can try to log in again. If the next attempt fails, the user will be blocked for the next 2 minutes, and so on. For each consecutive failed login attempt, the block time will be increased to a maximum of 30 minutes. If the user performs a successful login, the failed login attempts and the block time will be reset. If the i4scada Server is stopped while a user is blocked, the user will be allowed to attempt to login directly when the Server starts. If the attempt fails, the user will be blocked again and the block time increases from the previous increment.
Failed logons - Displays the number of failed login attempts that the selected users have. This value can be reset by an Administrator.
First name - The first name of the user.
Last name - The last name of the user.
Company - The company name.
Plant - The name of the plant or factory.
Personnel number - The serial number of the employee.
Maintenance forecast - The number of days to display the maintenance reminder before the maintenance is scheduled.
By pressing the  Save button all changes done so far will be preserved. By pressing the
  Cancel button changes will be discarded.
The user password can be changed by clicking on the Change Password  action button. The Change password dialog is opened, featuring the following settings:
New password
Password confirmation
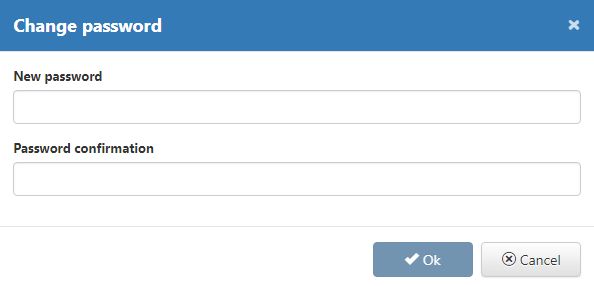
Change password dialog
Warning
The new password and the password confirmation must be the same.
To close the Change password dialog, the user has two options:
 button - button OK becomes active, only when the new password and password confirmation are the same. Pressing the OK button, closes the dialog and saves the changes in the database.
  button - the dialog will be closed and changes are discarded.
The listed users can also be updated by clicking on the Edit  action button. Once the button is selected, the system opens the Edit dialog. All the fields available in Add user dialog are available for further updates.
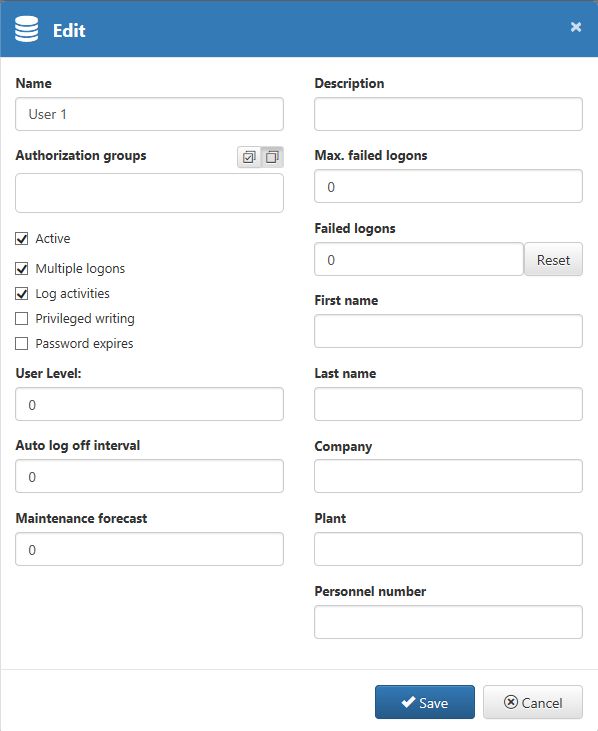
Edit user dialog
After all desired changes in the Edit dialog have been organized, the user may decide to Save or Cancel:
 button - the dialog will be closed and the changes saved in the database, for future use. The user changes shall be immediately applied to the concerning user(s).
  button - the dialog will be closed and changes are discarded.
The Users panel allows the possibility to clone an existing item by clicking the  button, in the Actions column of the user. The Name of the selected user is copied and the suffix "_clone" is added. The Name can be further changed, as desired, in the Clone item dialog.
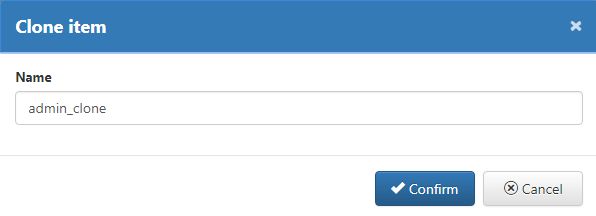
Clone domain user
The Clone dialog offers the user the possibility to either Confirm or Cancel the cloning action:
 button - the dialog will be closed and the changes saved in the database, for future use. Saving a domain user clone will consequently update that list of users, making the changes immediately visible.
 button - the dialog will be closed and changes are discarded.
To delete a listed user select the  button, in the Actions column of the user to be removed. The system opens the Warning dialog, asking for confirmation.

Warning deletion dialog
The Warning dialog allows the user to either Confirm deletion or Cancel the action:
 button - the dialog will be closed and the deletion is performed. The deleted user is immediately removed from the users list.
 button - the dialog will be closed and changes are discarded.