i4scada OPC-UA Tutorials
To help you configure the OPC-UA Connector in the i4scada Studio application, check out this step-based tutorial accompanied by helpful screenshots.
Configuring the OPC-UA Connector in i4scada Studio
Get going with your OPC-UA Connector and follow the steps described in this tutorial, for a successful outcome.
To configure and test an OPC-UA Connector, follow the below described steps:
Open the i4scada Studio application.
The login dialog is opened. Fill in your credentials (if you are a new user and made no changes during i4scada installation, the default user name is "sa" and the password is "webfactory").
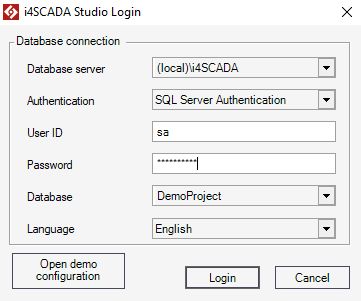
Select the [New Database] option from the Database drop-down list.
The New Database dialog is opened allowing the user to fill in the Database name.
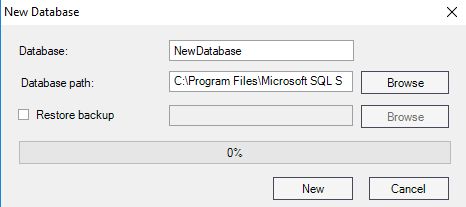
Press the button New to start generating the new Database.
Once the Database is prepared, press the Login button.
The i4scada Studio is opened. An information window pops-up asking the user to confirm if the new database should be set as Default or not.
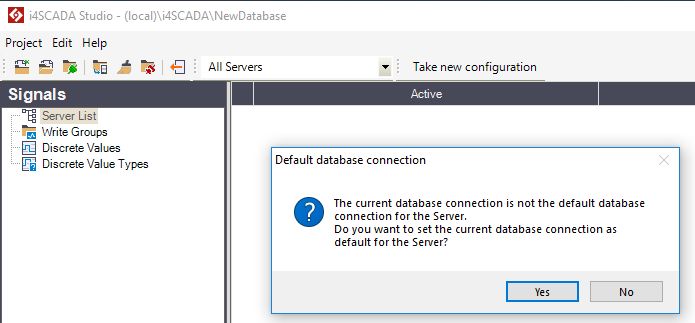
For the current use case, we shall set the New database as default, hence the button Yes will be selected.
Under the Signals section click right on the Server List node.
The Server contextual dialog is displayed. Select the option New Server.
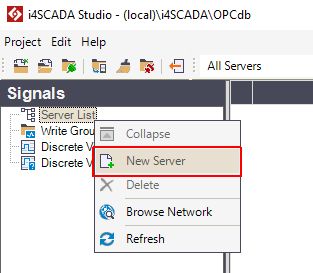
A new Server node is added, under Server List. We shall name the new Server ".", as for the current use case the Server runs on the same machine as the i4scada Studio.
Select the Server node and click-right. Select the option New Connector / OPC-UA Connector from the contextual menu.
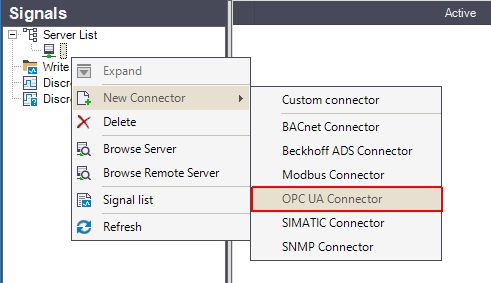
The OPC-UA Connector node is added to the hierarchical view.
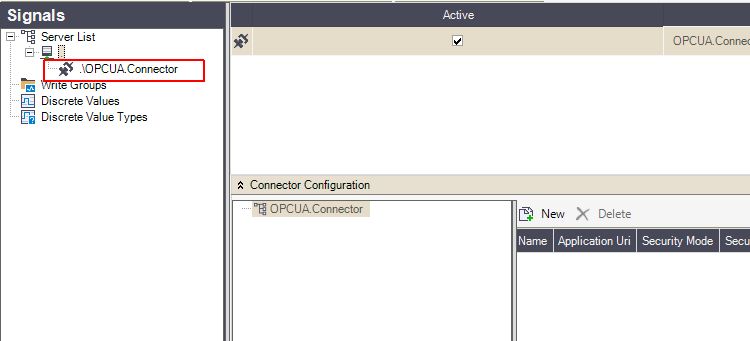
Further configuration steps, will be organized in the Connector Configuration panel.
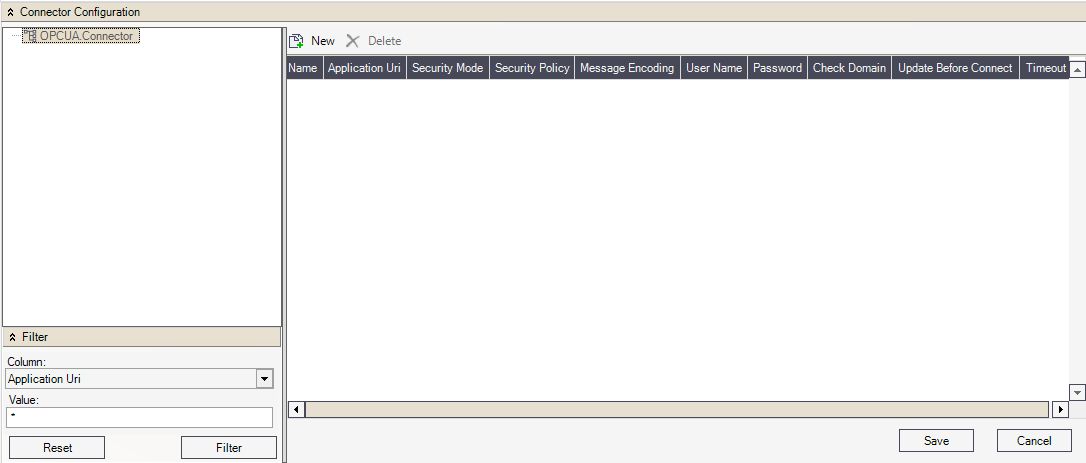
Click the toolbar button New to add a new Session to the OPC-UA Connector.

The OPC-UA Connector window pops-up. Type in Server Url and click the Connect button.

The Enpoints grid-view is populated. Select the desired Session endpoint(s) and click the Create button.
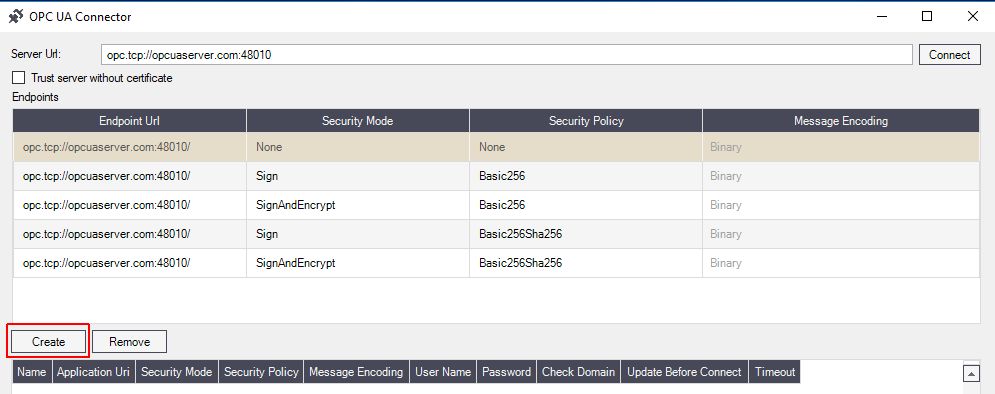
The Session is added to the below grid-view. Click the Import button to add the new Session to the OPC-UA Connector.
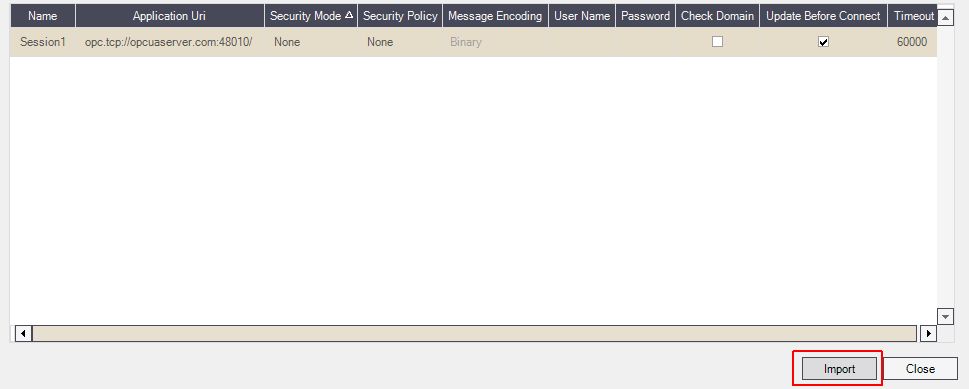
Close the OPC-UA Connector window to return to the Signals panel of i4scada Studio. In the Connector Configuration panel, the hierarchy is updated with a node for the new Session.
Select the Session node and click on the button New, to create a new Subscription.

The new Subscription is added automatically to the hierarchical view.
Select the new Subscription node and click on the button New, to add Items to the Subscription.

The Server nodes window pops-up, displaying the list of monitored Items (variables).
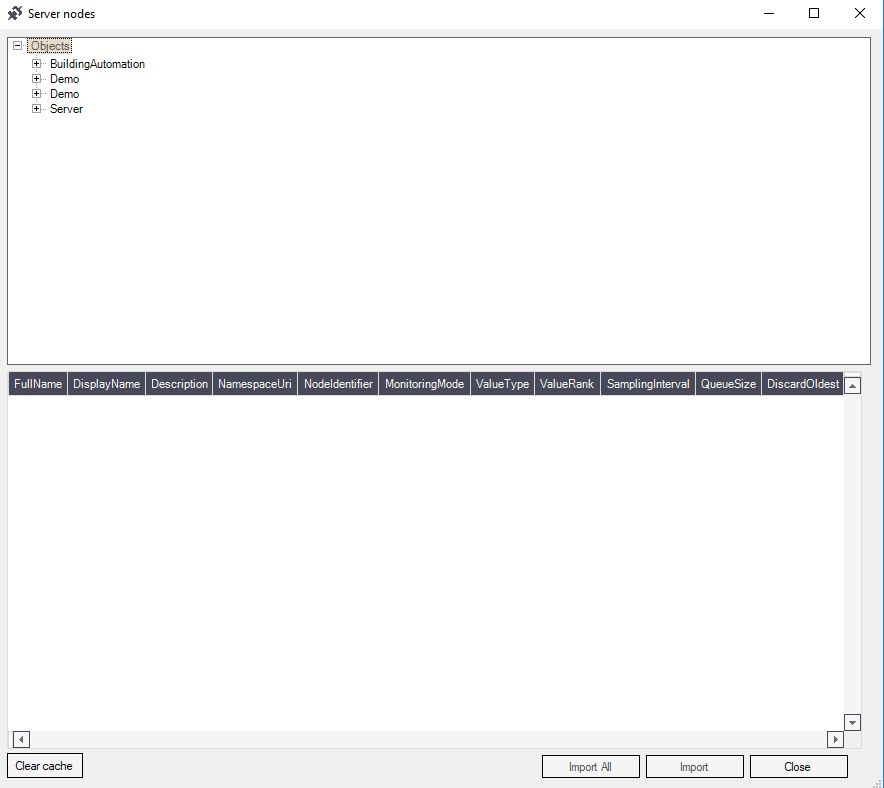
Select the desired server node(s) or expand the hierarchy. The items grid-view is populated with all the respective node variables.
Select the desired listed items and click either Import All or Import button.
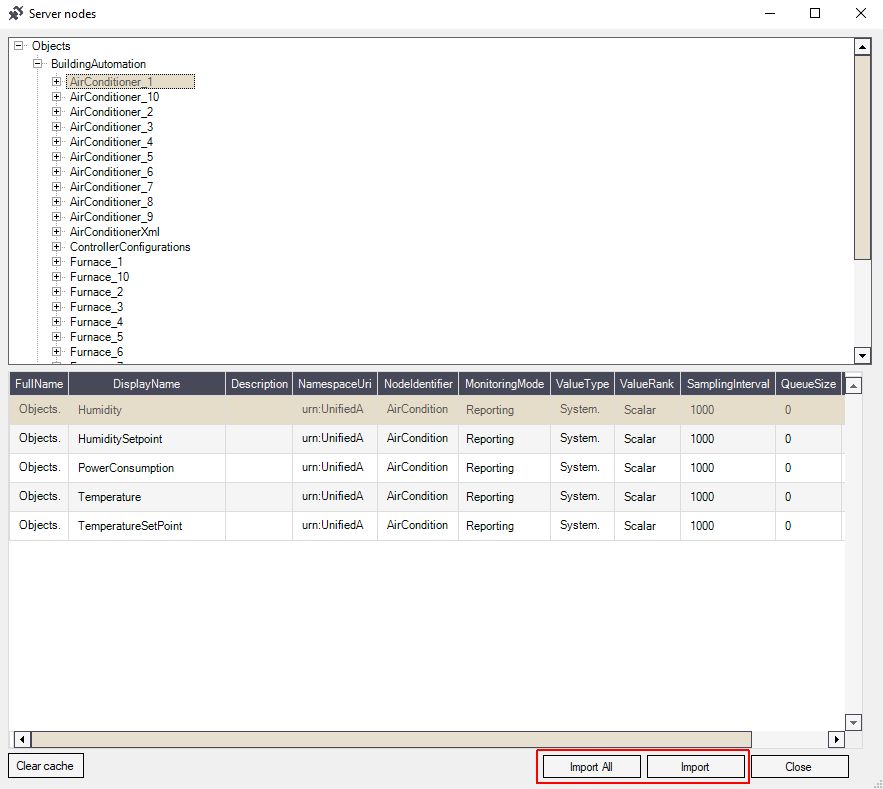
Close the Server nodes window, to return to the Signals panel in i4scada Studio.
The Subscription items grid-view is populated with the imported items. Press the Save button, in the Connector Configuration panel, to preserve the changes organized so far.
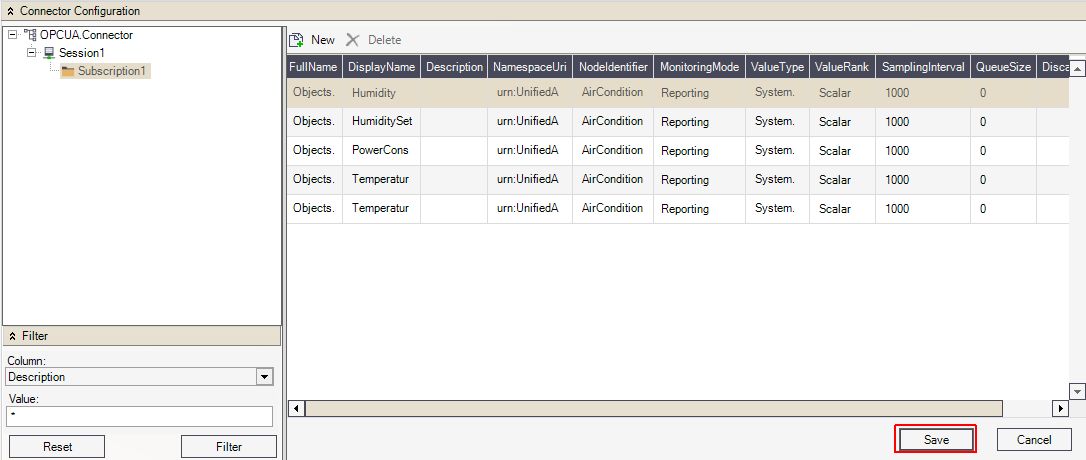
Click right on the .\OPCUAConnector node and select the Browse Connector option in the contextual menu.
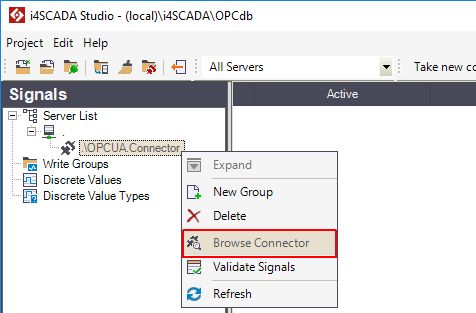
The Browse Connector window pops-up, displaying the previously created hierarchy. Click on the Subscription node.
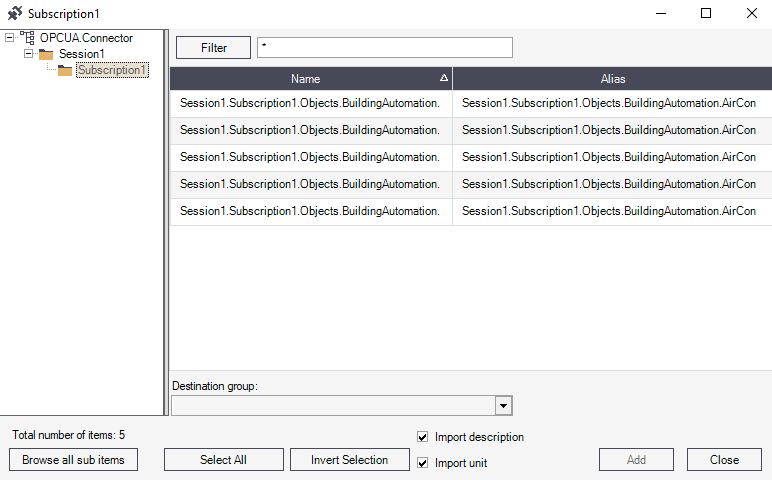
Select the desired Item(s) from the list view and fill in a new Destination group.
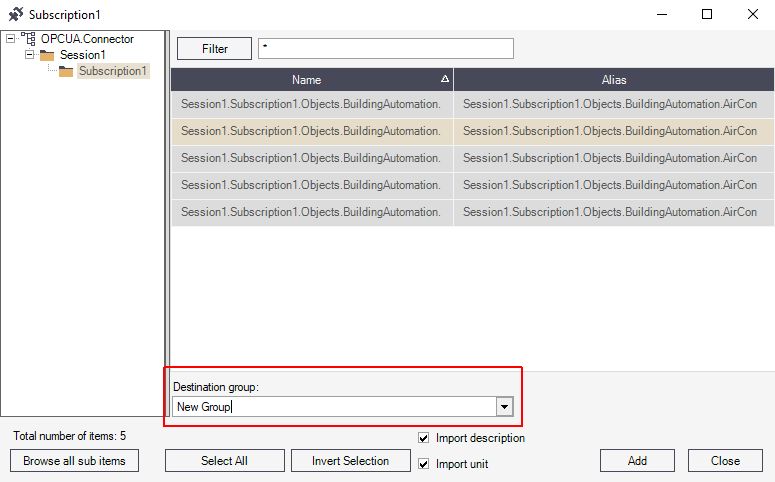
Click the button Add to enable the system to perform the mapping between Subscription Items and WEBfactory Signals.
Close the Browse Connector window to return to the Signals panel in i4scada Studio.
Click on the Group node. The list is populated with the Group Signals.

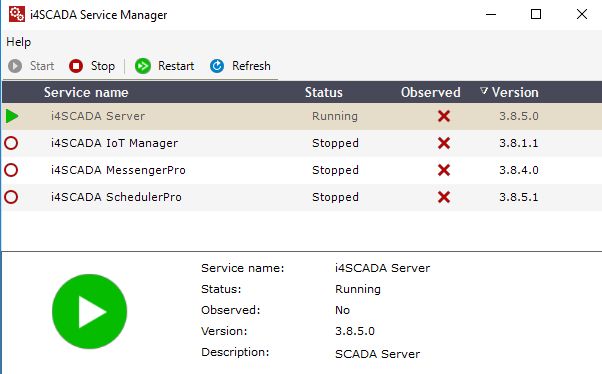
Open the i4scada Service Manager Application and start the i4scada Server.
Open the i4scada Activity Analyzer and click on the Start toolbar button.

Activity for the OPC-UA Connector and its Groups are successful.
