Installing i4scada on a different drive
Check out this tutorial and learn how to install the i4scada setup on a different drive.
This article explains the steps required to successfully install and run i4scada on a drive other than the system drive, typically "C".
The example scenario involves a machine with two drives, "C:" and "E:", where C: is the system drive (where Windows is installed), and i4scada will be installed and run from the E: drive. The same process can be applied to any other drive apart from the system drive (C:).
Note
Make sure that the machine on which you are installing meets the requirements specified in the i4scada Setup and i4scada Advanced Setup sections of the Knowledge Base.
Installing i4scada
The i4scada installation is similar to the default one, described in the i4scada Setup or i4scada Advanced Setup articles. The only difference is at the Destination Folder step, where you will need to specify the new folder on a different drive.
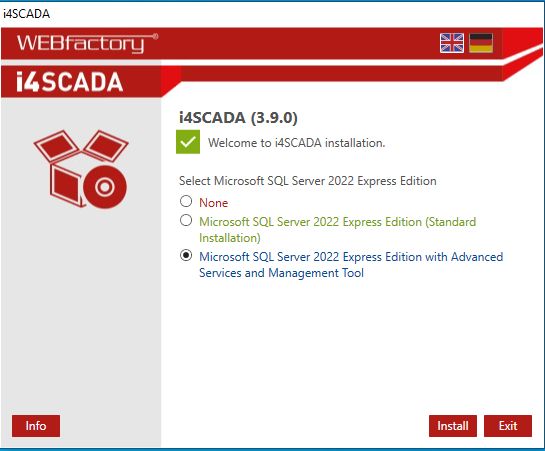
Inside the Ewon by HMS Networks i4scada setup folder, execute the Setup application with administrative privileges. The initial screen will ask you to select the Microsoft SQL Server 2022 Express Edition (Standard Installation). Select the Microsoft SQL Server Express Edition with Advanced Services and Management Tool and click Install.
Wait for the installation to be prepared. The setup will install the software required for the Microsoft SQL Server setup and proceed when done.
At the Destination Folder screen of the i4scada setup, modify the default installation path to point to the new folder on the second drive.
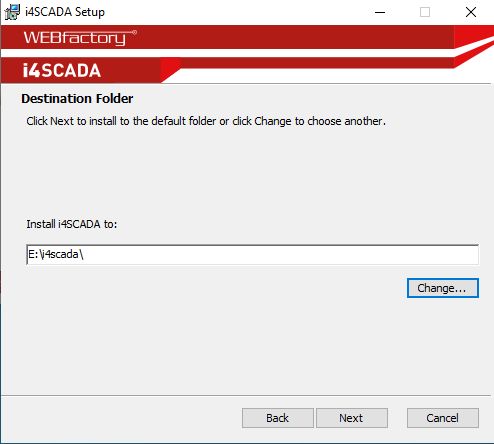
i4scada setup - Destination folder
Continue the installation as described in the Installing i4scada previous articles. i4scada is now installed on the second drive.
Moving the i4scada web services and web applications
This section addresses the scenario where the entire _SERVICES folder, including the i4scada web services and web applications, needs to be relocated. This approach remains compatible with future service packs due to the registry update in step 6.
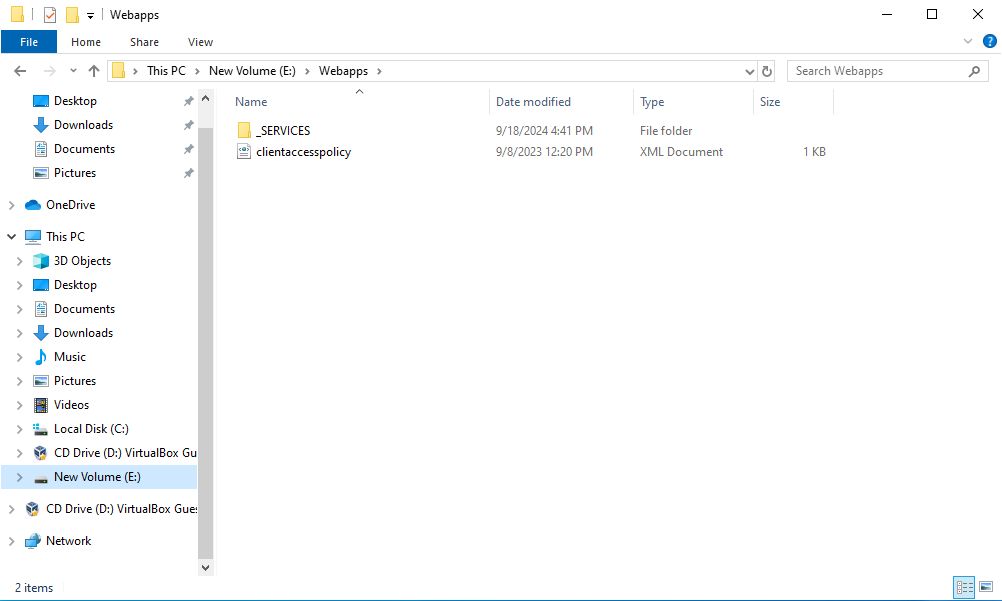
Navigate to the C:\inetpub\wwwroot folder and move the _SERVICES folder and the clientaccesspolicy.xml file to a new folder on the second drive (E:\Webapps in our example).
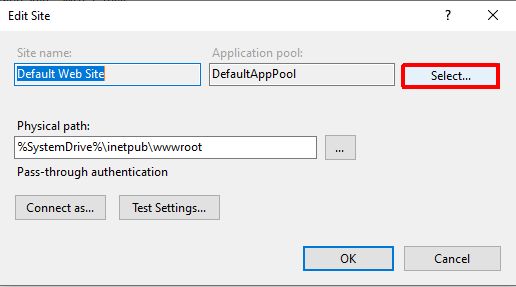
Next we need to map the IIS Default Web Site to the new folder containing the previously copied files. Open the Internet Information Services (IIS) Manager, and select the Default Web Site. From the Actions panel, select Basic Settings....
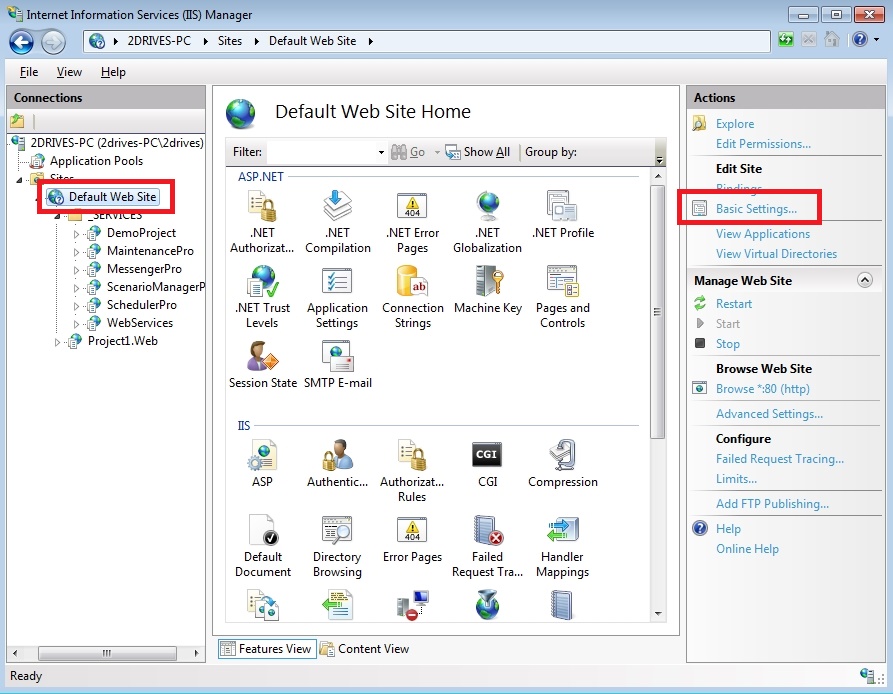
In the Edit Site window, click Select... next to the Application pool option.
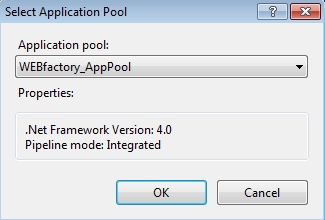
In the Select Application Pool dialog, select the WEBfactory_AppPool and click OK to confirm.
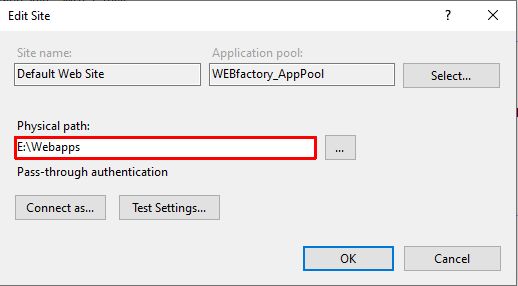
Back to the Edit Site window, point the Physical path to the folder on the second drive where the _Services and clientaccesspolicy.xml were moved. Click OK to confirm.
Update the PathWWWRoot value from HKEY_LOCAL_MACHINE\SOFTWARE\Microsoft\InetStp in Windows Registry to reflect the physical path to the new location of the _Services and clientaccesspolicy.xml. This can be done using the Command Prompt (with Administrator privileges) and the following command:
reg add "HKEY_LOCAL_MACHINE\SOFTWARE\Microsoft\InetStp" /v "PathWWWRoot" /t REG_EXPAND_SZ /d "E:\Webapps" /f
Replace the data to be written in the PathWWWRoot value with your own physical path! The /f switch will overwrite the existing value without prompting.
i4scada should now work as expected, using both its web services and web applications from the new location.