i4scada MessengerPro
The WEBfactory i4scada MessengerPro is an optional software module used for the distribution of event messages, fault, and alarms.
Ewon by HMS Networks MessengerPro is an optional software module used for the distribution of event messages, faults, and alarms.
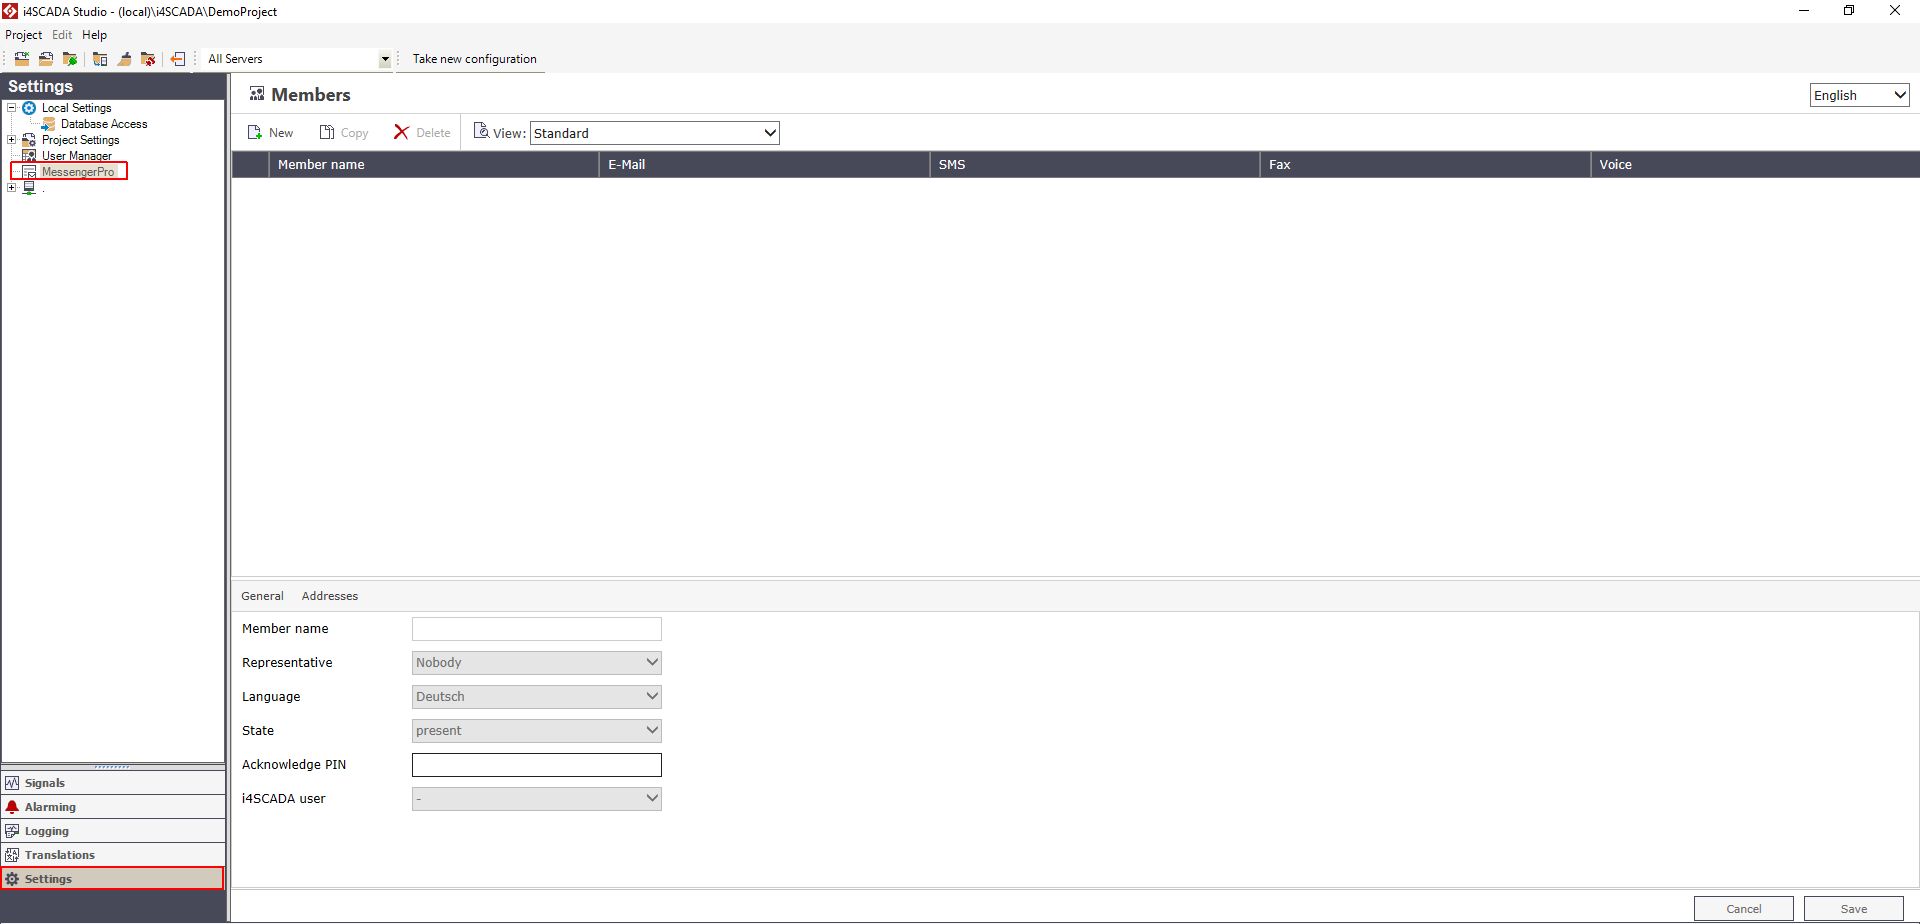
MessengerPro - main view
The monitoring of the process and the generation of alarms is done by the Ewon by HMS Networks Server. After the occurrence of a reportable event, Ewon by HMS Networks MessengerPro initializes a predefined alarm sequence in order to notify the relevant persons.
The module is divided into two parts. The first part consists of a Web application and the second part consists of a service application. The Web application is used to configure MessengerPro during the design phase and at runtime.
The service application monitors the active alarms and sends messages to the appropriate people. The service application is not normally visible.
Differences between Messanger Standard and MessengerPro
Messenger Standard | MessengerPro | |
|---|---|---|
Email delivery | X | X |
SMS delivery | X | X |
Fax delivery | X | X |
Voice messages delivery | X | |
Remote acknowledgement | X | |
Direct alarm delivery | X | X |
Alarm delivery using escalation table | X | |
Scheduled alarm delivery | X | |
Alarm delivery using alarm groups. | X | |
Communication log | X | X |
The Members Section
Learn how to create new members and update the general information or addresses of the existing i4scada MessengerPro members.
The Members section of MessengerPro, is the main entry of this module. As soon as clicking on the MessangerPro entry, in the Settings area of Studio, the list of available members is displayed.
The Members section, allows the user to create new members and add addresses to the existing or new members.
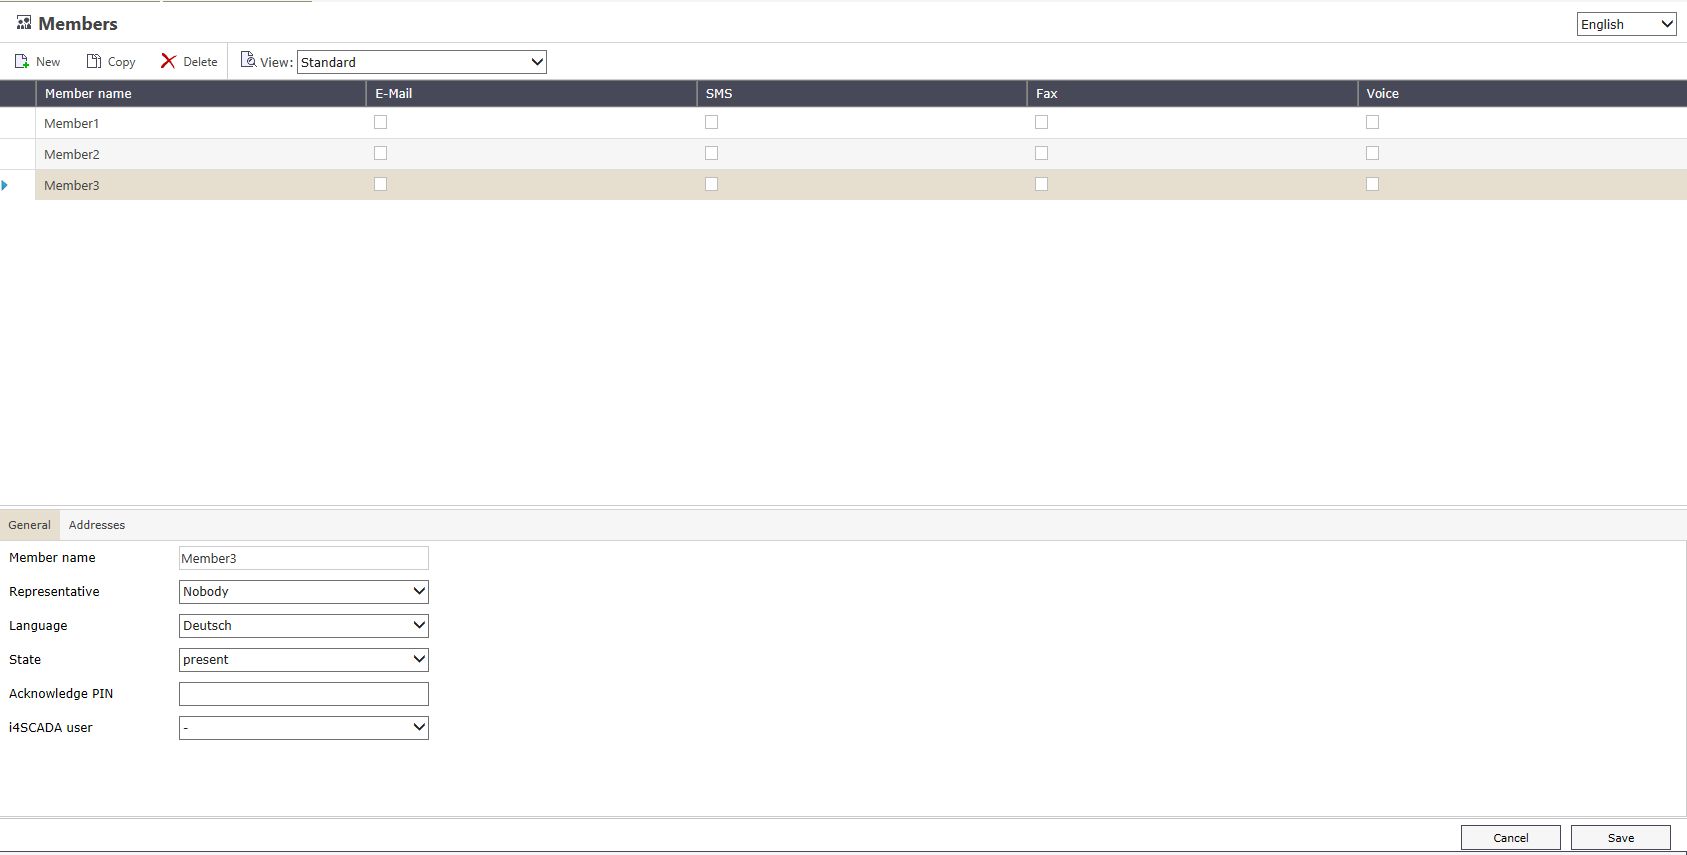
MessengerPro Members section
Members Main View
The main view displays the table with the existing MessengerPro members and the active communication services for each member.

Members panel
The toolbar allows the user to add, copy or delete a member from the member's table.
To add a new member to MessengerPro, the user can click on the New button from the toolbar. The new member will be added to the list of existing members. The default name will be Member1. Edit the general details and the addresses and click the Save button.

The New Member button
To remove a listed Member, the user can click the Delete toolbar button. A deletion confirmation dialog is displayed allowing the user either to proceed or cancel the deletion.
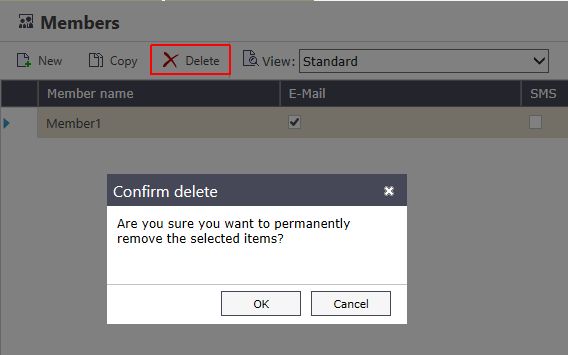
The Confirm delete dialog
Members Details Panel
The details panel will list the Members details under two tabs: General and Addresses.
General tab
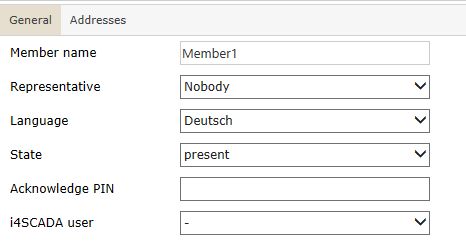
TAB General of Members details panel
TAB General Options | Description |
|---|---|
Member name | The name of the MessengerPro member. |
Representative | The representative is selected from the already available members. If the status of a member is set to Away, the notifications will be forwarded to the representative. |
Language | The language used for notifying the selected member. |
State | The member can either be Present or Not present. |
Acknowledge PIN | The number used for the identification of the member. It is required when acknowledging alarms via phone. |
i4scada User | When remotely acknowledging alarms, an i4scada user with acknowledgment rights must be selected. |
Important
When using a modem for sending SMS messages using the Swissphone pager service, the subscriber phone number has to be entered WITHOUT the area code!
Addresses Tab
The Addresses tab hosts the table of addresses for the selected member. Each member can have multiple addresses defined.

TAB Addresses of members detail panel
Each address has the following properties:
Addresses TAB Options | Description |
|---|---|
Active | The status of the current address. |
Service | The notification service selected for the current address. Notification services, may be selected from: E-Mail, SMS, Fax, Voice, PLC. |
Number/E-mail address | The phone number (for SMS, Fax and Voice) or the e-mail address. When using SMS messages over GSM all phone numbers have to be configured with international number coding “+ country code”; ex: +49123456789. When using analog or ISDN modem, the “+ country code” notation MUST NOT be used. |
To save any modification, press on the Save button.
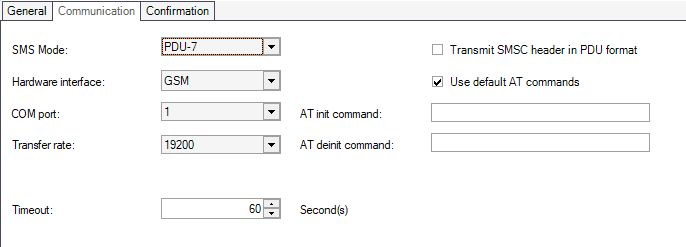
When using SMS messaging via GSM modem and the D1 or D2 providers, the SMS mode must be set to PDU-7 in Ewon by HMS Networks Studio.
The provider number for D1 network is +491710760000 (Hardware interface GSM).
When using SMS messaging via GSM modem and the D2 provider, the SMS mode must be set to PDU-7 in .
The provider number for D2 network is +491722270000 (Hardware interface GSM).
SMS Communication - GSM
The Escalation Tables Section
The i4scada MessengerPro Escalation Table allows you to define fully customised escalation environments. Check out this article for more details.
The Escalation tables entry may be accessed, in the drop-down list of MessangerPro sections:

Go to Escalation Tables
The Escalation tables section displays the list of defined escalation tables. Using the Toolbar options, the user is able to create a new escalation table, copy or delete an already existing one.
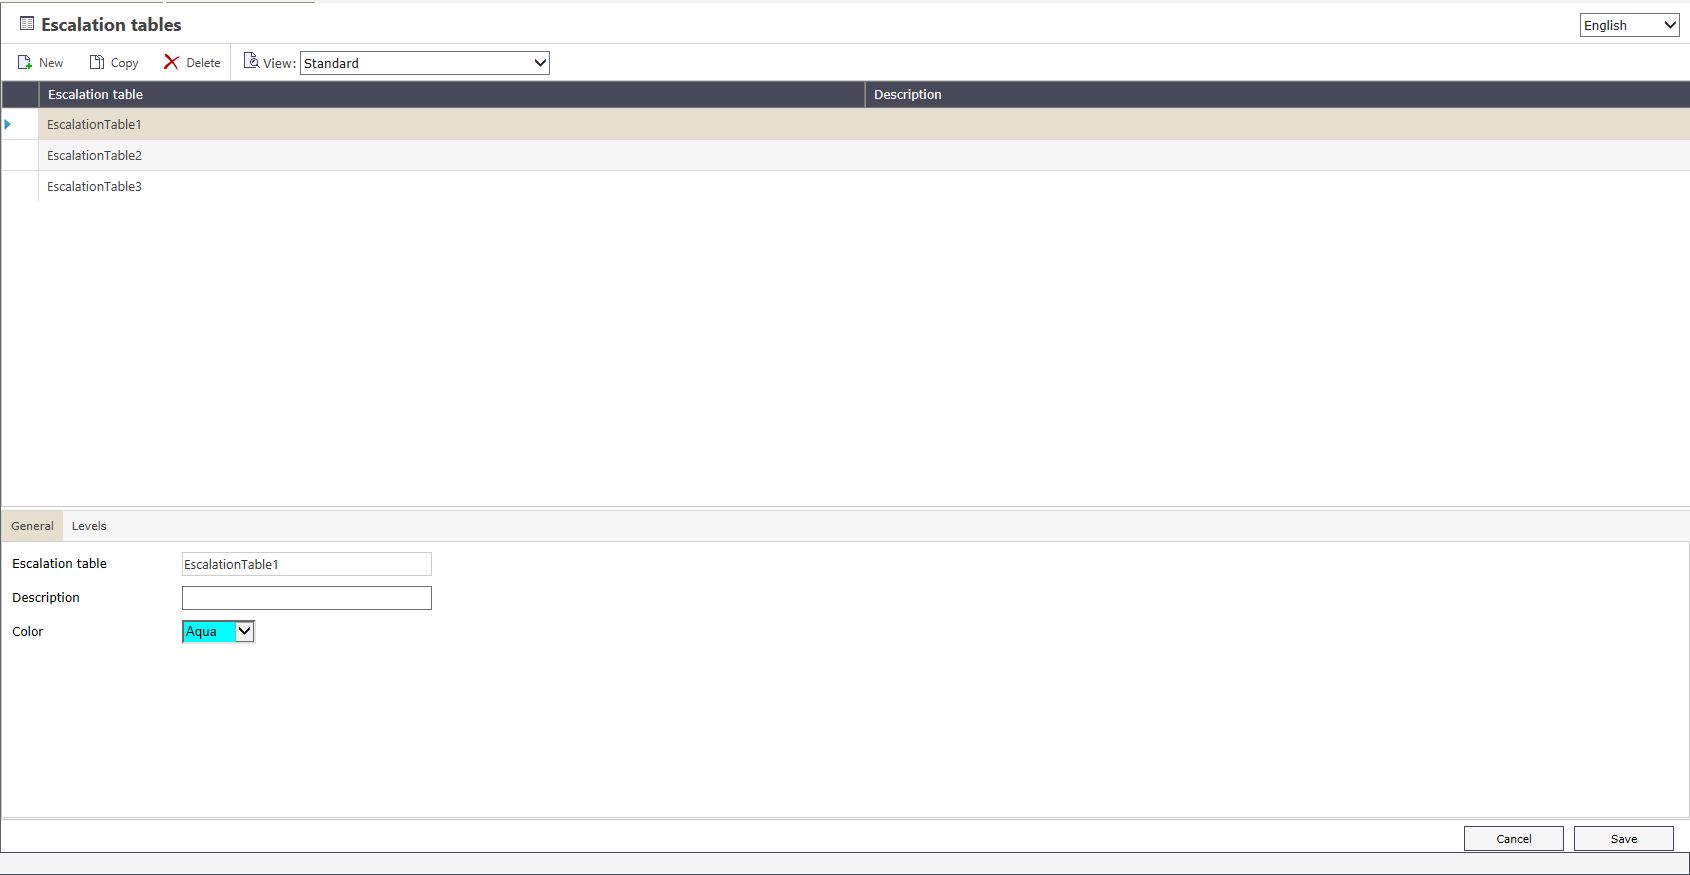
Escalation Tables main panel
By clicking the New toolbar button, the user can start defining a new Escalation Table. By default, the new item is named "EscalationTable1", but the user can decide to change all its information while in edit mode.
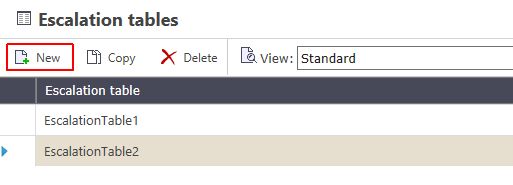
The New Escalation Table button
Redundant Escalation Tables can be removed by clicking the Delete toolbar button and confirming its deletion in the Delete confirmation dialog.
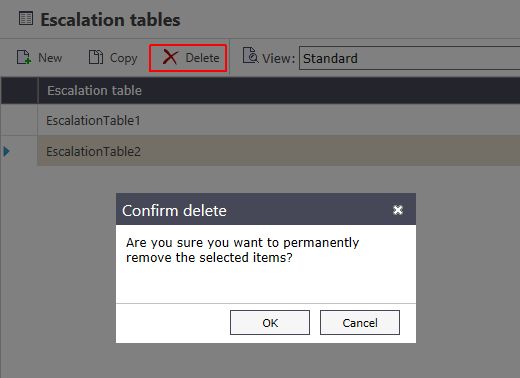
The Confim delete dialog
Escalation Tables Main View
The list of escalation tables is available in the main view.

Escalation tables list
UI Option | Description |
|---|---|
Escalation table | The name of the escalation table. |
Description | The description of the escalation table. |
The Escalation table column can also be used for sorting the table.
Escalation Tables Details Panel
The details panel of the Escalation tables section hosts the escalation table details, separated in two tabs: General and Levels.
General tab

Escalation Tables - General TAB
TAB General Options | Description |
|---|---|
Escalation table | The name of the escalation table. |
Description | The description of the escalation table. |
Color | The color associated with the selected escalation table. |
Levels tab
The Levels tab lists the members that are part of the selected escalation table. The user is able to add a new member or delete an existing one by using the New or Delete buttons.

Escalation Tables - Level TAB
Each member has the following properties:
TAB Levels Options | Description |
|---|---|
Member name | The name of the member. |
Time out (min)_ | The time period in which MessengerPro will notify the member. If the Time out period expires, the next member in the escalation table will be notified. |
Acknowledge right | Allows the user to decide if a member of the escalation table has the acknowledge rights. This setting can either be Yes or No. |
The escalation table’s names must be unique. The amount of escalation tables and members is not limited.
Colors make it easier to find escalation tables in shift schedules.
The Shift Schedules Section
Check out this article to learn how to define Shift Schedules, using the WEBfactory i4scada MessengerPro module.
The Shift Schedule section displays the available shift schedules and allows the user to edit them. To access the Shift Schedules section, click on the MessengerPro sections drop-down list:
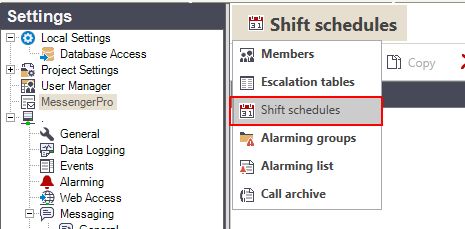
Shift Schedules
In this view, user may create new shift schedules, or see weekly or monthly overviews of the shift schedules.

Shift Schedule list
The shift schedules can be either cyclic or calendar based.
Shift Schedules Main View
In the main view, all the available shift schedules are listed in the table, as follows:
UI Option | Description |
|---|---|
Shift schedule | The shift schedule name. |
Description | The description associated with the shift schedule. |
Type | The type of the shift schedule. It can be either Cyclic or Calendar based. |
Creating a new Shift Schedule
To create a new shift schedule, press the New button from the toolbar. Any shift schedule can be either cyclic or calendar based.
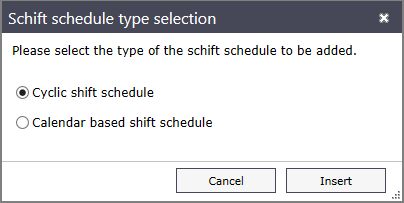
Shift Schedule type selection
A Cyclic shift schedule is a one week schedule with the particularity that the planned week can be repeated up to 8 times. Ex: planning a 4 week cyclic shift schedule means that after 4 weeks the shift schedule will start from beginning.
The Calendar based shift schedule is a non-repetitive schedule that follows a calendar pattern.
Editing a Shift Schedule
To edit a shift schedule, click the Edit button from the toolbar.
The Edit shift schedule window allows the user to edit the name, description, calendar week (if calendar based shift schedule) or Week cycle ad Start week (if cyclic shift schedule). More important, the Edit window allows the planning of the escalation tables during a shift.
UI Option | Description |
|---|---|
Shift schedule | The name of the Shift schedule. |
Description | The description of the shift schedule. |
Cyclic shift schedule | |
Week cycle | The number of cycles the shift will run. A cycle is a week. |
Start week | The starting week for the cyclic shift schedule. |
Calendar based shift schedule | |
Calendar week | The starting week for the calendar based shift schedule. |
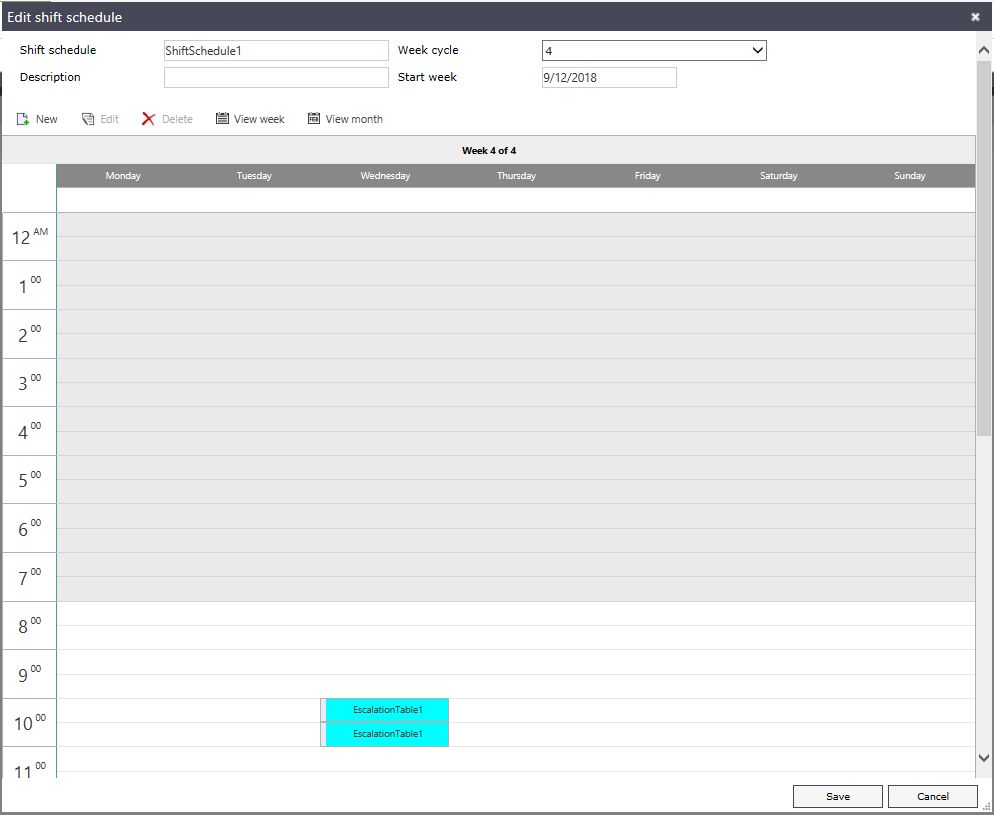
Editing a cyclic shift schedule
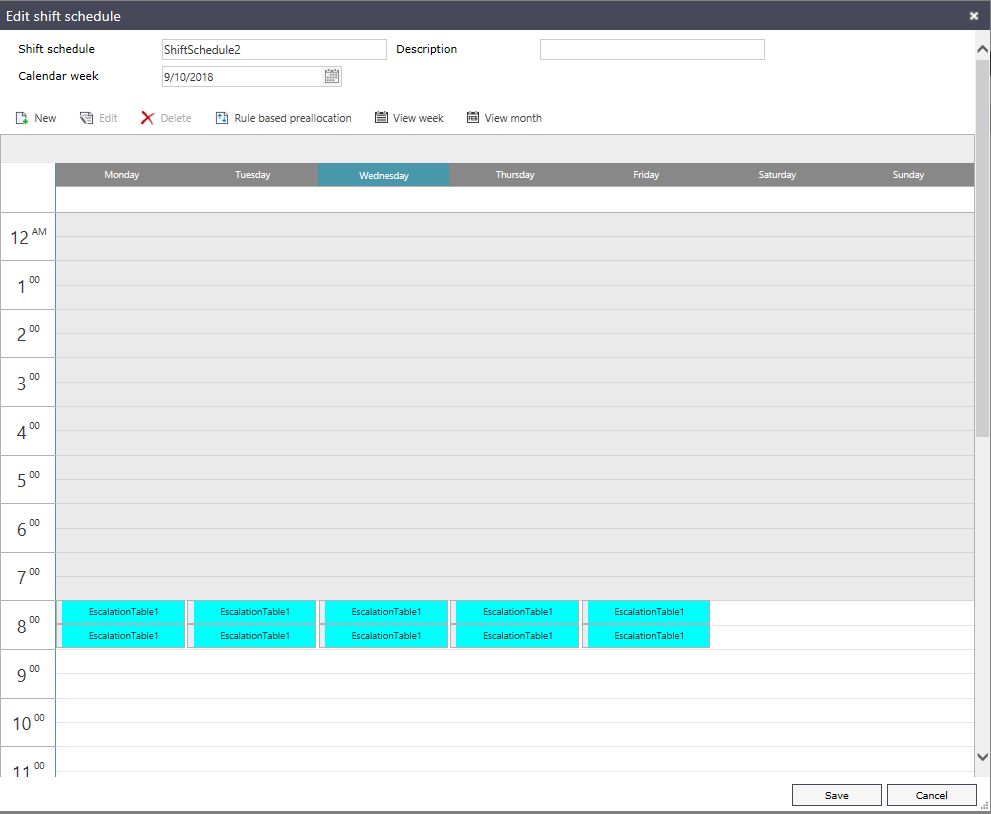
Editing a calendar based shift schedule
To plan a new Escalation table in a shift, double-click the desired day in the Edit shift schedule window. The Shift Schedule window will pop up.
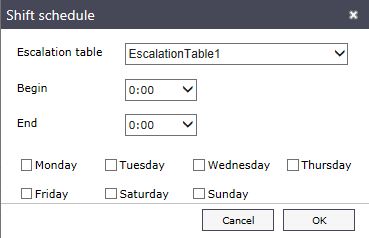
Shift Schedule window
UI Option | Description |
|---|---|
Escalation table | Select the desired escalation table to be planned in the shift. |
Begin | The beginning hour of the period for which the selected escalation table is planned. |
End | The ending hour of the period for which the selected escalation table is planned. |
Monday, Tuesday, Wednesday, Thursday, Friday, Saturday, Sunday | The days of the week in which the planned escalation table will be active. |
The scheduled escalation tables will be displayed in the daily calendar inside the Edit shift schedule window.

Scheduled escalation tables
Click the Save button to save the new schedule.
Deleting a Shift Schedule
Redundant Shift Schedules can be removed by clicking the Delete toolbar button. As soon as the Delete button has been clicked, the Confirm delete dialog is displayed allowing the user to either proceed with the deletion process or cancel it.
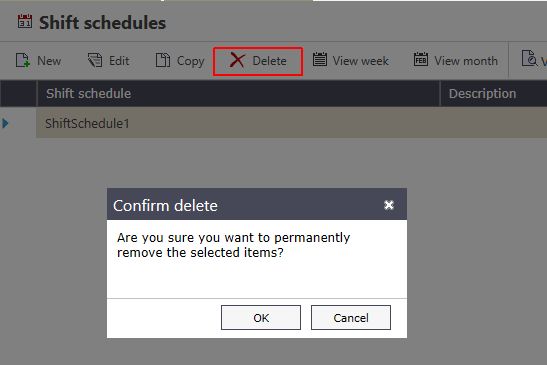
The Confirm delete dialog
Week View
The View week button allows the user to have an overall of the selected week. To open the Shift schedule – week view window, press the View week button from the toolbar.
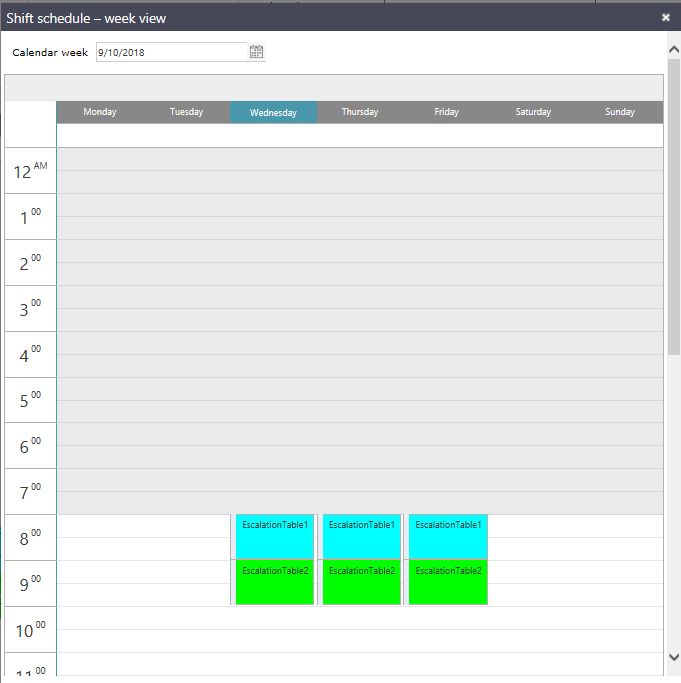
Week view
The main view of the Week view window displays the week agenda. The different planed escalation tables are visible for each day.
To select a different week, use the Calendar week drop-down date menu.
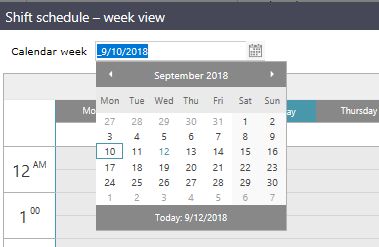
Calendar week
Month View
The View month button allows the user to have an overall of the selected month. To open the Shift schedule – month view window, press the View month button from the toolbar.
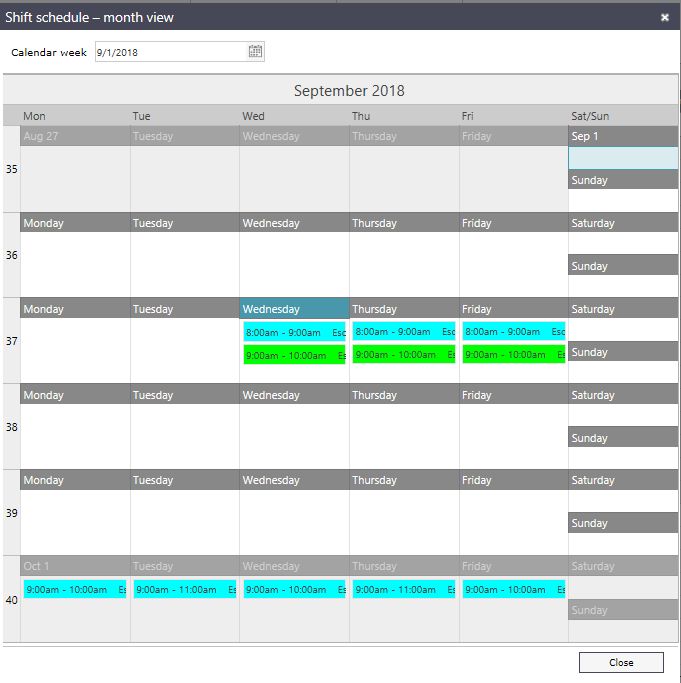
Month view
The main view of the Month view window displays the monthly agenda. The different planed escalation tables are visible for each day.
To select a different month, use the Calendar week drop-down date menu.
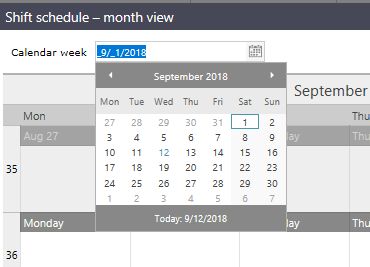
Month view calendar
The Alarming Groups Section
Read more details concerning the Alarming Groups of the i4scada MessengerPro and how to distribute them to different Shift Schedules.
The Alarming groups menu entry, is available under drop down list of MessengerPro, as follows:
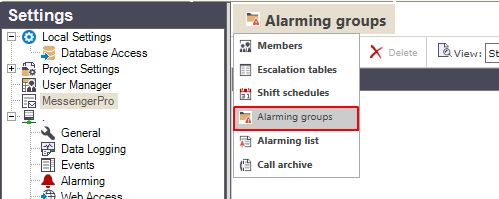
Alarming groups menu entry
Here, user may group different Shift schedules under a single Alarming group. The Alarming groups can be used for notifying different service units, each one containing its own shifts and escalation tables.
For example, electricians and mechanics, each with their own shift schedules, can be easily combined in one Alarming group.
Alarming Groups Main View
The main view of the Alarming groups section contains the list of defined Alarming groups.

Alarming Groups list
Using the contextual menu, the existing Alarming groups can be copied or deleted, or new Alarming groups can be created.
By clicking the toolbar button New the user can add new Alarming Groups, which can be then either copied or deleted. When removing an Alarming Group, the user is required to confirm the deletion operation.
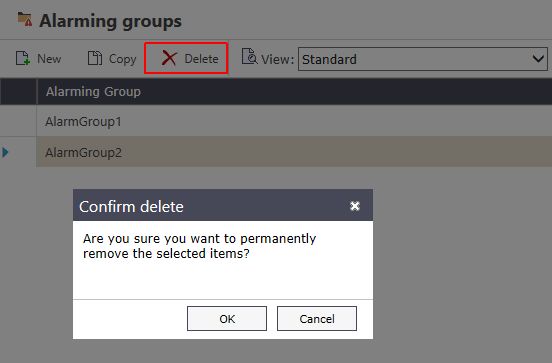
The Confirm delete dialog
Alarming Groups Toolbar
The toolbar hosts the usual buttons (New, Copy, Delete and the View). The same options are available using the contextual menu in the main view.

Alarming Groups toolbar
Alarming Groups Details Panel
The details panel contains two tabs: General tab and Shift Schedules tab.
TAB General Options | Description |
|---|---|
Alarming Group | The name of the Alarming group. |
Description | The description of the Alarming group. |
Shift Schedules TAB Options | Description |
|---|---|
Shift schedule | The name of the selected shift schedule. |
Confirmations |
To add a new Shift schedule to the Alarming group, click the New button from the Shift Schedules tab toolbar. The Shift Schedules Selection window will open, allowing the user to select the desired shift schedules.
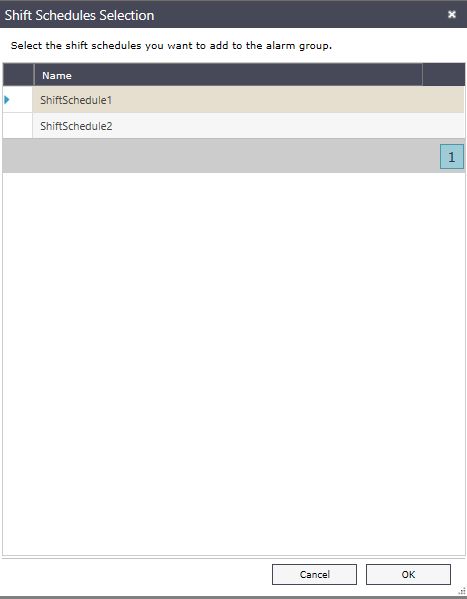
Shift Schedule Selection for Alarming Groups
To delete a Shift schedule, select the schedule and press Delete in the tab’s toolbar.
Press Save to save the Alarming groups changes.
The Alarming List Section
Set up the i4scada MessengerPro Alarming List by defining the Alarms or Alarm Groups picked up by the messaging mechanism.
The existing alarms and alarm groups can be found in the Alarming list section of the MessengerPro, under the sections drop-down list.
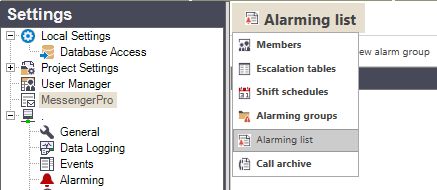
Alarming List entry
The toolbar provides the options of creating new alarms and new alarm groups, besides the expected Copy and Delete options.
Warning
It is mandatory that at least one MessengerPro Member is already available, in order to be able to add new Alarming lists and Alarming groups. Otherwise, all the management options in this area are grayed-out.

Management options are inactive if no MessengerPro member exists
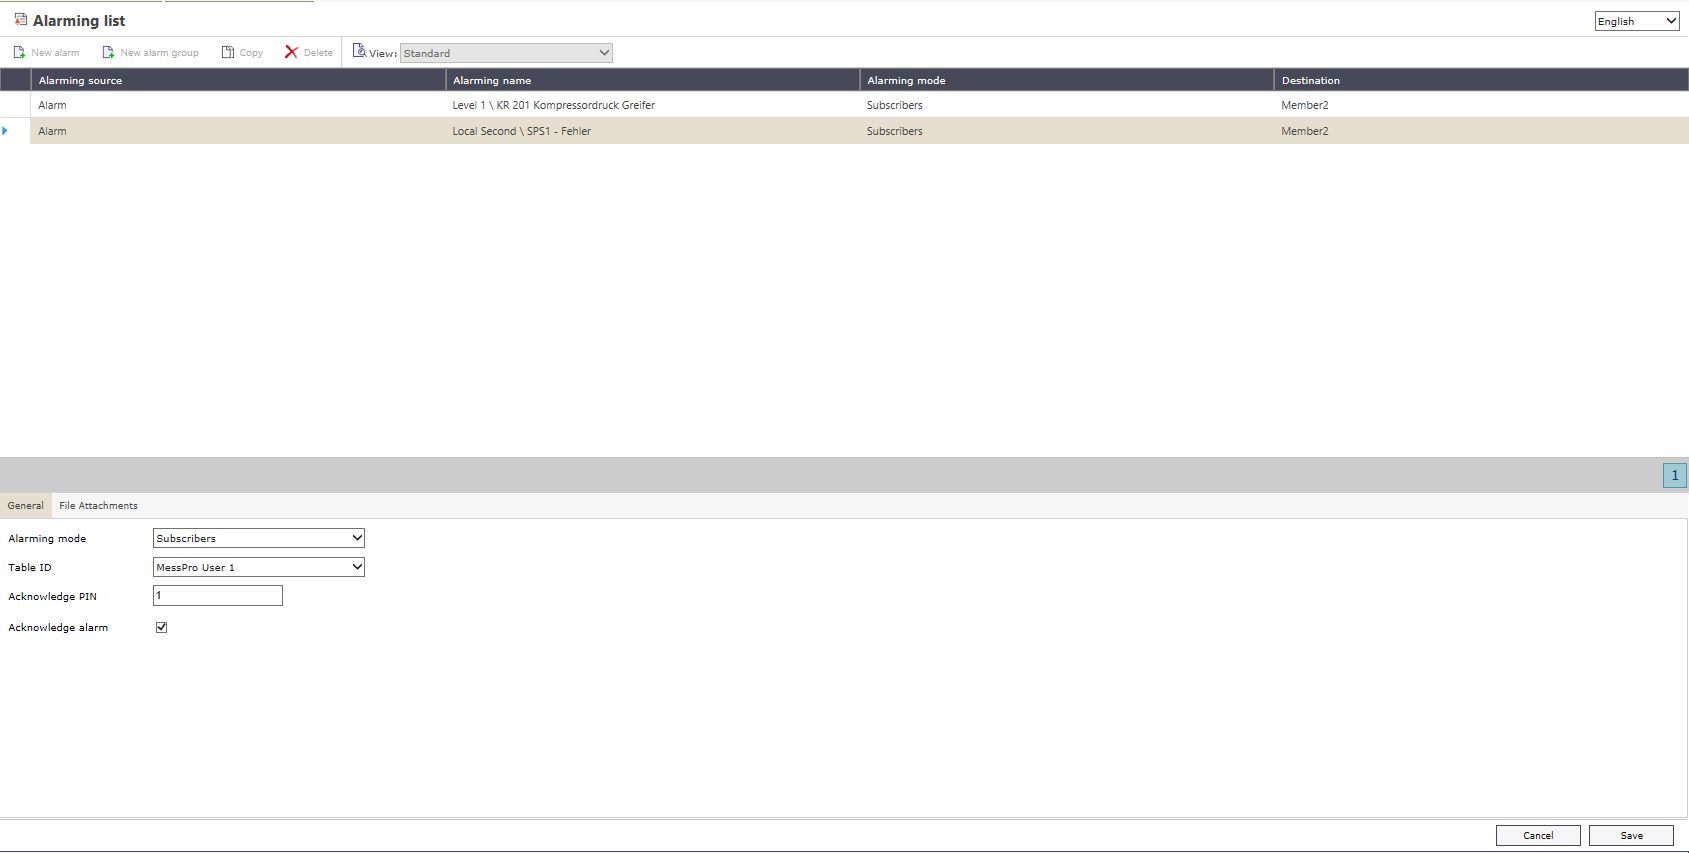
Alarming list
When removing redundant items from the Alarming list panel, the user can click the Delete toolbar button and consequently confirm the deletion operation.
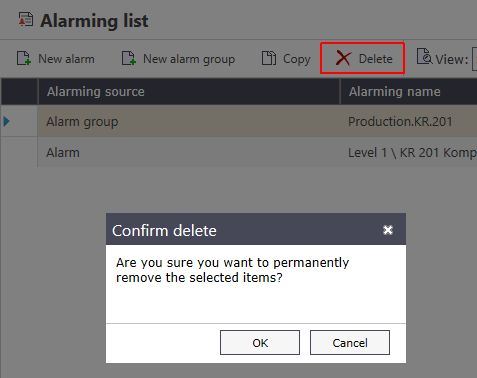
The Confirm delete dialog
In the Alarming list section, the alarms or alarm groups can be set up in different ways: the alarms can be set up to directly notify subscribers or use escalation tables, shift schedules, or alarming groups.
Alarming List Main View
The main view contains the alarms table. The table contains all the alarms and the alarm groups defined in MessengerPro.

List of existing Alarming
UI Option | Description |
|---|---|
Alarming source | The source of the alarming: alarm or alarm group. |
Alarming name | The name of the alarm. |
Alarming mode | The procedure followed by MessengerPro for the current alarm. |
Destination | The destination of the alarm: Escalation table, Shift schedule, Alarming group, or direct notification to the member. |
The alarm mode might either be a single alarm or a selection of an existing alarm group.
Tip
Starting with version 3.8.13, the Alarms Selection columns can be filtered by the following options:
Clear Filter
Equals
Does Not Equal
Begins With
Ends With
Contains
Does Not Contain
Is Null
Is Not Null
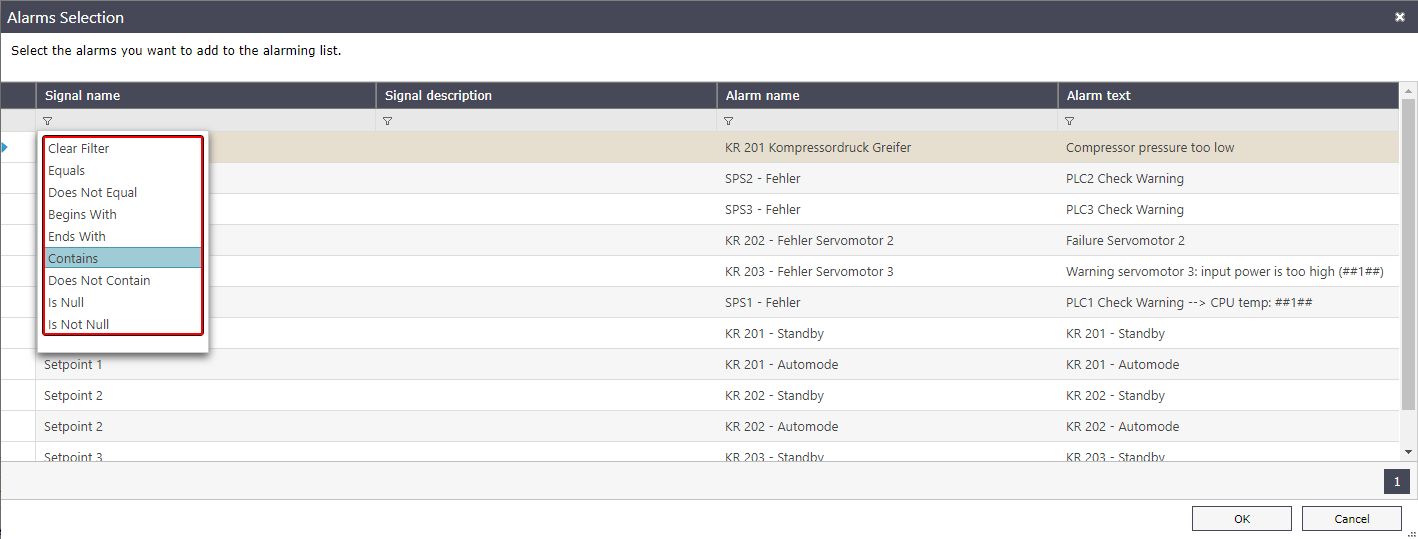
When selecting an “alarm group”, the message is sent when an alarm of that specific group becomes active. There is no need for setting up 10 alarms for a specific group to send a message; the Alarming Group can be used as alarm mode.
Alarming List Details Panel
The Alarming list details panel contains two tabs: the General tab and the File Attachments tab.
TAB General Options | Description |
|---|---|
Alarming mode | The procedure followed by MessengerPro for the current alarm. It can be Escalation table, Shift schedule, Alarming group, or Subscriber.
|
Table ID | The Shift schedule, Escalation table, Alarming group, or member that will receive the notification. |
Acknowledge PIN | The PIN required for remote alarm acknowledgment. |
Acknowledge alarm | If on, the alarm can be acknowledged by the users who have acknowledgment rights. |
TAB File Attachment Options | Description |
|---|---|
Language | The language of the file. |
Text | The textual description of the file. |
File URL | The URL of the file. |
The Call Archive Section
Check out more details about the Call Archive list where all the calls logged in the system are displayed and learn how to manage them.
The Call archive section of MessengerPro, is available under the sections drop down list.
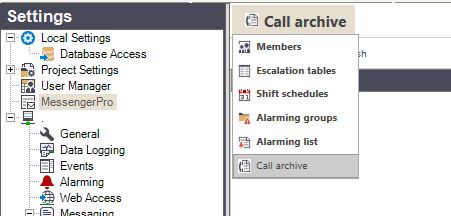
Call Archive entry
The Call Archive contains the list of calls logged in the system.
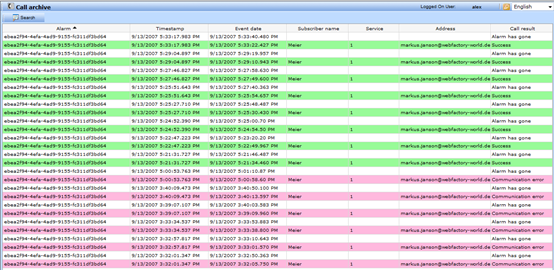
The calls are listed in a table that contains all important information for the calls:
UI Option | Description |
|---|---|
Alarm | The alarm event that triggered the call. |
Timestamp | The date and time when the alarm has been raised. |
Event date | The date and time when the notification was sent. |
Subscriber name | The name of the subscriber that received the notification call. |
Service | The communication service used for the notification call. |
Address | The address where the call was made. |
Call result | The result of the notification. |
The user has the ability to search the Call archive using the Search button from the toolbar. The Call archive search allows extensive search using wildcards and complex filtering.
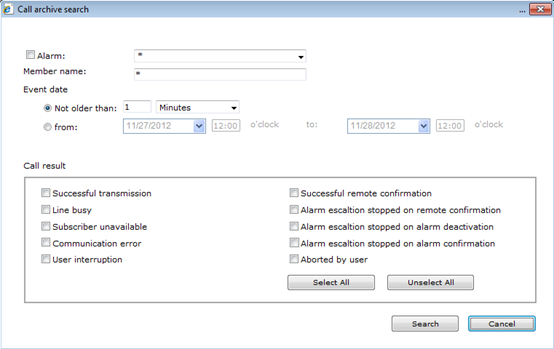
The search can be made using the alarm name, the member name, event date or call result.
UI Option | Description |
|---|---|
Alarm | Allows filtering by alarms. Wildcards are supported. |
Member name | Allows filtering by members names. Wildcards are supported. |
Event date | Filters the alarms by event date. The filtering can be exclusive (Not older than...) or inclusive (from...to). |
Call result | Allows filtering by call result. Selecting all call results is possible using the Select All button. |
