SchedulerPro configuration
Check out this article for a quick insight about the few settings required, before starting to work with the i4scada SchedulerPro module.
The i4scada SchedulerPro module allows the user to schedule events in a calendar-based application. The scheduled events will trigger programs that can control various devices in predefined locations, using specific module signals.
Before heading in the i4scada SchedulerPro, there are a few settings that need to be done in Ewon by HMS Networks Studio:
After defining the SchedulerPro settings as described in the sections below, you may also visit the SchedulerPro Tutorials article.
Set up Module Signals
Follow these 3 easy steps in order to enabe the Signals for the WEBfactory i4scada SchedulerPro module.
The Module Signals are the signals that are available to be used in Ewon by HMS Networks modules like SchedulerPro. The signals that are not defined as Module Signals for the specific Ewon by HMS Networks module (SchedulerPro in our example) will not be available inside the module.
Important
Setting up the Module Signals for SchedulerPro is a necessary step in using the SchedulerPro module!
Follow the next steps to set up the Module Signals for SchedulerPro:
Navigate to the Module Signals section of the Settings area of the i4scada.
Tip
In the Demo Database, the Module Signals section can be found under the Server settings, represented by the dot (.).
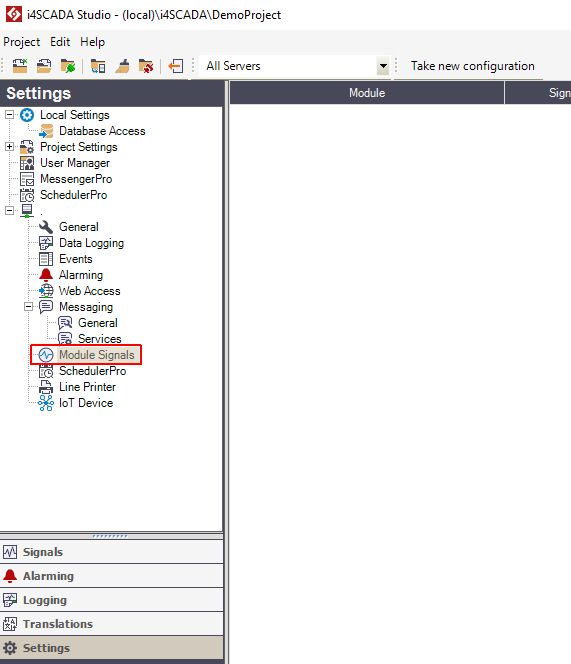
Module Signals section
To create a new Module Signal, right-click on the empty space of the main view and select New > SchedulerPro from the contextual menu.
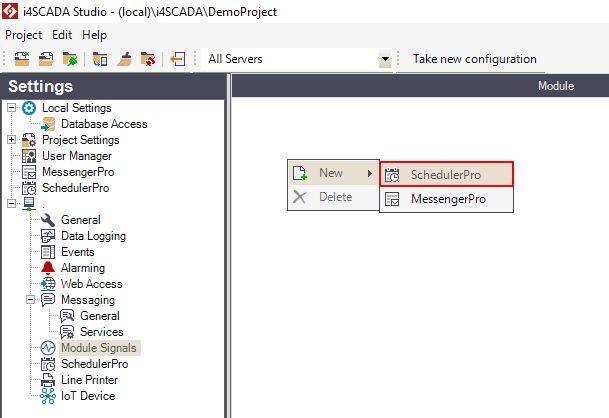
Create new Module Signal
The Signal Browser window will open. Select the needed signal (Setpoint 1 in our tutorial) and click OK.
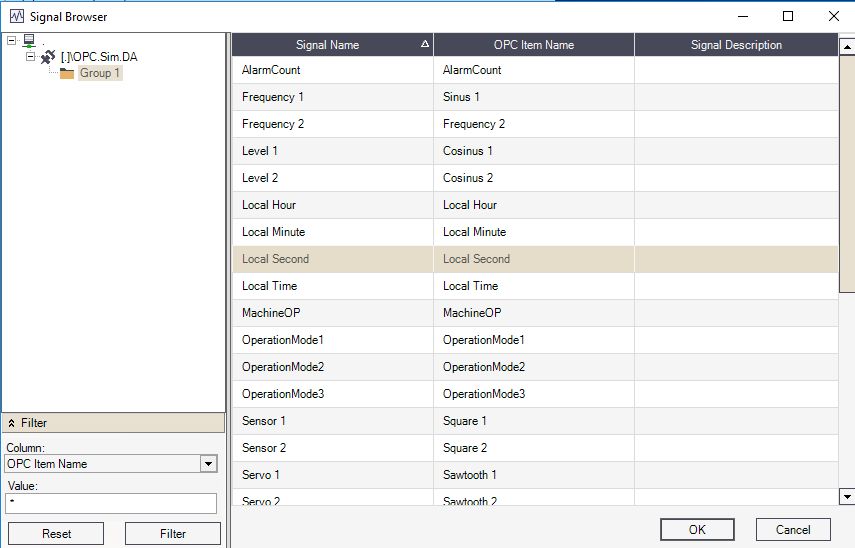
Signal Browser
Now the Setpoint 1 signal is defined as a Module Signal for SchedulerPro and can be used inside this module.
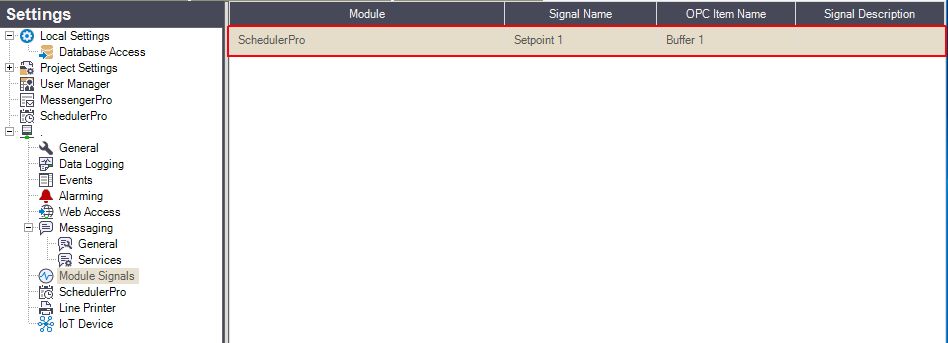
Signal is defined as Module Signal
Set up security and activate SchedulerPro
Organise these settings in order to secure the Signal Group, set up the Write Group access level and enable security for the SchedulerPro module.
In order to use the Ewon by HMS Networks SchedulerPro module and benefit from the security built in the solution, we need to make sure that the signal that will be used in the SchedulerPro module can be written by the user using SchedulerPro.
Note
The Security settings are optional but recommended when using Ewon by HMS Networks SchedulerPro.
Secure the Signal Group
In the Signals area of Studio, go to the active server and select the OPC.Sim.DA simulation OPC server.

OPC server
Set the Read Write Mode of the Group 1 signal group to Write, Read. This way, the signal selected as Module Signal for SchedulerPro will not be written without proper credentials.

Set the Read Write Mode of Group to "Write, Read" option
Write group access
In Ewon by HMS Networks Studio go to the User Manager node, under the Settings area.
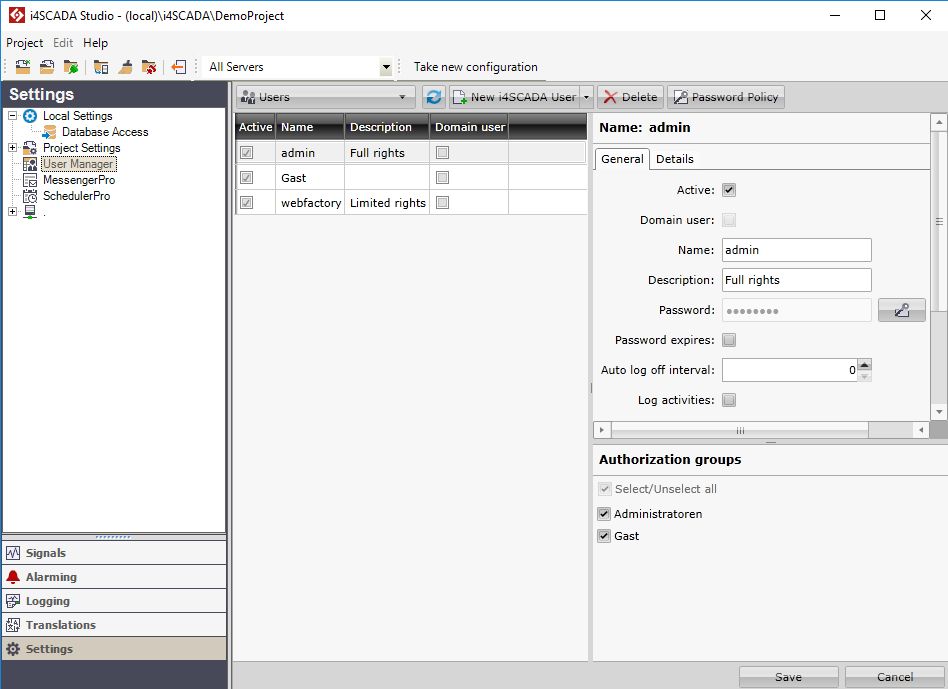
User Manager
In our tutorial, we will use the webfactory user, predefined in the Demo Database. Make sure that the Authorization group assigned to the user (Gast in our situation) has the same write group assigned as our selected signal (Setpoint 1). This means that our user will be able to write values to the signal belonging to this write group.
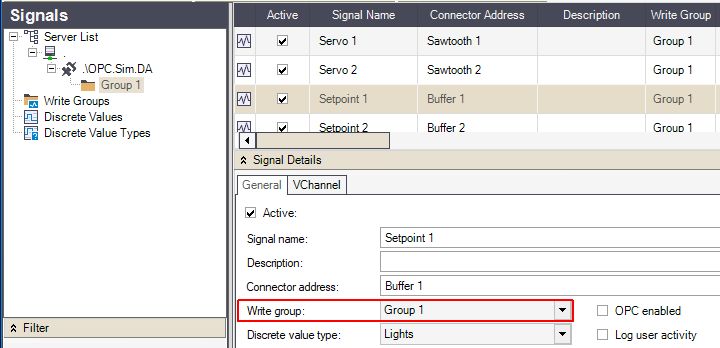
Write group of the Signal
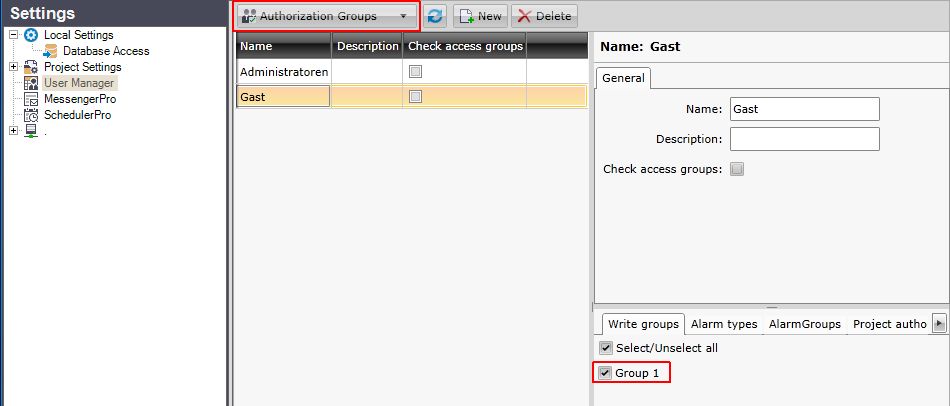
Write group of the User
SchedulerPro settings
Another step before heading in the SchedulerPro module is to set up the user for write operations and activate the SchedulerPro module.
In the Settings area of the Studio, go to the SchedulerPro settings under the Server settings represented by the dot (.).
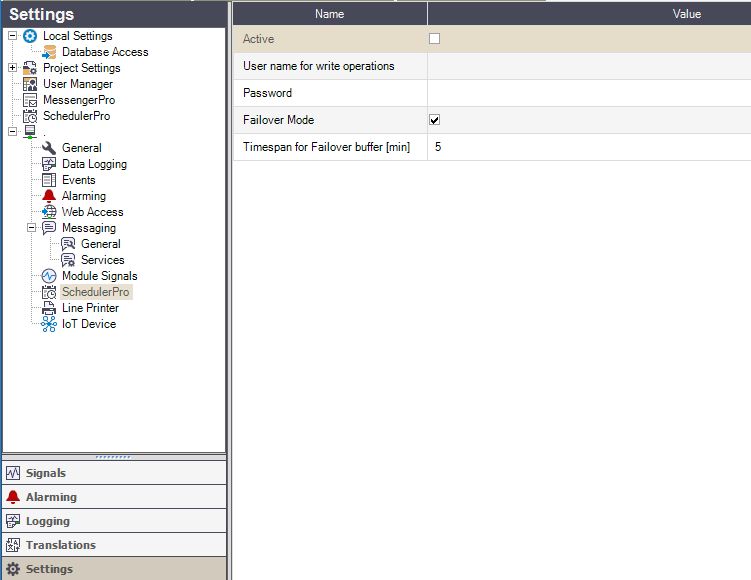
SchedulerPro Settings
Activate the SchedulerPro module by checking the box corresponding to the Activate option.

Activate SchedulerPro module
Enter the user name and password for the user that will be used in write operations (the user that has access to the write group assigned to the used signal).
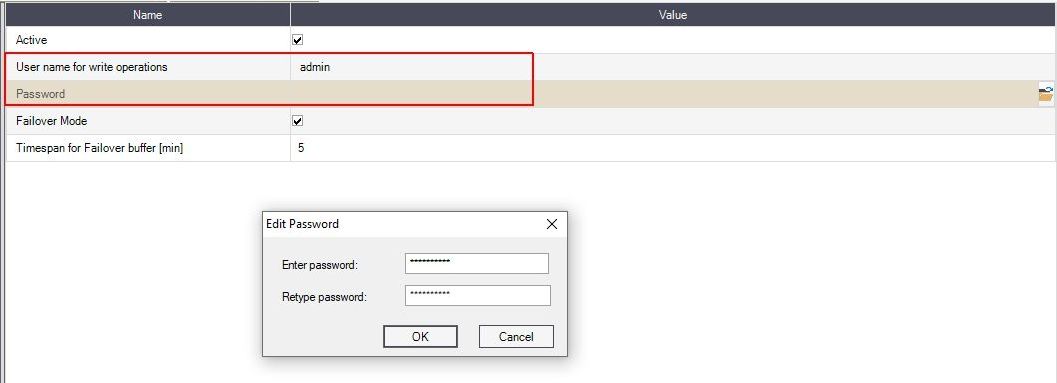
Configure username and password
Set up discrete values
Learn how to set up a human readable value for the Signals enabled for the i4scada Schedulerpro module.
The Discrete Values allow us to use a human readable value for the selected signal. When using a Discrete Value in SchedulerPro, the user will assign the Discrete Value ON to a signal instead of assigning value 1, assuming that the Discrete Value ON is set up to write the first value.
Tip
Using Discrete Values is a recommended but optional step when working with SchedulerPro. The user is also able to write direct values to the selected signals, not only Discrete Values.
To set up discrete values in i4scada Studio follow the next steps:
Navigate to the Discrete Value section in the Signals area.
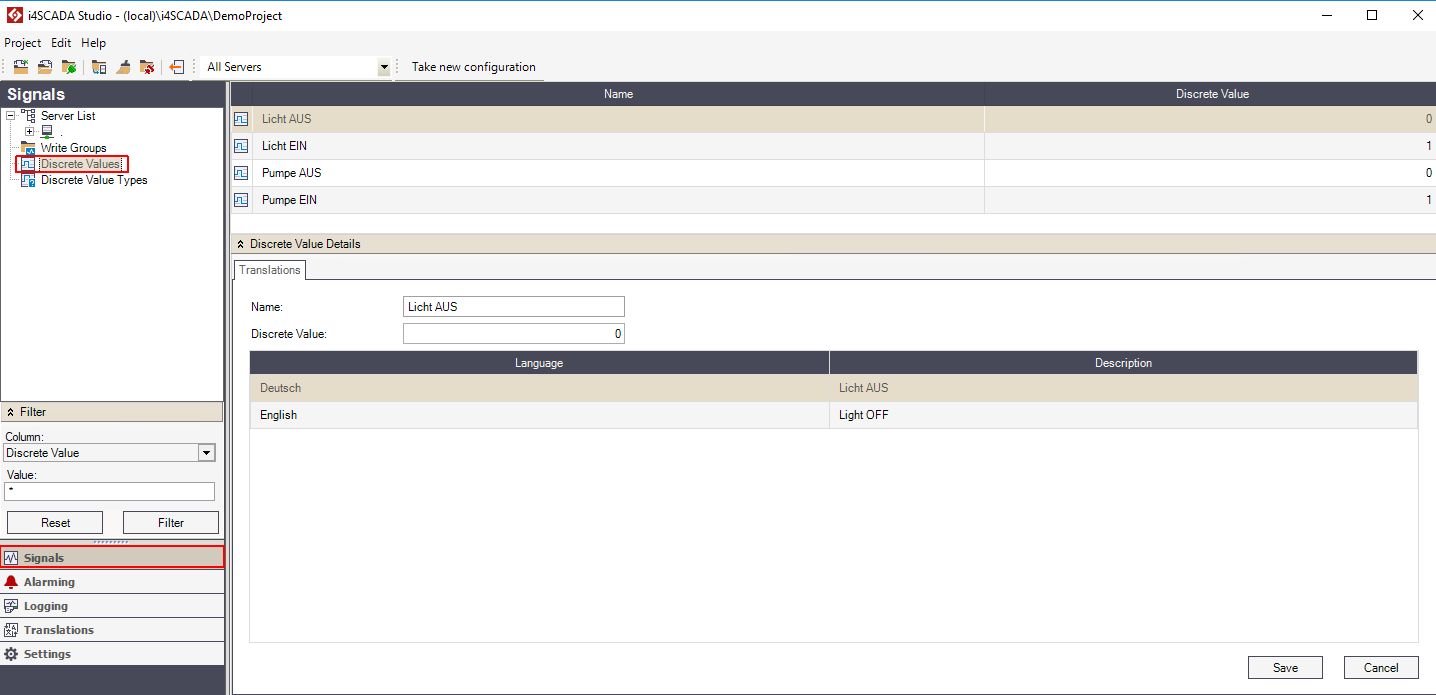
Signals area - Discrete Values
Right-click in the empty space of the main view and select New Discrete Value from the contextual menu.
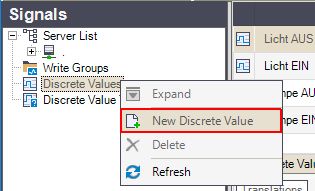
New Discrete Value
Enter a name, value and descriptions for the new Discrete Value. In our example, the Discrete Value will be named LightsON and will have the value 1. Save the changes using the Save button.

Save new Discrete Value
Create a second Discrete Value with the name LightsOFF and the value 0.

Create a second Discrete Value
Now head in the Discrete Value Types section and right-click on the empty area of the main view to open the contextual menu and create a new Discrete Value Type.
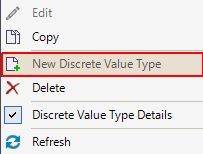
Create new Discrete Value Type
Name the new Discrete Value Type Lights and add the desired description. By default, the first Discrete Value, LightsON, is added to the Lights Discrete Value Type.
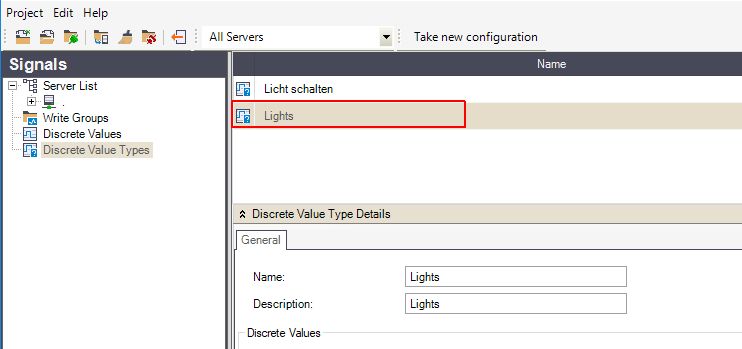
Discrete Value Types
We also need the second Discrete Value, LightsOFF, so click on the Add button to open the Select Discrete Values window and select the LightsOFF discrete value. Click Add to add it to the Lights Discrete Value Types and close the dialog. Save the new Discrete Value Type.
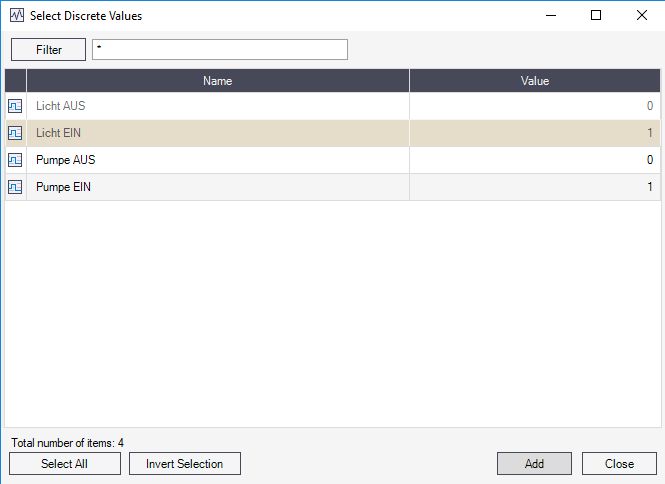
Create a second Discrete Value Type
Next, we need to assign the new Discrete Value Type to the signal that we will use in our SchedulerPro demonstration. In the Signals area, select the Group 1 signal group under the simulation OPC server. In the signals list, select Setpoint 1 (or Buffer 1).
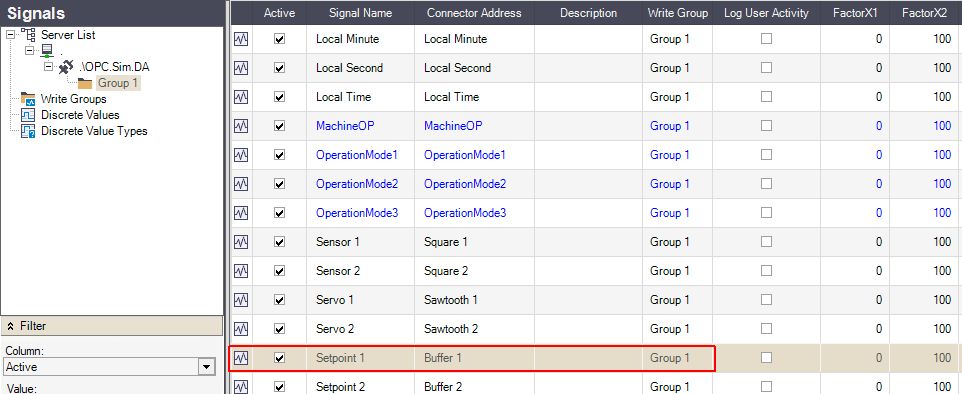
Assign Discrete Value Types to SIgnals
Open the Signal Details panel and, from the Discrete value types combo-box, select the Lights Discrete Value Type that we have previously created. Save the signal configuration.
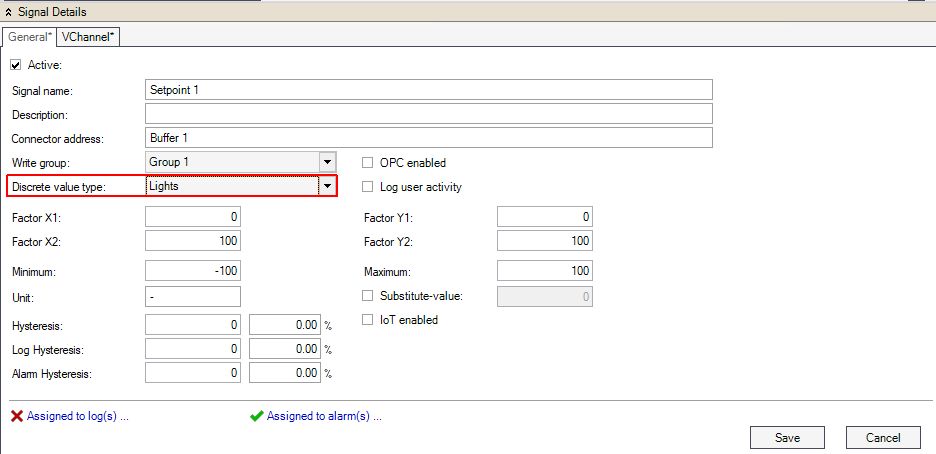
Save signal configuration