i4scada Studio Settings
Are you planning to configure the IoT Manager of your i4scada machine? Check these articles to learn more about the required Studio settings.
The first stop in the IoT Manager configuration is the i4scada Studio.
Defining the IoT Hub communication settings
Check out this article to start setting up the IoT Hub communication settings, in the i4scada Studio application.
Every i4scada Server will behave like an IoT device, so these settings can be organized in the i4scada Studio, under the Settings section, by accessing the IoT Device node.
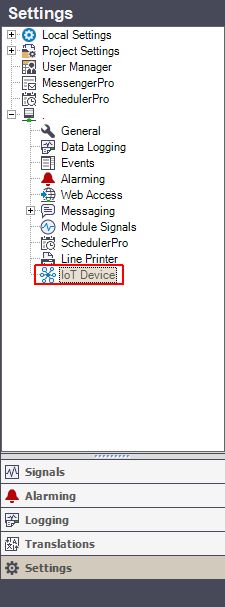
IoT Device entry
After clicking the IoT Device node, all the settings described below need to be defined:
Active - enables or disables the i4scada IoT Manager; if disabled, no data will be sent to the IoT Hub
IoT Hub Uri - the host name of the IoT Hub, where data will be sent
Device Id - the device name, as defined in the IoT Hub
Device Key - the device key, as defined in the IoT Hub
Transport Protocol - the protocol used to send the data to the IoT Hub (AMQP / MQTT). When the AMQP protocol is used, the traffic on port 5671 should be enabled on the computer that runs the i4scada IoT Manager, to ensure a working communication with the IoT Hub.

IoT Device Settings
All the above-described communication settings need to be defined, before proceeding with further configuration steps.
In case the IoT Device settings are incomplete, a warning dialog will require the user to complete the IoT Device setting, when trying to enable the IoT capability to a Log, an Alarm, or a Signal.
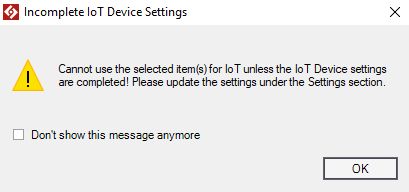
Warning message - Incomplete IoT Device Settings
By checking the "Don't show this message again" check box, the warning dialog will no longer appear, allowing the user to enable IoT for further Logs, Alarms, and Signals. The setting will be reset when the i4scada Studio is closed and opened again, or by using the Refresh option in the Logs, Alarms, or Signals contextual menus.
Enabling the IoT capability to a Log
In order to enable the IoT capability for a log, there is only one setting to be done, in the Logging section of the i4scada Studio.
In order to enable the IoT capability for a log, there is only one setting to be done, in the Logging section of the i4scada Studio.
The listed Logs can be enabled for IoT, by checking the IoT enabled check box. This can be done either in the main panel (the grid) or in the Logging details panel.
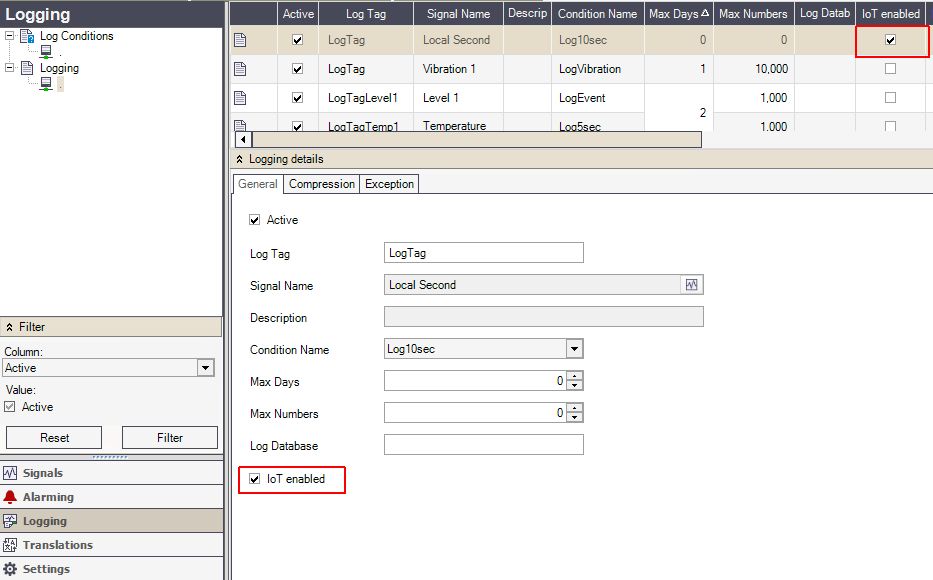
IoT enabled Log
Enabling the IoT capability to an Alarm
Each Alarm listed under the i4scada Alarming section can be enabled for the IoT Manager. Open this article to learn how to do it by yourself.
Each Alarm listed under the i4scada Alarming section can be enabled for the IoT Manager. This setting can be done by checking the IoT enabled check box, in the Alarm main panel (the Alarm grid), or in the Alarm details panel.
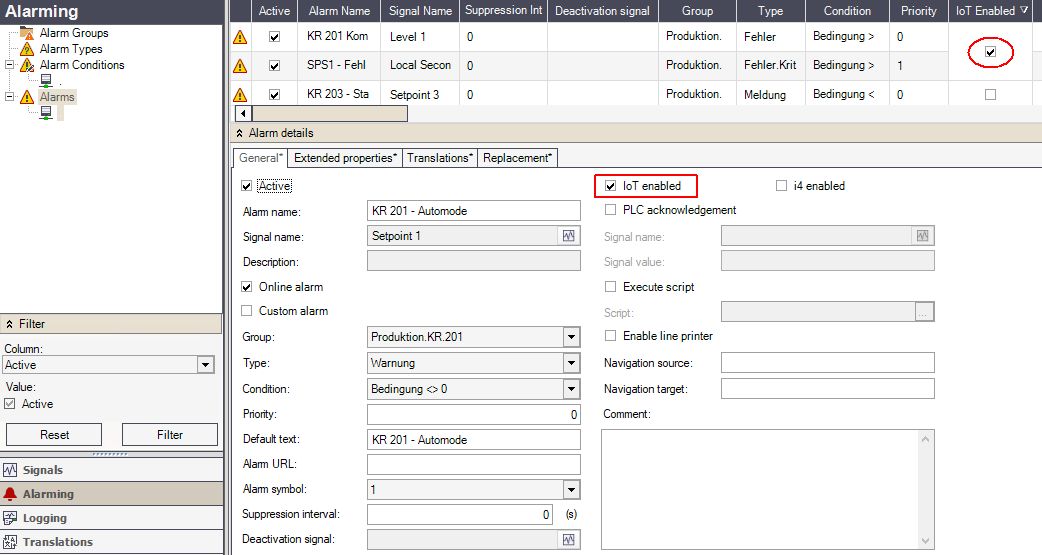
IoT enabled Alarm
Enabling the IoT capability to a Signal
Open this article to check out which is the i4scada Studio setting that enables the IoT Manager capability to a Signal.
The Signals should also be enabled for the IoT Manager, under the Signals section of the i4scada Studio. This setting can be organized by checking the IoT enabled check-box, in the Signals main panel (the Signals grid) or in the Signals details panel.
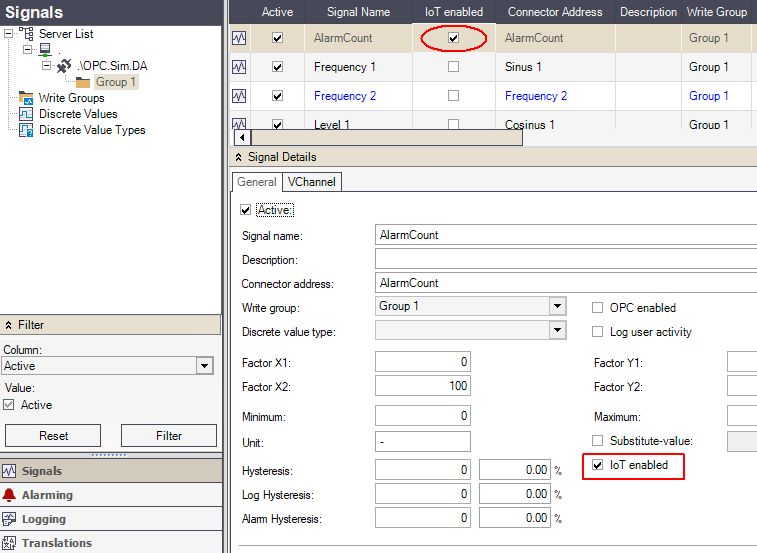
IoT enabled Signals
Enabling the logging mechanism for different event types
Here is the list of all fourteen event types that are currently supported by the i4scada Server. These event types can be enabled for IoT Manager, as well.
Currently, there are fourteen event types supported by the i4scada:
Alarm On
Alarm Off
Alarm Acknowledged
Alarm Activated
Alarm Deactivated
Server Started
Server Stopped
User Logged In
User Logged Out
User Wrote Signal
User Created
User Modified
User Deleted
User Password Changed
Users can decide to enable for the IoT all these event types or only some of them.
Enabling logging for Database and IoT
Logging for the Database and the IoT can be enabled or disabled, under the i4scada Studio, in the Settings section, by opening the Events node.
Logging for the Database and the IoT can be enabled or disabled, under the i4scada Studio, in the Settings section, by opening the Events node.
In this view, the first three options (Delete, Max Days, and Max Numbers) are only to be used for logging the events to the Database and have no effect on the IoT Manager. The rest of the options can be used to log data for different event types, as follows:
Alarms: the activities involving the alarms (on, off, acknowledged, activated, deactivated)
User Write Operations: occurs when a signal value is written
User Logon Operations: occurs when a user is logged in or logged out
System Events: occurs when the server is started or stopped
System Alarms: occurs for the system alarms
User Modifications: occurs when a user is created, deleted, or updated
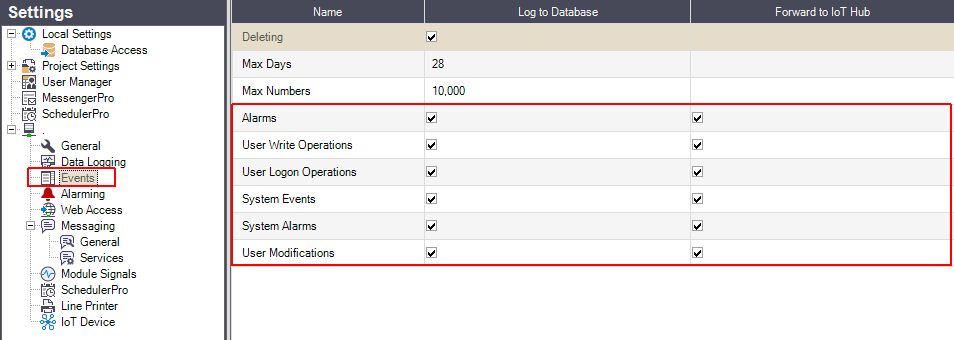
Enables logs for Database and IoT
Note
When organizing these settings, the following rules need to be considered:
If one of these options is enabled for the IoT, it will automatically be enabled for the Database, as well. A message window will pop up asking for confirmation if the operation should be continued or not.
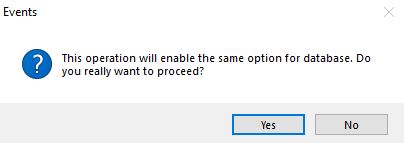
Message window
If one of these options is disabled for the IoT, it will have no effect on the Database counterpart.
If one of these options is enabled for the Database, it will have no effect on the IoT counterpart.
If one of these options is disabled for the Database, it will be automatically disabled for the IoT, as well. A message window will pop up asking for confirmation if the operation should be continued or not.
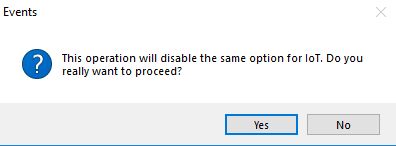
Message window
Enabling the User(s) activity on a Signal
In order to enable the user(s) activities done with a Signal, the Log User Activity check-box needs to be checked for a Signal definition.
In order to enable the user(s) activities done with a Signal, the Log User Activity check-box needs to be checked for a Signal definition.
This setting can be organized in the i4scada Studio, under the Signals section by expanding the Server List hierarchy until reaching the Group(s) node. The Log User Activity setting is available in both the main Signals view (the Signals grid) and in the Signal Details panel.
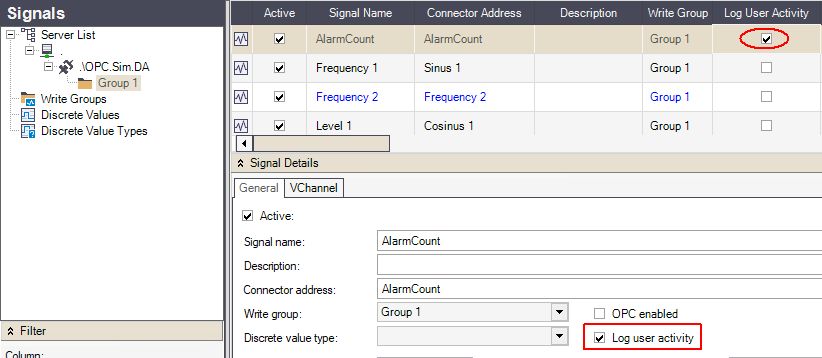
Enable Log User Activities for a Signal
Enabling the User(s) definition event types
Check how to enable the i4scada Log activities check-box of a User to ensure that all events related to the user activities are logged.
By enabling the Log activities check-box of a User, any events related to the user activities will be logged. This setting can be made in the i4scada Studio, under User Manager in the Settings section.
By opening a user in Edit or Create mode, the Log activities check-box can be enabled or disabled.
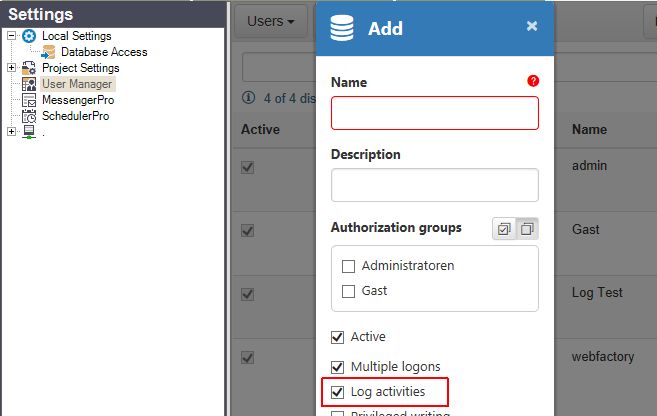
Add new User pop-up dialog
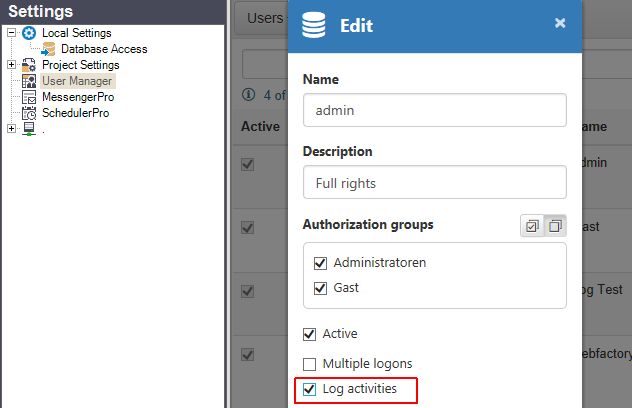
Edit User pop-up dialog