Collect, validate and submit data
Learn how to collect, validate and submit Counters data with the i4connected Mobile App. All you need to know can be found in this article!
As earlier indicated, the collection, validation, and submission of data can occur while the user is offline.
To collect manual counter measurements, the user needs to select the desired Device, from the main view. Once the Device has been selected, the list of Counters is displayed.
This view also provides the user with search functionality, in order to enable a smooth and easy management flow, in the case of a large number of counters.
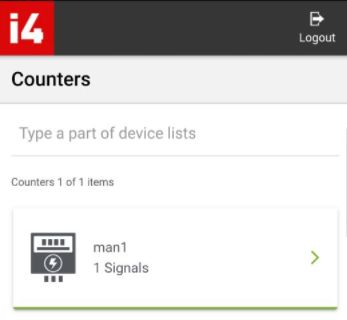
List of Counters
Once the counter is opened, the measurements collection panel is opened.
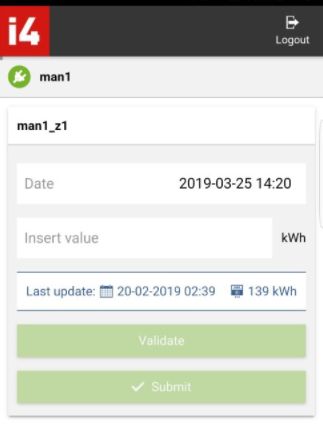
Measurement collection view
This initial view of the measurements collection panel is structured as follows:
Date - by default, the current date and time are displayed in this field. The user can change the date, by selecting this field. Automatically, at the bottom of the screen, a calendar selector is prompted. To close the Calendar view, without any changes, the user can press the Cancel button. To finish and preserve the changes, the user can press the Done button.
Note
Both date and time can be changed, using the Calendar view. However, the user cannot select a past date (only the current year, month, and day are allowed). On the other hand, the time selection is more flexible, allowing the user to select either a past or a future time.
Insert value - by default, the field is empty, allowing the user to fill in numerical values. Next to the valuation field, the Signal unit of measure is also displayed.
Last update - this field does not allow any user interaction, as it is displayed purely for informational purposes. In this field, the user can check the date, time , and value of the last validated and synchronized signal measurements update.
Validate button - by default, this button is inactive. The button is enabled only after the Signal measurement value is filled in.
By pressing the Validate button, the following scenarios can occur:
Validation is successful - a confirmation message is displayed and the view is enhanced with a "Comparison with previous year" panel.
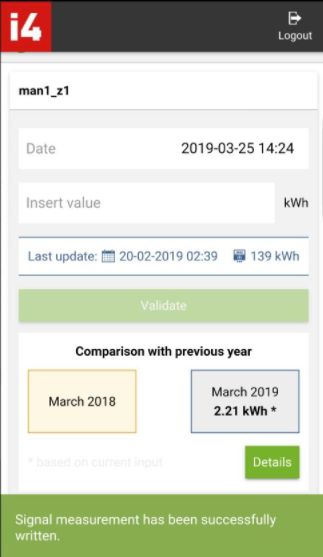
Validation successful
The comparison is done between the current month and last year's month. The values are calculated based on the currently inserted measurement value.
By clicking the Details button, the application displays a monthly based detailed comparison view, marking the last year in Yellow color and the current year in Blue color.
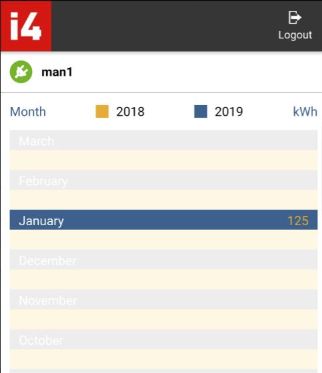
Detailed comparison view
Validation is not successful - in case the user fills in a measurement value smaller than the last one, a warning message pops up. To close the warning dialog, select the Close button.
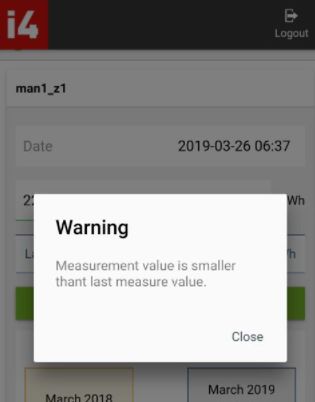
Validation not successful Warning message
Note
If the measurement value should be smaller than the last synchronized one, the user can proceed with submitting the value, without it validating upfront.
Submit button - by default, the Submit button is inactive. The user can press this button, only after a measurement value was inserted. It is not mandatory to validate a value, before submitting it. The user can decide to Submit a value, without an upfront validation.
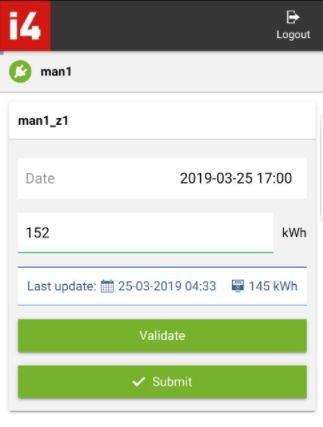
Submit button
By pressing the Submit button following scenarios can occur:
Submit is successful - The Signal measurement is written and the application displays a confirmation message.
Submit requires manual confirmation - This scenario can occur only in case the Signal measurement was not validated, upfront. In this case, the application asks the user to confirm if unsuitable values should be submitted or not. To proceed the user can select the Confirm button. To return to the input measurement values view, the user can select the Cancel button.
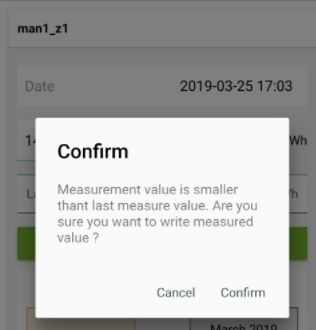
Submit confirmation