Managing i4connected tiles
Learn how to manage the i4connected tiles and learn more details about the importance of role assignments for these entities.
The i4connected pages are populated by tiles that open panels and drill-downs allowing the users to define structural entities and consequently analyze and monitor their data. As described in the Tile management article visibility of tiles is influenced by their assigned roles.
The following tutorials will guide us through the most commonly met use cases concerning tiles management.
Copying a tile from one page to another
Click on the Edit layout button located in the global menu bar.

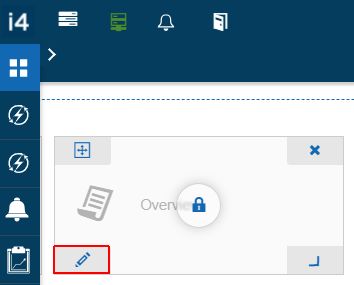
Click on the pen symbol in order to open the selected tile in edit mode.
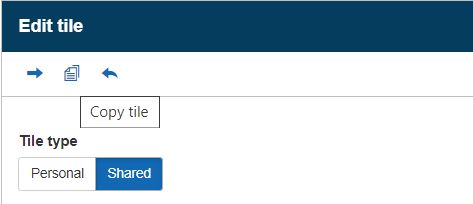
In the Edit tile panel click on the Copy tile toolbar button.
In the Copy tile panel, proceed with the following settings:
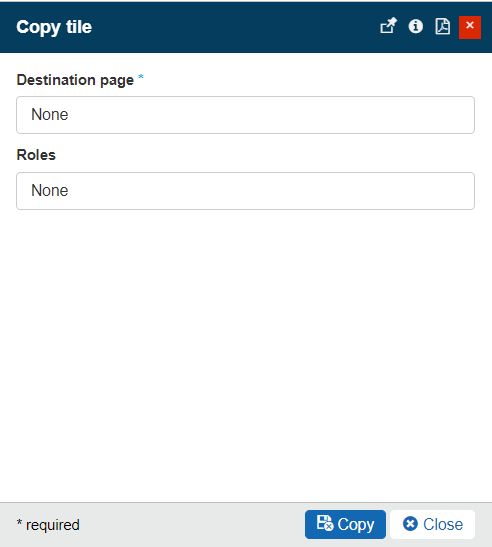
Select the tile Destination page from the Page list panel.
Select the Roles of the tile applied in the context of the destination page, from the Select roles panel.
Click the Copy button of the Copy tile panel.
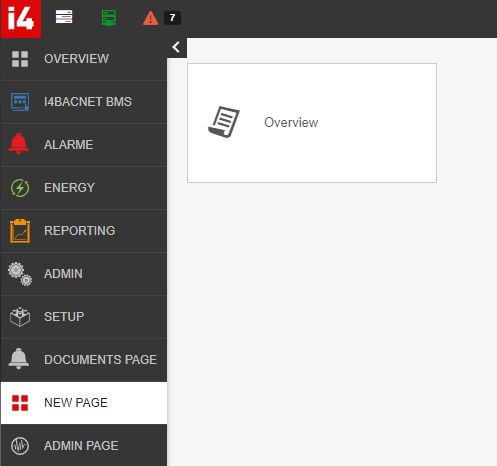
Open the selected destination page. The copied tile is available.
Sharing a tile with all users
Users having the Manage shared tiles permission enabled can pin a new tile or edit an existing one, by sharing it with other system users. To share a tile with all the system users, please organize the following steps:
Open a tile in edit mode.
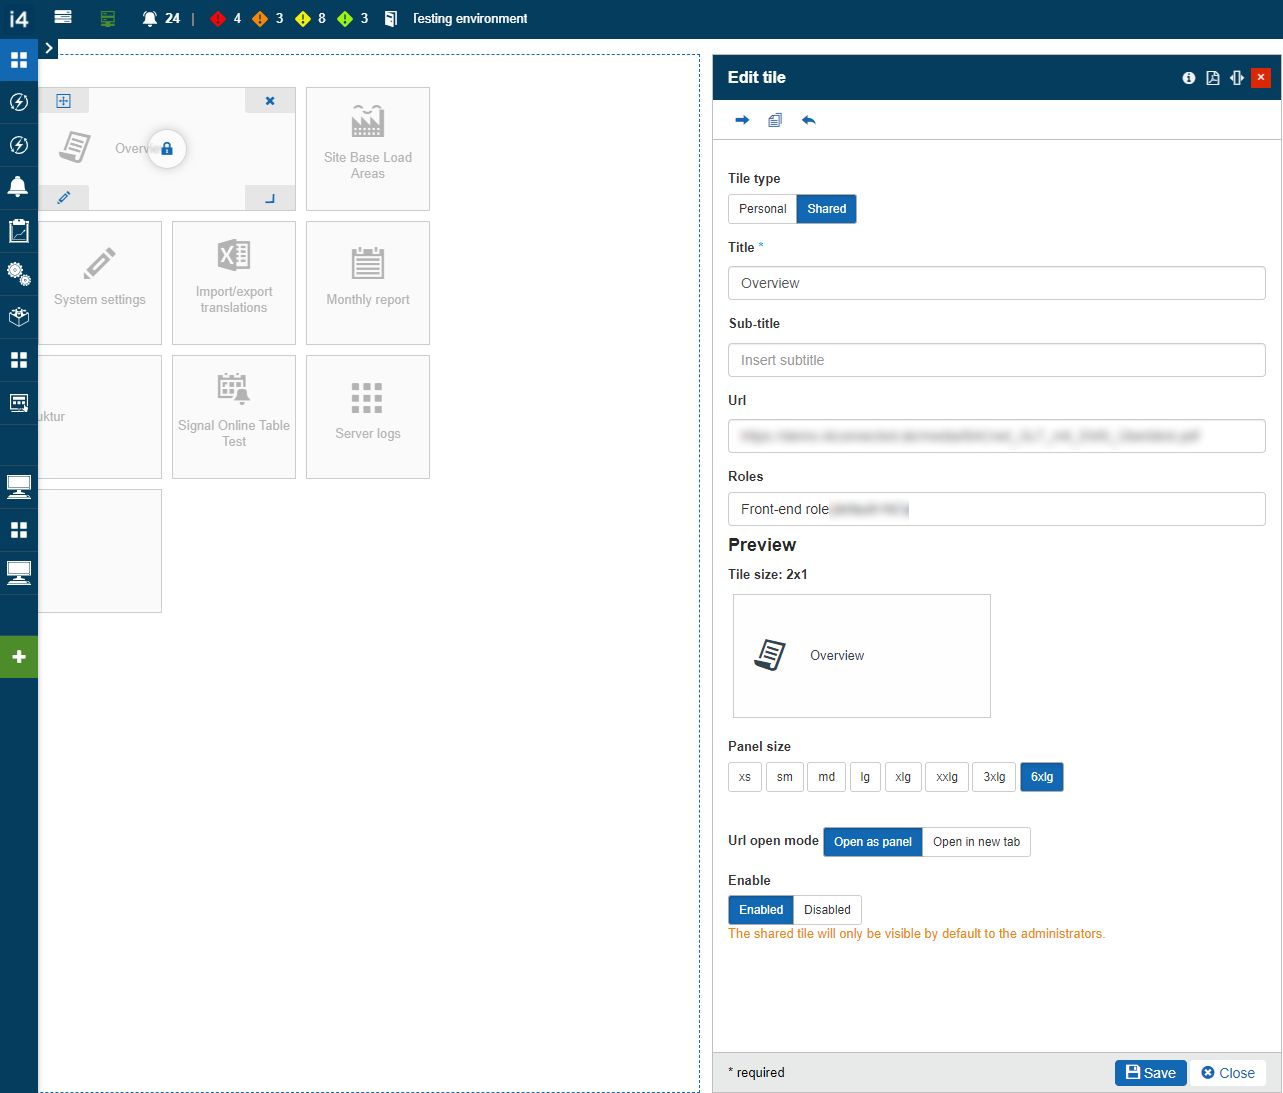
In the Edit tile panel, proceed with the following settings:
Make sure that the Tile type is set to Shared.
Change the tile Roles and make sure to add a Front-end role type. This way, all the system users will be granted access to this tile.
Optionally, you can update the tile characteristics (title, sub-title, size, URL) or the tile parameters.
Click the Save button of the Edit tile panel.
Login with a limited rights user. Under the destination page, the tile is now visible.
Sharing a tile only with specific users
In case a tile should be placed on a page that is accessible to multiple users, the system administrator user can decide to show this tile only to users with a set of specific rights, as follows:
Click on the Edit layout button located in the global menu bar.
Open a tile in edit mode.
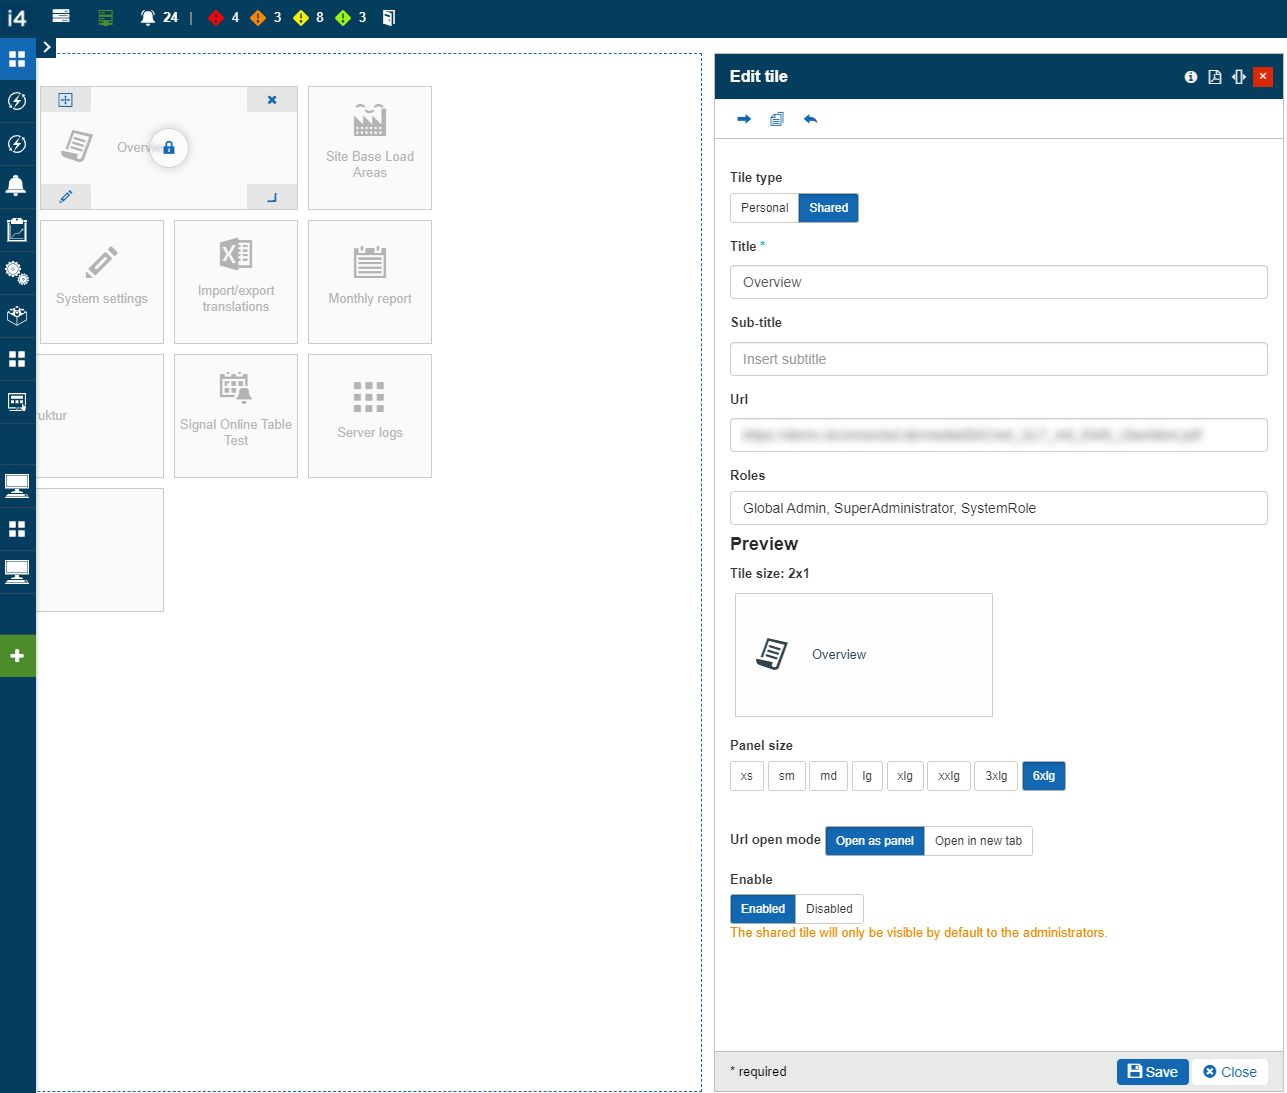
In the Edit tile panel, proceed with the following settings:
Make sure that the Tile type is set to Shared.
Change the tile Roles and make sure to add the desired specific role. This way, only the users having the respective role assigned will be able to see the tile.
Optionally, you can update the tile characteristics (title, sub-title, size, URL) or the tile parameters.
Click the Save button of the Edit tile panel.
Login with a limited rights user. Under the destination page, the tile is not visible.
Log in with a user having the specific role assigned. Under the same destination page, the tile is visible.
Setting a tile to private use
Users having the Manage personal tiles permission enabled can create tiles and set them for personal use only. To create such a new tile, please follow the below-described steps:
Click on the Edit layout button located in the global menu bar.
Hover the mouse over "+" button under Personal tiles.

In the Add tile panel, proceed with the following settings:
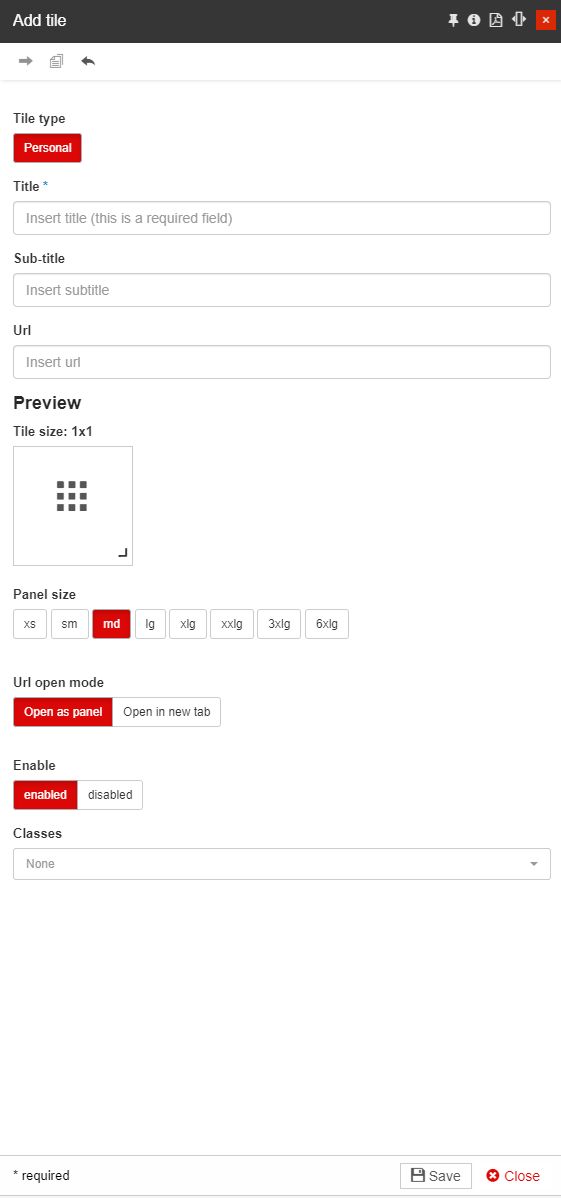
Type in the tile Title.
Type in the tile Sub-Title.
Type in the tile Url.
Select the Tile size and the Panel size.
Select the tile Open mode.
Set the tile to Enabled.
Select the tile CSS Class.
Click the Add tile Save button.
The newly created tile is now available under the page where it was added.
Log in as any other user than the tile creator and check for the tile visibility. The tile will be visible to its creator only, regardless of how powerful another user is.