Installing the i4connected pre-requisites
Check out this article and learn how to deploy the i4connected portal on your working machine.
In order for the i4connected portal to work on the desired machine, and to allow the usage of some features, the following prerequisites must be installed:
Internet Information Services (IIS);
URL Rewrite Plugin
.NET Framework
.NET Core Runtime and Hosting Bundle
RabbitMQ
In case your local machine does not already have the above-indicated programs available, please follow the steps provided below:
Internet Information Services (IIS)
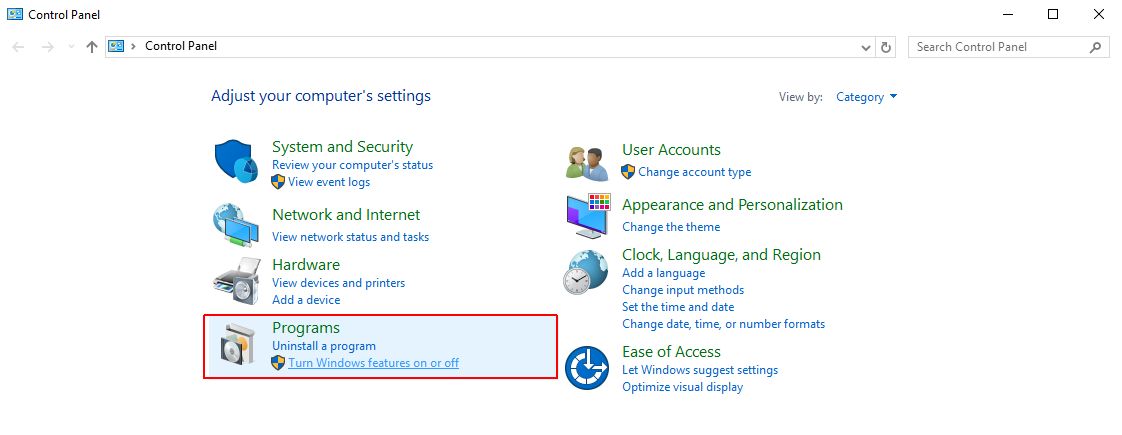
Go to Control Panel > Programs > Programs and Features. Click on the Turn Windows features on or off option.
The Add Roles and Features Wizard are opened. Use the Next button to move through the wizard's page until reaching the Server Roles page.
In this view, make sure that you enable the Web Server (IIS) roles as visible in the below screen.
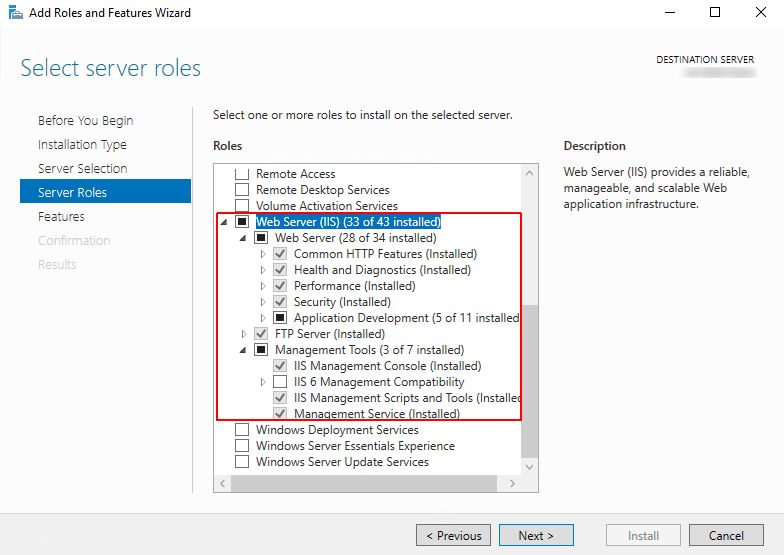
Click the button Next until reaching the Results section. Follow up on the installation progress and restart the machine, if needed.
URL Rewrite Plugin
The IIS URL Rewrite Plugin should be installed in order to allow an additional security layer to your installation. The IIS URL Rewrite Plugin enables Web administrators to establish rules for Content-Disposition response headers and to allow the usage of the Single sign-on (SSO) authentication scheme.
Tip
In a regular HTTP response, the Content-Disposition response header is a header indicating if the content is expected to be displayed inline in the browser, that is, as a Web page as part of a Web page, or as an attachment, that is downloaded and saved locally.
As an additional security measure, it is recommended that the Content-Disposition headers be displayed as an attachment.
To enable the rewrite rules, please install the IIS URL Rewrite extension.
.NET Framework
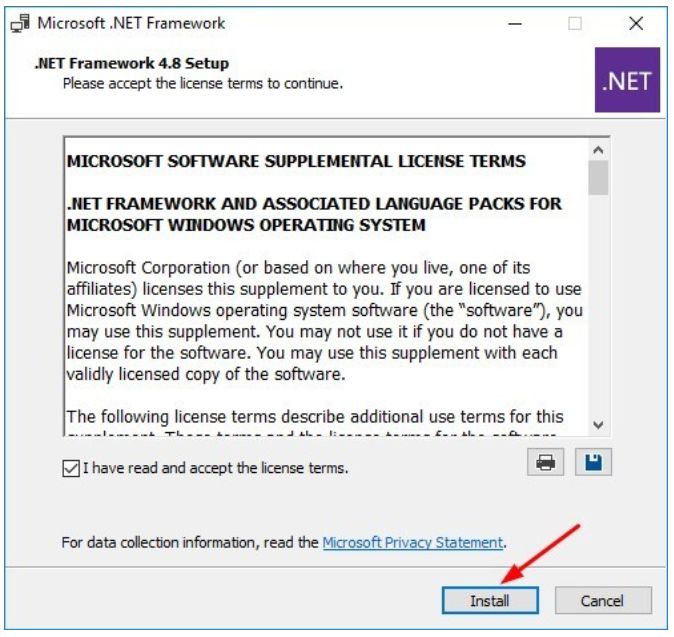
Open your preferred browser, go to Microsoft Download Center and download .NET Framework 4.8.
Run the downloaded file, read and accept the license agreement terms, and proceed with the installation.
.NET Core Runtime and Hosting Bundle
Open your preferred browser and go to Microsoft Download the following .NET Core Runtime and Hosting Bundle versions:
.NET Core Runtime and Hosting Bundle 6.0.X (needed for the i4Identity feature and the Invitation app feature)
Run the downloaded files, one by one.
Wait until the three setups are complete and restart the machine, so that the changes done by the .NET Core Runtime and Hosting Bundle are picked up by the IIS.
Tip
Alternatively, you can use the Command Prompt to stop the IIS by typing in net stop was /y and start it again by typing net start w3svc.
RabbitMQ
Important
The RabbitMQ server is only needed for the i4connected 5.6 version.
Since i4connected 5.6 the system is enforced with a powerful set of permissions allowing fine-grained control over user roles, eliminating security-by-assumption and hard-coded security rules. The RabbitMQ server scope is to enable the communication between the i4connected web portal and its server.
Open your preferred browser, go to RabbitMQ, and download the RabbitMQ.
Install the setup following the default installation steps, as described under the linked Get Started section article.
Important
During the RabbitMQ installation, you will be asked if Erlang Client should also be installed. As this is REQUIRED for the i4connected installation, please make sure to add it as well.
For more details on how to enable web management and how to manage exchanges and queues, you can also visit this article.
Note
In case you already have the RabbitMQ Server available, please make sure to configure the i4connected needed settings, as described under the following articles: