Finishing Touches
Check out the upcoming articles and learn how to install or configure some further i4connected features, before finishing the installation.
Logging into the Application
Check out this article and learn more details on how to log into the system and which credentials you can use for the first use.
After performing all the previously described steps, you can proceed with checking your new i4connected installation, as follows:
Run the Server and open the WebApp.
The i4connected Home page will be opened in your default browser.
Using the following default credentials, please log into the application.
Tip
Your default credentials:
Username: admin
Password: WEBfactory2020!
Tip
For more details about the Login page, please also visit the dedicated article, here.
Importing Translations
Check out this article and learn how to bring translations into a newly created i4connected database, as a finishing touch of the installation guide.
After a successful login, you can now proceed with importing i4connected translations, as follows:
Identify the Import data tile and click it to open the Import panel. This tile should be available under the Setup page.
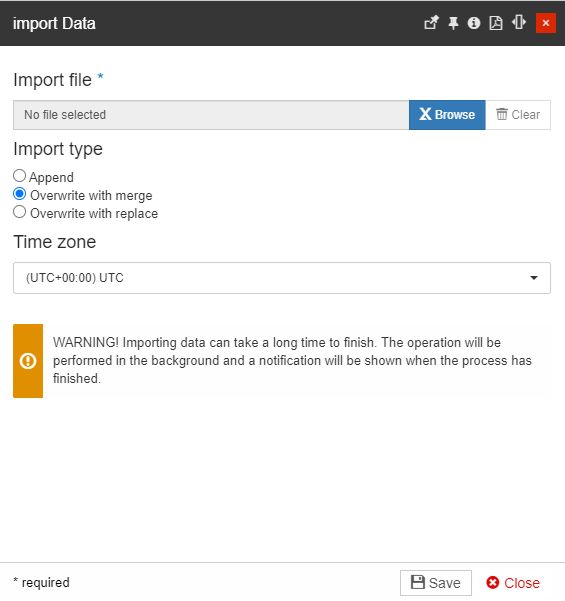
Upload the translation file via the Browse button and select the desired Import type, choosing from the three available options:
Important
The Translation file should be requested from the HMS Technical Support team if it has not been provided to you.
Append - the translations will be appended to the current data.
Overwrite with merge - the current data will be overwritten and merged with the imported translations,
Overwrite with replace - the current data will be overwritten and replaced with the imported translations.
To proceed with the translation import, click the Save button. The Import panel will provide you with a pre-validation report, where all the errors will be described.
Installing the API Printing service
Check out this tutorial in order to learn how to set up the printing service for your i4connected database and how to install the Chromium software.
The i4connected Printing service is based on the Chromium software so it is recommended to install it on the machine where it is accessible to the ASP.NET Core application. Please follow up the below-described steps in order that you set up your Printing service:
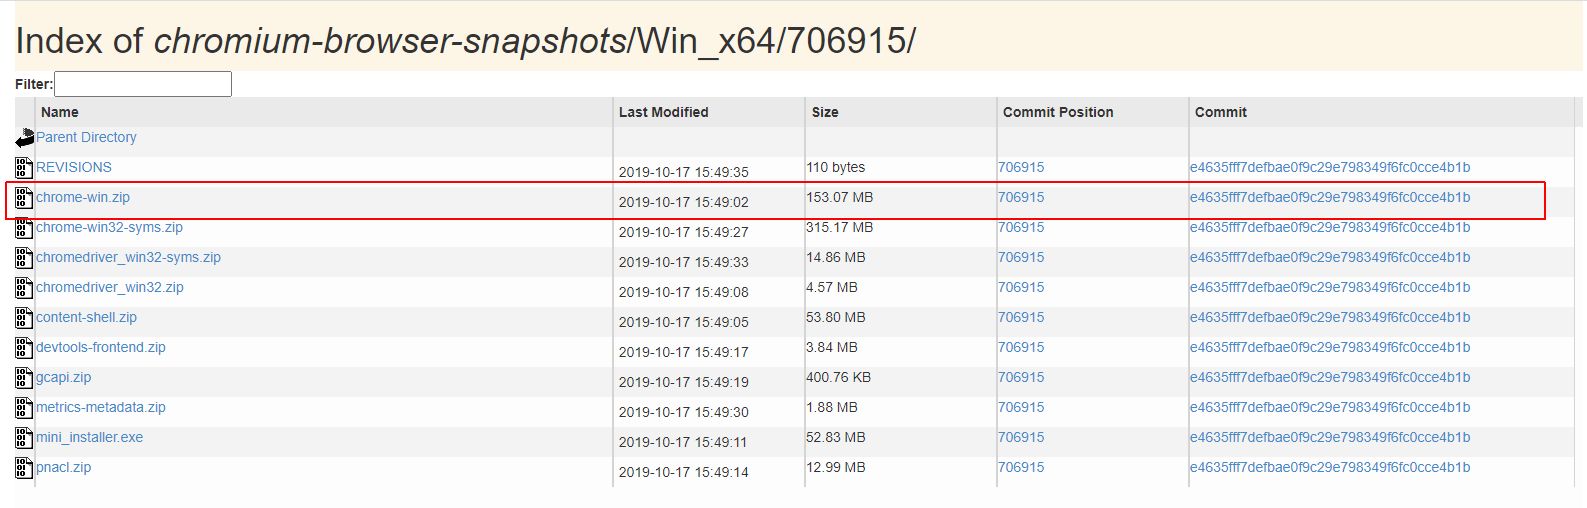
Download Chromium software from here and install it on the machine where the i4connected installation is available.
Note
For the present tutorial, we are using the 706915 Chromium version and we downloaded the chrome-win.zip archive.
Next, open Microsoft SQL Server Manager Studio and connect to the database server. Open the Settings table by means of right-clicking and Edit Top 200 Rows.
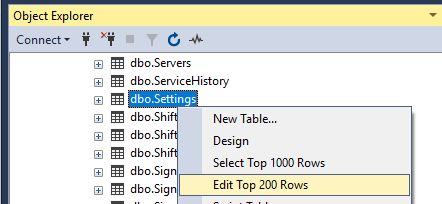
Identify the feature.printing .executablePath setting.

Make sure that the value of the is the feature.printing .executablePath setting is the absolute path to the chrome.exe .
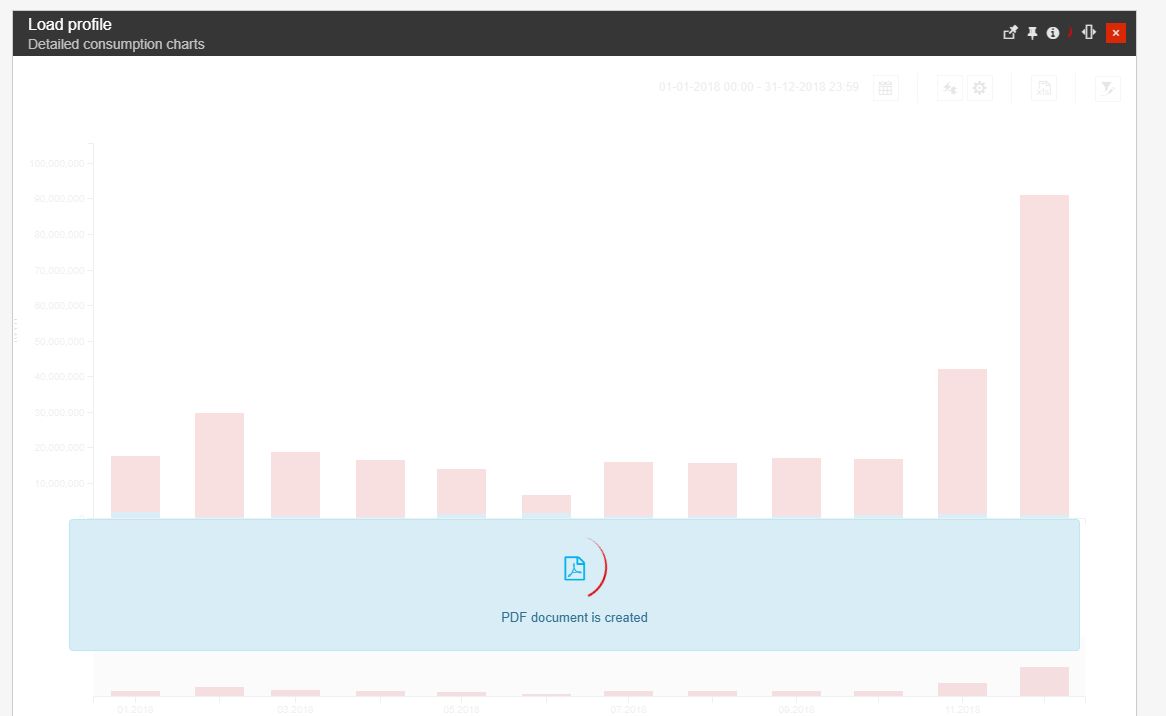
In order to check your settings, open the i4connected application and try to print the contents of a panel, using the designated function.

The PDF document will be downloaded directly in the browser.
Installing External Providers
Check out this article and learn how to enable multiple external providers such as Facebook, Twitter, Google, Microsoft, and Custom OpenID Connect.
The i4connected application gives users the freedom to choose which Identity Provider they use to sign in to the portal. Before moving on with this guide, let's clarify what is an Identity Provider.
An identity provider is a service that creates and maintains identity information in order to provide authentication services to the i4connected application. This function can significantly reduce sign-in and registration friction, which allows the users to easily access the application without needing to create new passwords or remember usernames.
The i4connected application allows the user to add social authentication connections (such as Facebook or Twitter), as well as build in-house connections (using the Custom OpenID Connect protocol).
Basically, the user can sign in to the i4connected application, using their credentials from the following supported external providers:
Facebook
Twitter
Google
Microsoft
Custom OpenID Connect
In order to configure an external provider, please follow the below-described steps:
Open a File Explorer window and locate the appsettings.json file under the i4connected Identity folder.
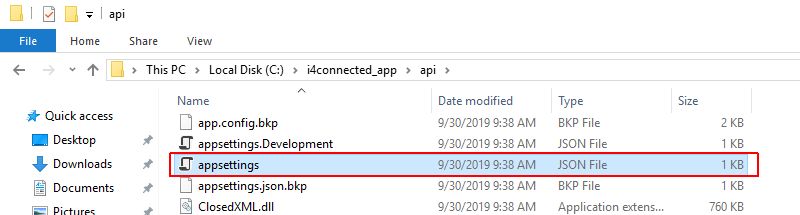
Open the appsettings.json file using an editor tool.
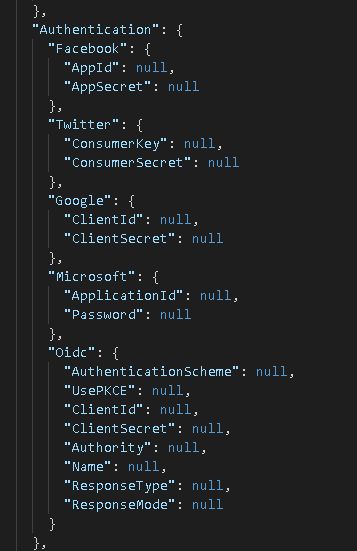
Under the Authentication line, the supported external providers are listed.
Replace the null value with the requested information and save the appsettings.json file changes.
Tip
Please also check our tutorial describing the steps needed to enable Login / Logout when using an external provider.
Here are the settings required to enable the i4connected external providers:
Property | Description |
|---|---|
AppId | The unique identification number of your Facebook application account. |
AppSecret | The secret key of your Facebook application account. |
Property | Description |
|---|---|
ConsumerKey | The unique identification key of your Twitter application account. |
ConsumerSecret | The secret key of your Twitter application account. |
Property | Description |
|---|---|
ClientId | The unique number is used to identify your Google account. |
ClientSecret | The secret key of your Google account. |
Property | Description |
|---|---|
ApplicationId | The unique identification number of your Microsoft application. |
Password | The Client secret (application password) consisting of a secret string that the application uses to prove its identity when requesting a token. |
Property | Description |
|---|---|
AuthenticationScheme | The scheme is used for external sign-out. To enable the external sign-out scheme for the OIDC provider, the user needs to define a scheme, otherwise, the default value will be used and the external sign-out will be disabled. TipThe scheme could be anything (such as the name of the external provider or another useful name) providing that spaces and special characters are NOT allowed. |
UsePKCE | The Proof Key for Code Exchange allows the user to prevent attacks and to be able to securely perform the OAuth exchange from public clients. This setting is by default disabled. TipFor more details, please also visit this site. |
ClientId | The unique number of the client for which all tokens must be issued. |
ClientSecret | The secret key of the client. |
Authority | The URL is used to identify the client. |
Name | The name of the client will be displayed in the application. |
ResponseType | The type of response can be:
|
ResponseMode | The mode of the response can be:
|
MetadataAddress | Optionally, allows the user to set a discovery endpoint address for obtaining metadata. |
Scopes | Optionally, allows the user to list additional permissions which the i4connected system requests from the external identity provider. For instance, the configured identity provider user email address. The Scopes array should be added between square brackets and each scope should be added between double-quotes. |