Managing i4connected pages
Check out this article and learn how to add new pages to the i4connected portal in a few easy steps.
The i4connected main menu, located at the right side of the screen is composed of a set of fully customizable pages, allowing the system administrator user to group i4connected tiles in a logical order.
Management of i4connected pages is done in the Page List panel which is usually made available only for users having an administrative role assigned. Users having the Manage configuration permission enabled are allowed to add and edit listed pages.
This article will guide you through the most commonly met use cases when managing i4connected pages.
Adding a new page, visible to all portal users
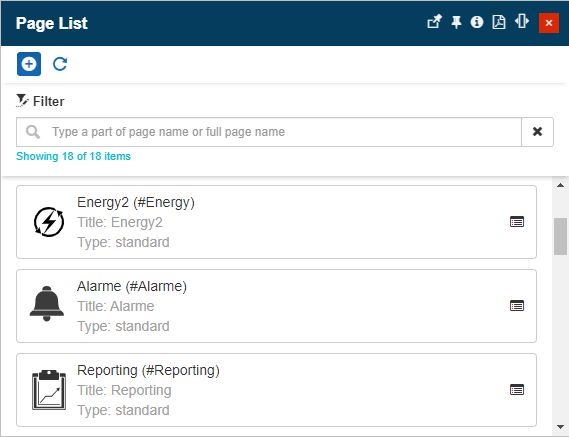
Select the Page list tile to open the Page list panel.
In the Page list panel, click the Add page toolbar button.
In the Add page panel, proceed with the following settings:
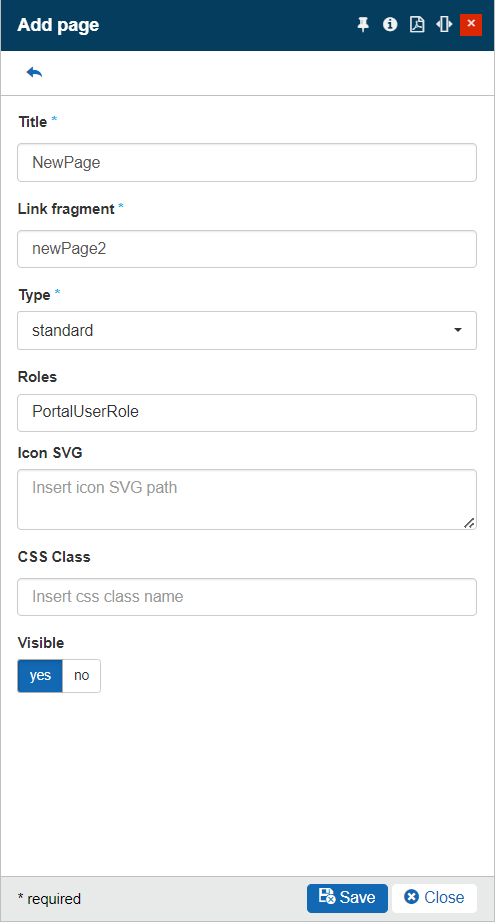
Type in the Title of the new page. The page title will be visible in the main menu after its creation.
Type in the Link fragment of the new page. The link fragment will be used in the URL when the new page is accessed.
Select the new page Type from the drop-down list options. The page can be an Overview, Standard, Customer, Site Overview, or System page. The page type will not affect the page visibility or other characteristics, this being mainly a way to group portal pages.
Select the new page Roles using the Select roles panel. For this tutorial, we will select a Front-End role type, to make the page visible to all users having login rights.
Note
Based on the selected roles the page visibility will be granted only for the users sharing the respective role(s).
Optionally, insert the path to the Icon SVG. The icon will be visible in the i4connected main menu.
Optionally, insert the CSS Class name for the page.
Set the page to Visible.
Click the Save button of the Add page panel.
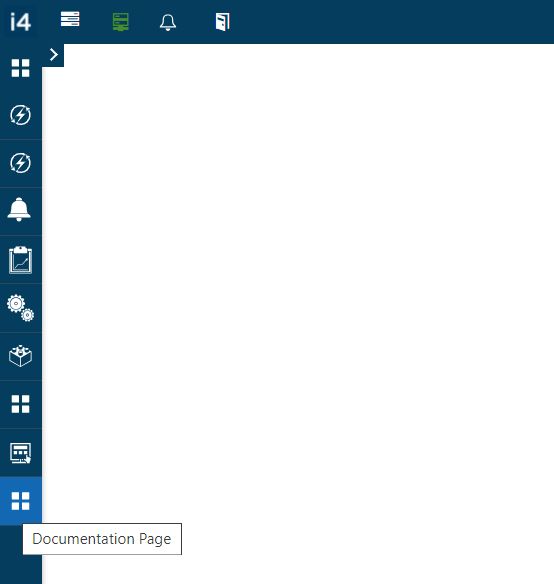
Refresh the browser page and check the main menu for the newly created page.
Log in as a limited rights user. The New page is available in the main menu, due to the page role selected at step 3d.
Adding a new page, visible only for specific users
Select the Page list tile to open the Page list panel.
In the Page list panel, click the Add page toolbar button.

In the Add page panel proceed with the following settings:
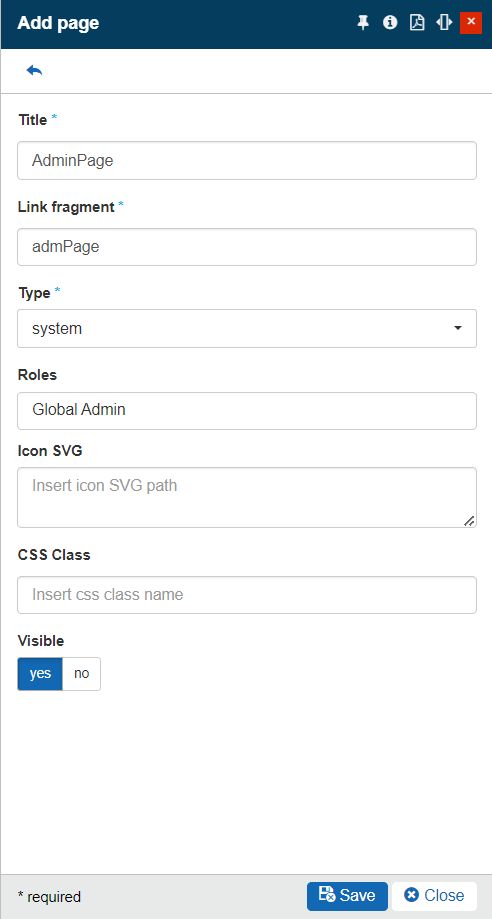
Type in the Title of the new page. The page title will be visible in the main menu after its creation.
Type in the Link fragment of the new page. The link fragment will be used in the URL when the new page is accessed.
Select the new page Type from the drop-down list options. The page can be an Overview, Standard, Customer, Site Overview, or System page. The page type will not affect the page visibility or other characteristics, this being mainly a way to group portal pages.
Select the new page Roles using the Select roles panel. For this tutorial, we will select the Global Admin role, to make the page visible only for Administrator users.
Note
Based on the selected roles the page visibility will be granted only for the users sharing the respective role(s).
Optionally, insert the path to the Icon SVG. The icon will be visible in the i4connected main menu.
Optionally, insert the CSS Class name for the page.
Set the page to Visible.
Click the Save button of the Add page panel.
Refresh the browser page and check the main menu for the newly created page. As the currently logged-in user has the Administrator role assigned, the page is visible.
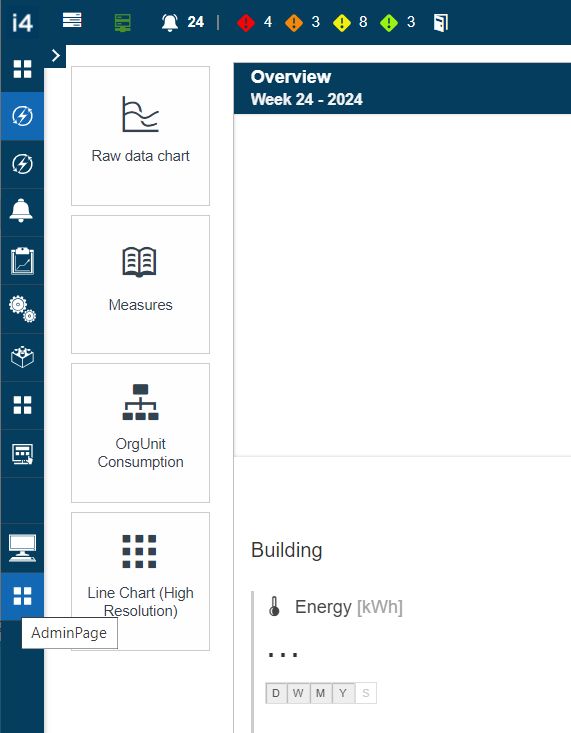
Log in as a limited rights user. The New page is not available in the main menu, due to the page role selected at step 3d.
Adding a new page from the Edit layout mode, visible only for specific users
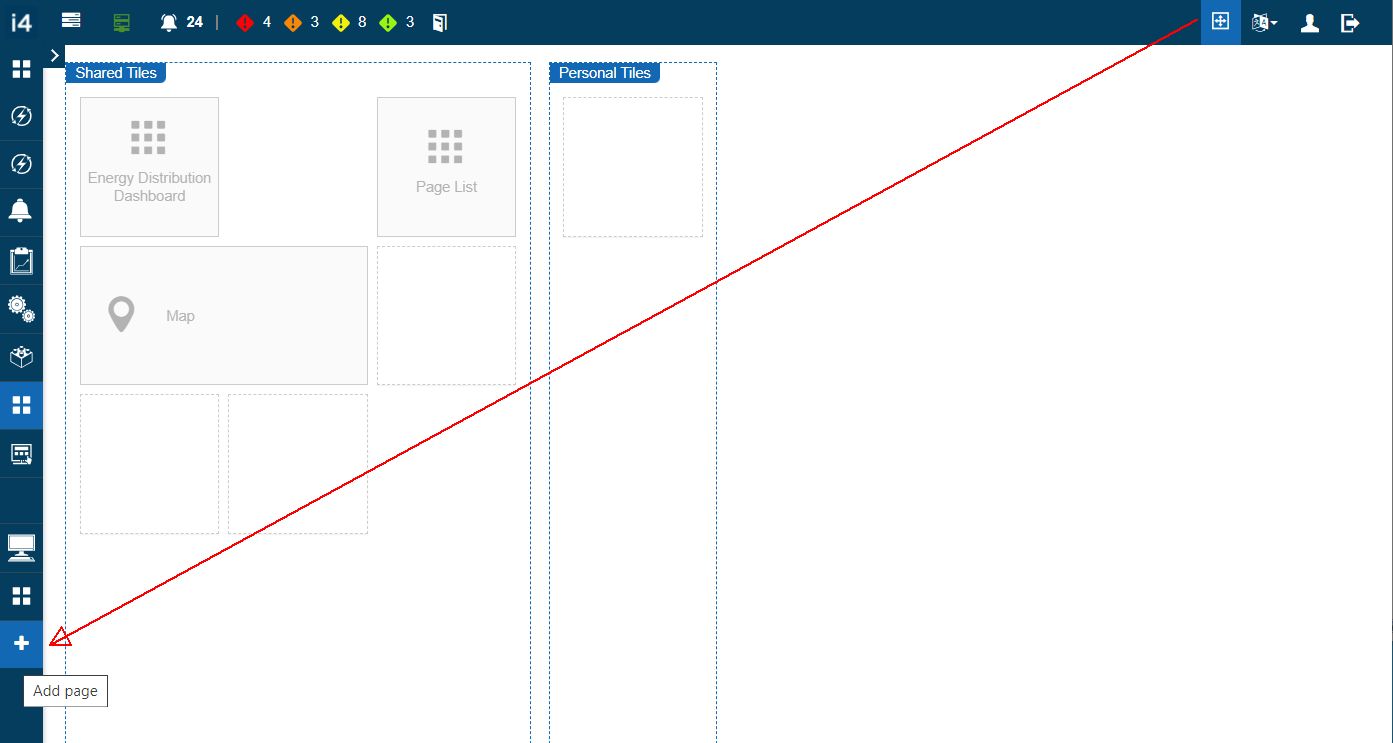
Select the Edit layout mode button visible on the Global menu bar.

Click on the Add page button from the Page list menu.
Tip
Pages can be managed by users having the Manage configuration and the Manage shared/personal tiles permissions.
In the Add page panel, proceed with the following settings:

Type in the Title of the new page. The page title will be visible in the main menu after its creation.
Type in the Link fragment of the new page. The link fragment will be used in the URL when the new page is accessed.
Select the new page Type from the drop-down list options. The page can be an Overview, Standard, Customer, Site Overview, or System page. The page type will not affect the page visibility or other characteristics, this being mainly a way to group portal pages.
Select the new page Roles using the Select roles panel. For this tutorial, we will select the Global Admin role, to make the page visible only for Administrator users.
Note
Based on the selected roles the page visibility will be granted only for the users sharing the respective role(s).
Optionally, insert the path to the Icon SVG. The icon will be visible in the i4connected main menu.
Optionally, insert the CSS Class name for the page.
Set the page to Visible.
Click the Save button of the Add page panel.
Refresh the browser page and check the main menu for the newly created page. As the currently logged-in user has the Administrator role assigned, the page is visible.