Setting up default page panels
Check out this article and learn more details about the Panel pinning function and the permissions needed to be allowed to use it.
The Panel pinning function allows the i4connected users the possibility to set up personal or shared panels, that are persisted on a page until they are manually closed.
Based on their permissions, users can pin personal or shared panels, by clicking the Make default panel button, located in the toolbar of panel headers.
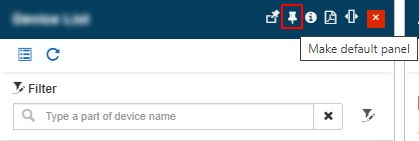
The Make default panel button
Tip
Each page has a limit of two default pinned panels: one shared panel and one personal panel.
The Make default panel button will be available only for users having at least the Manage personal panels permission enabled. By clicking it, the Make default panel dashboard is opened.
In this view, the user can select the:
Panel type - The panels can be of types:
Personal - setting a panel to type Personal will make the panel available only for the creator user. Personal tiles do not expect Role assignments, as they will inherit the owner's roles.
Shared - setting a panel to type Shared will make the panel available for all system users that share the same roles as the respective tile.
Panel size choosing from the provided options, starting with the smallest value of xs (extra small) and ending with the highest 6xlg (6 times large).
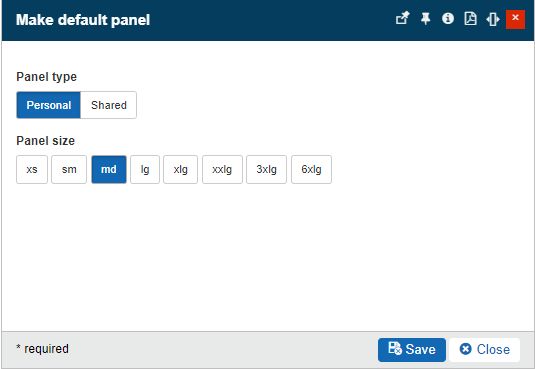
The Make default personal panel view
Upon saving the selected panel as default, a toast message is displayed at the bottom of the screen confirming the save operation.

Toast message
The pinned panel will be maintained on the current page, being visible only to the creator user. Hence, if the user switches to another project page or logs out of the system, when returning to the page, the pinned panel will be available there, by default.
Important
If a personal panel was already pinned to a page, the user cannot add a second one. In an attempt, the second panel will replace the first panel.
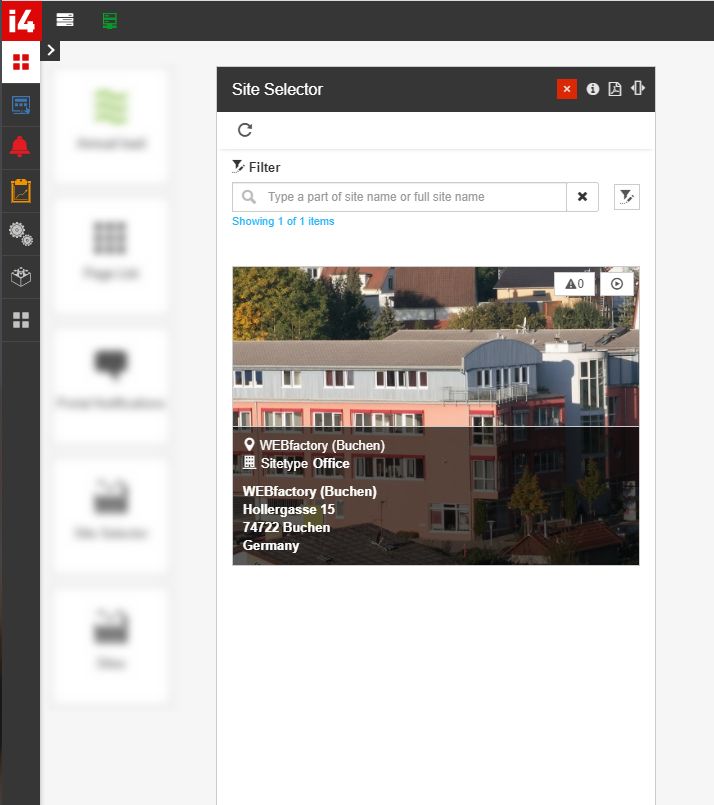
Example of a pinned personal panel
Having the Manage personal panels permission enabled, the users can manually close the personal pinned panel, by clicking the Remove default panel button, available in the pinned panel header.
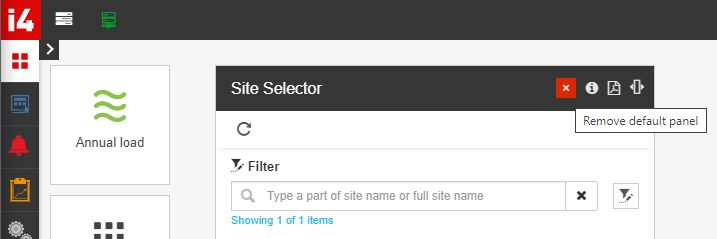
The Remove default panel button
When removing a personal default panel, a toast message is displayed at the bottom of the screen confirming the operation.

Toast message
Users having the Manage shared panels permission enabled are allowed to pin both personal and shared panels. When pinning a shared panel, the user is provided with the following settings:
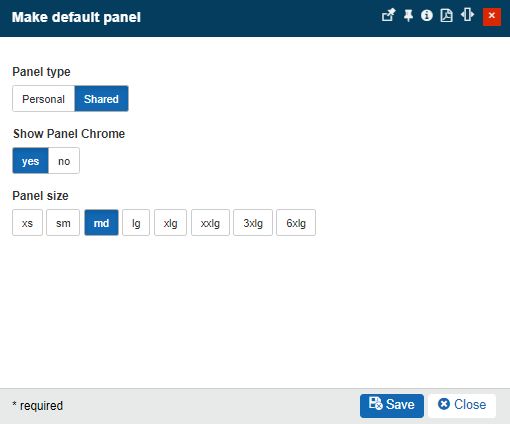
The Make default shared panel view
Panel type - sets the type of the panel to either personal or shared.
Note
If the user has the Manage shared panels permission enabled can pin both personal and shared panel.
Show Panel Chrome - enables or disables the visibility of the panel header.
Yes - if the toggle button is set to Yes, the header of the panel will be visible to all users. However, depending on their rights, the header Remove default panel button can be visible or not.
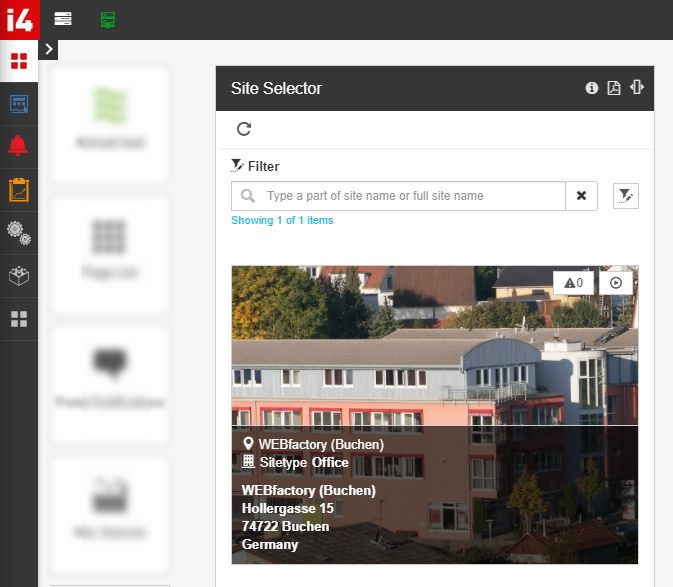
Example of a shared panel with visible chrome (header)
No - if the toggle button is set to No, the header of the panel will not be visible.
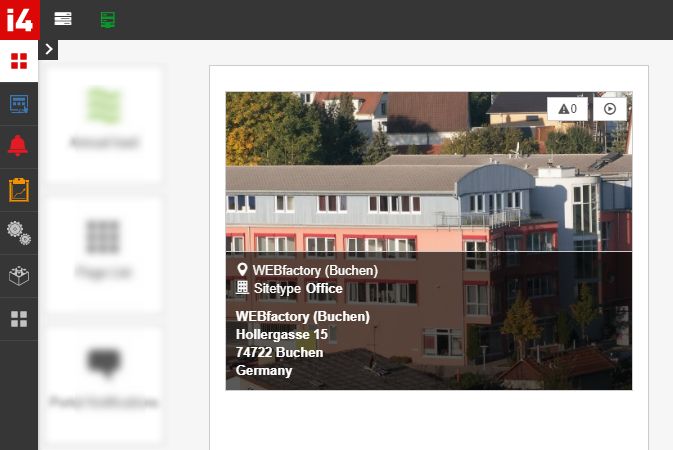
Example of a shared panel without chrome (header)
Panel size- sets the size of the panel, allowing the user to choose from the provided options, starting with the smallest value of xs (extra small) and ending with the highest 6xlg (6 times large).
After pinning a shared panel, a toast message is displayed at the bottom of the screen confirming the save operation.

Toast message
Important
If a shared panel was already pinned to a page, the same user or another one will not be allowed to pin a second shared panel. In the attempt, the second panel will overwrite the first panel.
Shared panels can only be removed by users having the Close shared panels permission enabled, regardless if they were the creators of the panel, or not.
The Remove default panel button is available in the header of all shared panels.
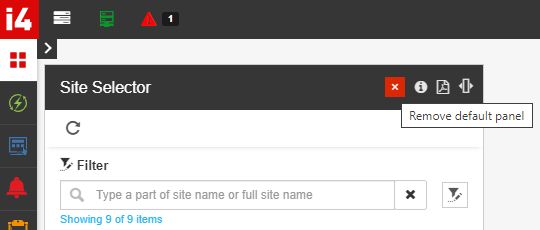
The Remove default shared panel button
Warning
Users having the Close shared panels permission enabled will always see the Panel Chrome, regardless of whether the creator user has set the Chrome visibility to Yes or No.
After removing a shared panel, a toast message is displayed at the bottom of the page, confirming the operation.

Toast message