Organizational Units Management
Check out this article for an insight into the Organizational Units management functionalities and how to use them in your i4connected project.
This article describes the Organizational Units Management functionality from the Admin section of the i4connected portal. The Organizational Unit structure is completely detached from the geographical structure and it can be built over different sites. An Organizational Units structure can contain any number of units and layers.
Tip
The Organizational Units position in the hierarchy can be changed by means of the move entity feature, described by the dedicated article, here.
The list of Organizational Units can be accessed through the dedicated tile. The list of Organizational Units will only be visible for users having at least the View Organizational units permission enabled. Additionally, only the Organizational Units to which the currently logged-in user is assigned will be visible in the list.
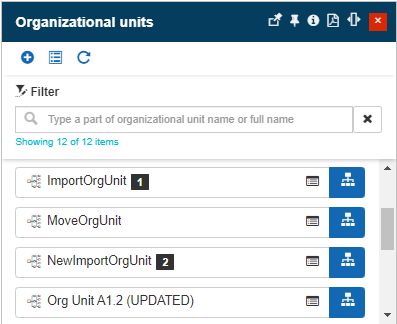
The Organizational Units panel
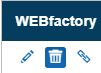
The Organizational Units are positioned in the panel's central area, like cards in a scrollable list. Each Organizational Unit card displays the following details:
The Organizational Unit name.
A numeric label, representing the number Sub-Organizational Units, is assigned to the current entity.
This view provides a filtering mechanism that helps the user to pinpoint the desired Organizational Units, by searching for the entity name.
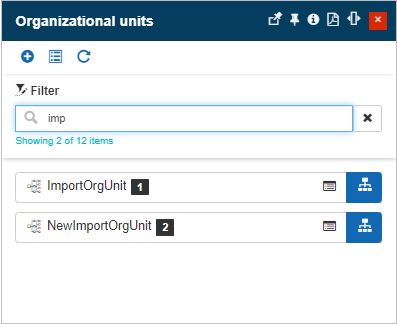
The Filtering option
By clicking the Reset filter button  all the contents in the search field are removed and the filter is no longer applied.
The Refresh button from the top menu provides a manual way to reload/update this list.
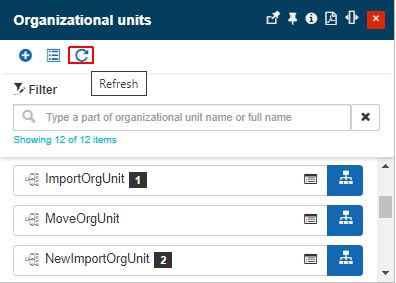
The Refresh button
Further on, system administrators having the Manage configuration permission enabled can manage Custom field definitions by clicking the Metadata toolbar button.
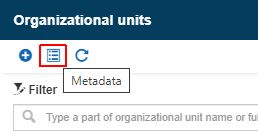
The Metadata button
Tip
For more details about the Custom field definitions panel, please visit the dedicated article here.
In the Organizational Units panel, the user can select a listed item in order to view its substructure  or to view its details
  .
.
By selecting an Organizational Unit from the list view the detailed view mode panel is opened. In this view, all the relevant Organizational Unit information are displayed (Organizational Unit's Name and Alias).
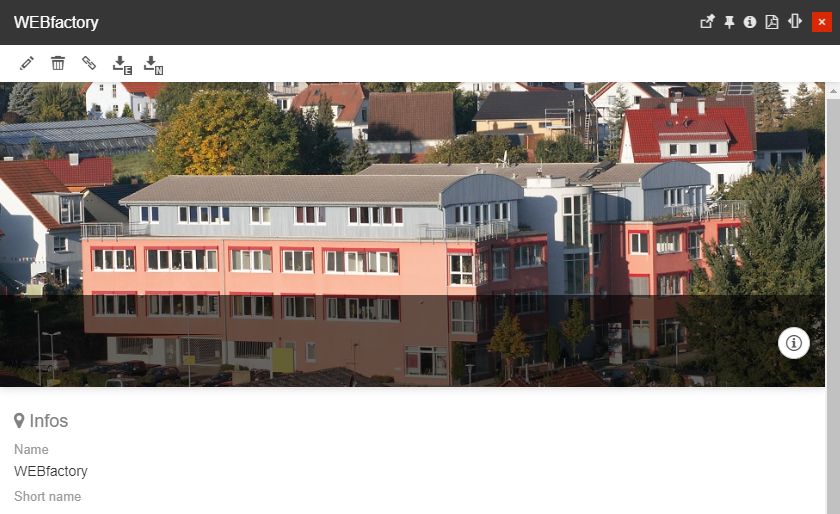
The Organizational Unit detailed view mode
Using the Extra information meta toolbar button, the Organizational Unit detailed view mode panel is expanded to display all the predefined metadata.
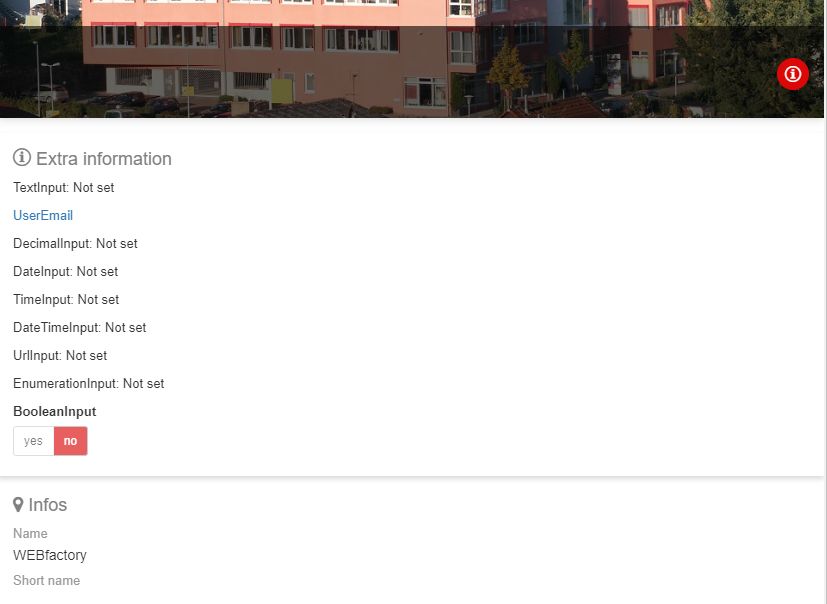
The Extra information area
The Extra information area lists all the Organizational Unit-specific Custom field definitions, in view mode only. However, some metadata allows the user interaction, as follows:
when clicking the linkable field of the metadata of type Url, the URL address is opened in a new tab of the used browser.
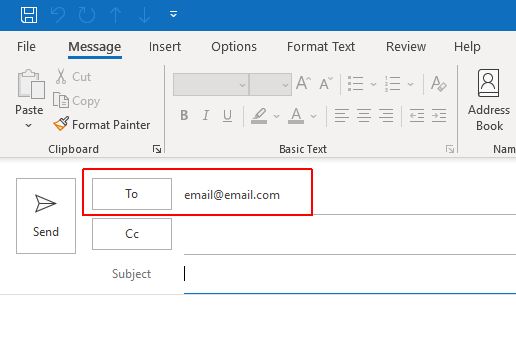
when clicking the linkable field of the metadata of type Email, the default email application is opened, having the user's email address prefilled, in the "To" field.
Further on, a set of management tiles will also be displayed, depending on the level of the permissions that the currently logged-in user has. Hence, the following management tiles can be available:
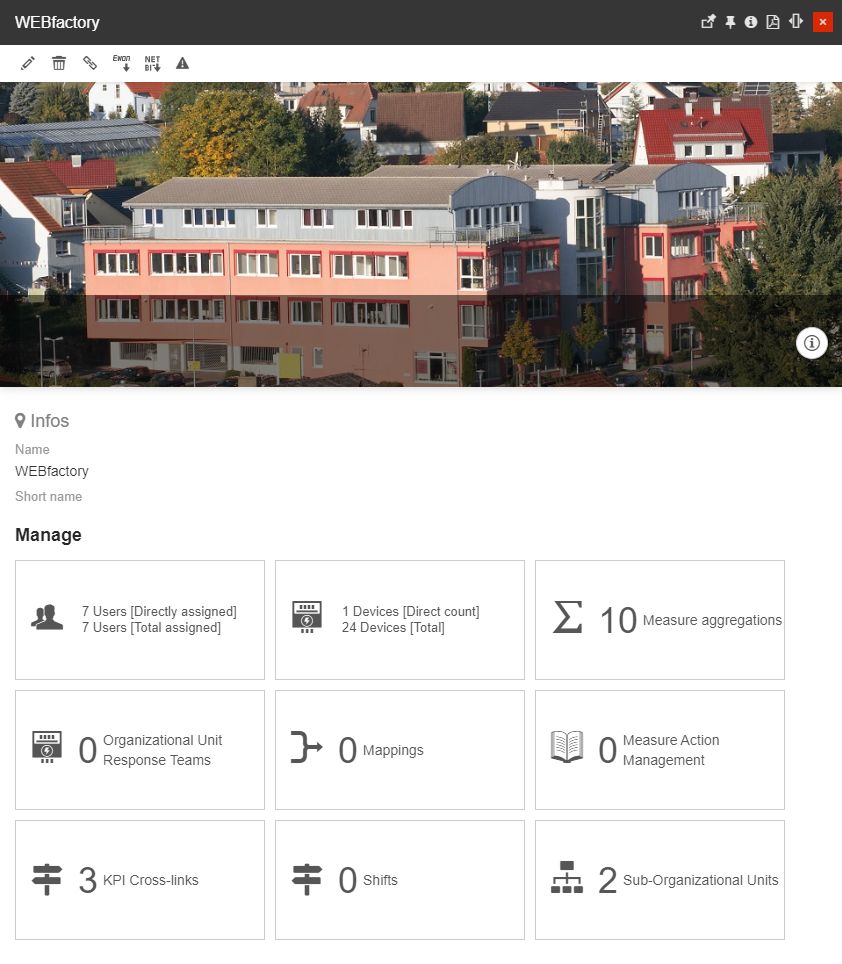
Organizational Unit's management tiles
Manage Organizational Unit's Users - The Users tile will be visible for all users having at least the View Organizational Units and Manage organizational unit users permissions enabled.
The Users tile displays the number of users assigned to the current Organizational Unit. Users can be assigned to Organizational Units by means of direct assignment or by inheritance. By clicking on the Users tile, the Organizational Unit role assignments panel is opened, where further changes can be processed. The management options available for each listed user depends on the permission level of the currently logged-in user.
Tip
For more details about the Organizational Unit role assignments panel please also visit the article here.
Manage Organizational Unit's Devices - the Devices tile will be visible for all users having at least the View Organizational Units permission enabled.
The Devices tile displays the total amount of Devices assigned to the current Organizational Unit. However, the number of displayed devices is highly related to the user's permissions set, as follows:
the View Organizational Units permission, enabled on a hierarchical level, shows the Devices tile as empty;
the View all Organizational Units permission, enabled on a global level, shows the Devices tile but only displays the devices that are assigned ONLY to Organizational Units;
the View Organizational Units / View all Organizational Units along with the View Sites and Areas / View all Sites and Areas, shows the Devices tile, and displays all the Devices assigned to Sites, Areas, and Organizational Units.
By clicking the Devices tile, the Device List panel is opened.
the Device list panel features multiple filtering options such as:
Tip
For more details about the Device List panel please also visit the article here.
Manage Organizational Unit's Measure aggregations - the Measure aggregations tile will be visible for all users having at least the View Organizational Units and Manage organizational unit measure aggregations permissions enabled.
The Measure aggregations tile displays the total amount of Measure aggregations used by the current Organizational Unit. By clicking the Measure aggregations tile, the panel with the same name is opened.
Tip
For more details about the Measure aggregations panel please also visit the article here.
Manage Organizational Unit's Response Teams - the Organizational Unit Response Teams tile will be visible to all users having the View Organizational Units and Manage organizational unit response teams permissions enabled.
The Organizational Unit Response Teams tile displays the total amount of Response Teams Mappings defined for the current Organizational Unit. By clicking this tile the Organizational Unit Response Team List panel is opened. In this view, all the Organizational Unit Response Teams Mappings are listed, allowing the user to open them in edit mode, add new ones or remove the redundant ones.
Tip
For more details about Response Teams Mappings please also visit the dedicated article here.
Manage Organizational Unit's Sub-Organizational Units - the Sub-Organizational Units tile will be visible for all users having at least the View Organizational Units permission enabled.
The Sub-Organizational Units tile displays the total amount of Organizational Units assigned to the current Organizational Unit. By clicking this tile, the list of Sub-Organizational Units is opened.
Manage Organizational Unit's Mappings - the Mappings tile will be visible for all users having at least the View Organizational Units and Manage configurations permissions enabled.
The Mappings tile displays the total amount of Mappings of the current Organizational Units. By clicking this tile, the Measures import mappings panel is opened.
Tip
For more details about the Measures import mapping tool please also visit the article here.
Manage Organizational Unit's Measure Actions - the Measure actions tile will be visible for all users having at least the View Organizational Units and View measure actions permissions enabled.
The Measure Action Management tile displays the number of measure actions associated with this Organizational Unit. The tile opens the Measure action list panel allowing users to view, edit and add measure actions.
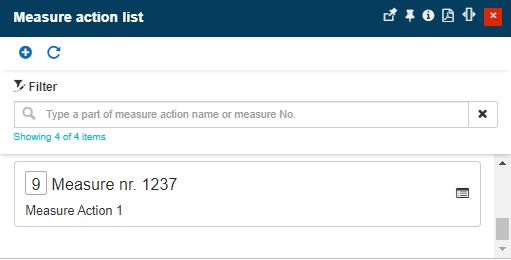
The Organizational Unit's Measure actions list
Tip
For a better understanding concerning Measure, Actions please also visit the article here.
Manage Organizational Unit's KPI Cross-links - the KPI Cross-links tile will be visible for all users having at least the View Organizational Units and Manage configurations permissions enabled.
The KPI Cross-links tile displays the number of cross-links created for this Organizational Unit. The tile opens the KPI Cross-links panel, allowing the user to view, edit and delete the existing cross-links and also add new ones.
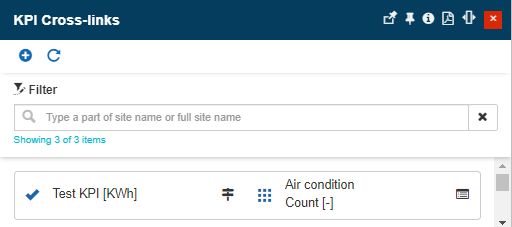
The KPI Cross-links panel
Manage Organizational Unit's Shifts - the Shifts tile will be visible for all users having at least the View Organizational Units and Manage configurations permissions enabled.
The Shifts tile displays the number of shifts defined for the respective Organizational Unit. Selecting this tile opens the OrgUnit shift list panel.
Tip
For more details regarding Shifts management please also visit the article here.
Besides the general Organizational Unit's information and the management tiles, the Organizational Unit details panel may also display an associated i4designer Application.
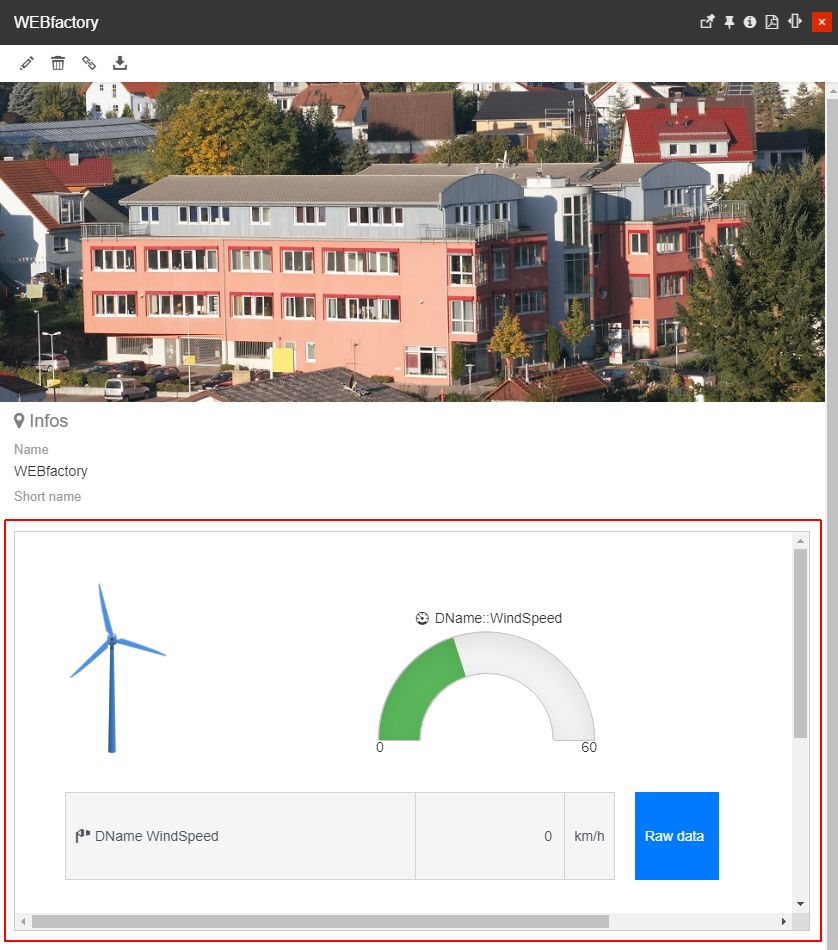
Example of Organizational Unit's application
Tip
For more details about the i4designer Application mapping feature please also refer to the dedicated articles here.
Additionally, to learn how to manage an Organizational Unit's Application mappings please also visit this article.
Adding a new Organizational Unit
The Add button from the toolbar of the Organizational Units panel provides access to the Add organizational unit panel, to users having the Manage Organizational Units permission enabled.

The Add Organizational Unit panel
To add a new Organizational Unit, the user must fill in at least the mandatory details (marked with an asterisk), as follows:
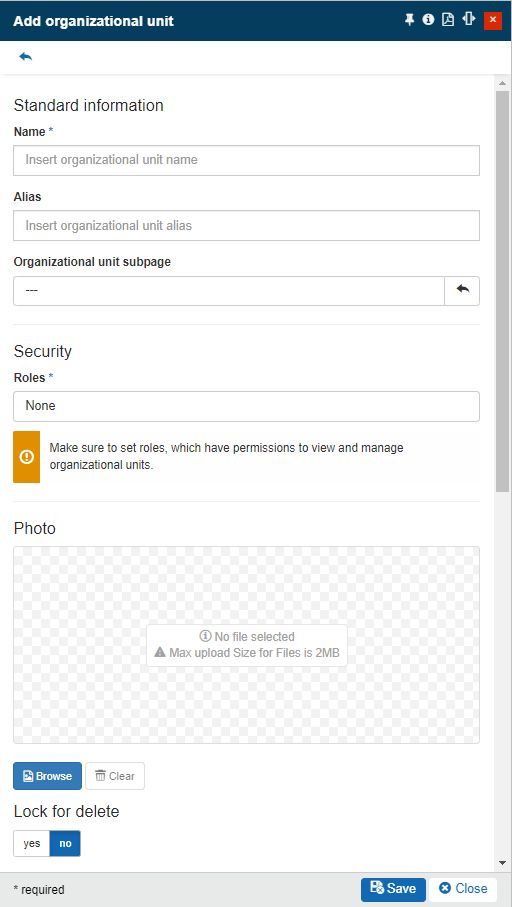
The Add Organizational Unit panel
Standard information
Name* - the name of the Organizational Unit.
Alias - the alias (friendly name) of the Organizational Unit.
Organizational Unit subpage - the dedicated portal page which can provide access to all portal modules and tools, directly configured for this Organizational Unit. Clicking on the selection field, the Page List panel is opened allowing the user to select the page.
Security
Roles - the role(s) defined for the new Organizational Unit. Role(s) can be selected in a dedicated panel, from a list of roles available for the currently logged-in user.
Photo - the photo will represent the current Organizational Unit in thumbnails and tiles. The user can Browse for an image file or Clear the existing one.
Lock for delete - this setting is available only for users having the Manage configuration permission enabled. By enabling this setting, the selected Organizational Unit will not be available for deletion. Therefore, an Organizational Unit that has the Lock for delete setting enabled cannot be deleted. Also, an Organizational Unit that was not explicitly locked for deletion, but has at least one Organizational Unit in its substructure having this setting enabled, the Organizational Unit will also be restricted for deletion operations.
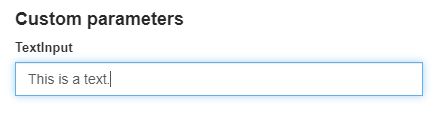
Custom parameters
Important
If no Custom field definitions were specified for Organizational Units, the Custom parameters area will be hidden from the Add / Edit Organizational Unit panel.
As soon as at least one Custom field definition is available, the Custom parameters area allows the user to fill in Organizational Unit's metadata, as described below.
For more details on the Custom field definitions validation rules, please also visit the dedicated article here.
Text metadata - expects textual metadata, with the scope to provide additional information about the user. When setting the textual metadata, the introduced value will be validated against the rules specified at the level of the Text Custom field definition.
Email metadata - expects a valid email address. When setting the email metadata, the introduced value will be validated against the rules specified at the level of the Email Custom field definition.

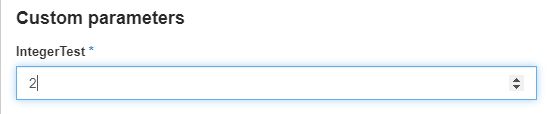
Integer metadata - expects an integer value. When setting the integer metadata, the introduced value will be validated against the rules specified at the level of the Integer Custom field definition.
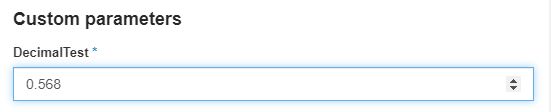
Decimal metadata - expects a decimal value. When setting the decimal metadata, the introduced value will be validated against the rules specified at the level of the Decimal Custom field definition.
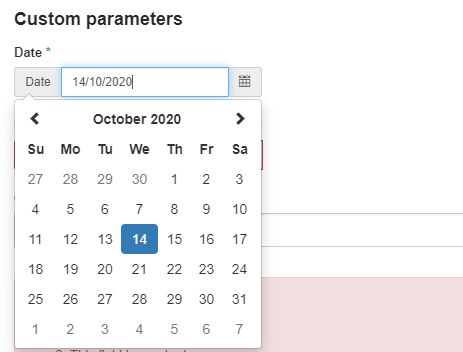
Date metadata - expects a date metadata, that can be selected using the calendar pop-up. When setting the date metadata, the introduced value will be validated against the rules specified at the level of the Date Custom field definition.
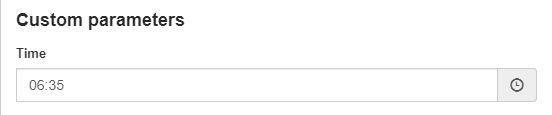
Time metadata - expects a timed metadata, that can be selected using the Clock pop-up. When setting the time metadata, the introduced value will be validated against the rules specified at the level of the Time Custom field definition.
DateTime metadata - expects a date and time metadata, that can be selected using the calendar pop-up. When setting the DateTime metadata, the introduced value will be validated against the rules specified at the level of the DateTime Custom field definition.

Url metadata - expects an URL. When setting the DateTime metadata, the introduced value will be validated against the rules specified at the level of the DateTime Custom field definition.

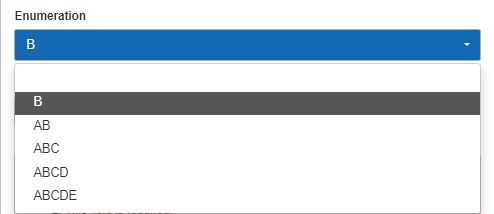
Enumeration metadata - expects the selection of one of the values defined by the Custom field definition. Selection can be done using the drop-down list. When setting the Enumeration metadata, the introduced value will be validated against the rules specified at the level of the Enumeration Custom field definition.
Boolean metadata - expects the selection of one of the Yes / No values. Selection can be done using the toggle button. When setting the Boolean metadata, the introduced value will be validated against the rules specified at the level of the Boolean Custom field definition.

The validation system will notify the user if the provided information is not sufficient for creating the new Organizational Unit.

Example of validation error
The bottom section of the Add Organizational Unit panel provides the options of saving the new Organizational Unit and closing the panel. Upon saving, the new Organizational Unit will be automatically displayed in the Organizational Units panel's list.
Editing an Organizational Unit
While in the detailed view mode of an Organizational Unit the user can decide to update the general information of it, by clicking the Edit toolbar button. The Edit Organizational Unit panel allows the following edit options:
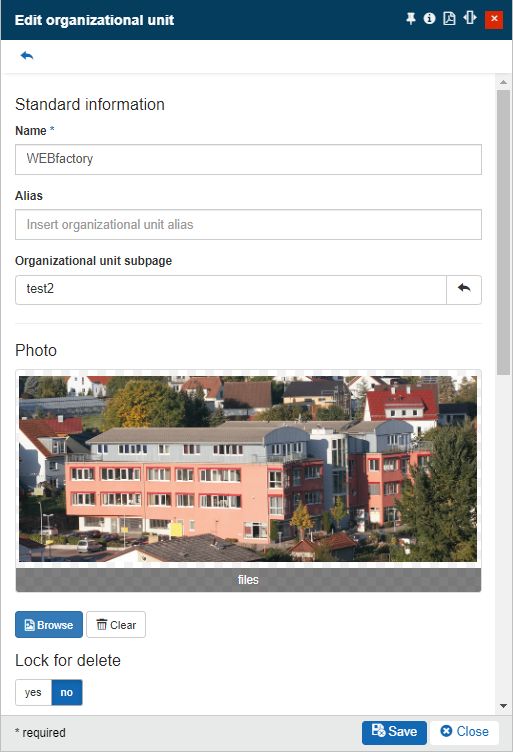
The Edit Organizational Unit panel
Name
Alias
Organizational Unit subpage
Photo
Lock for delete
Custom parameters
Deleting an Organizational Unit
The Organizational Unit detailed view mode provides the user with the possibility to remove the Organizational Unit by clicking the Delete toolbar button.
The Delete button
In the Delete Organizational Unit panel, the user is provided with information about the impact of the deletion on the whole system.
Warning
When deleting an Organizational Unit all its assigned Devices, Signals, Measurements, and Event occurrences will be deleted as well.
To acknowledge the consequences and proceed with the deletion, the user has to type in the designated field, the displayed confirmation code. To proceed with the deletion, the user can press the Delete button, located at the bottom of the panel. Deletion is immediately visible, in the Organizational Units panel.
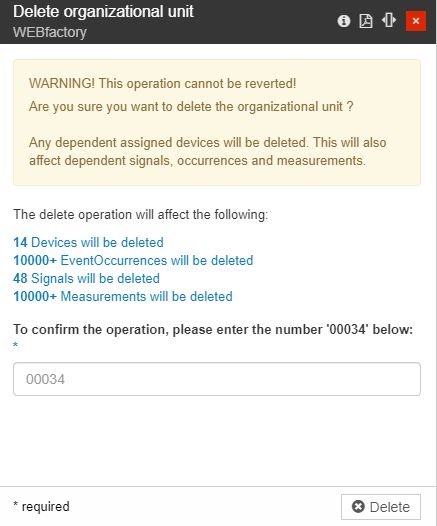
The Delete Organizational Unit panel
Note
In case the Organizational Unit selected in Delete mode has been previously locked for deletion, or has in its structure at least one Organizational Unit locked for deletion, the Delete action will be restricted.

Managing Application Mappings
The Manage Application button displayed in the Organizational Unit's details panel allows users, having the Manage Organizational Units and Manage organizational unit applications permissions enabled, to add and update an Organizational Unit's i4designer Application mapping.
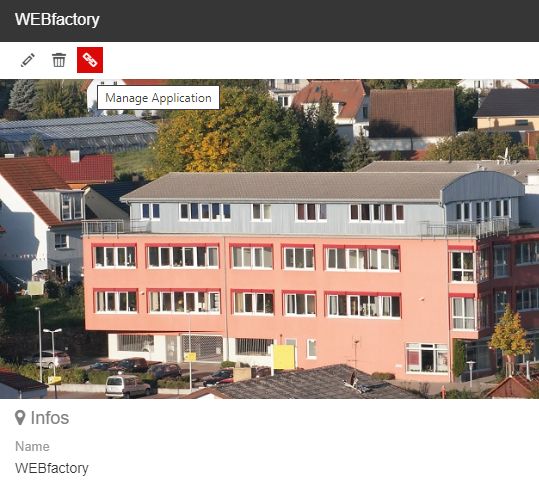
The Manage application button
Tip
For more details about the i4designer Application mapping feature please also refer to the dedicated articles here.
The Manage Application Mappings panel of an Organizational Unit features the following properties:
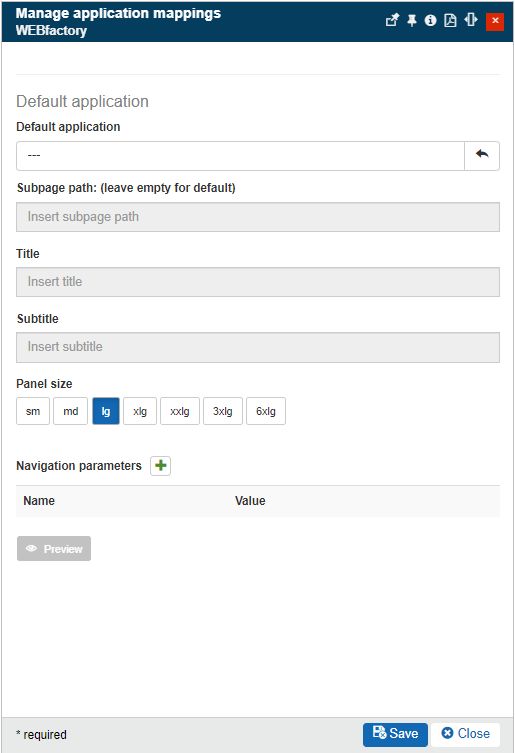
The Manage Application Mappings panel
Default Application - the application added in this section will be displayed in the Organizational Unit's details panel.
Default Application - the Application mapping used by the current Organizational Unit, that will be displayed in the Organizational Unit's details panel.
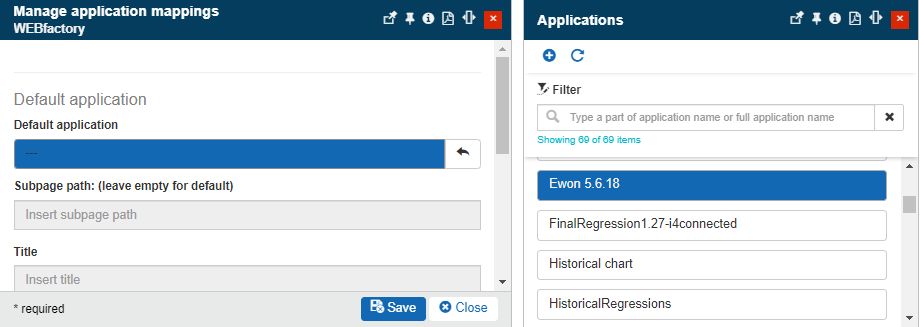
The list of Application mappings
Warning
Please note that the Application mappings list will be available when accessed from the Manage Application Mappings only for users having at least the View applications permission enabled. The list will display only Applications owned by or assigned to the logged-in user.
Subpage path - an optional sub-page of the i4designer project. The sub-page path is given by the project's sub-page exact name.
Note
By setting a sub-page path the page will be by default displayed by the Organizational Unit application. If the field is left empty, the project's default page will be displayed.
Title - the title displayed by the panel, when opening the Application in view or preview mode. If no title is filled in this field, the Application panel will display the name of the application mapping.
Subtitle - the sub-title displayed by the panel, when opening the Application in view or preview mode. If no sub-title is filled in the field, the Application panel will display no sub-title.
Panel size - the size of the panel, when opening the Application in view or preview mode. By default, the panel size is set to lg (large) but the user can decide to apply the following sizes: sm (small), md (medium), lg (large), xlg (extra large), xxlg (extra extra large), 3xlg (3 times extra large), 6xlg (6 times extra-large).

The Panel size selector
Navigation parameters - an optional set of parameters based on key-value mappings.
Navigation parameters can be added by clicking the Add parameter button
 . The user needs to manually input the Parameter Name and Value. Inserted parameters can be removed by clicking the Delete button
  .
.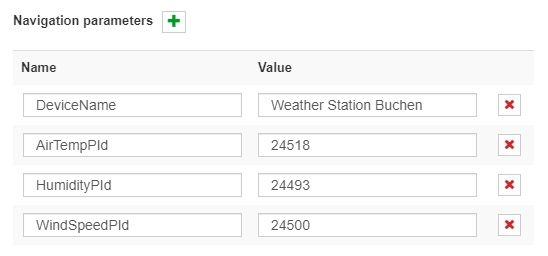
The Navigation parameters
Tip
For a step-based tutorial describing the usage of Navigation parameters, please follow the dedicated article, here.
Besides the custom navigation parameters, the i4connected platform is also injecting a set of standard parameters. The standard parameters are capable to automatically resolve parsed information.
This table lists the parameters that can be used by the application designer and which will be automatically available to the applications targeting the i4connected platform:
I4C_SITE_ID - Contains the ID of the site to which the application is attached. Injected via query parameters.
Note
Available if the application is attached to:
A site
An area
A device connected to a site
I4C_SITE_NAME - Resolved at startup, it contains the name of the site (untranslated).
Note
Available if the application is attached to:
A site
An area
A device connected to a site
I4C_AREA_ID - Contains the ID of the area to which the application is attached. Injected via query parameters.
Note
Available if the application is attached to:
An area
A device connected to an area
I4C_AREA_NAME - Resolved at startup, it contains the name of the area (untranslated).
Note
Available if the application is attached to:
An area
A device connected to an area
I4C_ORG_ID - Contains the ID of the organizational unit to which the application is attached. Injected via query parameters.
Note
Available if the application is attached to:
An organizational unit
A device connected to an organizational unit
I4C_ORG_NAME - Resolved at startup, it contains the name of the organizational unit (untranslated).
Note
Available if the application is attached to:
An organizational unit
A device connected to an organizational unit
I4C_DEVICE_ID - Contains the ID of the device to which the application is attached. Injected via query parameters.
Note
Available if the application is attached to:
A device
I4C_DEVICE_NAME - Resolved at startup, it contains the name of the device.
Note
Available if the application is attached to:
A device
I4C_DEVICE_DESCRIPTION - Resolved at startup, it contains the description of the device.
Note
Available if the application is attached to:
A device
I4C_DEVICE_ALIAS - Resolved at startup, it contains the alias of the device.
Note
Available if the application is attached to:
A device
Note
Empty Application mappings will not be visible in the detailed view mode of an Organizational Unit.
While configuring the Organizational Unit Default Application, the user can check the Application's display in preview mode. By clicking the bottom Preview button a separate panel is opened displaying the drill-down Application as it will be displayed in view mode.
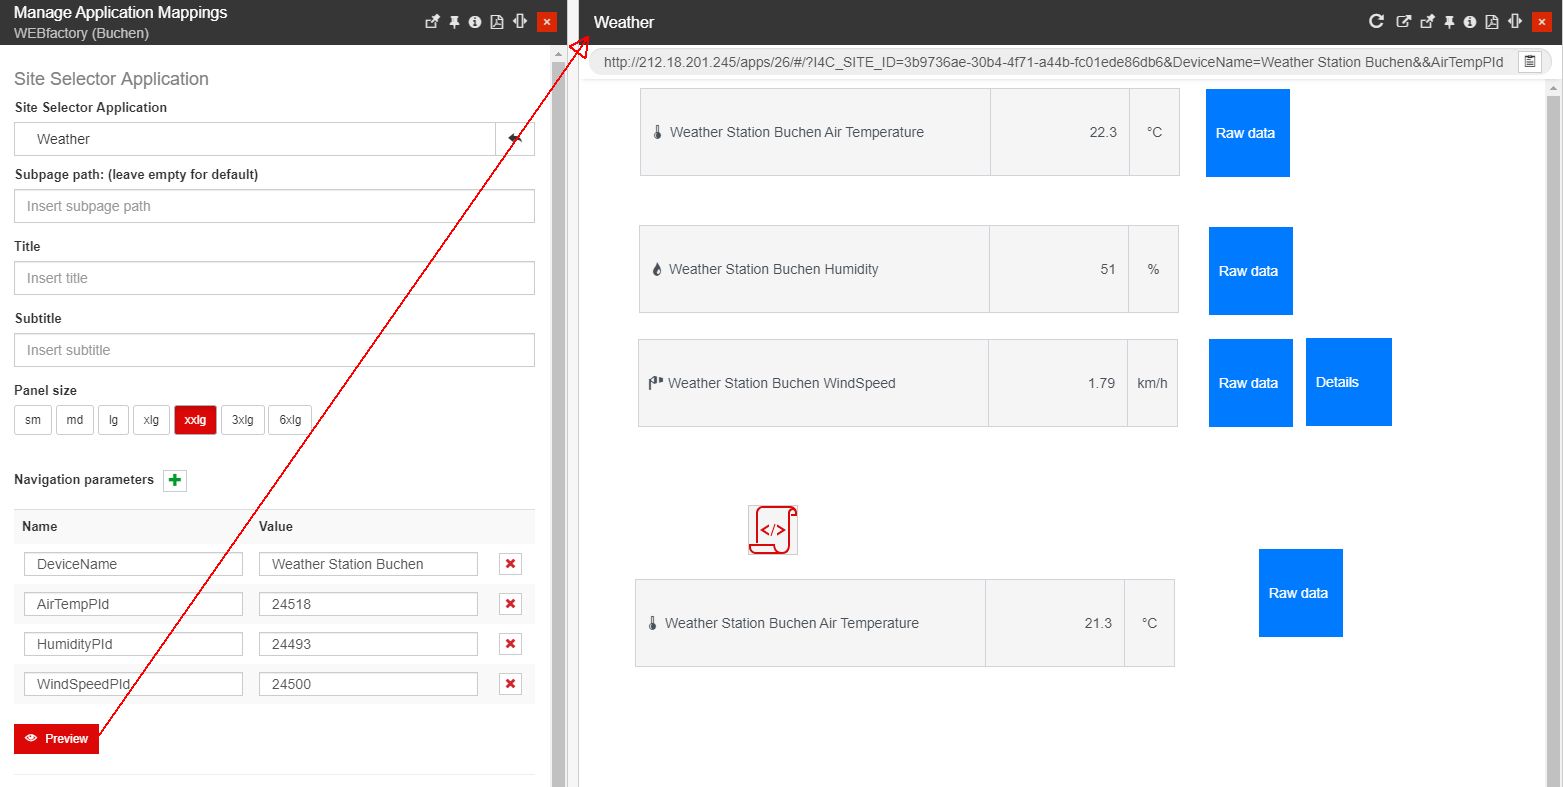
Example of Application opened in preview mode
While in preview mode, the user can assess the Application before saving and applying the settings.
Further on, the URL of the Application is displayed at the top of the preview panel allowing the user to copy it to the clipboard. The copied URL can be afterward used to pin tiles to i4connected pages.
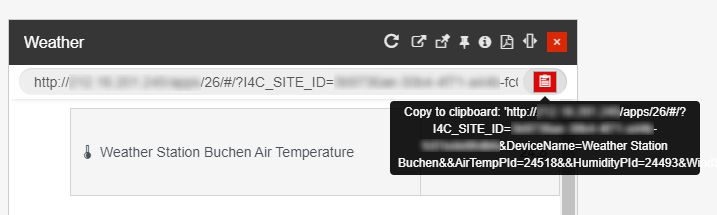
The Copy URL to clipboard option
Tip
For more details about the Pin tiles option, please also visit the dedicated article.
Importing Ewon configuration
The toolbar of the Organizational Unit's details panel allows users having the Manage Organizational Units and Manage configuration permissions enabled, to Import Ewon configuration.
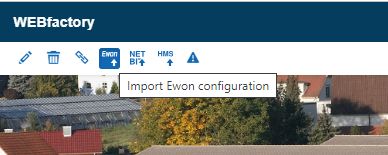
The Import Ewon configuration button
The Import Ewon configuration panel features the following parameters:
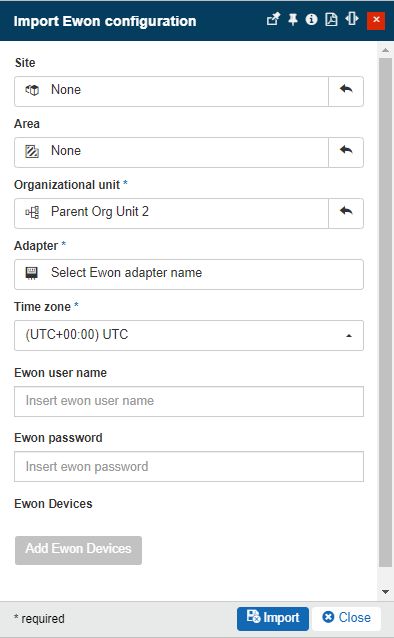
The Import Ewon configuration panel
Site - the Site where the devices will be assigned. This field is optional.
Area - the Area where the devices will be assigned. This field is optional.
Organizational Unit - the Organizational Unit where the devices will be assigned. This field is by default filled in with the currently opened Organizational Unit.
Adapter - the Adapter where the devices will be chosen from.
Time zone - the time zone that will be assigned to the devices. After the import, the time zone setting can be modified in the Device configuration panel.
Ewon username - the username of the device.
Ewon password - the password of the device.
Add Ewon Devices button - when clicked, the list of Ewon devices available for import is opened.
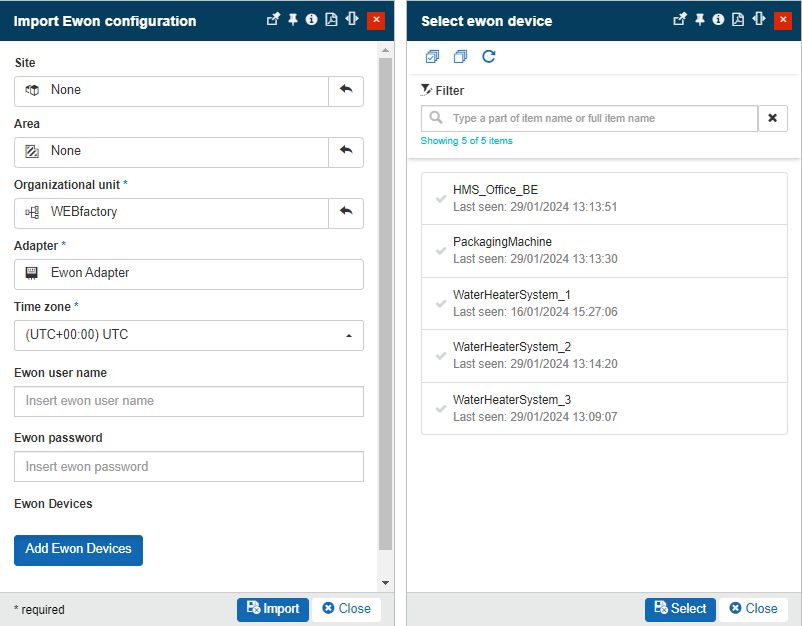
The Select ewon device panel
Warning
Please note that when importing multiple devices and filling in the Ewon username and password, only those devices that have matching credentials will allow signal writing.
By clicking the Import button the selected Devices and all their tags (signals) will be configured for the given Organizational Unit and the server will be notified that it can start collecting data.
Warning
The Ewon configuration import works like a move function. Hence, importing an Ewon device available for one hierarchical entity to another, the first entity will no longer use that device.
Tip
The Import Ewon configuration operation attempts to match Ewon Signal names with i4connected Signal type names and automatically apply the matching Signal types to the Signals.
Importing Netbiter configuration
The toolbar of the Organizational Unit's details panel allows users having the Manage Org Units and Manage configuration permissions enabled, to Import Netbiter configuration.
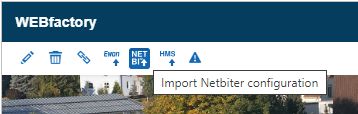
The Import Netbiter configuration button
The Import Netbiter configuration panel features the following parameters:
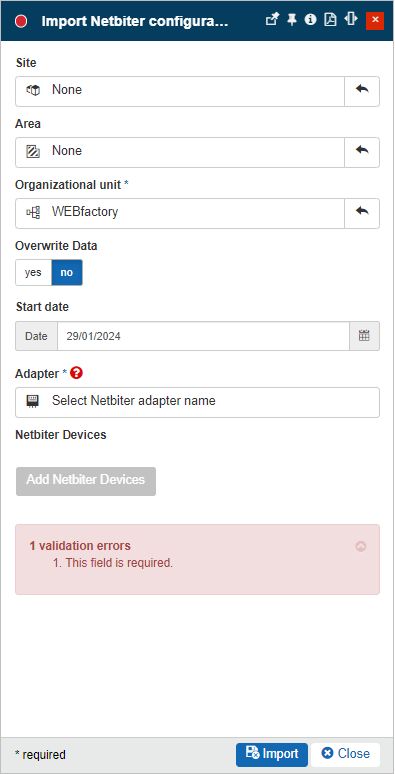
The Import Netbiter configuration panel
Site - the Site where the devices will be assigned. This field is optional.
Area - the Area where the devices will be assigned. This field is optional.
Organizational Unit - the Organizational Unit where the devices will be assigned. This field will be by default filled in with the name of the currently opened Organizational Unit.
Overwrite Data - Selecting the Overwrite option the previous data will be replaced with the new data.
Start Date - the Start date used by the Device to synchronize historical (past) values.
Adapter selector- when clicked, the list of Netbiter adapters is opened, allowing the user to chose and apply the desired one.
Add Netbiter Devices button - when clicked, the list of Netbiter devices is opened, allowing the user to chose and apply the desired one. The list of Netbiter devices shows all the Netbiter Argos projects available for the selected adapter.
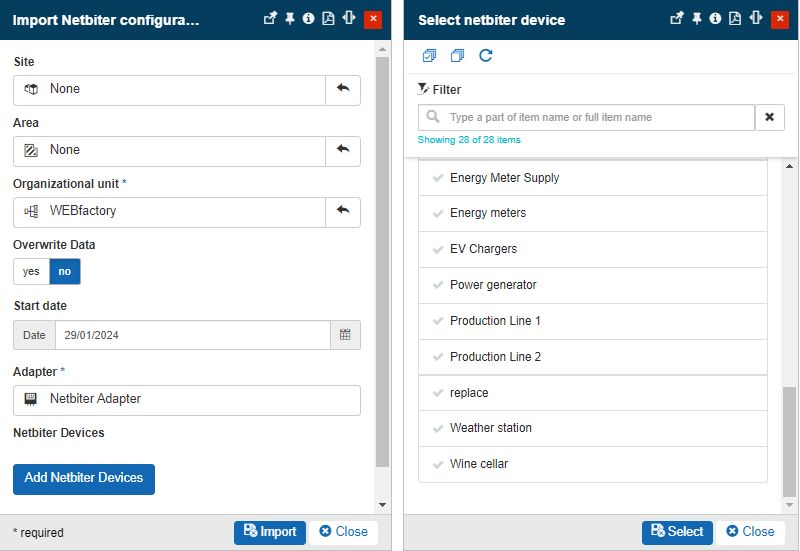
The Select Netbiter device panel
By clicking the Import button the selected Devices and all their Signals will be configured for the given Organizational Unit and the server will be notified that it can start collecting data.
Warning
The Netbiter configuration import works like a move function. Hence, importing a Netbiter device available for one hierarchical entity to another, the first entity will no longer use that device.
Note
Historical measurements will not be available when a Netbiter Adapter using Customer Data Channel communication protocol is involved in the Netbiter configurations import operation.
Tip
The Import Netbiter configuration operation attempts to match Netbiter Signal names with i4connected Signal type names and automatically apply the matching Signal types to the Signals.
Importing GridVis configuration
The toolbar of the Organizational Unit's details panel allows users with the Manage Organizational Units and Manage configuration permissions enabled, to Import GridVis configuration.
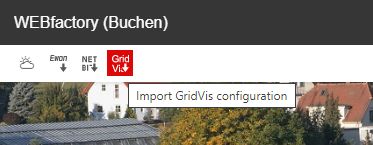
Import GridVis configuration button
The Import GridVis configuration panel features the following parameters:
Address - specifies the URL of the client GridVis-WEB application, where the GridVis projects, devices, and their measurements are installed. This setting is mandatory.
User name - specifies the GridVis-WEB account username.
Password - specifies the GridVis-WEB account password.
Poll interval (ms) - the time interval, in milliseconds, when the synchronization will be performed (the default is 90000 milliseconds – 15 minutes). This setting is mandatory.
Import months - specifies the number of months, for historical data imports. This setting is mandatory.
Based on the value selected in this field, the Import will pick up the device signal values (measurements) for the past months. By default, the value is set to 12 months, but it can be updated as desired.
GridVis project - opens the Select GridVis project panel, where all the accessible GridVis projects are listed. This setting is mandatory.
Tip
The Select GridVis project panel is populated with data, only if the previously added address pointing towards the GridVis-WEB account is active and available, for the currently logged-in user.
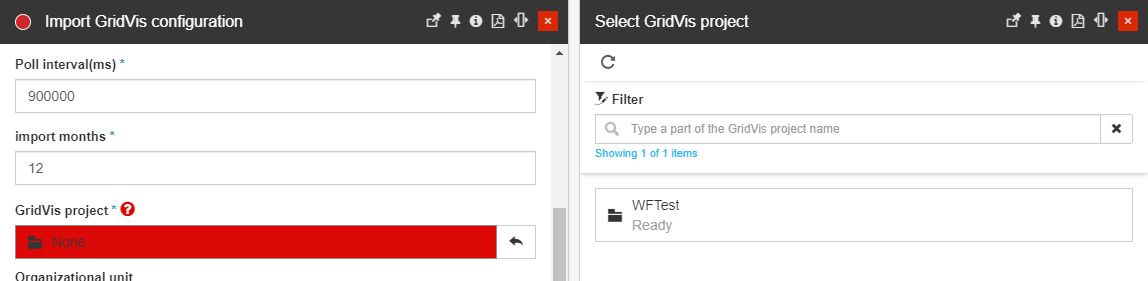
The Select GridVis project panel
Organizational Unit - the Organizational Unit where the device will be assigned after import. This field is optional.
GridVis values - opens the Add GridVis import values panel, where the user can make the following selections:
Counter - sets the device to type Manual Conter if the toggle button is set to Yes. By default, the toggle button is set to No.
Signal type - set the type of the Signals created by means of import. The user can select the Signal type by clicking on the respective selector and choosing the desired type.

The Signal types panel
GridVis signal value type - expects selection of the signal value type. GridVis Signals can provide 3 value types:
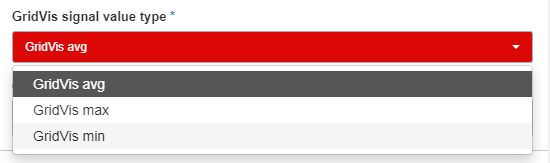
The GridVis Signal value type selector
Avg (Average) - given by a sum of all measurements divided by the number of Signal values.
Max (Maximum) - given by the highest measurements.
Min (Minimum) - given by the lowest measurements.
GridVis values - expects selection of GridVis value types, from the list of GridVis measurements (signals).
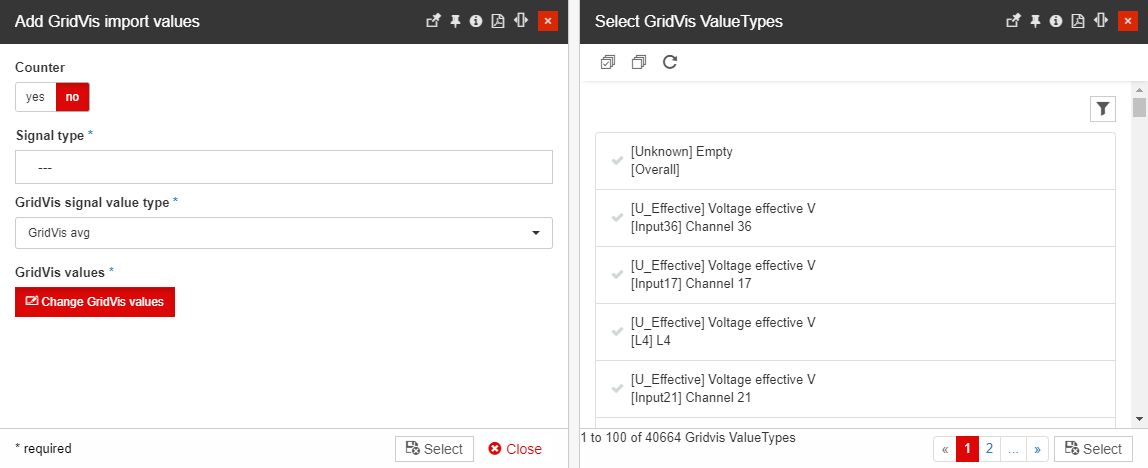
The Select GridVis Value Types
The Select GridVis Value Types panel lists all the GridVis measurements available for the previously selected project. As the list can be very large, the user is provided with a filtering mechanism consisting of the following parameters:
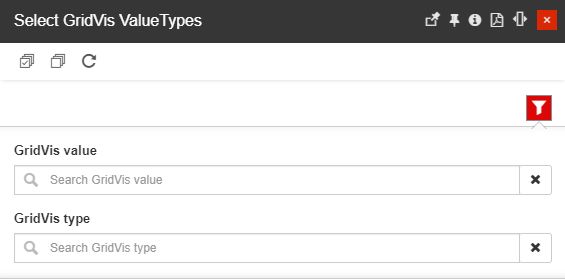
The GridVis Value types filters
GridVis value - allows the user to search directly by the signal value.
GridVis type - allows the user to search directly by the signal type.
After setting all the required parameters, the user can click the Import button of the Import GridVis configuration panel.
The import is performed asynchronously in the background. To confirm the import operation, a toast message is displayed at the bottom of your browser page.

Import confirmation toast message
Further on, the System Operations area is updated to display a confirmation message that the GridVis Adapter import is running in the background.

GridVis adapter import notification
Consequent to a successful GridVis configuration import, a new device is created along with all the imported signals and their values.
Warning
If the GridVis Adapter already exists when performing the GridVis configuration import, the import will update the following data:
Adapter configuration - Adapter Name, User name and Password, Poll interval, and Import months.
Signals configuration - Signal value type
Publishing manual events
Users having the Publish manual events for organizational units permission enabled can manually trigger an alarm in the context of the currently selected Organizational Unit, by clicking the Publish manual event toolbar button. As soon as the Publish manual event button is clicked the Select Manual Event panel is opened.
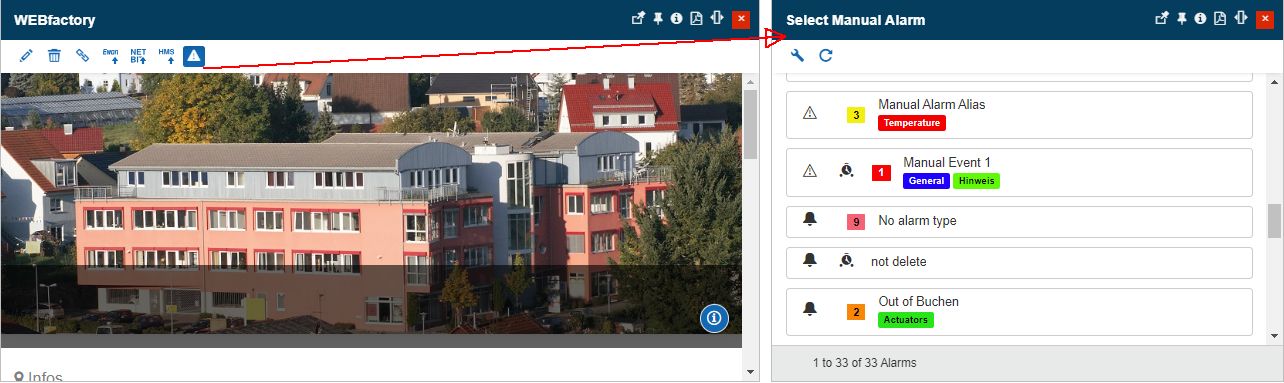
Publish Manual Events from Organizational Unit context
The Select Manual Event panel lists all the Manual events available for triggering an alarm. The list display is conditioned by the user's permissions, hence only users having the View Events permission enabled will be allowed to proceed with this action.
After selecting the desired Manual Event, the Publish Manual Alarm panel is opened. In this view, the user is required to type in a comment that will accompany the event occurrence. Further on, the Alarm priority selector allows the user to apply the system default priority (which is the event original priority), or choose a different priority from the Priorities list.
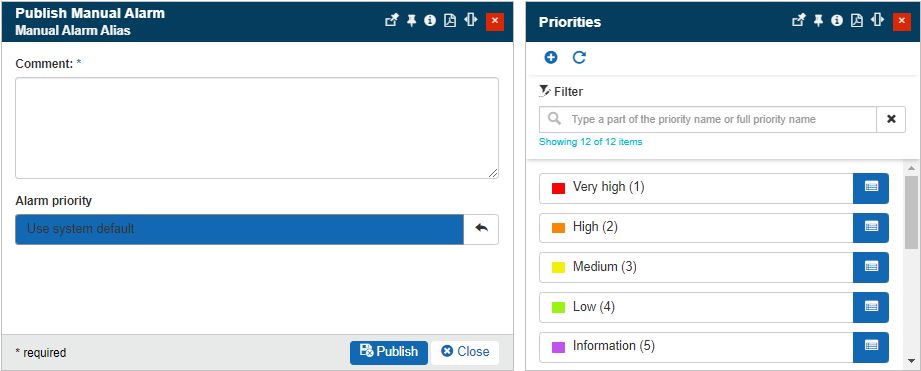
The Publish Manual Alarm panel
Tip
For more details about the management of Manual events please visit the dedicated article here.