The Netbiter Adapter
Check out this article and learn everything that you need to know about the Netbiter Adapter and how to configure it in i4connected.
Netbiter is a communication gateway enabling the user to remotely manage online installations. At the level of i4connected, Netbiter data can be remotely monitored and analyzed. The i4connected Netbiter users can choose between two communication protocols, for reading the Netbiter signal updates and alarms:
Argos - The Netbiter solution relies on Argos™, a secure IoT management platform, and Netbiter Edge connectivity gateways that can be connected to various IoT solutions, such as Ewon by HMS Networks's i4connected application.
The Netbiter adapter enables the Argos protocol and reads the historical values for the configured Netbiter devices (systems) and signals (parameters) which are then pushed as measurements into the i4connected system.
Customer Data Channel - The Netbiter signal updates and alarms can be passed to the Customer Data Channel application, which is external customer service, having its own set of security settings.
Prerequisites
To be able to use the Netbiter Adapters a set of prerequisites needs to be met, depending on the used communication protocol:
Argos
An active account should be available on the Argos platform
The Netbiter Argos Access Key should be set at the level of the Netbiter Adapter, in i4connected.
Tip
For more details about the Argos platform, please also check the articles here.
Customer Data Channel
An active account should be available on the Netbiter Argos platform;
An active account should be available on the Customer Data Channel application;
The Customer Data Channel application should be capable to communicate and extract data from Netbiter Argos;
Customer Data Channel account information should be set at the level of the Netbiter Adapter, in i4connected.
Netbiter adapter connection
While configuring the Netbiter Device the user is required to add a set of Netbiter specific settings.
Note
Only users with the Manage adapters permission enabled can add and edit Adapters.
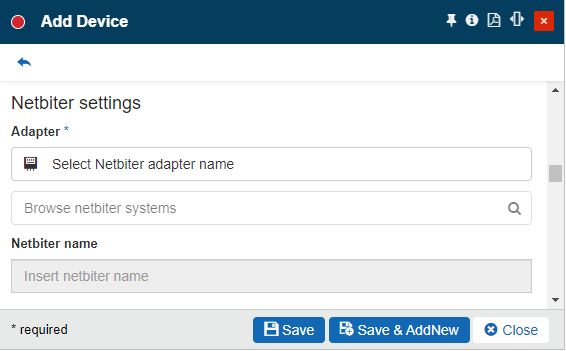
The Netbiter device settings
By clicking the Select Netbiter adapter name field the Select Netbiter server panel is opened. In this view, all the already configured Netbiter adapters are listed allowing the user to choose the one to be used. Additionally, the user can click the Add toolbar button to start configuring a new Netbiter server.
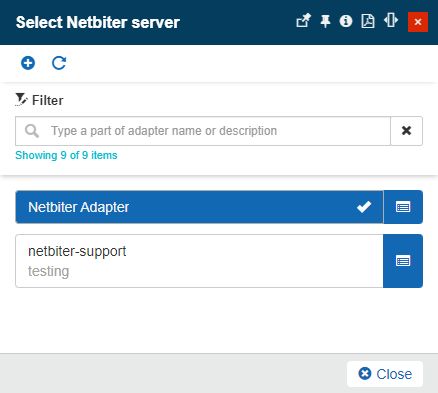
The Select Netbiter server panel
The Add Netbiter server panel features the following settings:
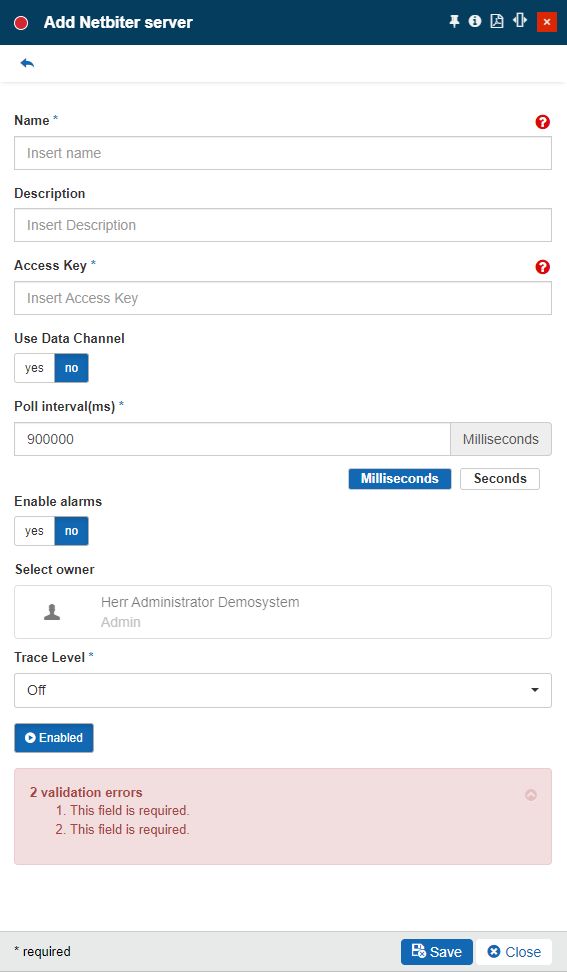
The Netbiter adapter server
Name - specifies the name of the Netbiter server that will be displayed in the Netbiter Device properties, as well.
Description - the user-friendly description of the Netbiter adapter.
Access Key - specifies the access key available on the Argos account. The unique access key contains 32 alphanumeric characters, that will be valid for a particular account, project, or system, depending on the Argos security configuration.
Important
As soon as the Access Key of an active Argos account has been added, the user will have access to all the configured Netbiter data.
Poll interval(ms) - the time interval, in milliseconds, when the synchronization will be performed (the default is 90000 milliseconds– 15 minutes).
Use Data Channel - enables communication through the Customer Data Channel application. Regardless if the Use Data Channel option is enabled or not, the user is still required to fill in the Argos Access Key and apply for a Netbiter project.
As soon as this toggle button is set to Yes, a set of sub-settings is displayed and requires further configuration:
Data Channel Url - the Url pointing to the Customer data Channel Application
Data Channel UserName - the UserName of the Customer Data Channel application
Data Channel Password - the Password used to log into the Customer Data Channel application
Data Channel LogQueue - the Log Queue of the Customer Data Channel application
Data Channel AlarmQueue - the Alarm Queue of the Customer Data Channel application
Data Channel GeoLocationQueue - the Geo Location Queue of the Customer Data Channel application
Warning
As soon as the Use Data Channel option is enabled, the Poll Interval setting and the Alarm poll interval setting will be invalidated, as the reading interval of the Netbiter Argos signals will be considered in this case.
Enable alarms - when set to true, the user can customize the alarm priority associated with the alarm type. When set to false, the following alarm settings are not required anymore.
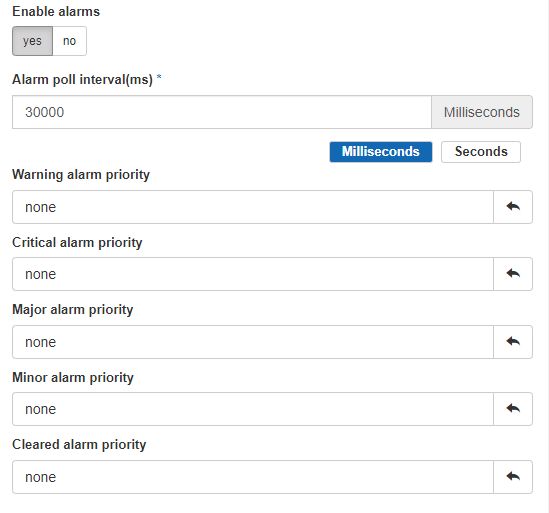
Alarm settings
Alarm poll interval (ms) -The alarm time interval (in milliseconds). By default, the value is set to 30000 ms.
Warning alarm priority - the event priority used when creating or updating a warning event occurrence in the i4connected system for a HIGH or LOW Netbiter alarm. The event priority can be selected from the Priorities panel.
Critical alarm priority - the event priority used when creating or updating a critical event occurrence in the i4connected system for a HIGH or LOW Netbiter alarm. The event priority can be selected from the Priorities panel.
Major alarm priority - the event priority used when creating or updating a major event occurrence in the i4connected system for a HIGH or LOW Netbiter alarm. The event priority can be selected from the Priorities panel.
Minor alarm priority - the event priority used when creating or updating a minor event occurrence in the i4connected system for a HIGH or LOW Netbiter alarm. The event priority can be selected from the Priorities panel.
Cleared alarm priority - the event priority used when creating or updating a cleared event occurrence in the i4connected system for a HIGH or LOW Netbiter alarm. The event priority can be selected from the Priorities panel.
Select owner - the name of the Adapter owner.

Adapter owner selector
By clicking on the owner selector, the Select Users panel is opened allowing the user to choose the Adapter's owner.
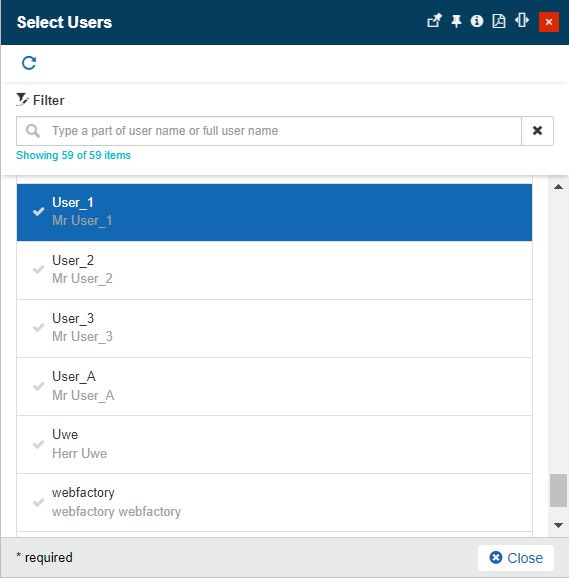
Select Users panel
Important
When adding a new Adapter the creator user is by default set as Adapter's owner. However, the owner can be changed after the Adapter was saved, by all users having at least the Manage adapters permission enabled.
Trace level - trace levels determine which events the trace provider generates. The user can select the desired trace level from a drop-down list where the following predefined value is available: Trace, Debug, Info, Warn, Error, Fatal, and Off.
Enabled / Disabled toggle button - If the setting is turned on, the Adapter is enabled and functional.
Before setting up the adapter for the Netbiter Device, the user is required to apply the Netbiter system, by clicking the Browse netbiter systems selector.
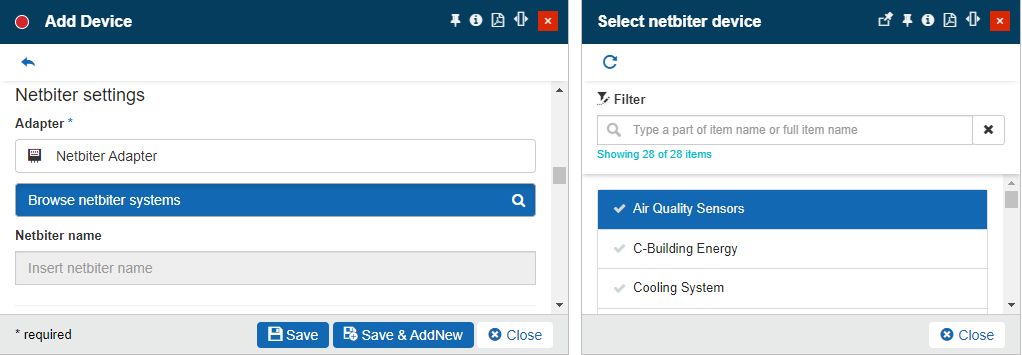
The Select Netbiter device panel
After applying both the Netbiter adapter and system(s) the user can save the new Device.
Tip
For more details about the Netbiter signal settings please also visit the dedicated article here.