Pinning panels to tiles
Check out this article and learn more details about the Pin panels to tiles function, available for users having the appropriate permissions set.
The Pin panel to tile function allows the users the possibility to add new custom tiles that open the selected panel. This function can be accessed by clicking the Pin panel to tile button available in the toolbar of each panel header.
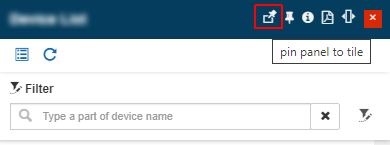
The Pin panel to tile button
Based on their permissions, users can add either personal tiles or shared tiles.
Adding personal tile via Pin panel to tile function
Check out this article and learn more details about the Pin panels to tiles function, available for users having the Manage personal tiles permission enabled.
Having the Manage personal tiles permission available enables the Pin panel to tile button of all system panels. As the Add tile option is accessed from a specific panel, after performing the necessary settings and saving them, the tile will open the selected panel.
When clicking the Pin panel to tile button, a new panel is opened allowing the user to customize the new tile, as follows:
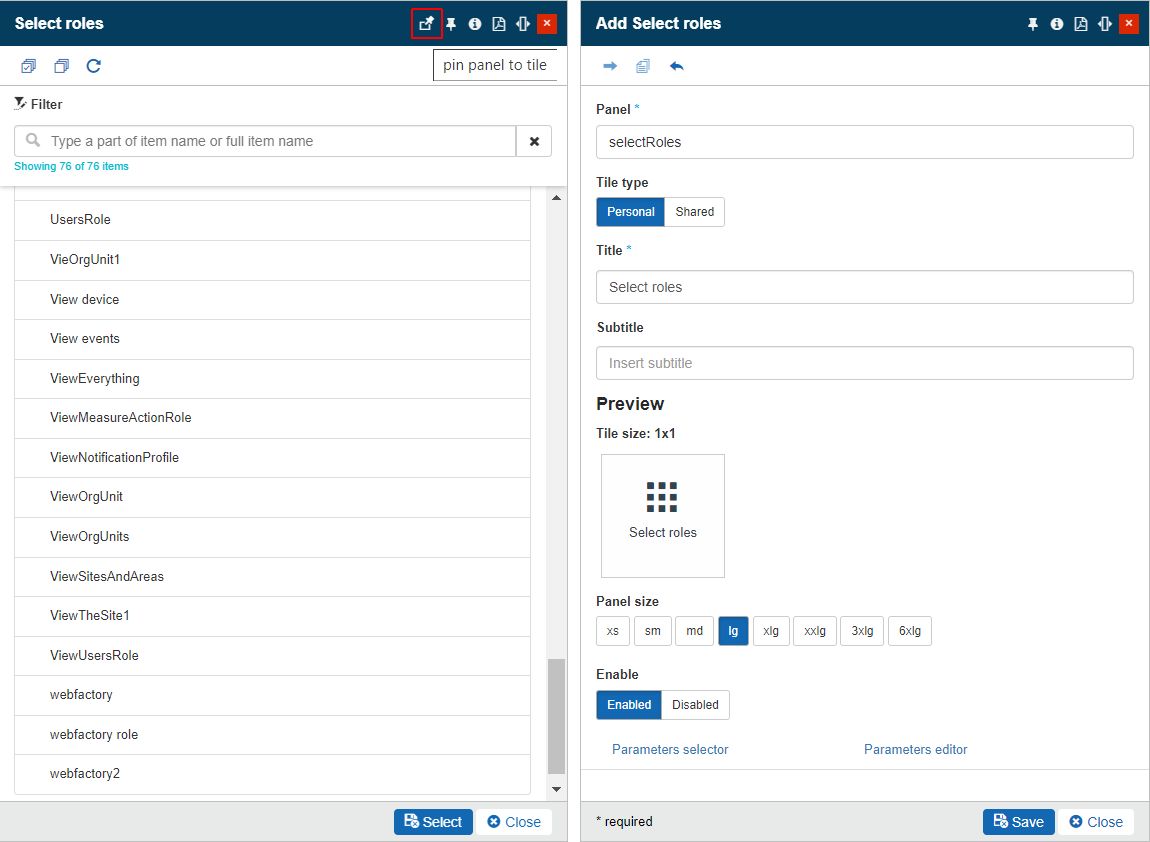
Panel - the panel parameter will be prefilled with the panel used by the currently selected Tile.
Tile type - sets the type of the tile to Personal, allowing the user to change it to Shared as long as the user has the Manage shared tiles permission also available.
Note
Tiles of type Personal are visible only to the currently logged-in user. On the other hand, the Shared Tiles will be visible to all users, that have the assigned Tile roles.
Title - sets the name of the tile, displayed by the tile and the associated panel.
Subtitle - sets the subtitle of the tile, displayed by the tile and the associated panel.
Tile size - Allows the user to manually update the size of the respective Tile. The default Tile size is 1x1, which is also the minimum value, but it can be adjusted to higher values such as 1x2, 2x1, 2x2, 3x1, and the maximum of 3x2.
Panel size - Allows the user to select the size of the current panel. Users can select from the available options, starting with the smallest value of xs (extra small) and ending with the highest 6xlg (6 times large).
Enable status - defines if the Tile is active (enabled) or inactive (disabled). A disabled Tile is grayed out in the Tiles grid.
Parameters selector section - sets further parameters to the new tile and its associated panel. The available parameter selectors, depend on the selected panel, each having its particularities.
Parameters editor section - sets further parameters to the new tile and its associated panel. The parameter editor reflects the JSON structure, generated based on parameter selections, organized in the Parameter selector area. The user can also manually edit the JSON structure.
To preserve the changes at the level of Tile properties and panel parameters, the user has to click the Save button. To exit the Add tile to panel view, without saving the changes, the user can click the Close button.
Adding shared tile via Pin panel to tile function
Check out this article and learn more details about the Pin panels to tiles function, available for users having the Manage shared tiles permission enabled.
Having the Manage shared tiles permission available, enables the Pin panel to tile button of all system panels available in the Shared tiles section. As the Add tile option is accessed from a specific panel, after performing the necessary settings and saving them, the tile will open the selected panel.
When clicking the Pin panel to tile button, a new panel is opened allowing the user to customize the new tile, as follows:
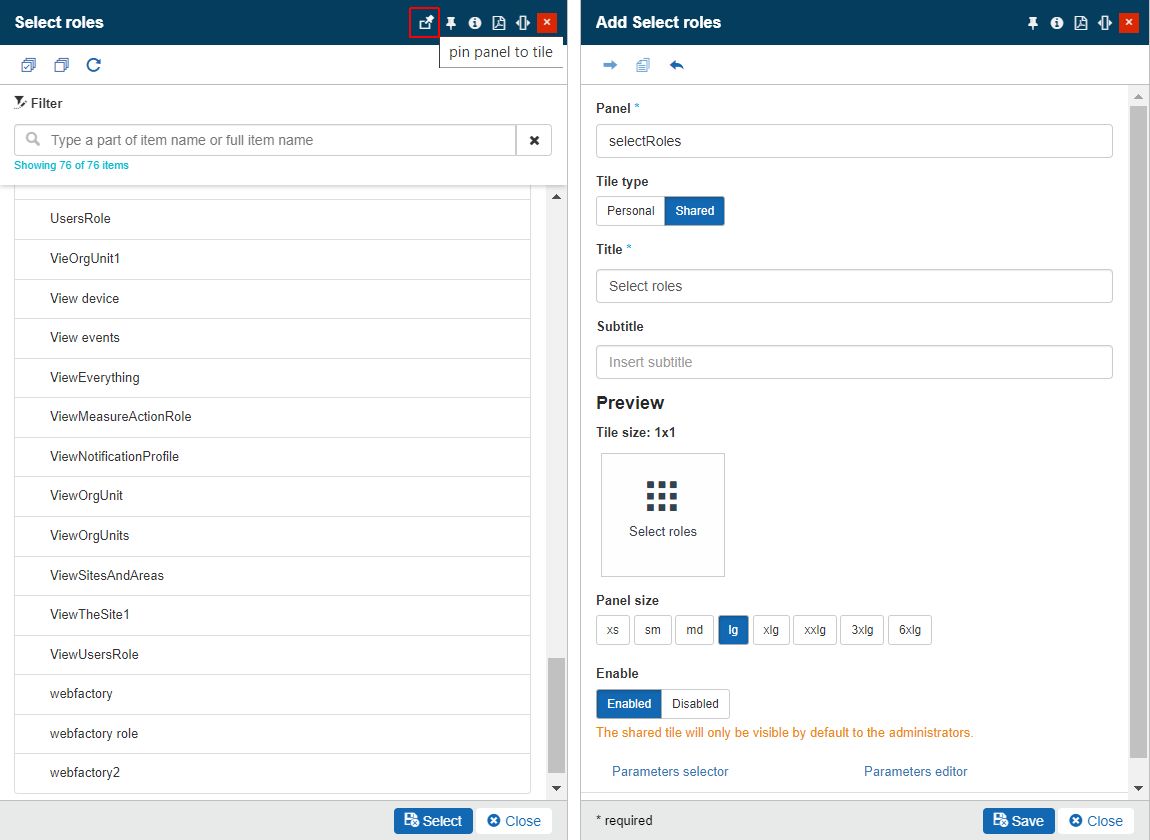
Panel - the panel parameter will be prefilled with the panel used by the currently selected Tile.
Tile type - sets the type of the tile to Shared, allowing the user to change it to Personal as long as the user has the Manage personal tiles permission also available.
Note
Tiles of type Personal are visible only to the currently logged-in user. On the other hand, the Shared Tiles will be visible to all users, that have the assigned Tile roles.
Title - sets the name of the tile, displayed by the tile and the associated panel.
Subtitle - sets the subtitle of the tile, displayed by the tile and the associated panel.
Tile size - Allows the user to manually update the size of the respective Tile. The default Tile size is 1x1, which is also the minimum value, but it can be adjusted to higher values such as 1x2, 2x1, 2x2, 3x1, and the maximum of 3x2.
Panel size - Allows the user to select the size of the current panel. Users can select from the available options, starting with the smallest value of xs (extra small) and ending with the highest 6xlg (6 times large).
Enable status - defines if the Tile is active (enabled) or inactive (disabled). A disabled Tile is grayed out in the Tiles grid.
Parameters selector section - sets further parameters to the new tile and its associated panel. The available parameter selectors, depend on the selected panel, each having its particularities.
Parameters editor section - sets further parameters to the new tile and its associated panel. The parameter editor reflects the JSON structure, generated based on parameter selections, organized in the Parameter selector area. The user can also manually edit the JSON structure.
To preserve the changes at the level of Tile properties and panel parameters, the user has to click the Save button. To exit the Add tile to panel view, without saving the changes, the user can click the Close button.