Historical Alarms
The list of Historical Alarms covers all the closed and acknowledged Event occurrences providing the user with an advanced filtering mechanism.
This article describes the Historical Alarms concept and functionality from the i4connected portal.
The Historical Alarms functionality of the i4connected portal covers the following historical alarms:
Acknowledged alarms
Closed alarms
Audit events
Login / Logout actions
Change password actions
Add / Edit / Delete user actions
Change user password actions
Change role assignments actions
Any CRUD operation performed in the system
Important
As opposed to the online Alarming panel, the Historical Alarms panel is not updated live and requires a refresh in order to update the list of historical alarms.
The Historical Alarms are displayed in a dedicated panel accessible by clicking the Historical Alarms tile.
The list of Historical Alarms is guarded by the View event occurrences permission. Further on, depending on the roles and permissions, the list of Historical Alarms will display different results, as follows:
Permission | Assignment level | Result |
|---|---|---|
No permission | - | The user can open the Historical Alarms panel to view his/her owned historical alarms and audit events, assuming that the user is allowed to see the Historical Alarms tile. Without additional rights to manage occurrences, no further actions will be allowed. |
View events occurrences | Global | The View events occurrences permission, assigned on a global level, grants the user with the possibility to view all the alarms having as a source an entity with which the user has a relationship. Additionally, the user can only see Events of other users if an equal or inferior relationship between the users exists. NoteIf the Source of the Event is the Server, the user is required to have the View server events permission enabled, as well. Without additional rights to manage occurrences, no further actions will be allowed. |
Hierarchical | The View events occurrences permission, assigned on a hierarchical level, grants the user with the possibility to view all the alarms having as a source an entity in the context of which this permission was explicitly assigned. NoteIf the Source of the Event is the Server, the user is required to have the View server events permission enabled, as well. Additionally, the user can only see Events of other users if an equal or inferior relationship between the users exists, or if the currently logged-in user interacted with that Event, at some point in time, by acknowledging it, closing it, commenting on it, etc. Without additional rights to manage occurrences, no further actions will be allowed. | |
View audit log | Global | Without the View audit log permission, the currently logged-in user can only see Audit events involving his/her own user. By enabling the View audit log permission, on a global level, the user will be allowed to view audit events related to all the portal users. |
The Historical alarms filtering options
The entity filtering system is shared with other panels inside the i4connected portal, and can be accessed using the top-right filter buttons.

The Historical Alarms filtering options
The user can filter the list of Historical alarms as follows:
by means of Object filters

The Object filters panel allows the user to narrow down the results displayed by the Historical Alarms list, to only show alarms having as a source one or multiple selected entities, such as Sites, Areas, Organizational Units, and Devices.
Tip
For more details regarding the usage of the Object Filters panel please also visit the article here.
by means of Alarms filters
The Alarms filter panel allows the user to narrow down the results displayed by the Historical Alarms list, to only show alarms originating from one or multiple Event definitions.
The Advanced filter button allows the user to apply additional filters to the Event definitions list, by filtering by Event types and Event groups.

by means of quick filters

The Historical Alarms quick filters
Search filter - allows the user to filter the open events using a custom text. The panel will display only the events for which the imputed text matches any textual information of the alarm (Event, Metadata, Owner, Source).

Owner filter - allows the user to filter the list of historical alarms by their owner. The user can select one of the three available options:

All - displays all the events, regardless of their owner.
Assigned to me - displays all the events owned by the currently logged-in user.
Not Assigned - displays all the events with no owner assigned.
Audit filter - allows the user to filter the list of historical alarms on basis of audit events criteria. The user can select one of the three available options:

All - all events will be displayed, regardless if they are of type audit or not.
Audits - only the events of type audit will be displayed.
No audits - all the events will be displayed, except the events of type audit.
Tip
For more details about Audit events, please also visit the dedicated article here.
Acknowledgment filter - allows the user to filter the events based on their acknowledgment status. The user can select one of the three available options:

All - displays all the events, regardless of their acknowledgment status.
Acknowledged - displays the acknowledged events.
Acknowledged by Me - displays the events acknowledged by the currently logged-in user.
Not Ack - displays the events with "not acknowledged" status.
Status filter - allows the user to filter the events based on their status. The options are:

All - displays all the events, regardless of their status.
Closed - displays all the closed events.
Closed by Me - display all the events closed by the currently logged-in user.
Priority filter - allows the user to filter the events based on their priority. In this view, all the system priorities are displayed, allowing the user to choose one or multiple priorities, to apply the filter.

Tip
For more details about Event priorities, please also visit the dedicated article, here.
Type filter - allows the user to filter the events based on their alarm types. In this view, all the system event types are displayed, allowing the user to choose one or multiple types, to set the apply the filter.

Tip
For more details about Event types, please also visit the dedicated article, here.
Group filter - allows the user to filter the events based on their alarm group. The filter is structured as a hierarchical tree, where the user can select multiple alarm groups (nodes) from the hierarchical structure. When multiple groups are selected, the events belonging to any selected group will be displayed together, not just the events that belong to all selected groups simultaneously (this filter does not act as an intersection of the selected groups).

Tip
For more details about Event groups, please also visit the dedicated article, here.
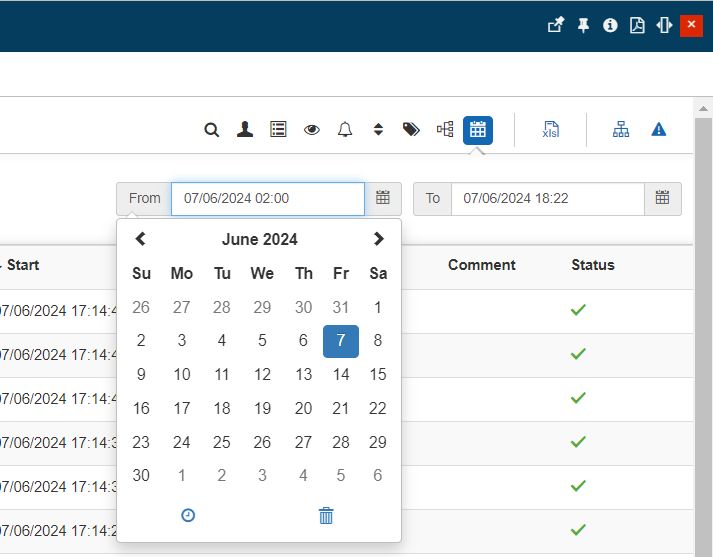
Time filter - allows the user to filter the events list based on their Start/End date and time, as follows:

By setting a custom time interval, using the From/To calendar selectors
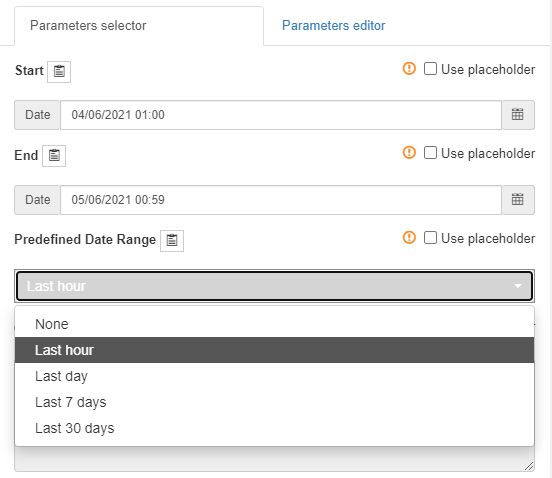
By choosing one of the predefined Time range options: Last hour, Last day, Last 7 days, Last 30 days.

Tip
The user can apply permanent time filters to the Historical Alarms list, by opening the Historical Alarms tile in edit tile mode. The Parameters selector area provides the user with the possibility to set a custom Start/End date and time or apply a predefined date range.
The Historical alarms list
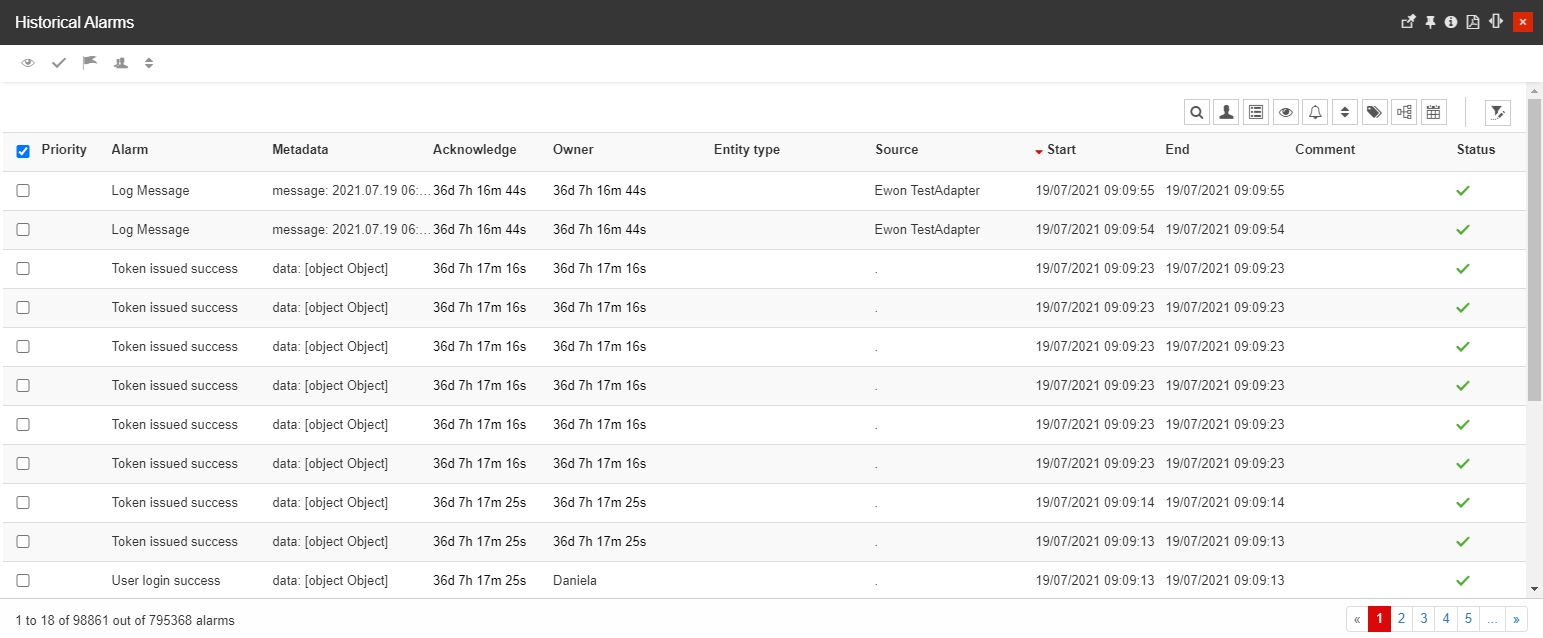
The Historical Alarms panel is the main interface where the user can view, filter, and manipulate historical alarms.
The Historical Alarms panel
The alarms are listed in the table available in the main area of the Historical Alarms panel. The historical events table consists of multiple columns which show important event details, such as:
Priority - the priority of the alarm, stated by the priority number (actual priority value) and the color code of the priority stage
Event - the occurrence of the alarm event
Metadata - additional information for this specific event occurrence (alarm)
Acknowledged - the date of acknowledgment of the alarm. If the alarm is not acknowledged, a live counter will display the time since the alarm has been opened up to the current time.
Owner - the user which owns the alarm
Entity type - the type of entity where the current event draws its origin. If available, an icon will also be associated with the respective entity type.
Source - the origin for this occurrence which can be a Site, an Area, an Organizational Unit, a Device, an Adapter, or the i4connected Server.
Warning
The list of events also considers the currently logged-in user's access permissions to the Event Source. Hence, if the user does not have access to the Event Source, the Event will not be listed in the Online Alarms panel.
Start - the date and time when the alarm was opened (the current event has occurred)
End - the date and time when the alarm was closed (or the event occurrence was terminated).
Comment - the alarm comment.
Note
Visibility of the Comment column is conditioned by the View event occurrence comments permission. Users that do not have this permission enabled will not see the Comment column, in the Historical Alarms panel.
Status - the state of the alarm, represented by symbols: Open, Acknowledged, or Closed.
The actions bar of the Historical Alarms panel allows the user to perform various actions on one or multiple alarms, based on the assigned permissions set.
In order to activate the top menu buttons, at least one alarm needs to be selected from the alarms table. The selection is done by marking the check-boxes corresponding to the desired alarms.

The Actions bar of the Historical Alarms list
The following actions can be performed on one or more alarms:
Acknowledge - acknowledges the event. The Acknowledge alarm button is available only for users having the Acknowledge event occurrences permission enabled.

Close - as all the alarms listed in this view are already closed, the Close button is inactive, even if the user has the Close event occurrences permission enabled.
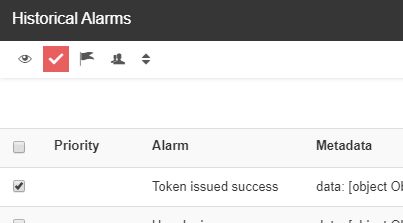
Take ownership - assigns the current user as the owner of the event, if the current user is not the owner of the event already. The Take ownership button is available only for users having the Take event occurrence ownership permission enabled.
Assign ownership - allows the user to assign another user as the owner for this event. Clicking this button will open the Select Users panel, allowing, where the desired user can be searched and selected. The Assign ownership button is available only for users having the Assign event occurrence ownership and View users permissions enabled.
Prioritize - allows the user to change the priority of the alarms. The Prioritize button is available only for users having the Change event occurrence priority permission enabled.
To see the details of a specific historical alarm, the user can select it from the list view. This action will open the Occurrence panel.
Historical Alarms Export
The list of Historical Alarms can be exported via an XLS format. The Excel export button is located in the Historical alarms toolbar. As soon as the Excel export button is clicked, the export will start in the background.

The Excel export button
Warning
Since the Historical alarms lists usually contain large amounts of items, the export can be a long-lasting operation.
When the export operation is finished, the user can save the document locally on their machine, using the Save as pop-up dialog.
The Export file lists all the historical alarms available at the moment when the export was started. The Excel file consists of the following columns: Priority (showing both the priority label and color), Group, Alarm name, Owner, Entity type, Source type, Start, Acknowledge, End, and Comment.

The Excel export file
The Historical Alarm Occurrences panel
The Occurrence panel displays all the available information about the current alarm (occurrence of the selected event).
Depending on the user's permissions set some of the actions and information in this panel may be displayed or not.
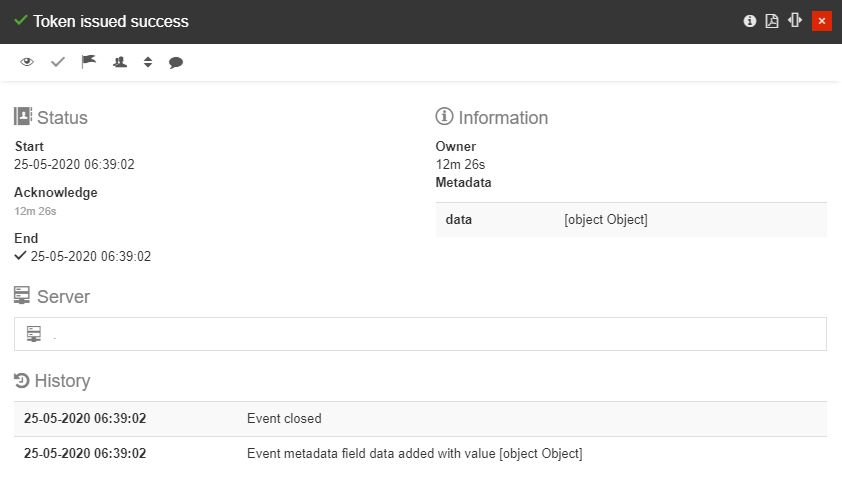
The Historical Event occurrence panel
The panel's header will reflect the alarm status and event as title, as well as the alarm priority reflected in the header's background color. The top menu of the Occurrence panel provides the means to take action on the alarm.
Users having additional permissions enabled are provided with a set of actions, as follows:
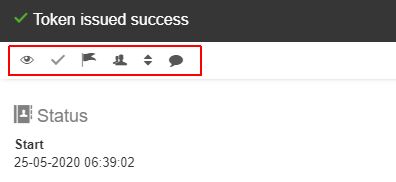
The Historical Event Occurrence actions bar
Acknowledge - acknowledges the alarm.
The Acknowledge alarm button is available only for users having the Acknowledge event occurrences permission enabled.
Close - as the alarm is already in status closed, this button will be inactive, even if the user has the Close event occurrences permission enabled.
Take ownership - assigns the current user as the owner of the alarm, if the current user is not the owner of the alarm already.
The Take ownership button is available only for users having the Take event occurrence ownership permission enabled.
Assign ownership - allows the user to assign another user as the owner for this alarm. Clicking this button will open the Select Users panel, allowing, where the desired user can be searched and selected.
The Assign ownership button is available only for users having the Assign event occurrence ownership and View users permissions enabled.
Prioritize - allows the user to assign a priority to the current alarm occurrence. The Priorities panel lists all available priorities and allows you to define new ones.
The Prioritize button is available only for users having the Change event priority permission enabled.
Change Comment - allows the user to change the current comment of the alarm occurrence. The Change comment panel displays the latest available comment and allows you to edit it. The Comment button is available only for users having the Comment event occurrences permission enabled.
The Status and Information section of the Occurrence panel, located below the top menu, displays all the available information about the alarm. The data displayed in this area can vary from one Alarm to another.
Additionally, an Alarm comment can only be viewed by a user having the View event occurrences comments permission enabled.

The Occurrence status and information area
The Context section of the Occurrence panel displays the source of origin for the alarm. This section is located under the Status and Information section. The Event Occurrence Context can be either Logbook (manual events), Device, Server, Adapter, or Query.
Depending on the event, the event occurrence context can be a hierarchical entity (Site, Area, or Organizational Unit), a Device, an Adapter, the i4connected Server, or a Query.
If the Context on the Event occurrence is a Site, an Area, an Organizational Unit, of a Device the user can open the entity in detailed view mode, where additional information and actions are available.
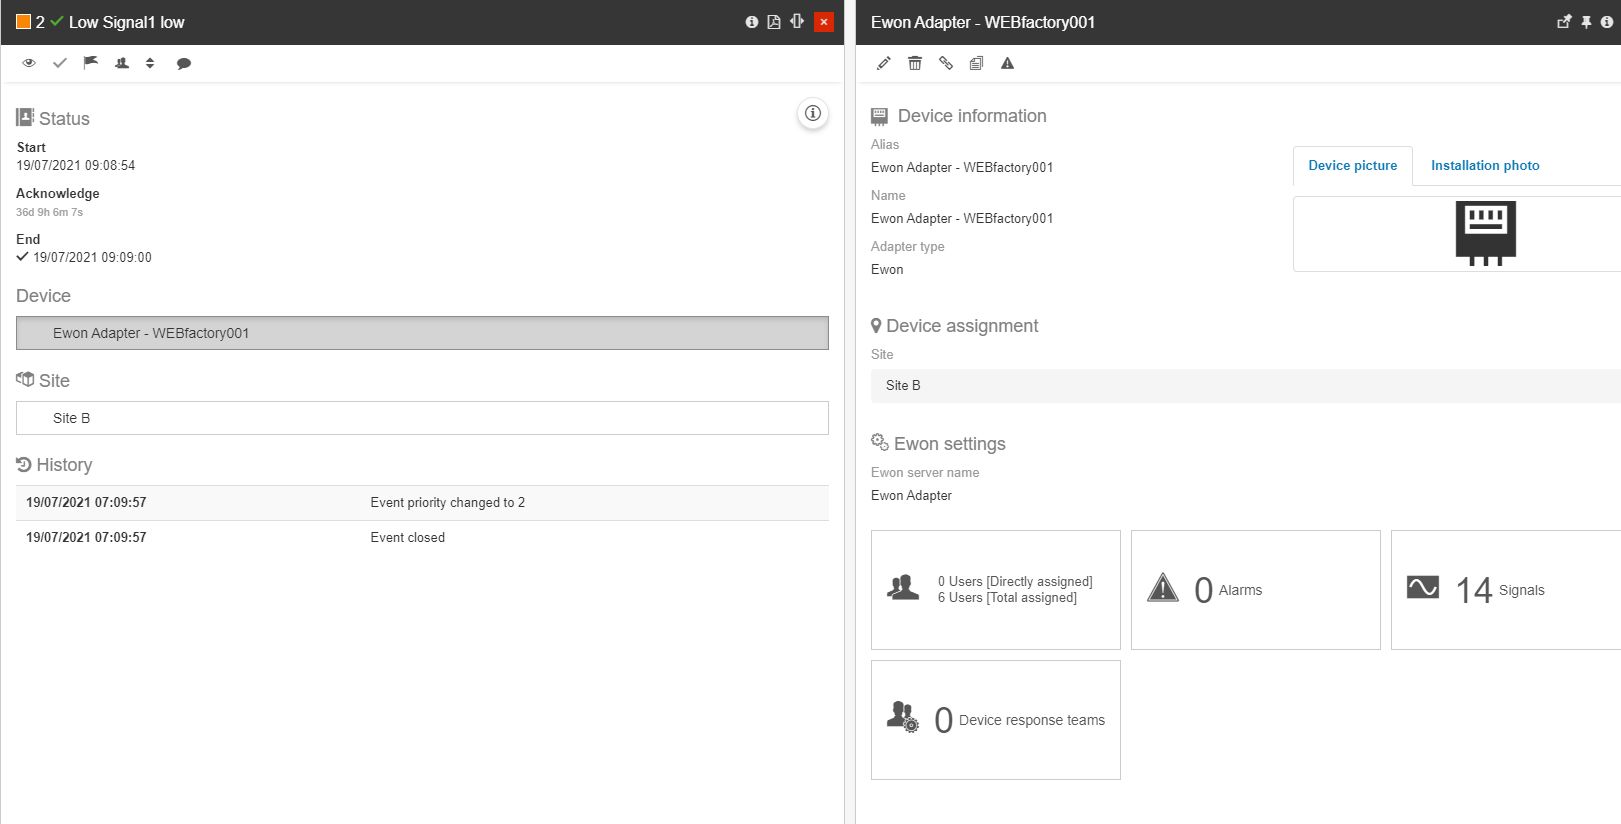
Example of an Event Occurrence having a Device as a source
If the Context of the Event occurrence is an Email parser Device, an Email target Device, or an Email Adapter, the user can open the Email Alarm scripts panel in order to check the script and manually test its results. For more details about the Email Alarm scripts, please also visit the dedicated article here.
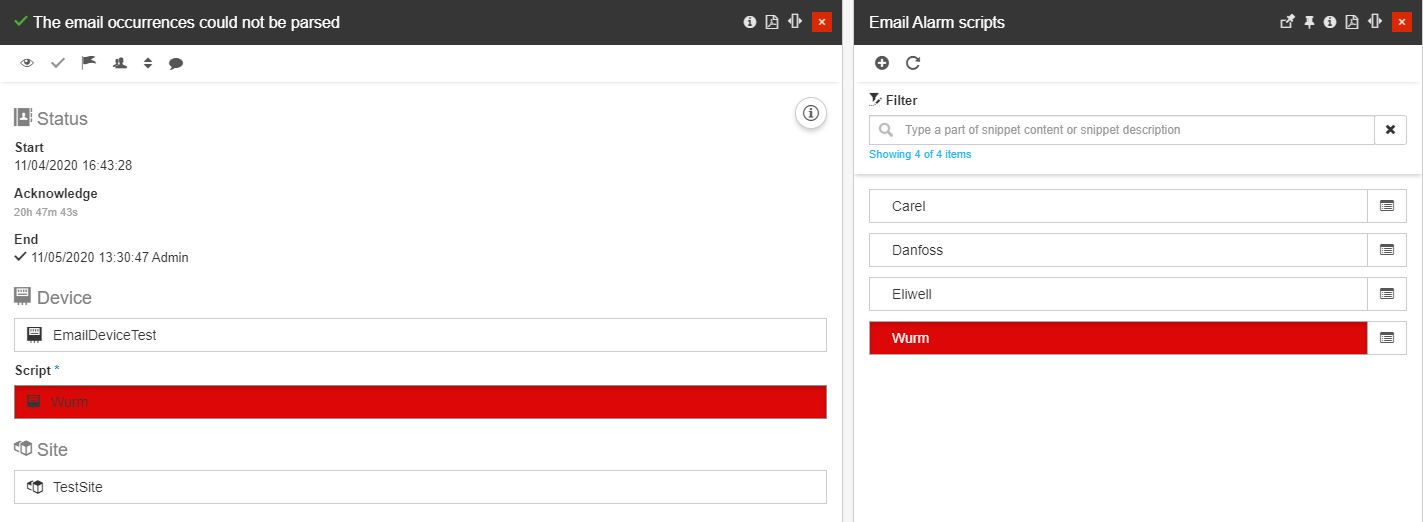
The Occurrence Script
The History section of the Occurrence panel displays all the actions performed on the current alarm, being ownership assignments, acknowledgments, etc. The Event occurrence history area is displayed for all users having the View event occurrence history permission enabled.
Each action log is represented in real-time, along with the date and time of the action and the user who performed the action.

The Occurrence History