User Roles
The User Roles are objects that define user permissions and rights throughout the entire i4connected platform. Check out this article!
The User Roles are objects that define user permissions and rights throughout the entire i4connected platform. Users having no roles assigned are restricted from accessing the system.
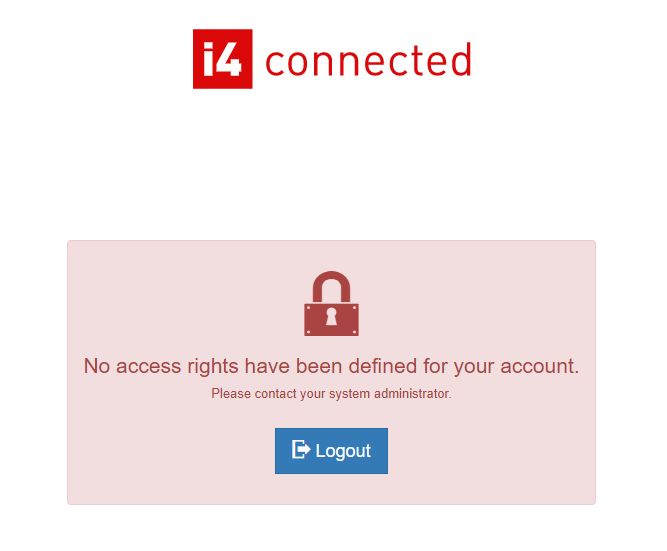
No access rights have been defined for this account
The Roles panel can be accessed by any user having access to the page where the User role tile is located. However, a user with low or limited permissions can only see their roles in the list view.
The Roles panel allows the user to perform the following operations:
The Roles panel
Viewing, filtering, and refreshing the list of Roles
There are two methods to access the Roles panel:
from the User roles tile on the i4connected Admin panel
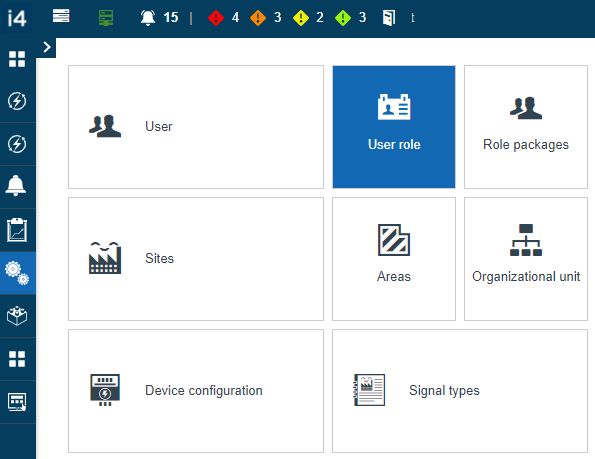
The User role tile
from the Roles tile in the User detailed view mode panel
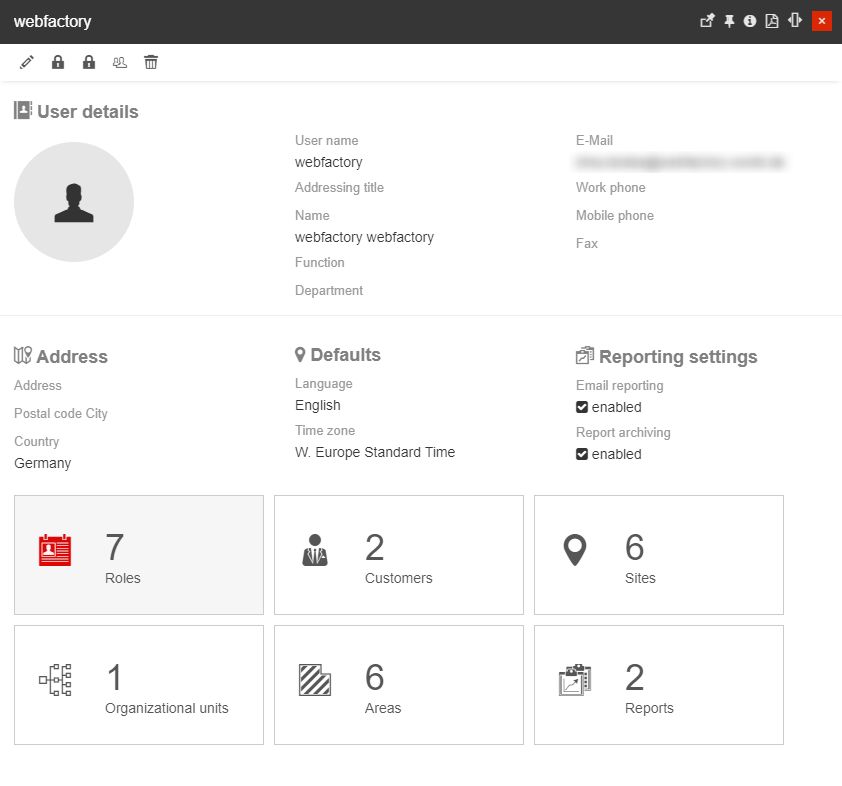
The User role tile in the detailed view mode of a User
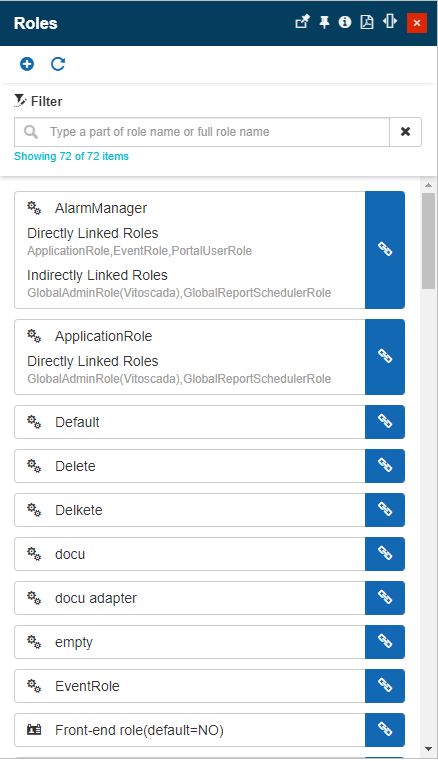
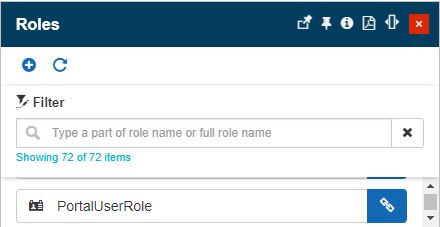
Clicking on this tile the Roles panel is opened. The user can filter the list of Roles by typing in the name of the desired role. The Reset filter button  clears all the contents in the search field are removes the filter from the list.
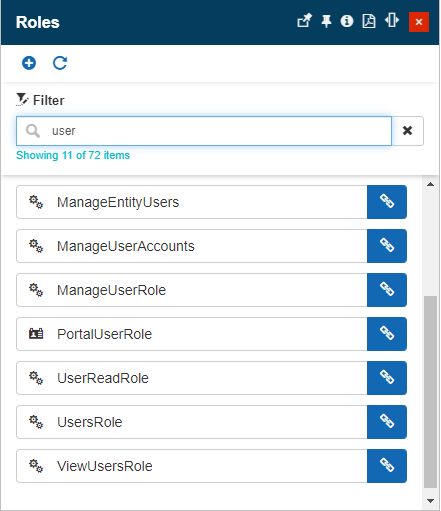
The Roles filter
The user is also provided with the possibility to manually reload the list contents, by clicking the Refresh toolbar button.
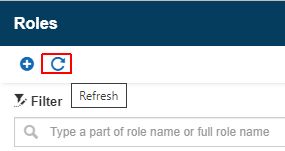
The Refresh panel
Adding new Roles
The Add button located in the Roles panel opens the Add role panel. The Add roles function is available only for users having the Configure security permission enabled.
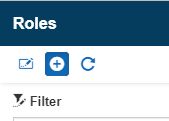
The Add Roles button
The Add role panel features the following properties:
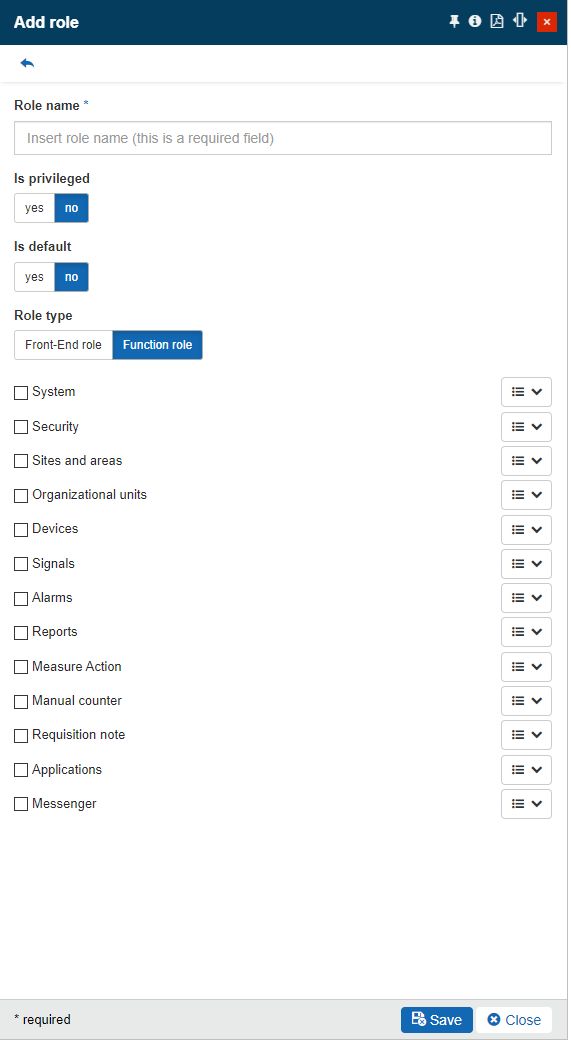
The Add role panel
Role name - the name of the role;
Is privileged - marks the role as privileged.
Tip
The users having a privileged role assigned are provided with a set of special rights, hence being able to interact with other privileged roles and users.
Only users that have privileged roles assigned to them can create or modify privileged roles. Non-privileged users will not be able to see or modify privileged items.
Is default - marks the role as default.
Tip
All the roles that are marked as default will be automatically assigned to new users.
Role type - sets the type of the role, allowing the user to choose from the following options:
Front-end role - is a portal user role.
Tip
Usually, the default roles are marked as Front-end.
Function role - is a function specific user role, defining a set of functions that the user should have permission to process.
Permissions - assigns permissions to the role, defining what operations are permitted for each role.
Tip
For more details about the i4connected role management permissions, please also visit the Permissions article.
To preserve the changes made the user can click the Save button. Otherwise, by clicking the Close button, the Add role panel is closed and no changes are saved.
Linking Roles
Roles can be linked to other roles by clicking the Link button on the Role cards.
The Link role button
In the Link roles panel, the user can select the Roles to be linked to the selected Role.

The Link roles panel
By clicking the Select button, the Link roles panel will be closed and the listed Role card will be updated to display the link relation. When linking a role to another, the relation will be treated as a Direct linked role.
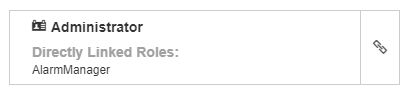
Role card with Directly Linked Roles
When linking a Role having already other linked roles will establish an Indirect linked role relation. Roles that are indirectly linked to other roles will be also visible in the Role card.
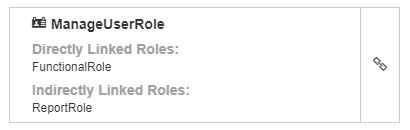
Role card with Directly and Indirectly Linked Roles
Note
The scope of the Linked Roles function is highly related to the fact that limited rights users, can only see and manage those roles that they have been explicitly assigned to.
The Linked Roles function enables the possibility to view and manage both the directly assigned roles and the linked roles.
For a better understanding of this function, please also visit the Linked Roles management tutorial.
Editing Roles
Users having the Configure security permission available, can manage the existing roles.
The Edit role panel can be accessed by clicking on a role card listed in the Roles panel. In this view, the user can change all the settings described under the Add role article. Changes can be preserved by clicking the Save button.
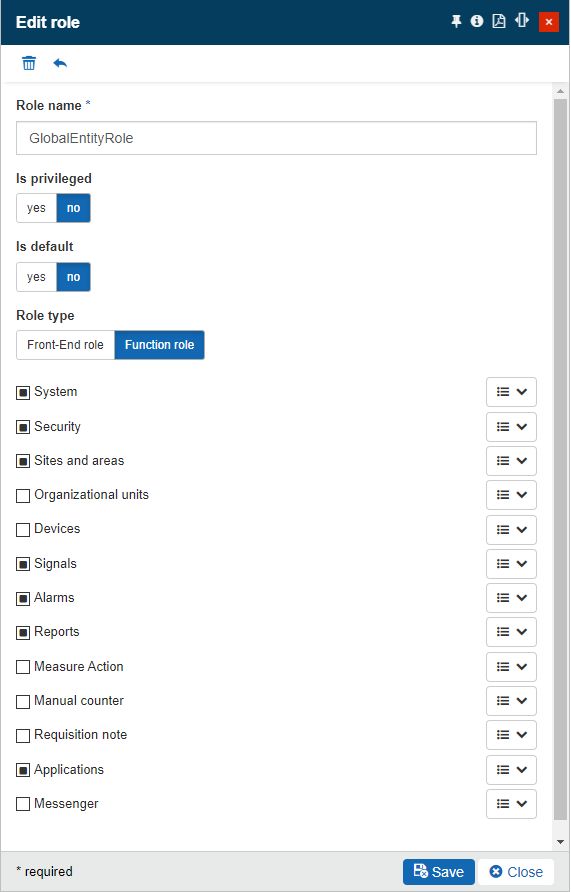
The Edit role panel
Deleting Roles
The listed roles can also be removed by clicking the Delete toolbar button, in the Edit role panel. The Delete role option is available only for users having the Configure security permission enabled.
The Delete role panel displays information on the impact of the removal operation.

The Delete role panel
Deletion is confirmed by filling in the provided code and clicking the Delete button.
Role packages management
Check out this article and learn how to collect multiple roles into Role packages and distribute them to users in various contexts.
Role packages are collections of roles, managed independently from other entities. The Role Packages tile is the entry point to the management of Role Packages. This tile is usually guarded by an administrative role, but this is a matter of system customization.
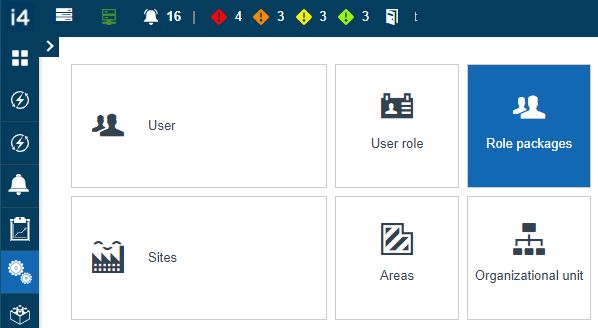
The Role Packages tile
While the entry point tile can be made available for high or low-authority users, the contents of the Role Packages panel are guarded by the Manage role package permission.
Authorized users can view all the existing Role packages, which are displayed as cards, distributed in a scrollable list view. Each card displays the name and description of the Role package.
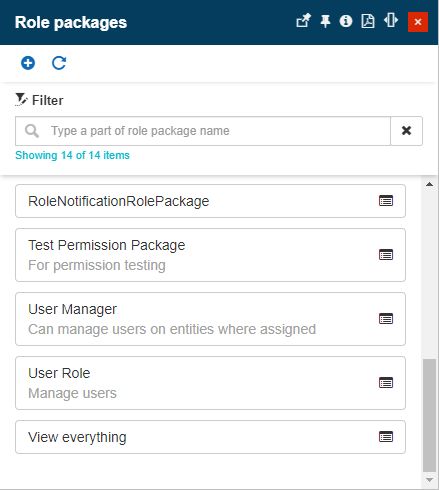
The Role Packages panel
The list features a simple filtering mechanism allowing the users to easily pinpoint the desired Role packages.
Tip
For more details about the simple filtering mechanism please also check this article.
The Refresh toolbar button allows the user to manually update the list contents.
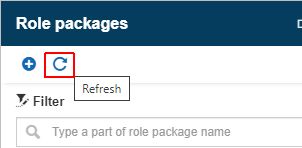
The Refresh button
It is possible to create new Role packages, by clicking the Add toolbar button.

The Add button
In the Add Role Package panel, the user is provided with the following settings:
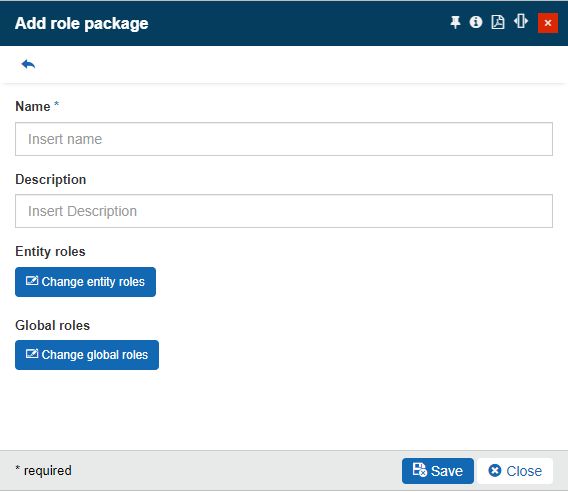
The Add role package
Name - the name of the new Role package.
Description - the friendly description of the new Role package.
Entity roles - allows the user to select the desired role(s) that will be applied on a hierarchical level.
The list of Roles can be accessed by clicking the Change entity roles button. In this view, the user can choose one or multiple roles and apply them to the Role package, by clicking the Select button.
Tip
When selecting Entity roles, the user can either choose simple roles or more complex ones that also have directly or indirectly linked roles.
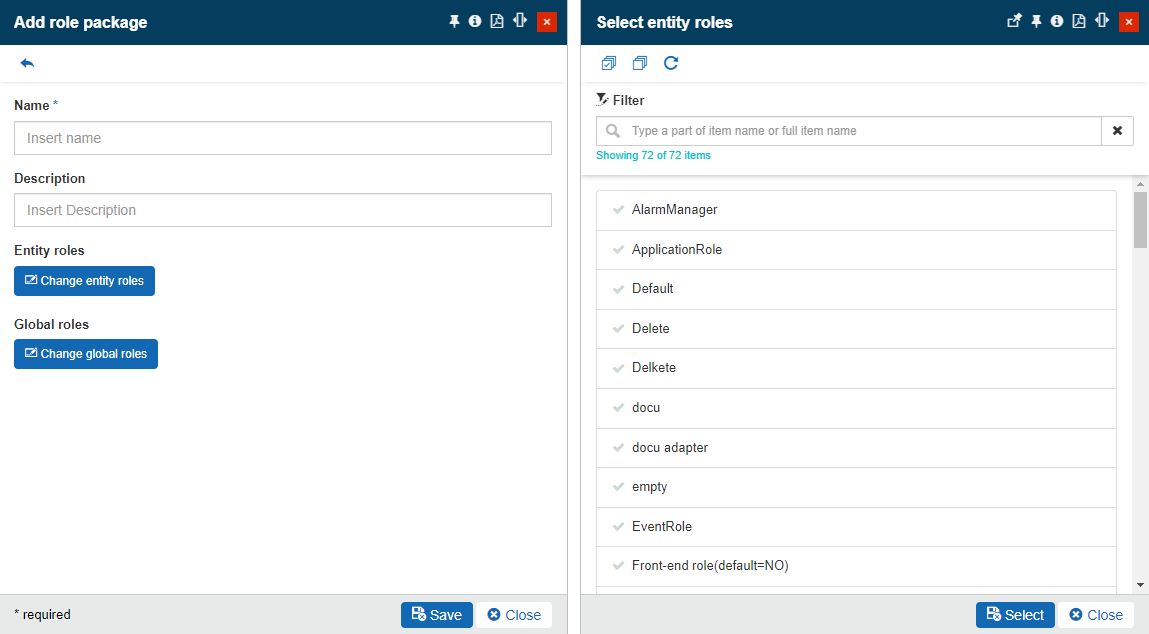
The Select entity roles panel
Global roles - allows the user to select the desired role(s) that will be applied on a global level. The list of Roles can be accessed by clicking the Change global roles button. In this view, the user can choose one or multiple roles and apply them to the Role package, by clicking the Select button.
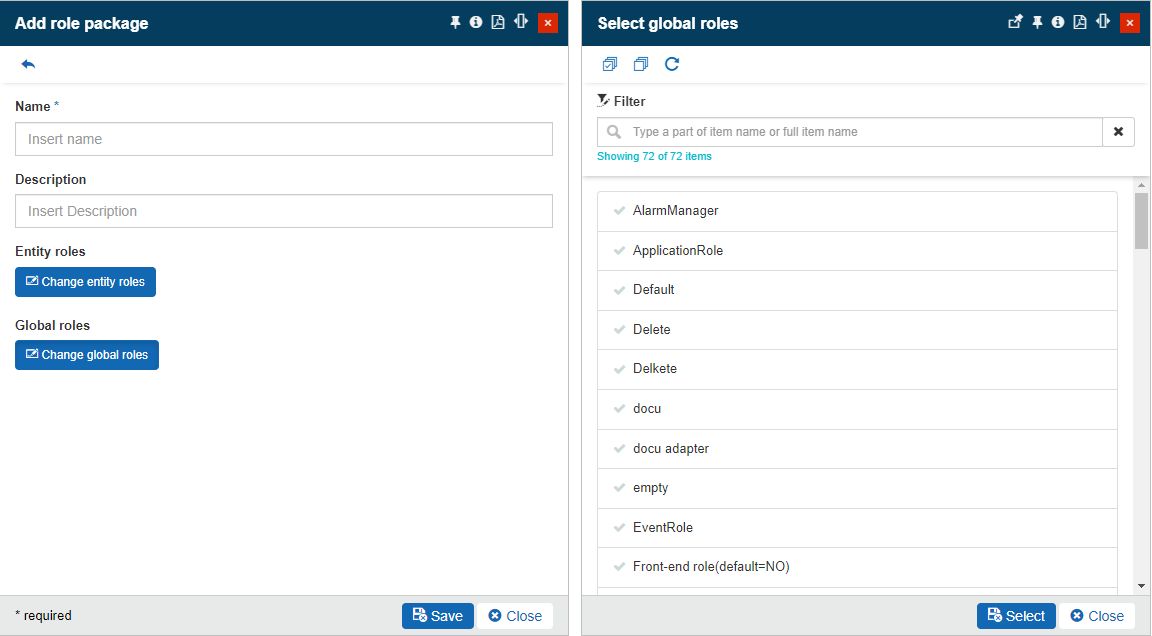
The Select global roles panel
Tip
When selecting Global roles, the user can either choose simple roles or more complex ones that also have directly or indirectly linked roles.
After filling in all the required settings the user can click the Save button to add the new Role Package to the list, or the Close button to close the panel without saving the new entity.
To edit a listed Role Package, the user can select it from the list view. The Edit role package panel allows the user with the possibility to change all the entity settings.
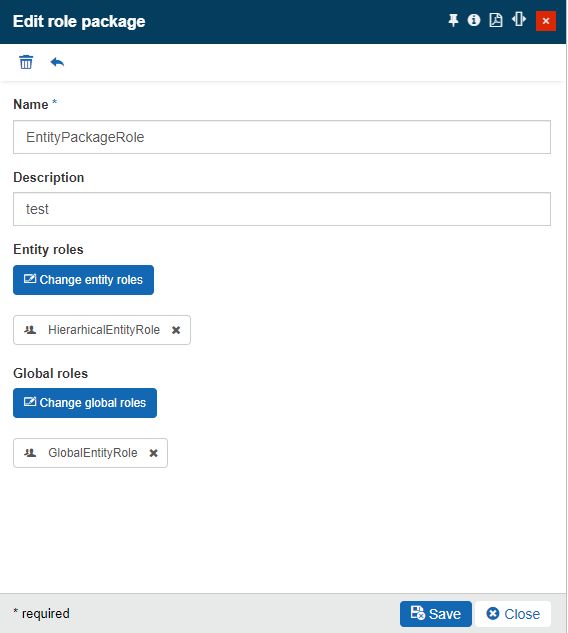
The Edit role package panel
After processing all the necessary changes, the user can click the Save button to update the selected Role package, or the Close button to close the panel without saving any changes.
Redundant Role packages can be deleted while in edit mode, by clicking the Delete toolbar button.
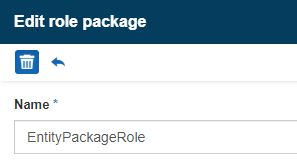
The Delete button
The Delete role package panel displays a confirmation code that the user is required to manually fill in, to proceed with the delete operation.
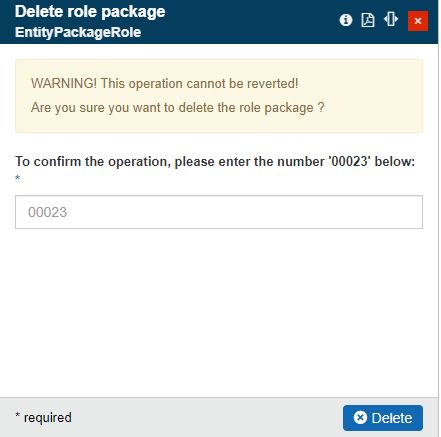
The Delete role package panel
In case the typed deletion code is incorrect, the system will warn the user and prevent the deletion operation. If the correct deletion code has been typed, pressing the Delete button will permanently remove the selected Role package.
Entity role assignments
Check out this article and learn how to assign users to the i4connected entities, such as Sites, Areas, Organizational Units, Devices, and Signals.
The Entity role assignments panel is opened by selecting the Users tile of a hierarchical entity or by clicking the Users button under the edit panel of an entity.
The i4connected Entities allowing role assignments are the following:
Hierarchical entities
Other entities
The Entity role assignments panel can be accessed only by users having at least the View users permission enabled.
Warning
The View users permission alone does not grant the user the possibility to manage the Entity's permissions and assign new roles. The list of assigned users will be grayed out and no further management operations will be possible.
To manage hierarchical entities and other entities' role assignments, additional permissions are required.
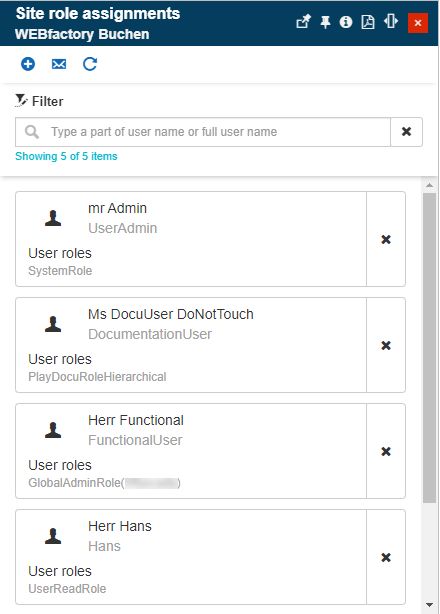
Entity role assignments panel in view-only mode
The Entity role assignments panel lists all the users assigned to that Entity, like cards in a scrollable list view. Each user card provides the following information:
Entity user role assignment card
the picture of the user;
the addressing title, username, and name;
the list of user roles, available for that user in the context of the currently viewed entity.
While scrolling through the list of users, under the Entity role assignments panel, two types of assignments can be recognized:
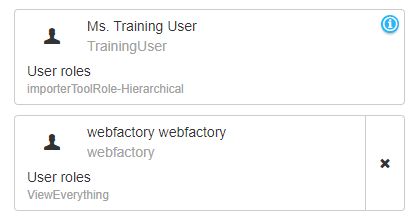
Direct assignment vs inherited assignment
Direct assignment - the directly assigned users can be removed from the selected Entity and implicitly managed from the roles point of view.
Inherited assignment - the users inherited from higher hierarchical authorities are accompanied by the
 symbol. These users cannot be detached from a lower hierarchical level, but their roles and permissions can be edited.
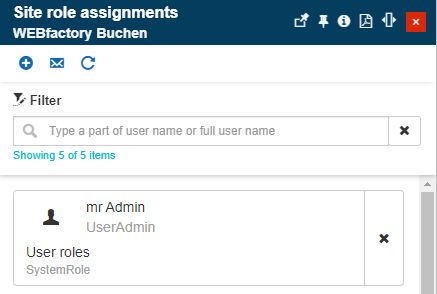
As all the i4connected lists, the Entity role assignments list can also be filtered, by typing in the search field the username/name of the user or only a part of it. The list is automatically filtered to display only the relevant results.
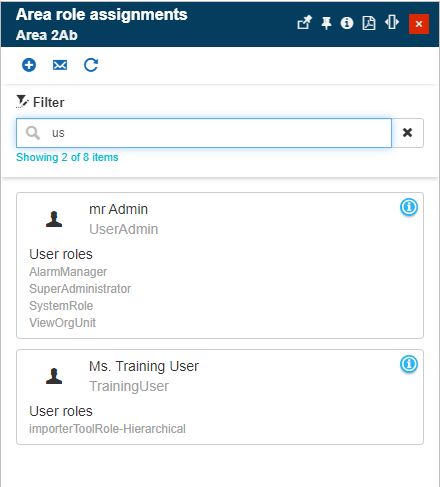
Example of the filtered list
Warning
Search by User role is not possible. The filter will not return any results.
The list of Entity role assignments can be manually updated by clicking the Refresh toolbar button.
Site Roles Assignments
Check out this article and learn more about the Site Role Assignments panels and how to assign or invite a user to Sites.
Users having the Manage site users permission enabled can assign other users to Sites, using the Site Roles Assignments list panel.
To proceed with Site role assignments, the user can click the Add or the Invite toolbar buttons.
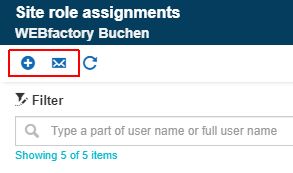
The Add and Invite buttons
Assigning an existing user
By clicking the Add toolbar button, the Site role assignments panel is opened, allowing the user to proceed with the following selections:
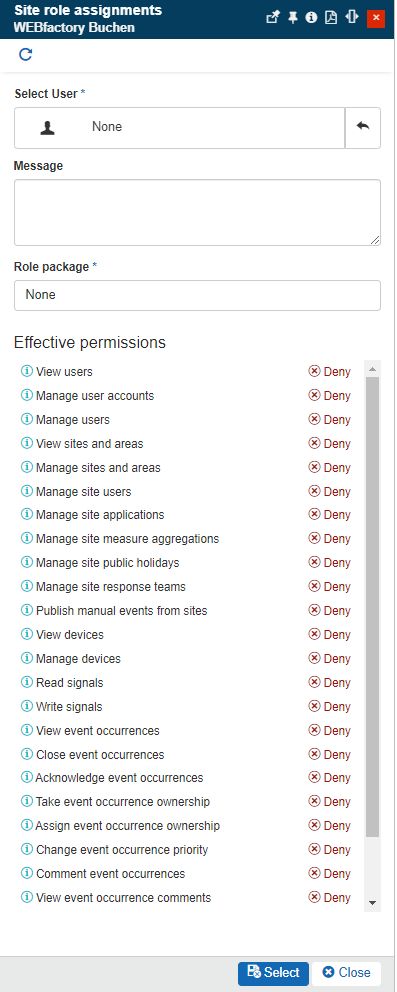
The Site role assignments panel
Select User - opens the Select User panel where the list of users available for selection is displayed.
The list is filtered displaying only the users that are covered by the currently logged-in user's permissions. Hence, users having only the View users permission enabled will be allowed to select only users having common and lower or equal rights. On the other hand, a user having the View all users permission enabled will be allowed to select from a complete list of all system users.
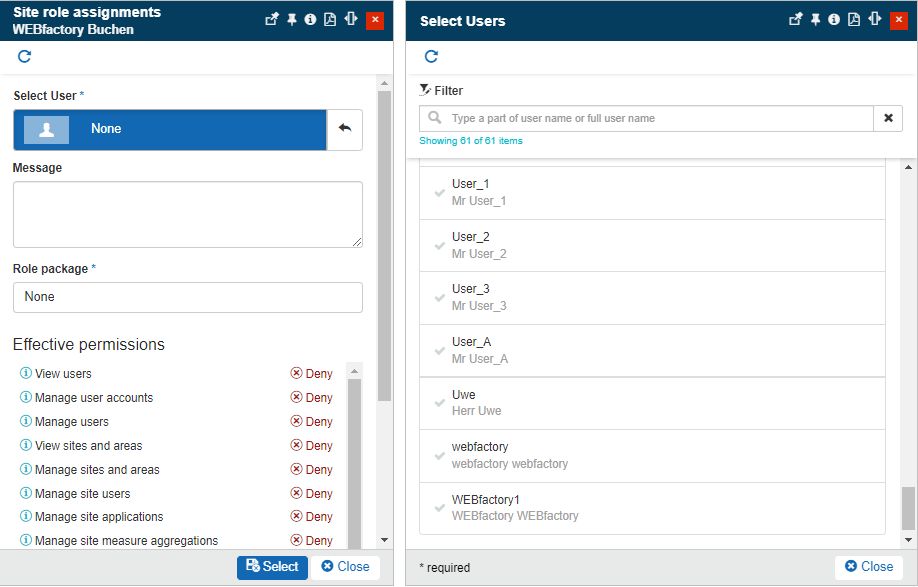
The Select users panel
Message - allows the user to type in an optional message that can accompany the E-Mail notification that will be delivered to the involved user.
Role package - allows selection of the Role package to be assigned to the previously selected user.
Warning
The list of Role Packages, displayed during the assignment phase, is automatically filtered, to only display the Role Packages, containing Roles, and implicitly Permissions, to which the currently logged-in user has access.
As soon as the Role package has been selected the Effective permissions will be calculated considering both the hierarchical and global roles.
Effective permissions - lists the Entity set of Effective permissions, where by default, are all set to Deny. After selecting the user and the role package the list is adjusted to display the Effective permissions Applied for the user.
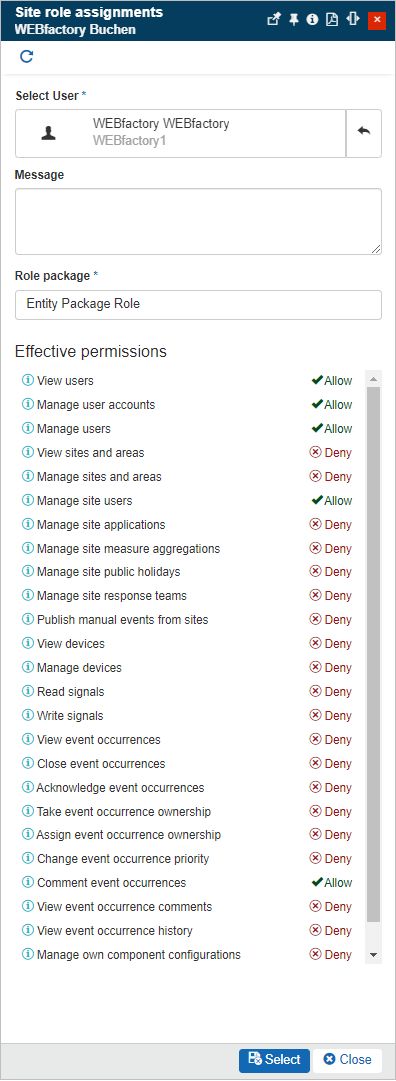
The Effective permissions list
After filling in all the mandatory settings the role assignment can be applied by clicking the Select button. To leave the Add Site role assignments mode the user can click the Cancel button.
Inviting a user via E-Mail
By clicking the Invite toolbar button the Site invitation panel is opened.
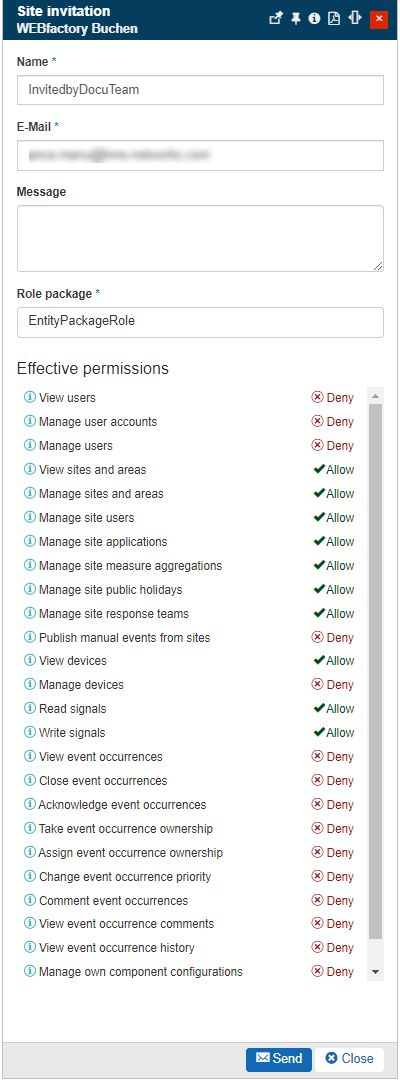
The Site Invitation panel
When inviting a user to access a Site, the following settings need to be performed:
Name - the name of the User
E-Mail - the User's E-Mail address, where the invitation will be delivered.
Message - an optional message that will accompany the E-Mail notification.
Role package - allows selection of the Role package to be assigned to the previously selected user.
Warning
The list of Role Packages, displayed during the assignment phase, is automatically filtered, to only display the Role Packages, containing Roles, and implicitly Permissions, to which the currently logged-in user has access.
As soon as the Role package has been selected the Effective permissions will be calculated considering both the hierarchical and global roles.
Effective permissions - lists the Entity set of Effective permissions, where by default, are all set to Deny. After selecting the User Roles, the Effective permissions list will also be updated to display the applied and the denied permissions.

The Effective permissions list
After filling in all the mandatory settings the role assignment can be applied by clicking the Send button. To leave the Site invitation panel the user can click the Cancel button.
The invited user will be automatically assigned to the current hierarchical entity after he/she accepts the invitation and fills in the registration form.
Tip
For more details about the i4connected Invitation System, please visit the dedicated articles here.
Warning
Sending multiple invitations to the same email address is not allowed until the previous invitation is processed.
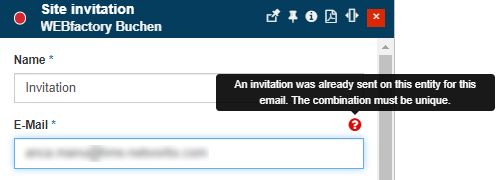
Error message: Email address already used
Area Role Assignments
Check out this article and learn more details about the Area Role Assignments panels and how to assign or invite a user to Areas.
Users having the Manage area users permission enabled can assign other users to Areas, using the Area Roles Assignments list panel.
To proceed with Area role assignments, the user can click either the Add or the Invite toolbar buttons.
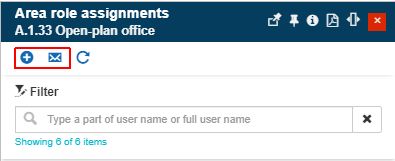
The Add and Invite buttons
Assigning an existing user
By clicking the Add toolbar button, the Area role assignments panel is opened, allowing the user to proceed with the following selections:
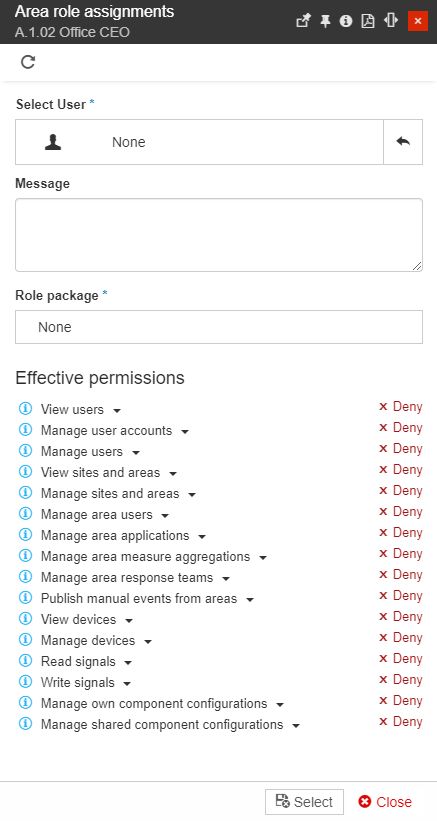
The Area role assignments panel
Select User - opens the Select User panel where the list of users available for selection is displayed.
The list is filtered displaying only the users that are covered by the currently logged-in user's permissions. Hence, users having only the View users permission enabled will be allowed to select only users having common and lower or equal rights. On the other hand, a user having the View all users permission enabled will be allowed to select from a complete list of all system users.
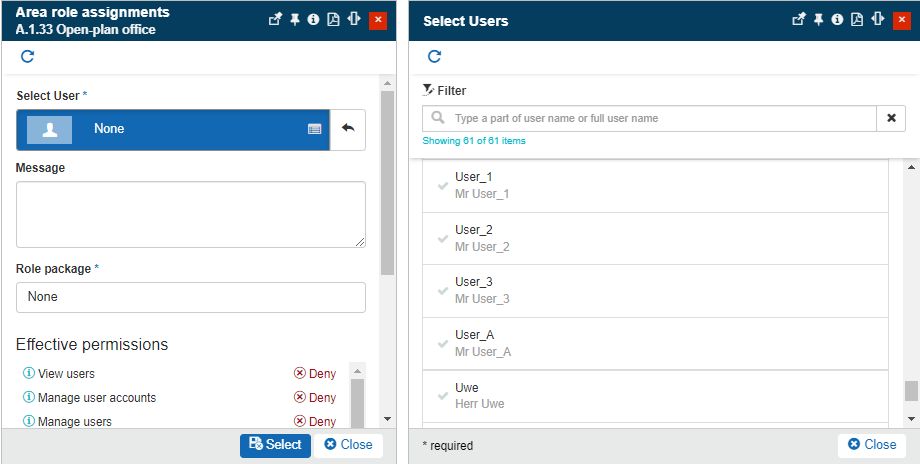
The Select users panel
Message - allows the user to type in an optional message that can accompany the E-Mail notification that will be delivered to the involved user.
Role package - allows selection of the Role package to be assigned to the previously selected user.
Warning
The list of Role Packages, displayed during the assignment phase, is automatically filtered, to only display the Role Packages, containing Roles, and implicitly Permissions, to which the currently logged-in user has access.
As soon as the Role package has been selected the Effective permissions will be calculated considering both the hierarchical and global roles.
Effective permissions - lists the Entity set of Effective permissions, where by default, are all set to Deny. After selecting a user the list is adjusted to display the Effective permissions Applied for the user.
The Effective permissions list
After filling in all the mandatory settings the role assignment can be applied by clicking the Select button. To leave the Add Area role assignments mode the user can click the Cancel button.
Inviting a user via E-Mail
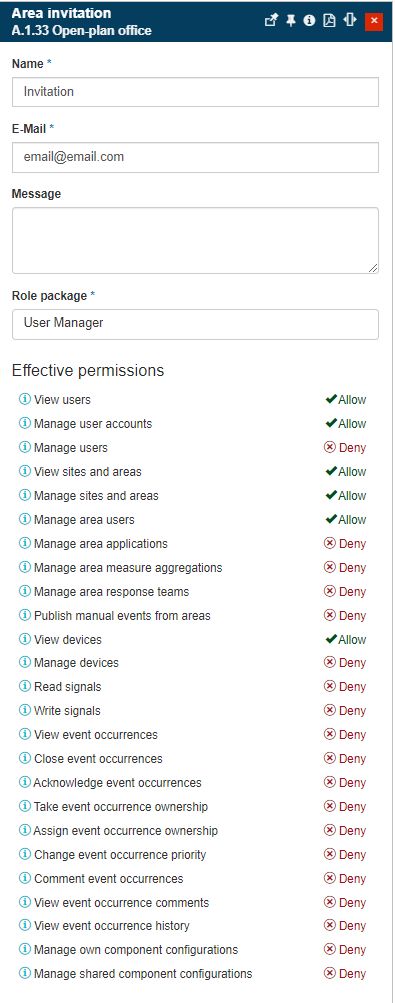
By clicking the Invite toolbar button the Area invitation panel is opened.
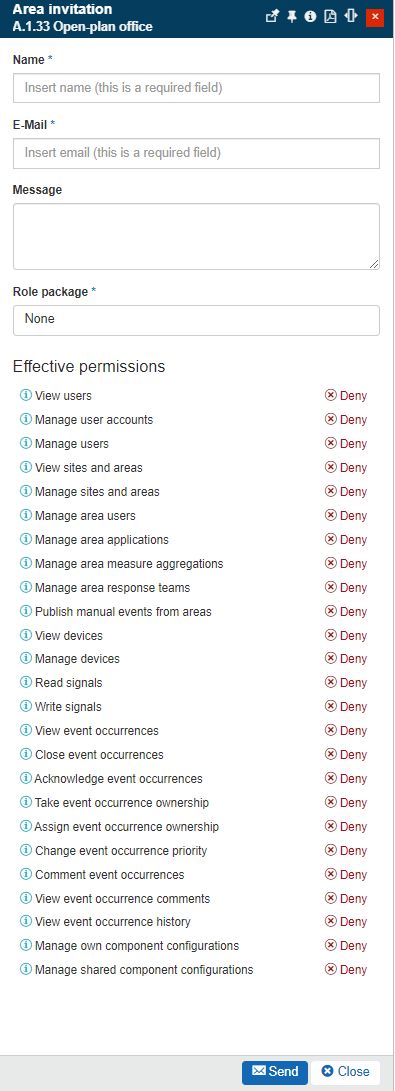
The Area Invitation panel
When inviting a user to access an Area, the following settings need to be performed:
Name - the name of the User
E-Mail - the User's E-Mail address, where the invitation will be delivered.
Message - an optional message that will accompany the E-Mail notification.
Role package - allows selection of the Role package to be assigned to the previously selected user.
Warning
The list of Role Packages, displayed during the assignment phase, is automatically filtered, to only display the Role Packages, containing Roles, and implicitly Permissions, to which the currently logged-in user has access.
As soon as the Role package has been selected the Effective permissions will be calculated considering both the hierarchical and global roles.
Effective permissions - lists the Entity set of Effective permissions, where by default, are all set to Deny. After selecting the User Roles, the Effective permissions list will also be updated to display the applied and the denied permissions.
The Effective permissions list
After filling in all the mandatory settings the role assignment can be applied by clicking the Send button. To leave the Area invitation panel the user can click the Cancel button.
The invited user will be automatically assigned to the current hierarchical entity after he/she accepts the invitation and fills in the registration form.
Tip
For more details about the i4connected Invitation System, please visit the dedicated articles here.
Warning
Sending multiple invitations to the same email address is not allowed until the previous invitation is processed.
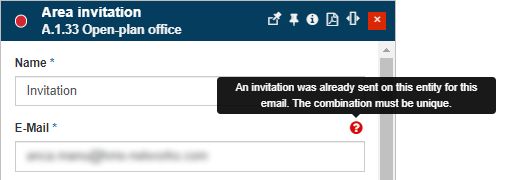
Error message: Email address already used
Organizational Units Role Assignments
Check out this article and learn more details about the Organizational Unit Role Assignments panels and how to assign or invite a user to Organizational Units.
Users having the Manage organizational unit users permission enabled can assign other users to Organizational Units, using the Organizational Unit Roles Assignments list panel.
To proceed with Organizational Units role assignments, the user can click either the Add or the Invite toolbar buttons.
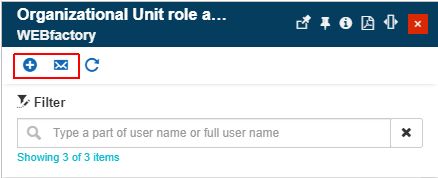
The Add and Invite buttons
Assigning an existing user
By clicking the Add toolbar button, the Organizational Unit role assignments panel is opened, allowing the user to proceed with the following selections:

The Organizational Unit role assignments panel
Select User - opens the Select User panel where the list of users available for selection is displayed.
The list is filtered displaying only the users that are covered by the currently logged-in user's permissions. Hence, users having only the View users permission enabled will be allowed to select only users having common and lower or equal rights. On the other hand, a user having the View all users permission enabled will be allowed to select from a complete list of all system users.
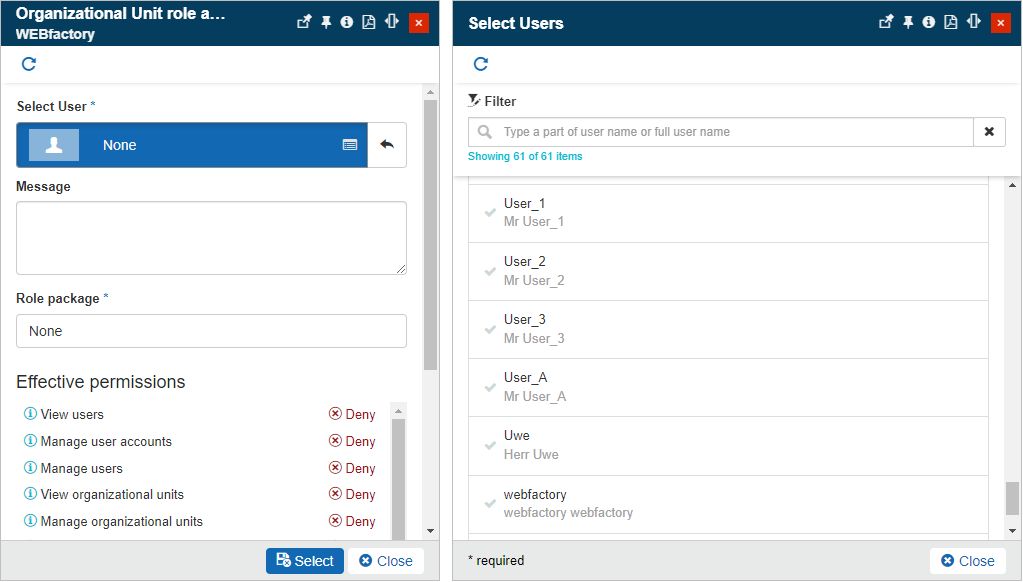
The Select users panel
Message - allows the user to type in an optional message that can accompany the E-Mail notification that will be delivered to the involved user.
Role package - allows selection of the Role package to be assigned to the previously selected user.
Warning
The list of Role Packages, displayed during the assignment phase, is automatically filtered, to only display the Role Packages, containing Roles, and implicitly Permissions, to which the currently logged-in user has access.
As soon as the Role package has been selected the Effective permissions will be calculated considering both the hierarchical and global roles.
Effective permissions - lists the Entity set of Effective permissions, where by default, are all set to Deny. After selecting the user and the role package the list is adjusted to display the Effective permissions applied for the user.
The Effective permissions list
After filling in all the mandatory settings the role assignment can be applied by clicking the Select button. To leave the Add Organizational Units role assignments mode the user can click the Cancel button.
Inviting a user via E-Mail
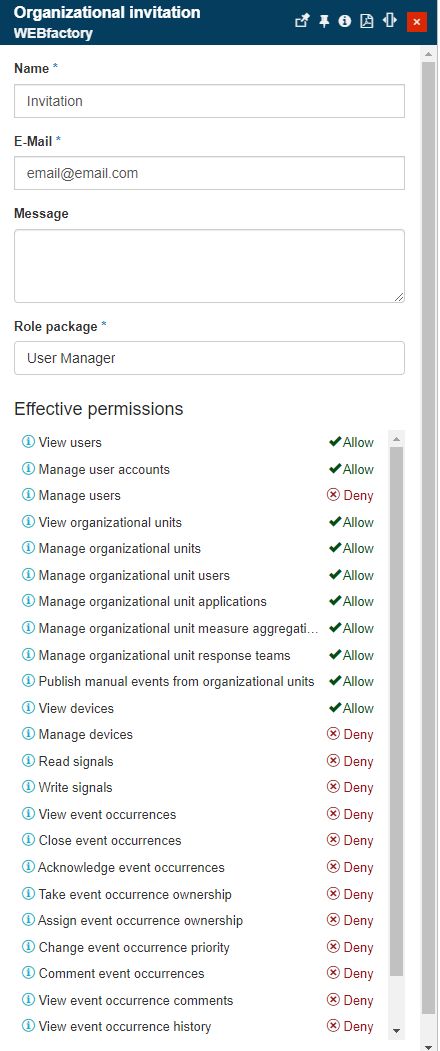
By clicking the Invite toolbar button the Organizational invitation panel is opened.
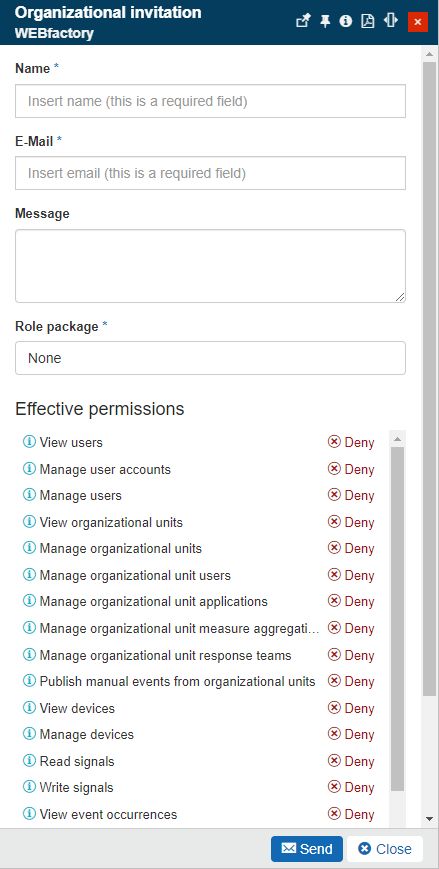
The Organizational Unit Invitation panel
When inviting a user to access an Organizational Unit, the following settings need to be performed:
Name - the name of the User
E-Mail - the User's E-Mail address, where the invitation will be delivered.
Message - an optional message that will accompany the E-Mail notification.
Role package - allows selection of the Role package to be assigned to the previously selected user.
Warning
The list of Role Packages, displayed during the assignment phase, is automatically filtered, to only display the Role Packages, containing Roles, and implicitly Permissions, to which the currently logged-in user has access.
As soon as the Role package has been selected the Effective permissions will be calculated considering both the hierarchical and global roles.
Effective permissions - lists the Entity set of Effective permissions, where by default, are all set to Deny. After selecting the User Roles, the Effective permissions list will also be updated to display the applied and the denied permissions.
The Effective permissions list
After filling in all the mandatory settings the role assignment can be applied by clicking the Send button. To leave the Organizational Unit invitation panel the user can click the Cancel button.
The invited user will be automatically assigned to the current hierarchical entity after he/she accepts the invitation and fills in the registration form.
Tip
For more details about the i4connected Invitation System, please visit the dedicated articles here.
Warning
Sending multiple invitations to the same email address is not allowed until the previous invitation is processed.
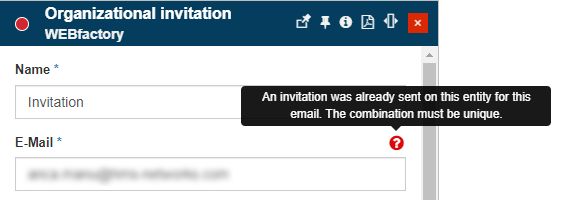
Error message: Email address already used
Device Role Assignments
Check out this article and learn more details about the Device Role Assignments panels and how to assign a user to Devices.
Users having the Manage device users permission enabled can assign other users to Devices, using the Device Role Assignments list panel, accessible by clicking the Users tile of the Device details panel.
Warning
To assign users to a Device, the currently logged-in user should be able to view and manage that Device. For more details, please visit the Devices Management article, here.
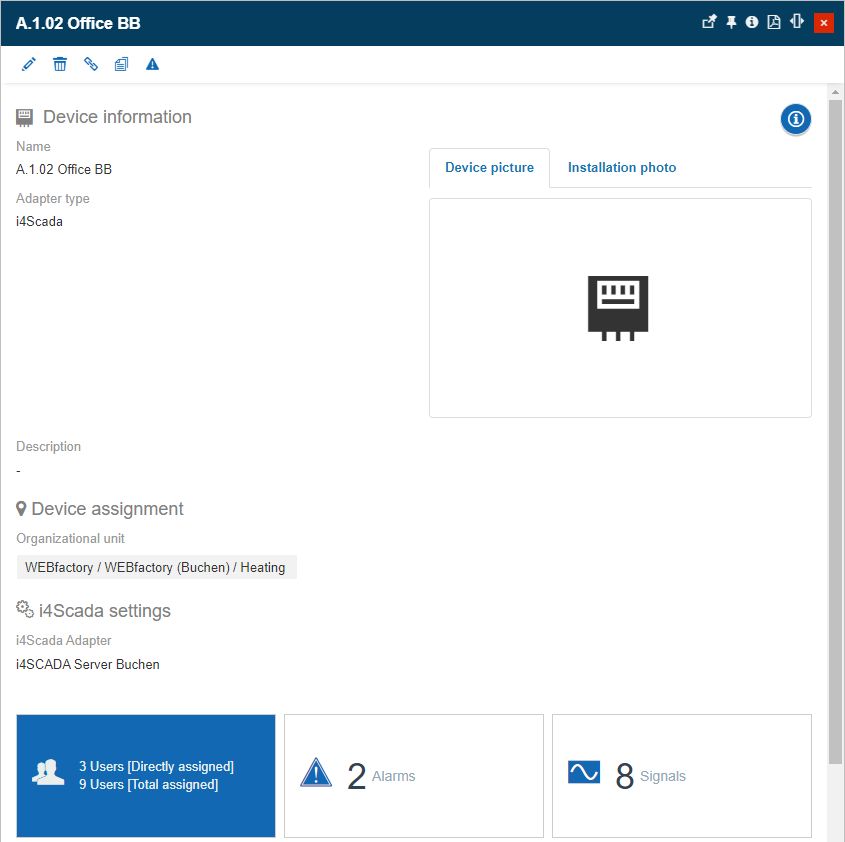
The Users tile
To proceed with Device role assignments, the user can click the Add toolbar button.
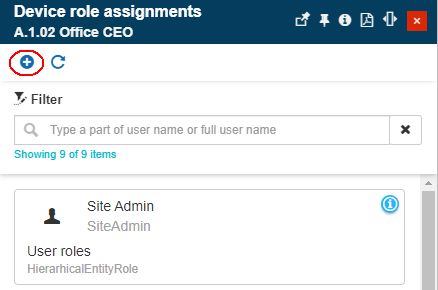
The Add button of the Device Role Assignments panel
The Device role assignments panel allows the user to proceed with the following selections:
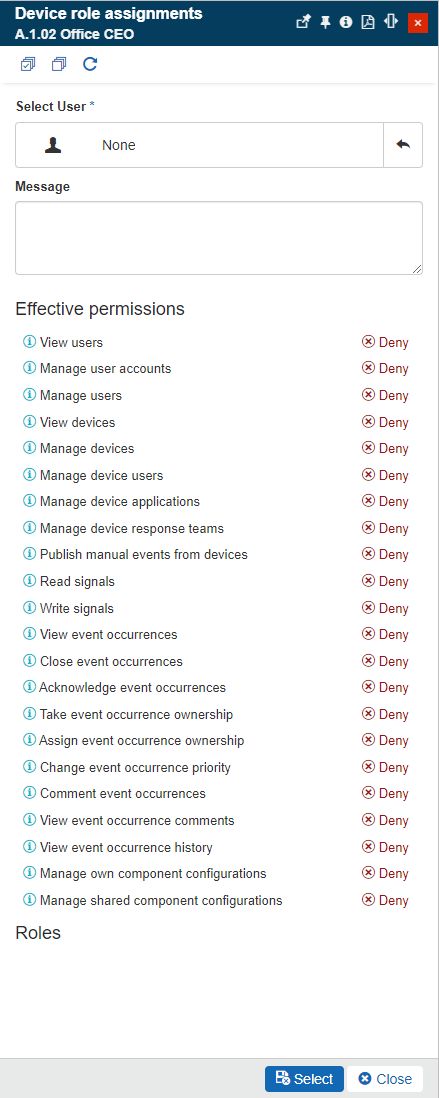
The Device Role Assignments panel
Select User - opens the Select User panel where the list of users available for selection is displayed.
The list is filtered displaying only the users that are covered by the currently logged-in user's permissions. Hence, users having only the View users permission enabled will be allowed to select only users having common and lower or equal rights. On the other hand, a user having the View all users permission enabled will be allowed to select from a complete list of all system users.
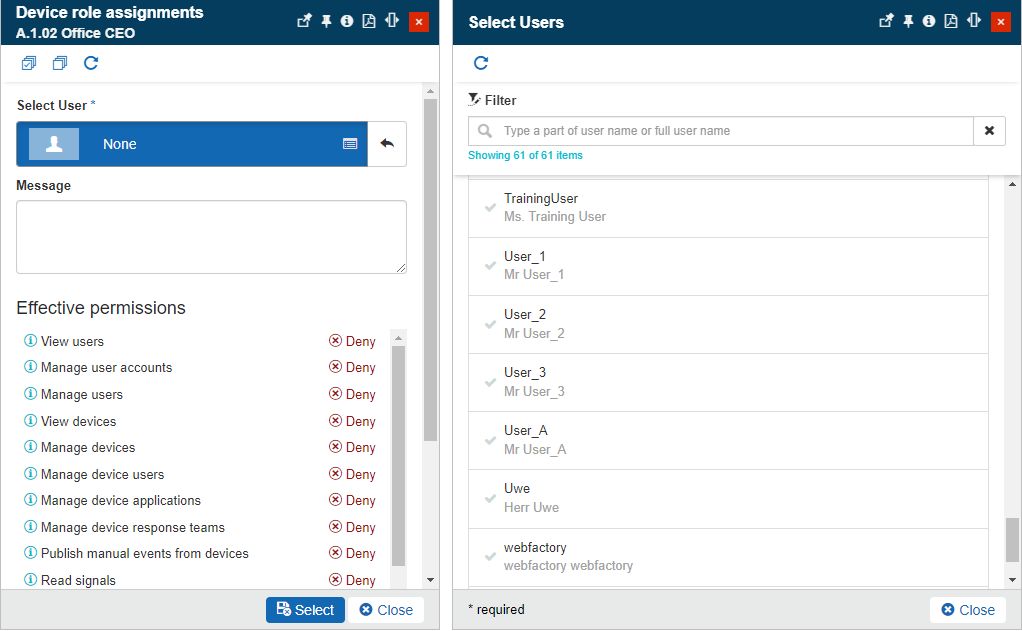
The Select users panel
Message - allows the user to type in an optional message that can accompany the E-Mail notification that will be delivered to the involved user.
Effective permissions - lists the Entity set of Effective permissions, where by default, are all set to Deny. After selecting the user and the role package the list is adjusted to display the Effective permissions applied for the user.
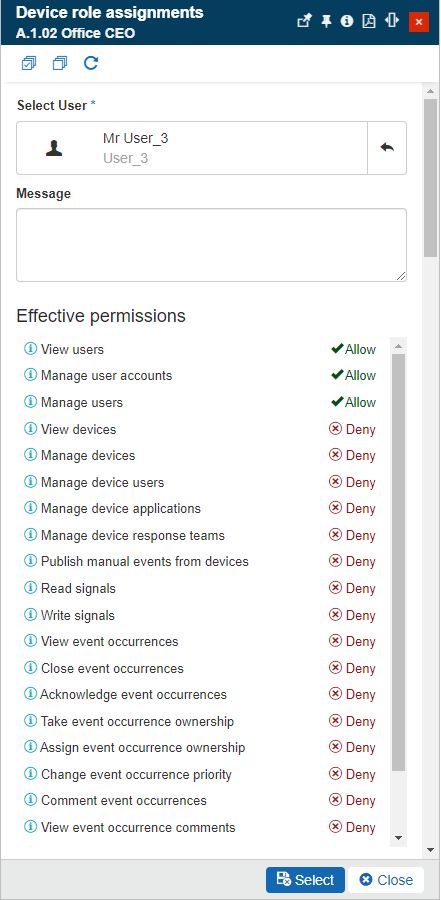
The Effective permissions list
Roles - lists the roles available for the currently logged-in user. At least one role needs to be assigned to the user, in the context of the selected Device.
Warning
The list of roles will only be populated after selecting a user for the assignment.
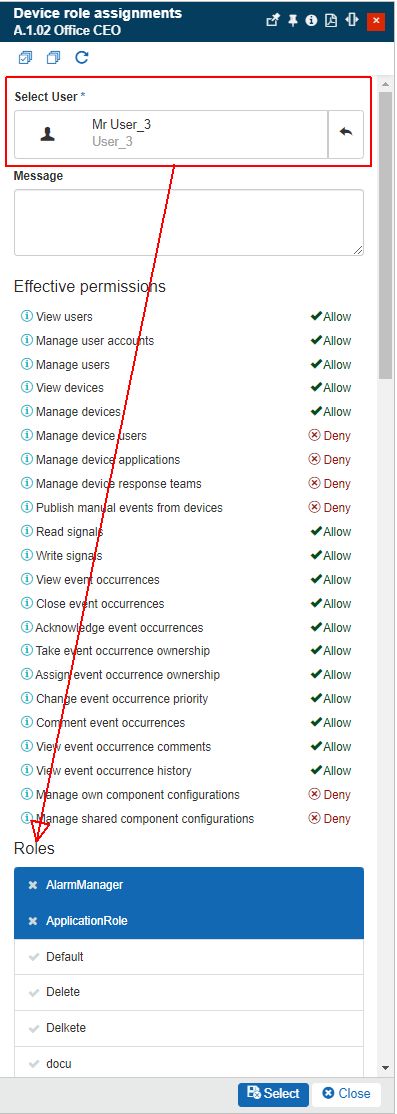
The list of Device Roles
After filling in all the mandatory settings the role assignment can be applied by clicking the Select button. To leave the Add Device role assignments mode the user can click the Cancel button.
Adapters Role Assignments
Check out this article and learn more details about the Adapter Role Assignments panels and how to assign a user to Adapters.
Users having the Manage users permission enabled can assign other users to Adapters, using the Adapter Role Assignments list panel, accessible by clicking the Users button of the Edit Adapter panel.
Warning
To assign users to an Adapter, the currently logged-in user should be able to view and manage that Adapter. For more details, please visit the Adapters configuration article, here.
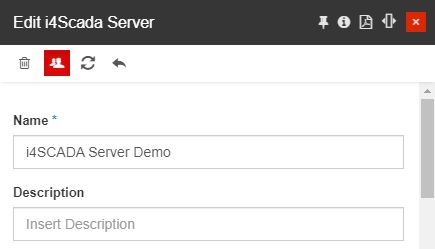
The Users button
By clicking the Users button, the Adapter role assignments panel is opened. In this view, the user can click the Add button to assign further users to the selected Adapter.
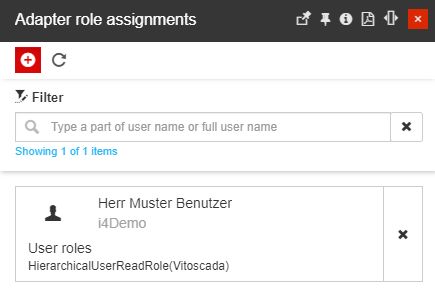
The Add Adapter role assignments button
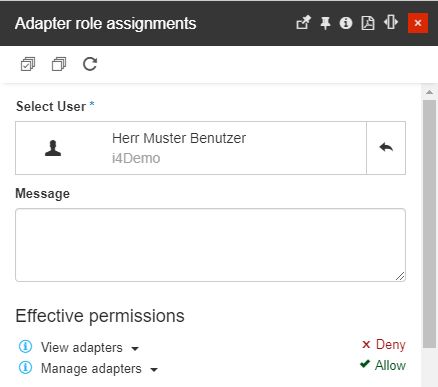
The Adapter role assignments panel allows the user to proceed with the following selections:
The Adapter role assignments panel
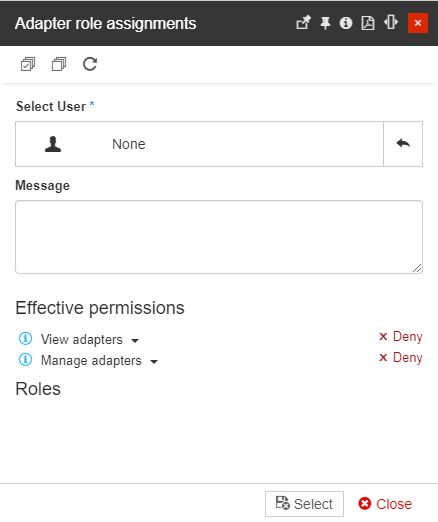
Select User - opens the Select User panel where the list of users available for selection is displayed.
The list is filtered displaying only the users that are covered by the currently logged-in user's permissions. Hence, users having only the View users permission enabled will be allowed to select only users having common and lower or equal rights. On the other hand, a user having the View all users permission enabled will be allowed to select from a complete list of all system users.
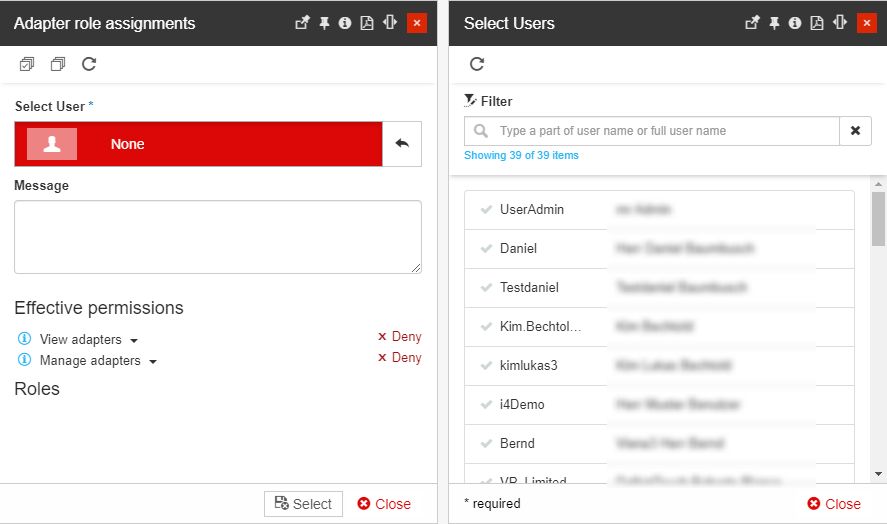
The Select users panel
Message - allows the user to type in an optional message that can accompany the E-Mail notification that will be delivered to the involved user.
Effective permissions - lists the Entity set of Effective permissions, where by default, are all set to Deny. After selecting the user and the role package the list is adjusted to display the Effective permissions applied for the user.
The Effective permissions list
Roles - lists the roles available for the currently logged-in user. At least one role needs to be assigned to the user, in the context of the selected Adapter.
Warning
The list of roles will only be populated after selecting a user for the assignment.

The list of Adapter Roles
After filling in all the mandatory settings the role assignment can be applied by clicking the Select button. To leave the Add Adapter role assignments mode the user can click the Cancel button.
Signals Role Assignments
Check out this article and learn more details about the Signal Role Assignments panels and how to assign a user to Signals.
Users having the Manage users permission enabled can assign other users to Signals, using the Signal Role Assignments list panel, accessible by clicking the Users button of the Edit Signal panel.
Warning
In order to assign users to a Signal, the currently logged-in user should be able to view and manage that Signal. For more details, please visit the Signals management article, here.

The Users button
By clicking the Users button, the Signal role assignments panel is opened. In this view, the user can click the Add button to assign further users to the selected Signal.
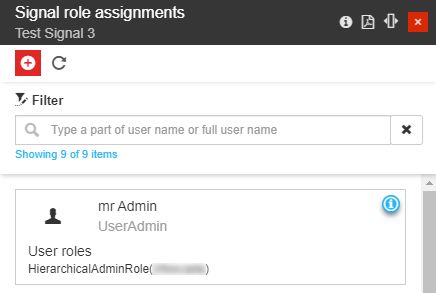
The Add Signal role assignments button
The Signal role assignments panel allows the user to proceed with the following selections:
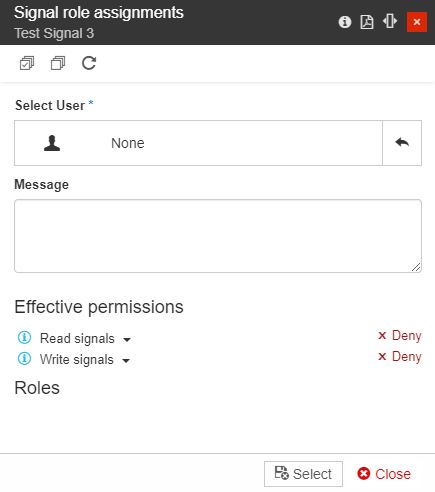
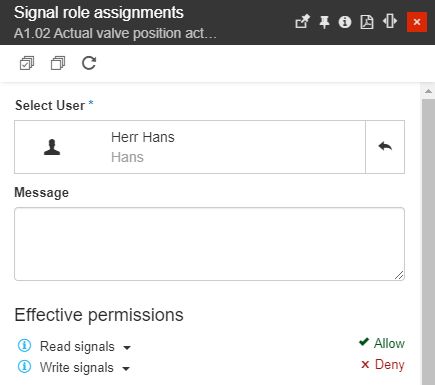
The Signal Role Assignments panel
Select User - opens the Select User panel where the list of users available for selection is displayed.
The list is filtered displaying only the users that are covered by the currently logged-in user's permissions. Hence, users having only the View users permission enabled will be allowed to select only users having common and lower or equal rights. On the other hand, a user having the View all users permission enabled will be allowed to select from a complete list of all system users.
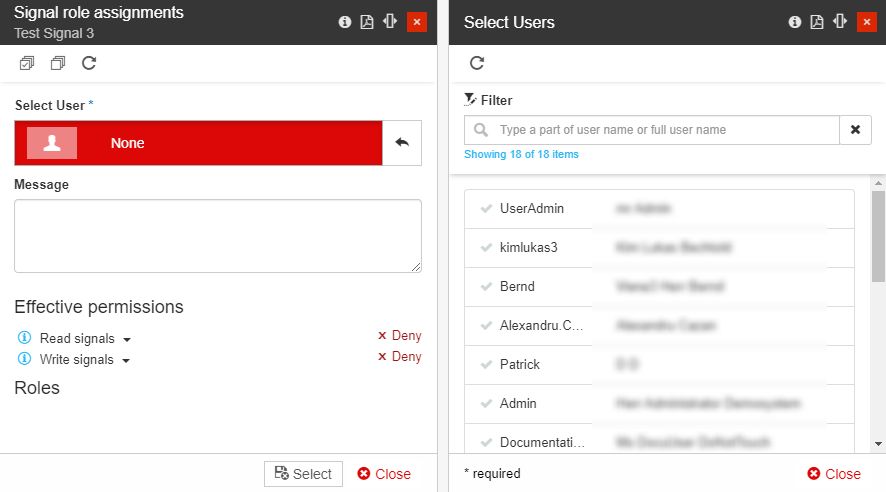
The Select users panel
Message - allows the user to type in an optional message that can accompany the E-Mail notification that will be delivered to the involved user.
Effective permissions - lists the Entity set of Effective permissions, where by default, are all set to Deny. After selecting the user and the role package the list is adjusted to display the Effective permissions applied for the user.
The Effective permissions list
Roles - lists the roles available for the currently logged-in user. At least one role needs to be assigned to the user, in the context of the selected Signal.
Warning
The list of roles will only be populated after selecting a user for the assignment.
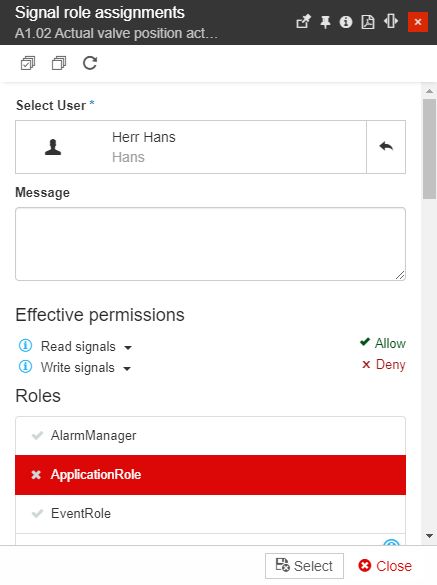
The list of Signal Roles
After filling in all the mandatory settings the role assignment can be applied by clicking the Select button. To leave the Add Signal role assignments mode the user can click the Cancel button.
Reports Role Assignments
Check out this article and learn more details about the Reports Role Assignments panels and how to assign a user to Reports.
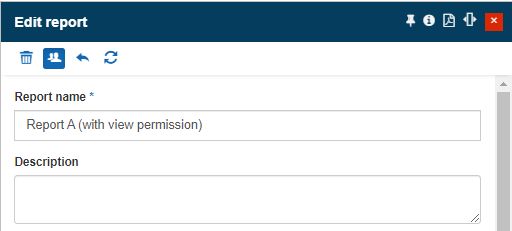
Users having the Manage users permission enabled can assign other users to Reports, using the Report Role Assignments list panel, accessible by clicking the Users button of the Edit report panel.
Warning
To assign users to a Report, the currently logged-in user should be able to view and manage that Report. For more details, please visit the Reports Management article, here.
The Users button
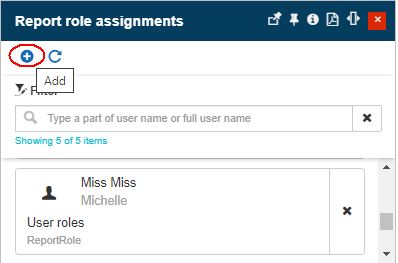
By clicking the Users button, the Report role assignments panel is opened. In this view, the user can click the Add button to assign further users to the selected Report.
The Add Report role assignments button
The Report role assignments panel allows the user to proceed with the following selections:

The Report role assignments panel
Select User - opens the Select User panel where the list of users available for selection is displayed.
The list is filtered displaying only the users that are covered by the currently logged-in user's permissions. Hence, users having only the View users permission enabled will be allowed to select only users having common and lower or equal rights. On the other hand, a user having the View all users permission enabled will be allowed to select from a complete list of all system users.
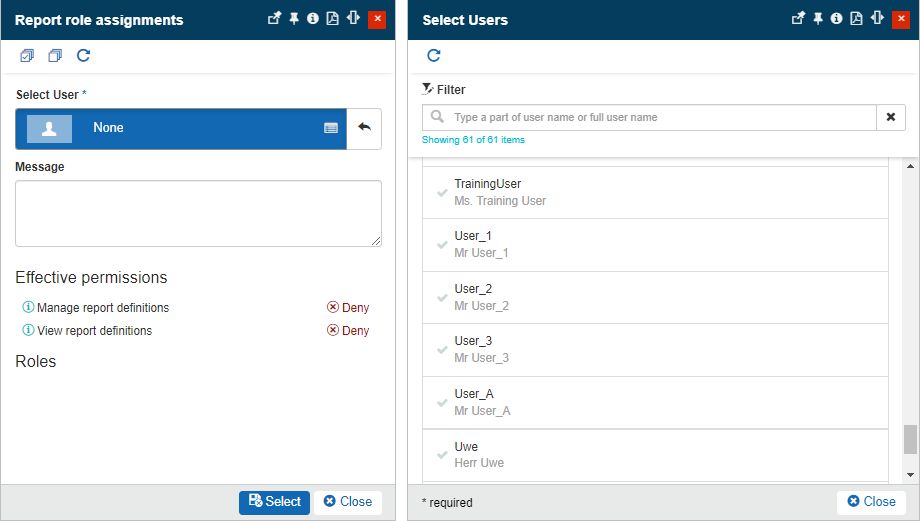
The Select users panel
Message - allows the user to type in an optional message that can accompany the E-Mail notification that will be delivered to the involved user.
Effective permissions - lists the Entity set of Effective permissions, where by default, are all set to Deny. After selecting the user and the role package the list is adjusted to display the Effective permissions applied for the user.
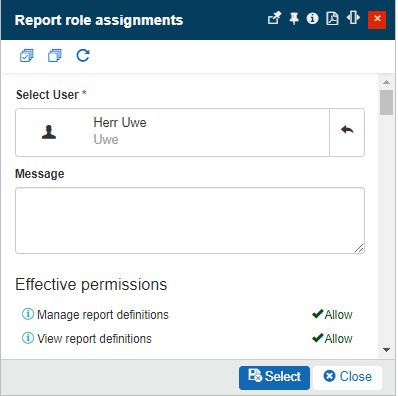
The Effective permissions list
Roles - lists the roles available for the currently logged-in user. At least one role needs to be assigned to the user, in the context of the selected Report.
Warning
The list of roles will only be populated after selecting a user for the assignment.
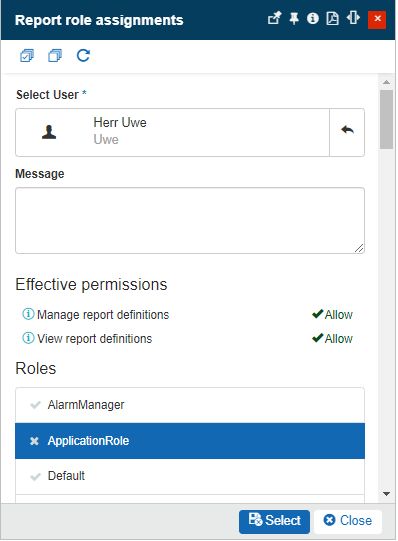
The list of Report Roles
After filling in all the mandatory settings the role assignment can be applied by clicking the Select button. To leave the Add Report role assignments mode the user can click the Cancel button.
Applications Role Assignments
Check out this article and learn more details about the Applications Role Assignments panels and how to assign a user to Applications.
Users having the Manage users permission enabled can assign other users to Applications, using the Application Role Assignments list panel, accessible by clicking the Users button of the Edit Application panel.
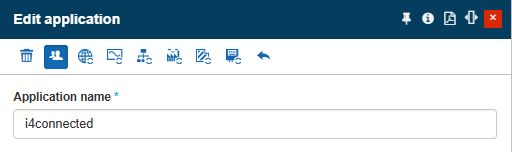
The Users button
Warning
In order to assign users to an Application, the currently logged-in user should be able to view and manage that Application. For more details, please visit the Applications Management article, here.
By clicking the Users button, the Application role assignments panel is opened. In this view, the user can click the Add button to assign further users to the selected Application.
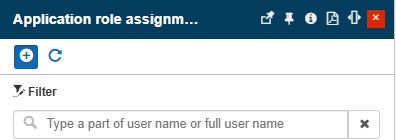
The Add Application role assignments button
The Application role assignments panel allows the user to proceed with the following selections:
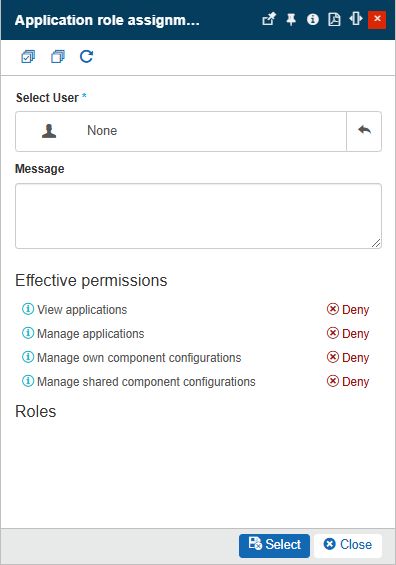
The Application role assignments panel
Select User - opens the Select User panel where the list of users available for selection is displayed.
The list is filtered displaying only the users that are covered by the currently logged-in user's permissions. Hence, users having only the View users permission enabled will be allowed to select only users having common and lower or equal rights. On the other hand, a user having the View all users permission enabled will be allowed to select from a complete list of all system users.
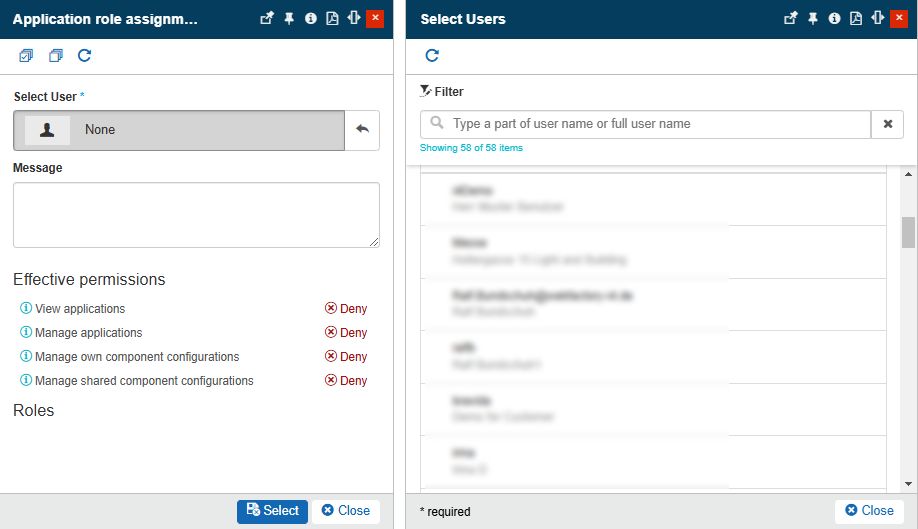
The Select users panel
Message - allows the user to type in an optional message that can accompany the E-Mail notification that will be delivered to the involved user.
Effective permissions - lists the Entity set of Effective permissions, where by default, are all set to Deny. After selecting the user and the role package the list is adjusted to display the Effective permissions applied to the user.
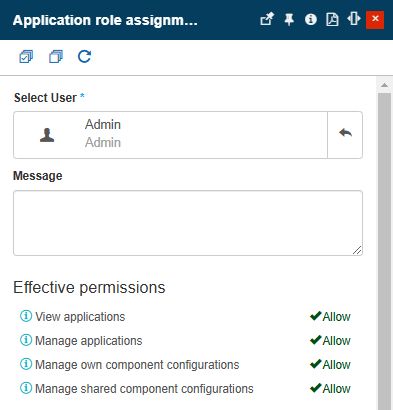
The Effective permissions list
Roles - lists the roles available for the currently logged-in user. At least one role needs to be assigned to the user, in the context of the selected application.
Warning
The list of roles will only be populated after selecting a user for the assignment.
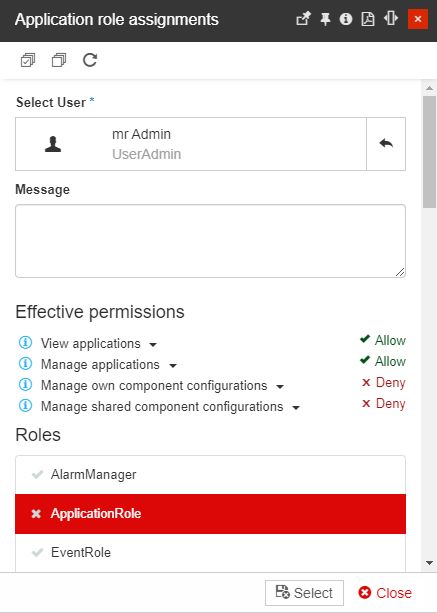
The list of Application Roles
After filling in all the mandatory settings the role assignment can be applied by clicking the Select button. To leave the Add Application role assignments mode the user can click the Cancel button.
Response Teams Role Assignments
Check out this article and learn more details about the Response Teams Role Assignments panels and how to assign a user to Response Teams.
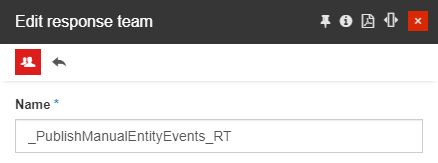
Users having the Manage users permission enabled can assign other users to Response Teams, using the Response Team Role Assignments list panel, accessible by clicking the Users button of the Edit report panel.
The Users button
Warning
In order to assign users to a Response Team, the currently logged-in user should be able to view and manage that Response Team. For more details, please visit the Response Team Management article, here.
By clicking the Users button, the Response Team role assignments panel is opened. In this view, the user can click the Add button to assign further users to the selected Response Team.
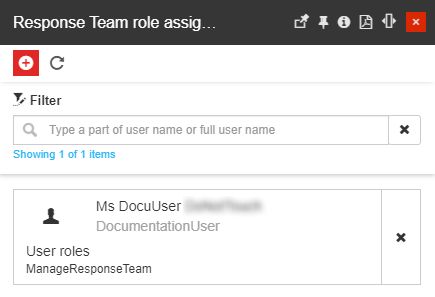
The Add Response Teams role assignments button
The Response Team role assignments panel allows the user to proceed with the following selections:
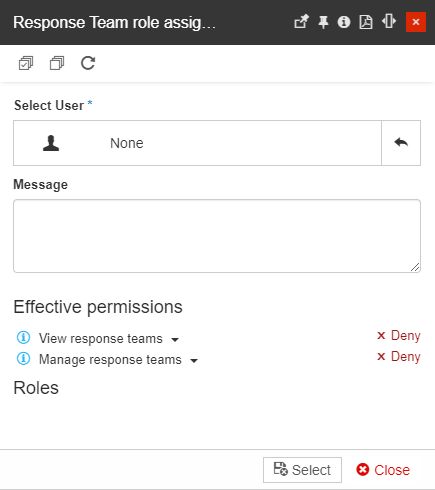
The Response Teams role assignments panel
Select User - opens the Select User panel where the list of users available for selection is displayed.
The list is filtered displaying only the users that are covered by the currently logged-in user's permissions. Hence, users having only the View users permission enabled will be allowed to select only users having common and lower or equal rights. On the other hand, a user having the View all users permission enabled will be allowed to select from a complete list of all system users.
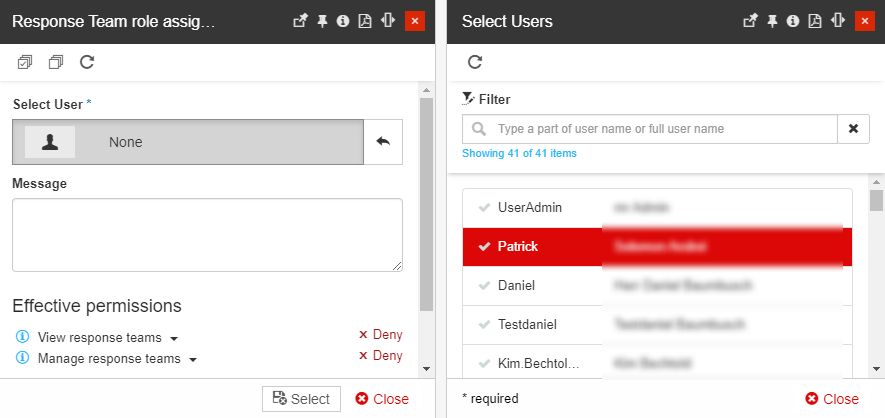
The Select users panel
Message - allows the user to type in an optional message that can accompany the E-Mail notification that will be delivered to the involved user.
Effective permissions - lists the Entity set of Effective permissions, where by default, are all set to Deny. After selecting the user and the role package the list is adjusted to display the Effective permissions applied for the user.
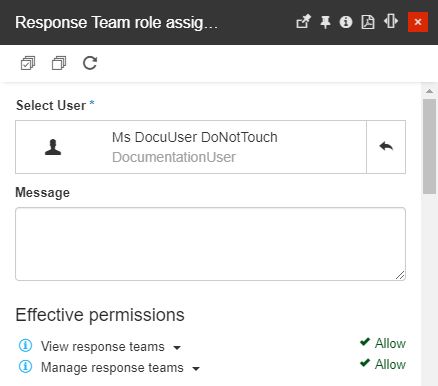
The Effective permissions list
Roles - lists the roles available for the currently logged-in user. At least one role needs to be assigned to the user, in the context of the selected Response Team.
Warning
The list of roles will only be populated after selecting a user for the assignment.
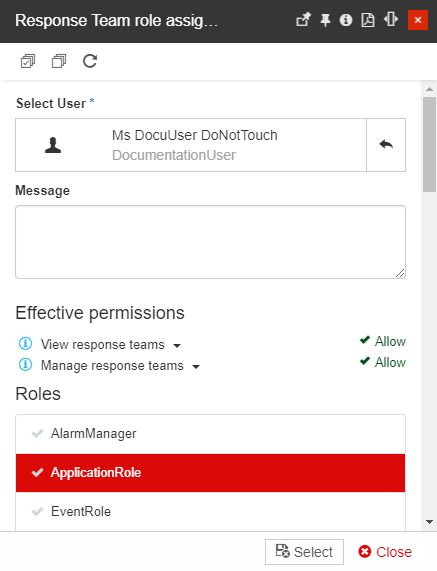
The list of Response Team Roles
After filling in all the mandatory settings the role assignment can be applied by clicking the Select button. To leave the Add Response Team role assignments mode the user can click the Cancel button.
Notification Profiles Role Assignments
Check out this article and learn more details about the Notification Profiles Role Assignments panels and how to assign a user to Notification Profiles.
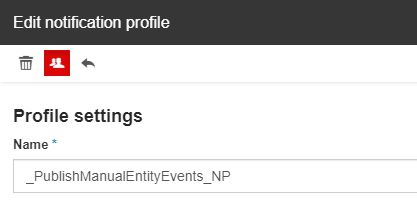
Users having the Manage users permission enabled can assign other users to Notification Profiles, using the Notification Profiles Role Assignments list panel, accessible by clicking the Users button of the Edit Notification Profile panel.
The Users button
Warning
In order to assign users to a Notification Profile, the currently logged-in user should be able to view and manage that Notification Profile. For more details, please visit the Notification Profile Management article, here.
By clicking the Users button, the Notification Profile role assignments panel is opened. In this view, the user can click the Add button to assign further users to the selected Notification Profile.
The Add Notification Profile role assignments button
The Notification Profile role assignments panel allows the user to proceed with the following selections:
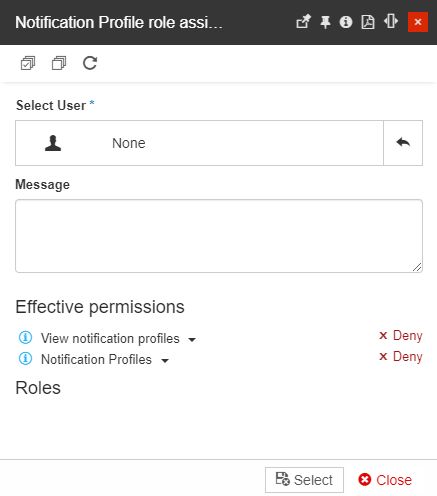
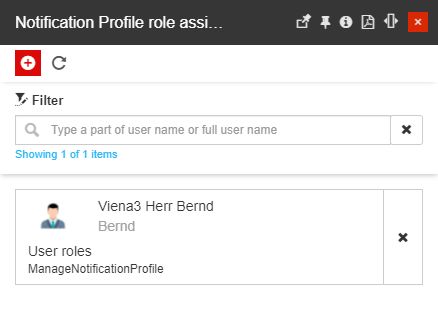
The Notification Profile role assignments panel
Select User - opens the Select User panel where the list of users available for selection is displayed.
The list is filtered displaying only the users that are covered by the currently logged-in user's permissions. Hence, users having only the View users permission enabled will be allowed to select only users having common and lower or equal rights. On the other hand, a user having the View all users permission enabled will be allowed to select from a complete list of all system users.
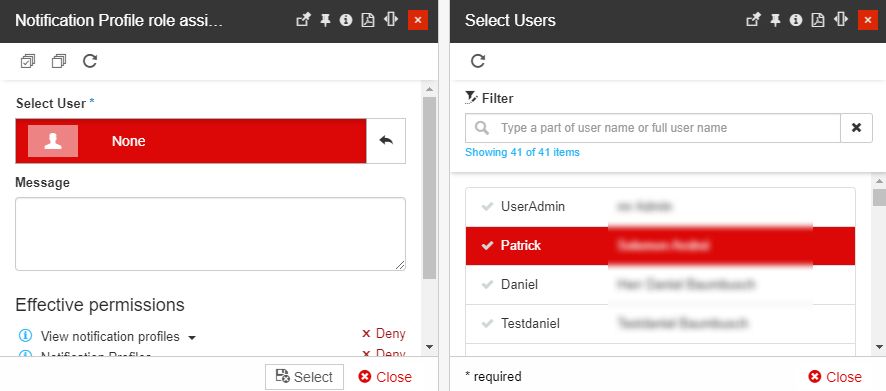
The Select users panel
Message - allows the user to type in an optional message that can accompany the E-Mail notification that will be delivered to the involved user.
Effective permissions - lists the Entity set of Effective permissions, where by default, are all set to Deny. After selecting the user and the role package the list is adjusted to display the Effective permissions applied for the user.
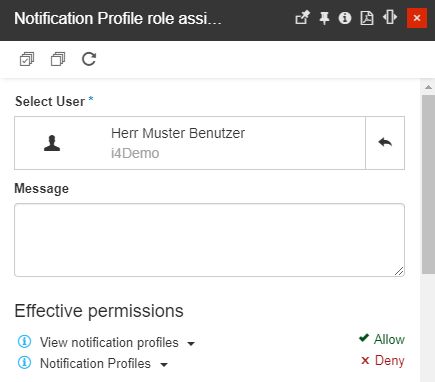
The Effective permissions list
Roles - lists the roles available for the currently logged-in user. At least one role needs to be assigned to the user, in the context of the selected Notification Profile.
Warning
The list of roles will only be populated after selecting a user for the assignment.
The list of Notification Profile Roles
After filling in all the mandatory settings the role assignment can be applied by clicking the Select button. To leave the Add Notification Profile role assignments mode the user can click the Cancel button.