Moving the Analysis Services database to a different SQL Server
This article aims to guide you with moving the Analysis Services database to a different SQL Server and provides information about many other settings.
This article aims to guide the users in moving the Analysis Services database to a different SQL Server. The described procedure implies backing up the source Analysis Services database, restoring the backed up database on the target SQL Server, and updating all connection strings to point to the new location of the Analysis Services database.
Before describing the procedure of moving the Analysis Services database, it is important to mention that the target SQL Server must have a version compatible with the Analysis Services database to be moved and must have Analysis Services installed.
Backing up the SQL Database:
Open Microsoft SQL Server Management Studio and connect to the Analysis Services.
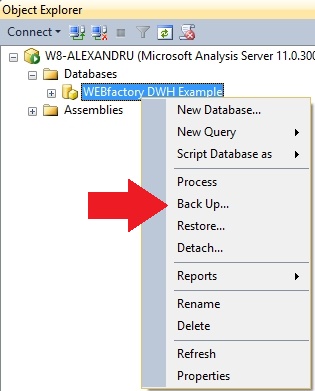
In the Object Explorer, expand the Databases node and right-click the appropriate Analysis Services database. Select Back Up... from the contextual menu.
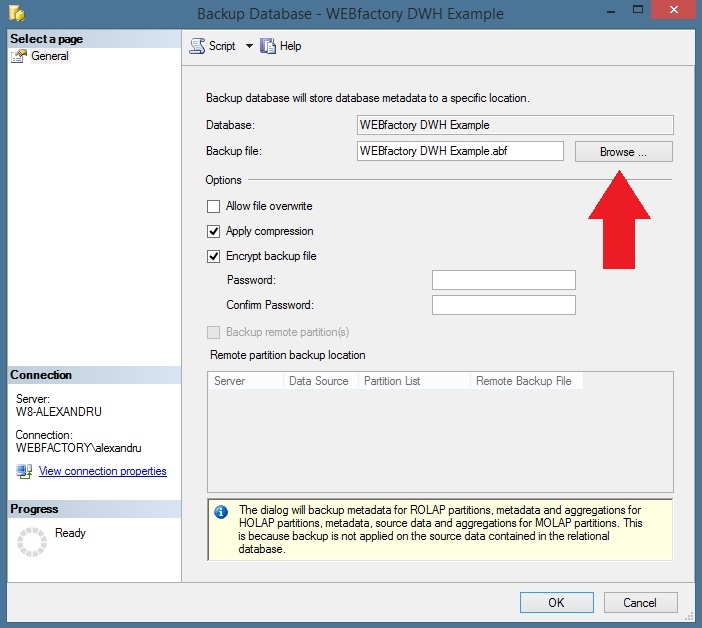
In the Backup Database dialog, select the folder where the backup (.ABF) file will be saved. By default, the backup file will be saved in C:\Program Files\Microsoft SQL Server\MSAS11.MSSQLSERVER\OLAP\Data.
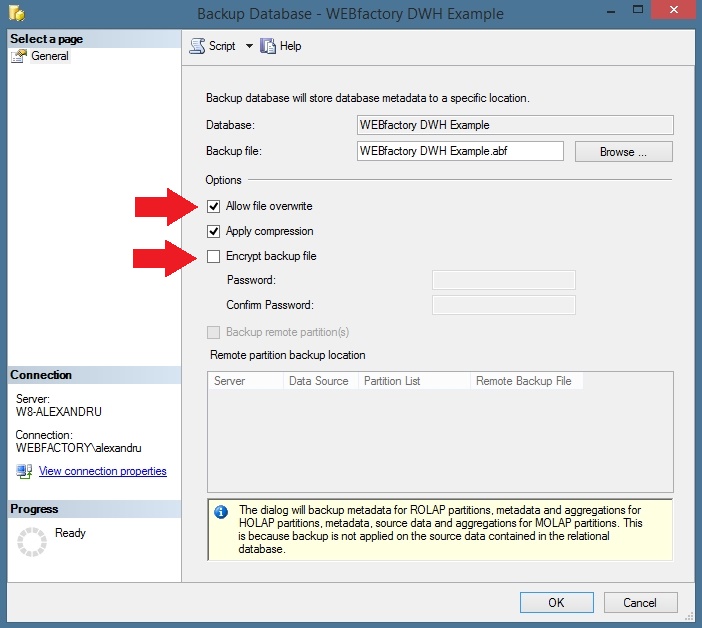
In the Options area, select Allow file overwrite. Deselect the Encrypt backup file option if you don't need encryption. If you decide to encrypt the file, provide a password for encryption.
Click OK to start the backup procedure. After the backup is complete, the backup file (.ABF) will be available in the folder specified in the Backup Database dialog.
Restoring the SQL Database on the target SQL Server:
On the target SQL Server with Analysis Services, copy the Analysis Database backup file (.ABF) to Program Files\Microsoft SQL Server\MSAS11.MSSQLSERVER\OLAP\Backup (where MSSQLSERVER - marked with italic fonts - is the SQL instance name).
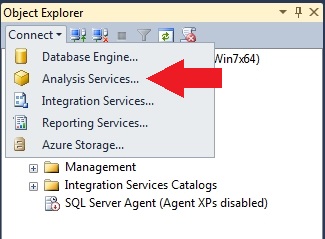
In Microsoft SQL Server Management Studio, connect to the Analysis Services server by clicking Connect > Analysis Services... in the Object Explorer.
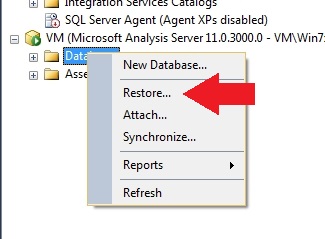
Select the Databases from the Microsoft Analysis Server and right-click on it to open the contextual menu. Select Restore....
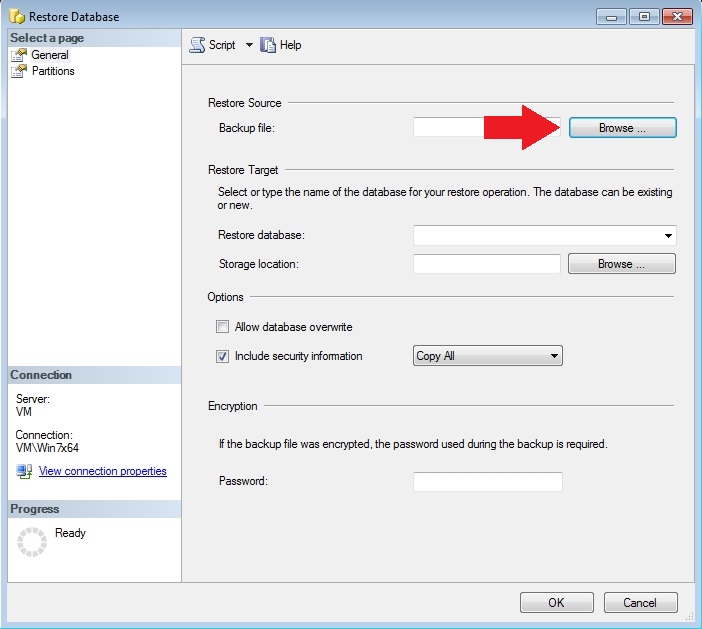
In the Restore Database dialog, go to the Restore Source Backup file and click the Browse button.
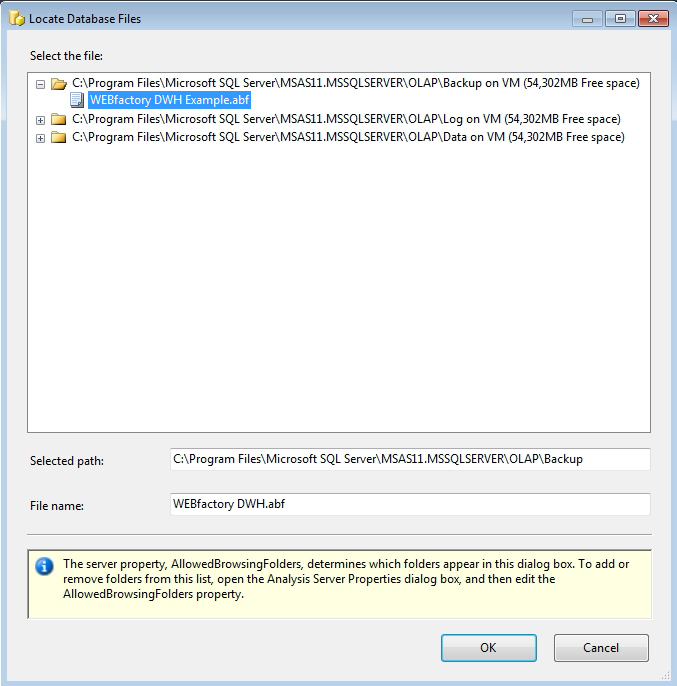
In the Locate Database Files dialog, the Analysis Services backup file should be located under the first displayed option (note that the path displayed is exactly the location where we have previously copied the .abf backup file). Select the backup file and press OK.
Back in the Restore Database dialog, enable the Allow database to overwrite option and make sure to uncheck the Overwrite security information option.
The Overwrite security information option becomes available only after activating the Allow database overwrite option.
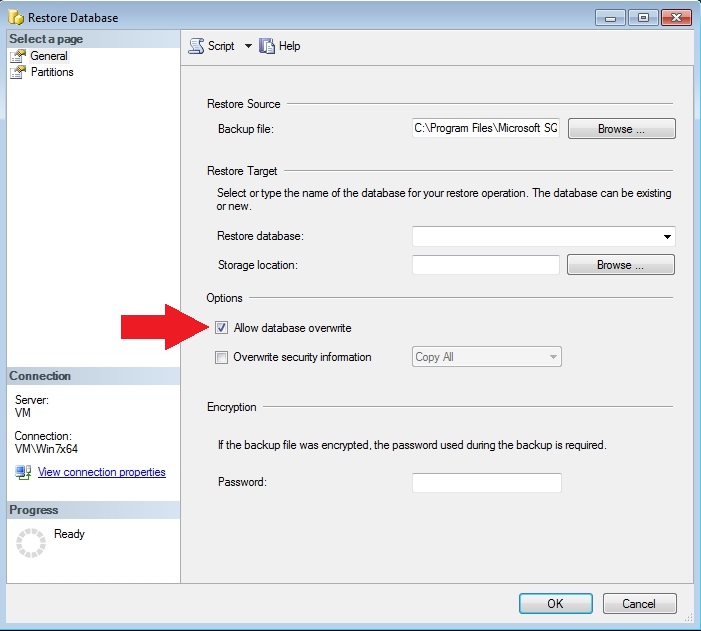
Select OK to start the restore process.
Updating the Connection Strings:
After the database has been restored, the connections strings for Portal, Server, and Reporting Server must be updated to point to the new location of the Analysis Services database. Also, the Analysis Services connection to the SQL database must be updated, if the Analysis Services and the SQL Database were running on the same SQL Server before moving (so the connection string points to localhost).
Update the Portal connection string
Go to the i4connected installation location (by default C:\Program Files\WEBfactory\Data Warehouse\[CUSTOMER_NAME]\[SW_NAME]).
Open the Portal folder and edit the web.config configuration file using any preferred text editor.
Locate the <connectionStrings> node and the connection string named DataWarehouseSSASConnectionString inside it.
<add name="DataWarehouseSSASConnectionString" connectionString="Data Source=.\WEBFACTORY2010DW;Initial Catalog=WEBfactory DWH" />
Edit the connectionString's Data Source attribute to point to the new SQL Server running the restored database and the appropriate database instance name.
<add name="DataWarehouseSSASConnectionString" connectionString="Data Source=TARGET-SQLSERVER-PC\pEMS;Initial Catalog=WEBfactory DWH" />Edit the connectionString's Initial Catalog attribute to point to the correct database.
<add name="DataWarehouseSSASConnectionString" connectionString="Data Source=TARGET-SQLSERVER-PC\pEMS;Initial Catalog=WEBfactory DWH Example" />Save and close the file.
Repeat steps 3, 4, 5, and 6 for both the WEBfactory DWH Server.exe.config configuration file from the Server folder and WEBfactory.DWH.Reporting.Server.exe.config configuration file from the Reporting folder.
Note
If other clients connect to the Analysis Services database, all their connection strings must be updated!
Updating the Analysis Services connection string to the SQL Database
This step is required if the Analysis Services was connected to a locally hosted SQL database before moving it to a different SQL Server. If the SQL database was on a different SQL Server before moving the Analysis Services database, the existing connection string should be intact and working.
On the machine running the SQL Server with Analysis Services, open the Microsoft SQL Server Management Studio. Connect to the appropriate Analysis Services instance.
Go to the Analysis Services database > Data Sources and double-click the appropriate data source to open the Data Source Properties dialog.

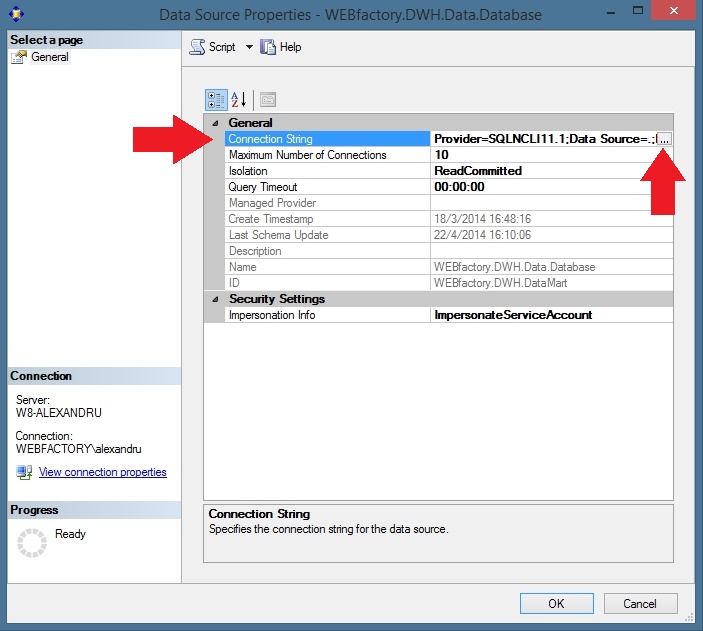
In the Data Source Properties, Select the Connection String and press the browse (...) button to open the Connection Manager.
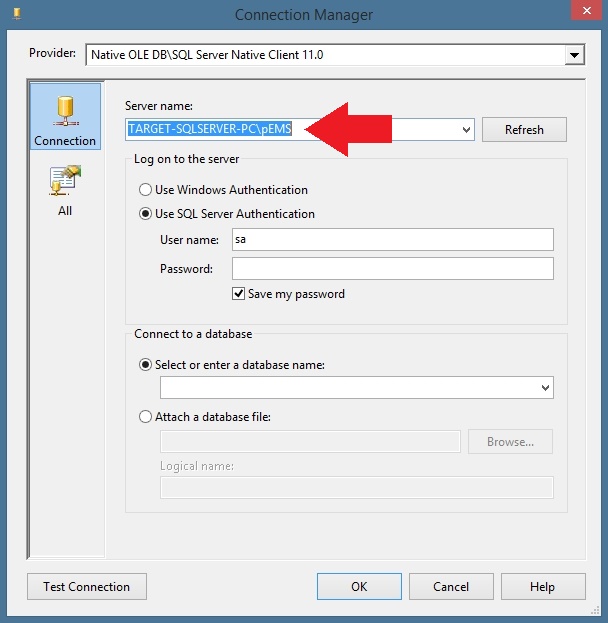
In the Connection Manager window, insert the IP (or name) of the machine running the SQL Server with the SQL database. To connect to a named instance on the SQL Server, add the instance name after a backslash character. For example TARGET-SQLSERVER-PC\pEMS.
Best practice: use SQL Server Authentication in order to avoid security issues. This is not required but recommended.
At the Connect to a database section, choose Select or enter a database name and insert the name of the SQL database to which the Analysis Services needs to connect.
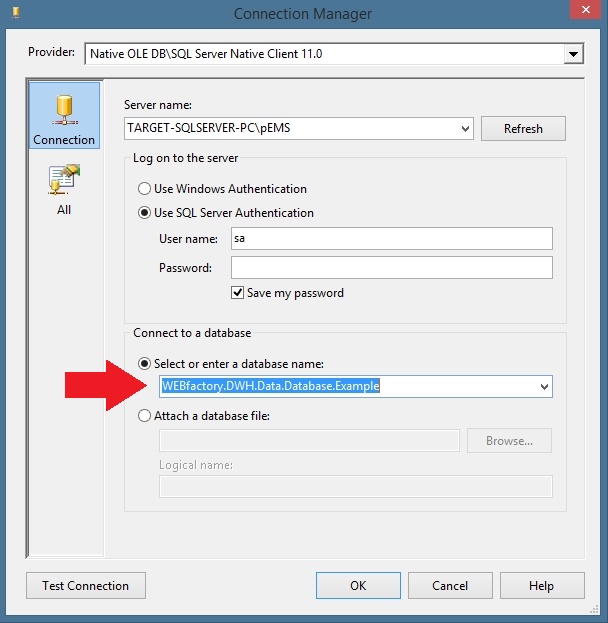
Click on Test Connection to check if the new settings are working. Click OK to confirm the connection.