Notification Profiles
The notification profile contains the configuration settings for publishing notifications to members of a response group. Learn more from this article!
The notification profile contains the configuration settings for publishing notifications to members of a response group. A notification profile is basically a template engine, supporting configuration of notifications via:
The i4connected event template notification engine can use the Scriban markup syntax to create and send notifications automatically when certain event conditions are met. Learn more about the Scriban syntax here.
The list of Notification profiles is available via the dedicated tile, for users having at least the View notification profiles permission enabled. In this view, the user can only see Notification Profiles if one of the following conditions is met:
the user is the owner of a Notification Profile;
the user has been explicitly assigned to a Notification Profile;
the user has the View all notification profiles permission enabled.
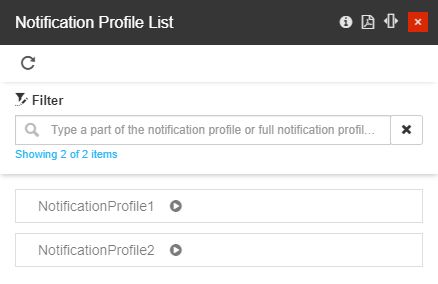
The Notification Profile List panel
Note
Users having the View all notification profiles permission enabled can see all the Notification profiles available in the system.
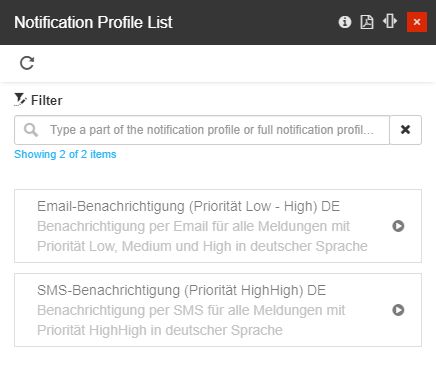
The Notification Profile List panel in view mode
The Notification Profiles are displayed as cards in a scrollable list providing the user with the following information:

The Notification Profile card
Notification profile name
Notification profile description
Notification profile status (Active or Inactive)
The list of Notification Profiles features a filtering mechanism, allowing the user to easily pinpoint the desired event template.
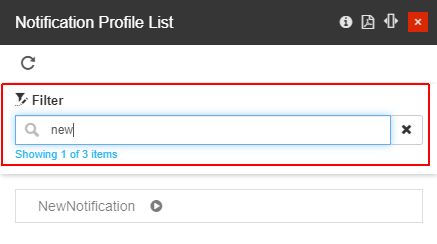
Example of filter applied to the list view
Tip
For a detailed description of the simple filtering mechanism, please also visit the Simple Filter article.
By clicking the Refresh toolbar button, the list of Notification Profiles is refreshed to display the most updated version of the page.
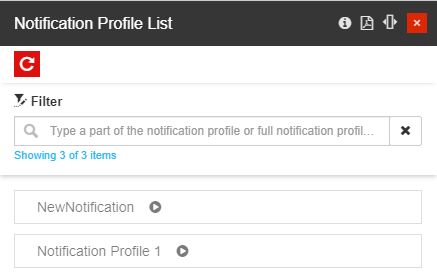
The Refresh button
Users having the Manage notification profiles permission enabled can also manage Notification Permissions, as described by the upcoming articles.
The Notification Profile List panel features the following actions:
Event Notification Settings
Check out this article to learn how to configure the Email, SMS, Telegram, and Server Event Notification settings for the i4messenger.
The first step in configuring the i4messenger is the definition of the Event Notification settings, such as Email settings, SMS settings, Telegram settings, and Notification Server settings. The Edit settings panel can be usually accessed under the Setup page (System settings tile).
Since processing these settings should be the responsibility of your system administrator, the contents of the Edit settings panel are guarded by the Manage configuration permission.
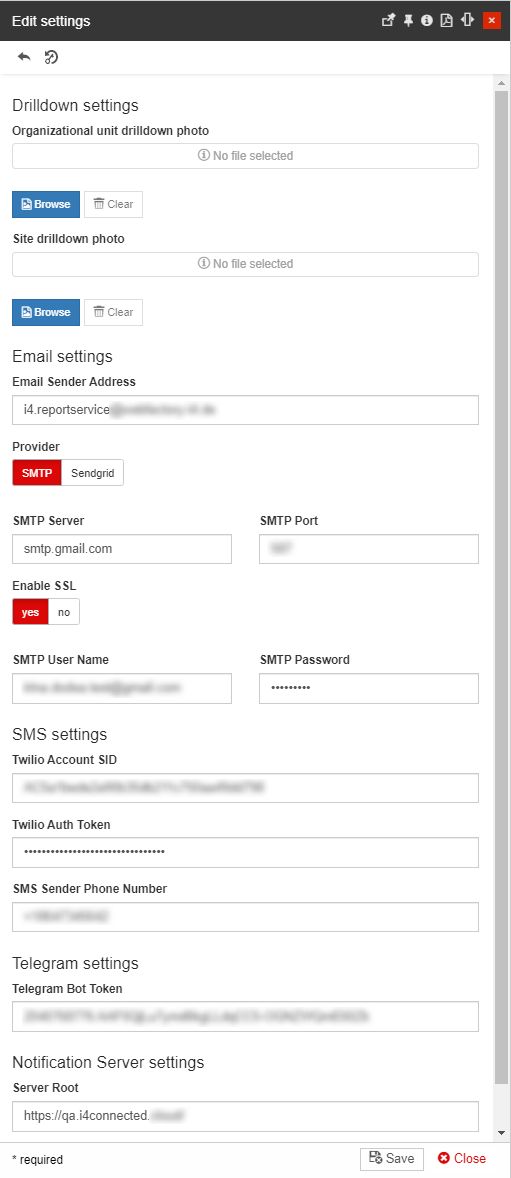
The Edit settings panel
Important
In this view, the i4messenger system administrator user can configure Email settings, SMS settings, Telegram settings, and the Notification Server settings. For more details, please visit the dedicated article, here.
Email Event notifications
Are you about to configure the Email event notifications? Check out this article for more details about the SMTP and SendGrid providers.
As the Event templates engine provides the possibility to send notifications via Email, SMS, and Telegram, the scope of the present article is to describe the email notification scenario.
The event occurrence emailing is based on:
User filters - a combination of event and object filters.
The system administrator can control what kind of events trigger an email notification, as well as how often and to what email address will the new notifications be delivered.
The recipient email addresses are stipulated at the User level and integrated into the i4messenger flow by means of Response Teams.
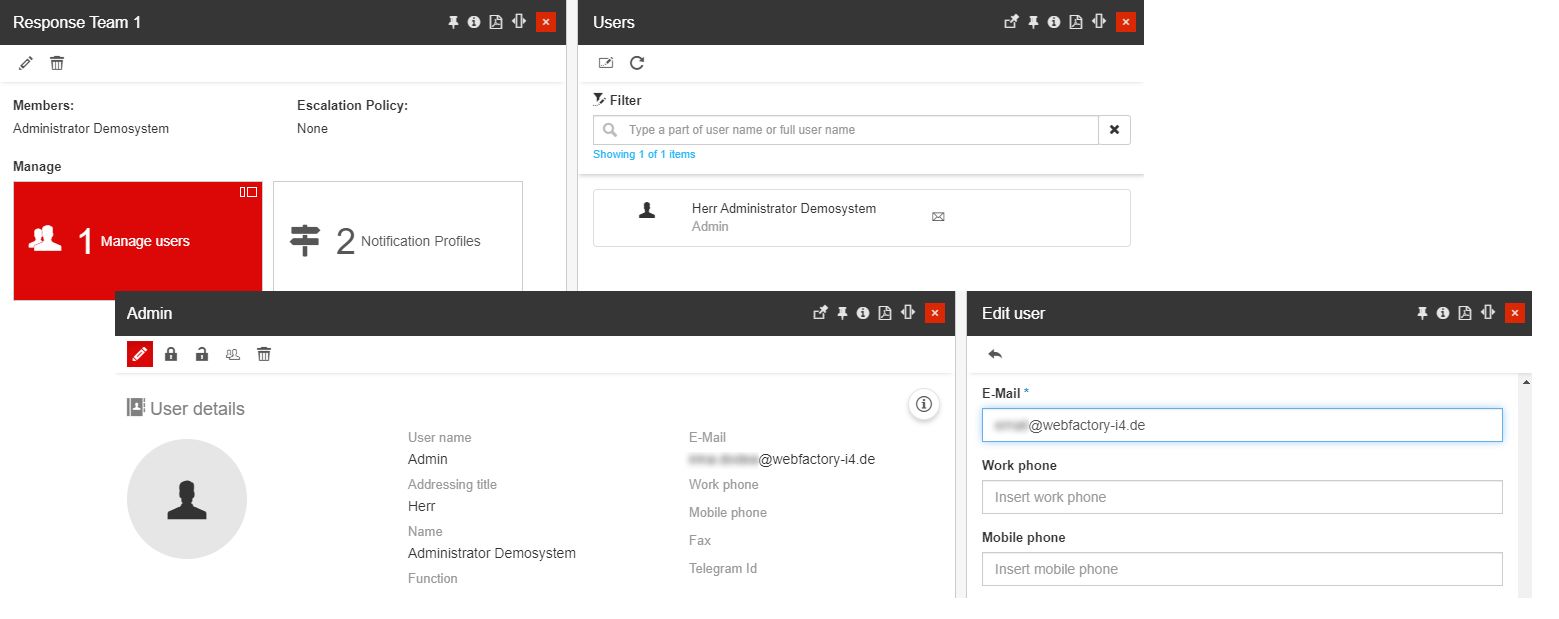
E-mail recipients settings
Templates - the template defines the format of the sent email. Templates support placeholders so that different information from the occurrence can be written in the email.
Provider - SMTP email and/or SendGrid email
Provider settings - depending on the selected provider, the user is required to add further settings, as described by the upcoming articles.
SMTP Provider
SMTP stands for Simple Mail Transfer Protocol, which is a communication protocol for electronic mail transmission. As described under the Global system settings article, by setting the SMTP Provider, the user needs to fill in the SMTP Server, Port, Username, Password and enable or disable SSL.
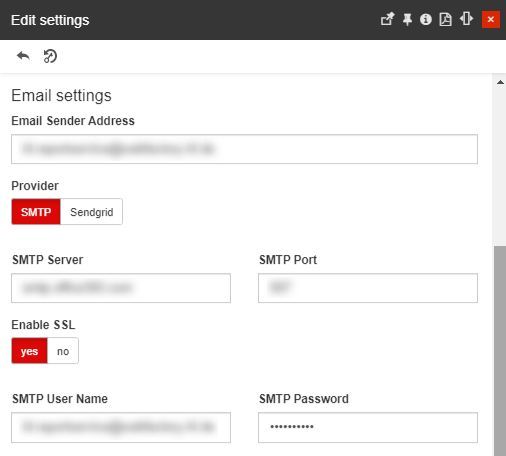
SMTP Provider settings
SendGrid Provider
SendGrid is a communication platform that ensures electronic mail transmission. SendGrid provides a cloud-based email delivery service that assists email delivery.
By setting the SendGrid provider, the user is requested to fill in the SendGrid API Key, as described under the Global system settings article,
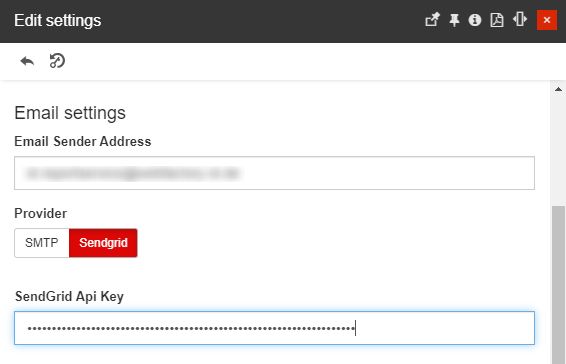
The SendGrid Provider settings
SMS Event notifications
Configure your SMS Event notification was never easier! Check out this article to learn how to do it by yourself!
The event notifications can be delivered via SMS, through the Twilio provider. Twilio is a cloud communications platform that allows its users to perform communication functions, such as sending and receiving text messages.
The phone numbers of the SMS recipients are stipulated at the User level and integrated into the i4messenger flow, by means of Response Teams.
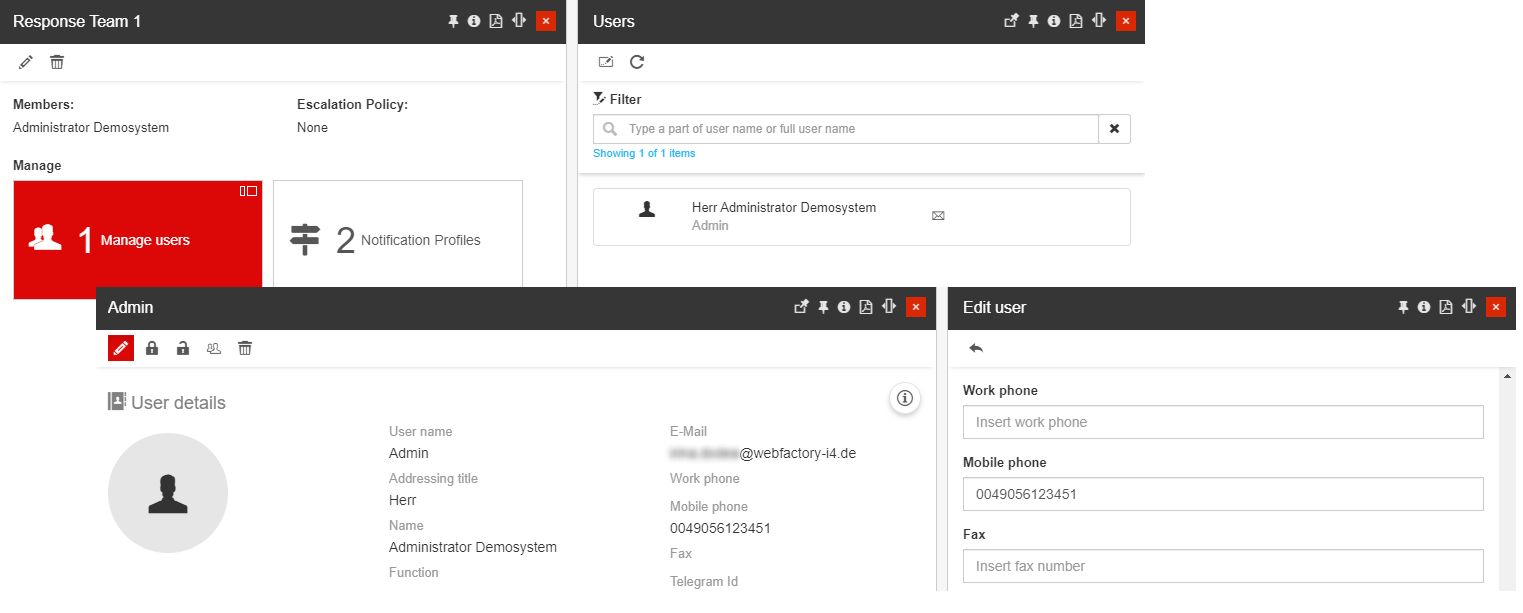
SMS recipients settings
As described in the Edit event notification settings article, the SMS settings expect the Twilio Account SID, the Twilio Auth Token, and the Sender Phone Number.
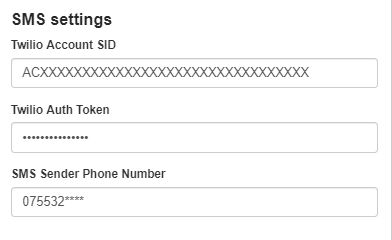
The SMS Provider settings
Unlike the emailing workflow, the SMS event notifications are limited to a total amount of 160 alpha-numeric characters per SMS. Twilio does not support batching notifications, instead, each notification is sent out as a separate message.
On the other hand, the benefit of this provider is the delivery speed which pushes the event notifications through the channel.
Telegram Event notifications
Configuring your Telegram Event notification was never easier! Check out this article to learn how to do it by yourself!
Since i4connected5.6.16, the event notifications can be delivered as messages, using the Telegram application. Telegram is a multilingual messaging app, focused on speed and security, that can be used on multiple devices at the same time. The Telegram application is available for various operating systems, such as iOS, Android, and a universal desktop app.
The integration between i4connected and Telegram is established on basis of a third-party application, called Bot. Bots run inside Telegram, and at their core, Bots are special accounts that do not require an additional phone number.
Telegram notifications also have a characters limit, but since the limit is set to a total of 4096 alpha-numeric characters, we can say that using the Telegram provider, to handle event notifications, is the middle way between the Email and the SMS providers.
The Telegram Identification numbers of the message recipients are stipulated at the User level and integrated into the i4messenger flow, by means of Response Teams.
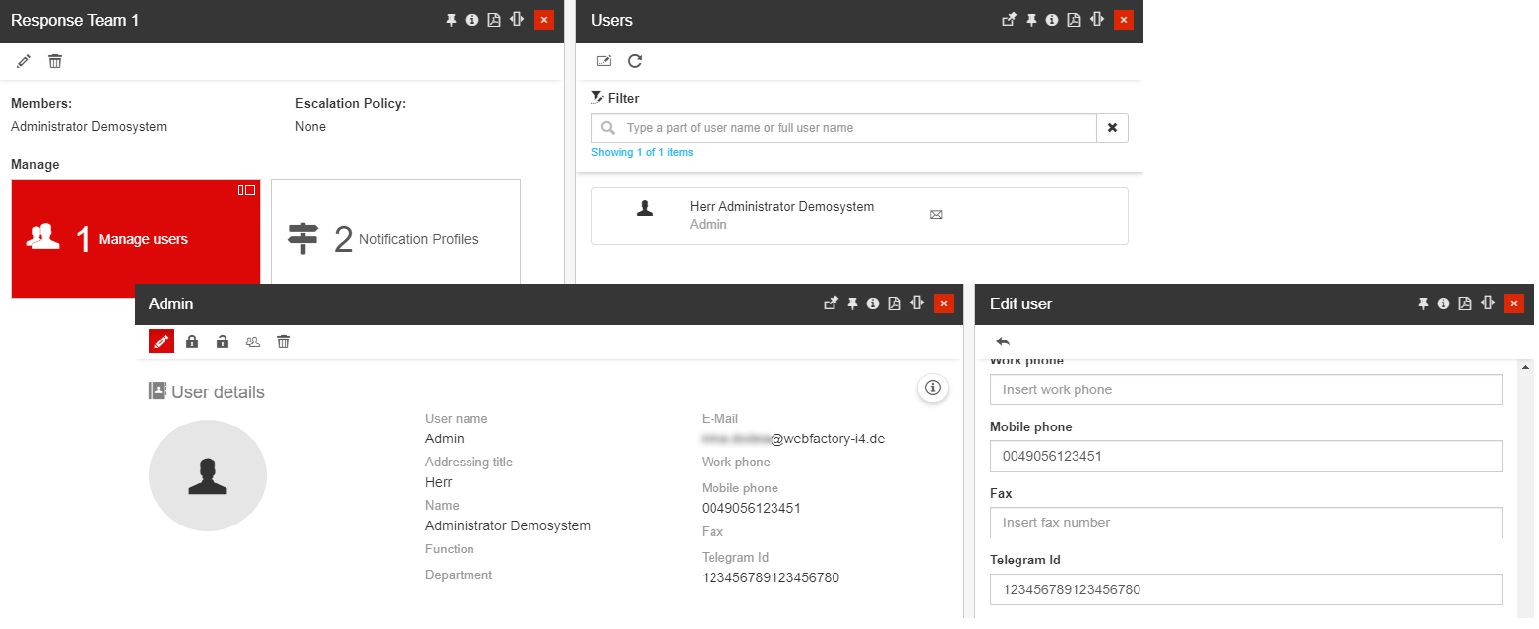
Telegram recipients settings
Getting ready to use the Telegram application
The Telegram application is available for free download on one of the following supported application marketplaces:
After installing the application on your device, let's configure the Bot and make the necessary settings at the level of i4connected:
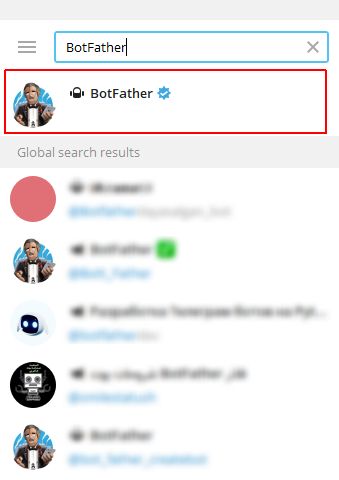
Open the Telegram application on your device and search for the official BotFather.
Tip
The BotFather is the one bot to rule them all. It will help you create new bots and change settings for the existing ones.
Open the chat with the BotFather and click the Start button.
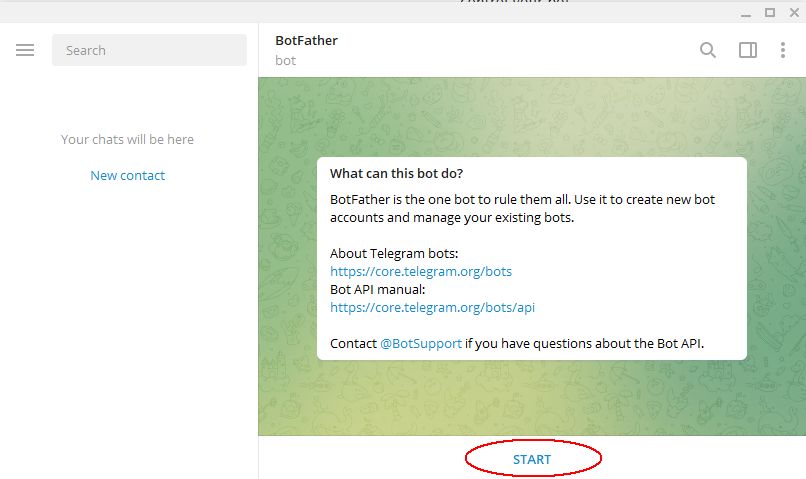
You will be provided with a list of commands that you can use to perform various actions. For more details about the Botfather commands, please visit the article here.
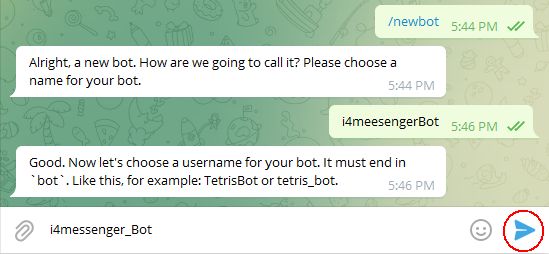
Type in the chat the "/newbot" command and hit the Send button.

Next, choose a name for your Bot, type it in the chat and select the Send button.

Type in a Bot username and send it in the chat.
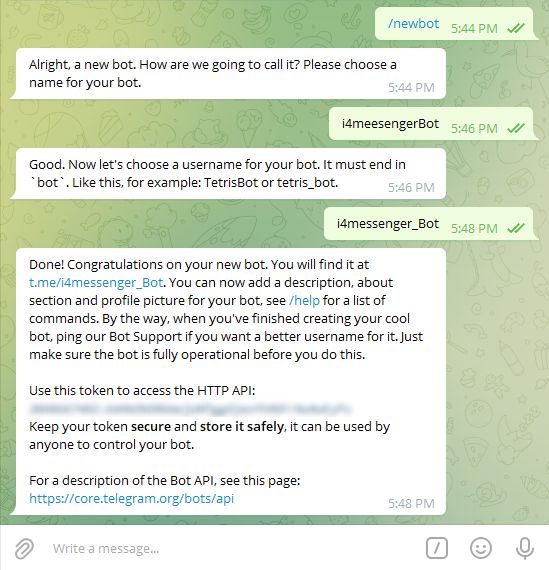
After processing the above steps, you will be provided with the Telegram Bot Token.
Use the Token key to set up the Telegram settings in the Edit settings panel.
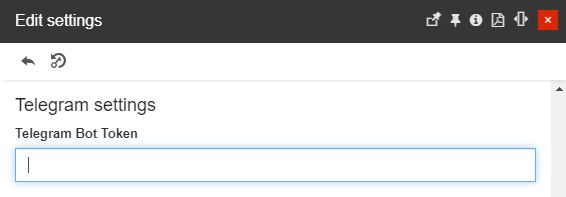
The Telegram provider settings
Warning
Since the Edit settings panel is guarded by the Manage configurations permission, you might need help from your system administrator for this step. For more details, please visit the dedicated article here.
Next, open a new chat room with your Bot and click the Start button.
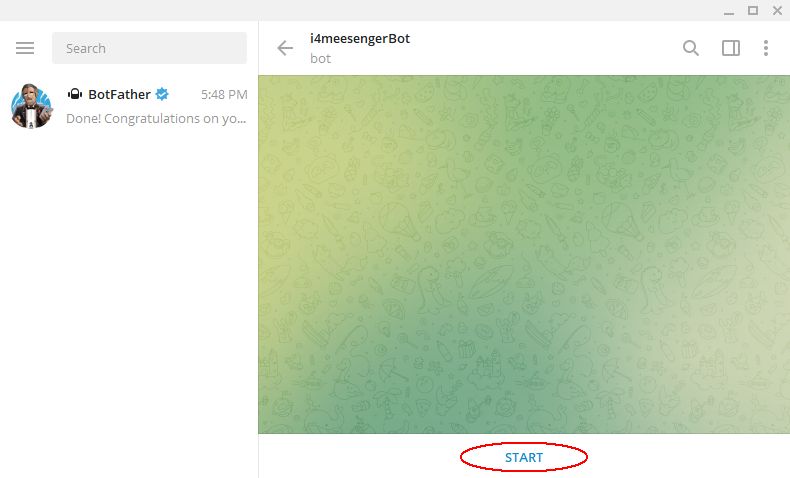
The "/start" command will be passed to your Bot.
Important
To establish the communication between the two ends, restart the i4connected Server!
As soon as the server is restarted, your Bot will provide you with a welcome message, containing your unique Telegram ID.

Tip
The Telegram Id can be requested as many times as needed, using the "/start" command.
The welcome message is available in several foreign languages (English-default, German, Spanish, French, Italian, and Russian), depending on the language applied for the Telegram application.
Use this identification number to update your i4connected User(s), that will be involved in receiving Telegram notifications.
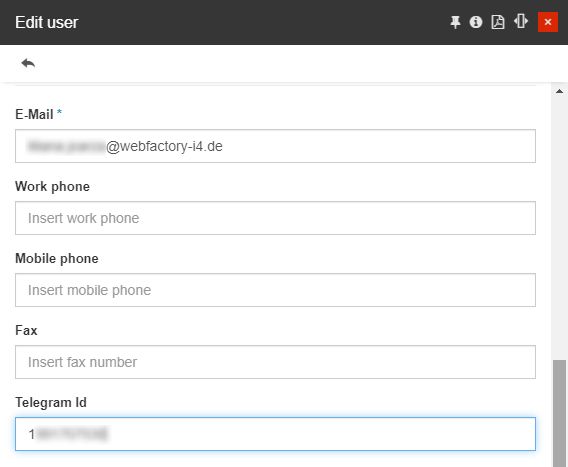
Last, but not least, enjoy using Telegram to keep track of your i4connected alarms!
Adding new Notification Profiles
Check out a complex explanation providing you the means to create new Notification Profiles for the i4messenger application.
Users having the Manage Notification Profiles permission enabled can create new event templates, by clicking the Add toolbar button of the Notification Profiles List panel.
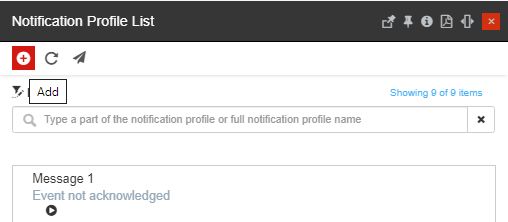
The Add button
The Add notification profile panel allows the user the possibility to create notification templates for either Email, SMS, or Telegram.
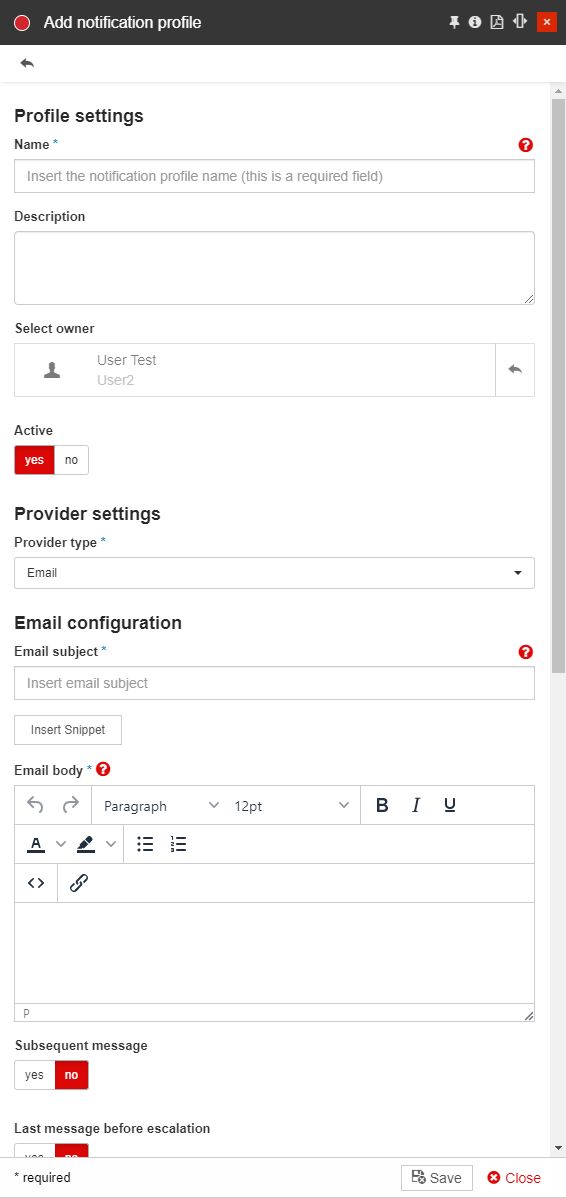
The Add notification profile panel
Name (required) - the name of the notification template.
Description - the description of the notification template.
Select owner - the owner of the Notification Profile. When adding a new Notification Profile the creator user is by default set as the owner.
Note
The owner can be changed after the Notification Profile was saved, by all users having the Manage Notification Profiles permission enabled.

Notification profile owner selector
By clicking on the owner selector, the Select Users panel is opened allowing the user to chose another owner for the Notification Profile. The list displayed by the Select Users panel will also reflect the currently logged-in user permissions set.
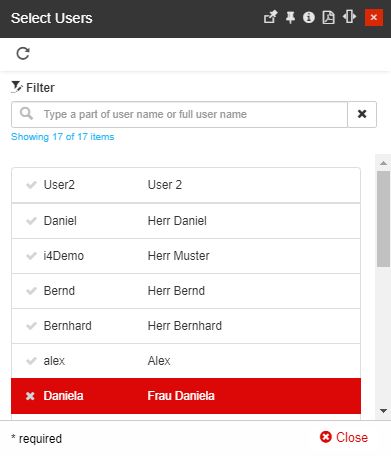
Select Users panel
Active toggle button - set the notification template to active or inactive. By default, the entity is set to Active.
Provider type (required) - the type of delivery being either Email, SMS, or Telegram. Based on the selected Provider type, the settings will be automatically updated.
Email subject (required) - the subject of the email event notification. This setting will be displayed, only if the Provider type is set to Email.
The complete Scriban syntax is supported in this view, as well as the data model behind, consisting of a collection of occurrences {{ IEnumerable.occurrence }} and accessible using the Scriban syntax.
Example:
New {{ occurence.EventName }} alarms
Email body / SMS body / Telegram body - the body of the event notification.
Email body - when sending an email, the user is not limited to how much text can be used. Hence, the Email body field provides the following features:

possibility to insert an Email Snippet. Read more details about the Email Snippets in the upcoming article.
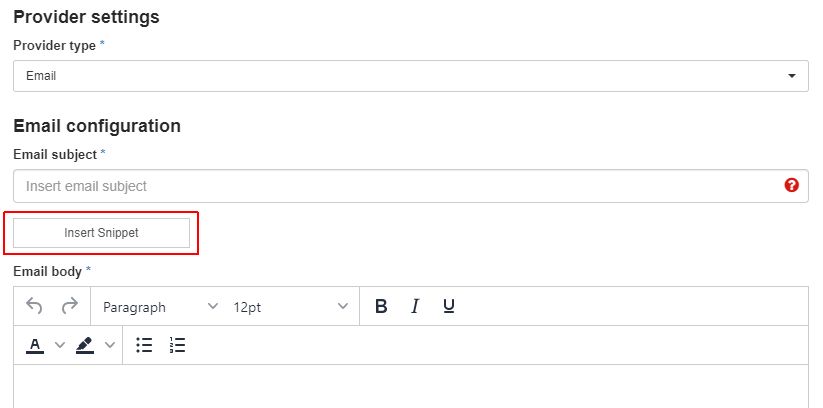
various text editing features, allowing the user with the possibility to input multiple fonts, font sizes, colored highlights, colored backgrounds, alignment options, different heading formats, and bullet or numbered lists.
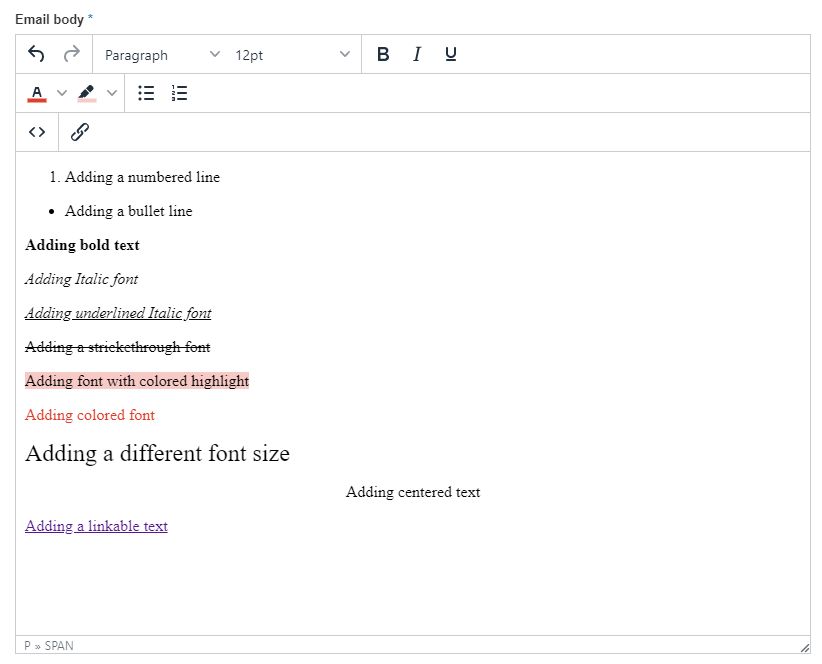
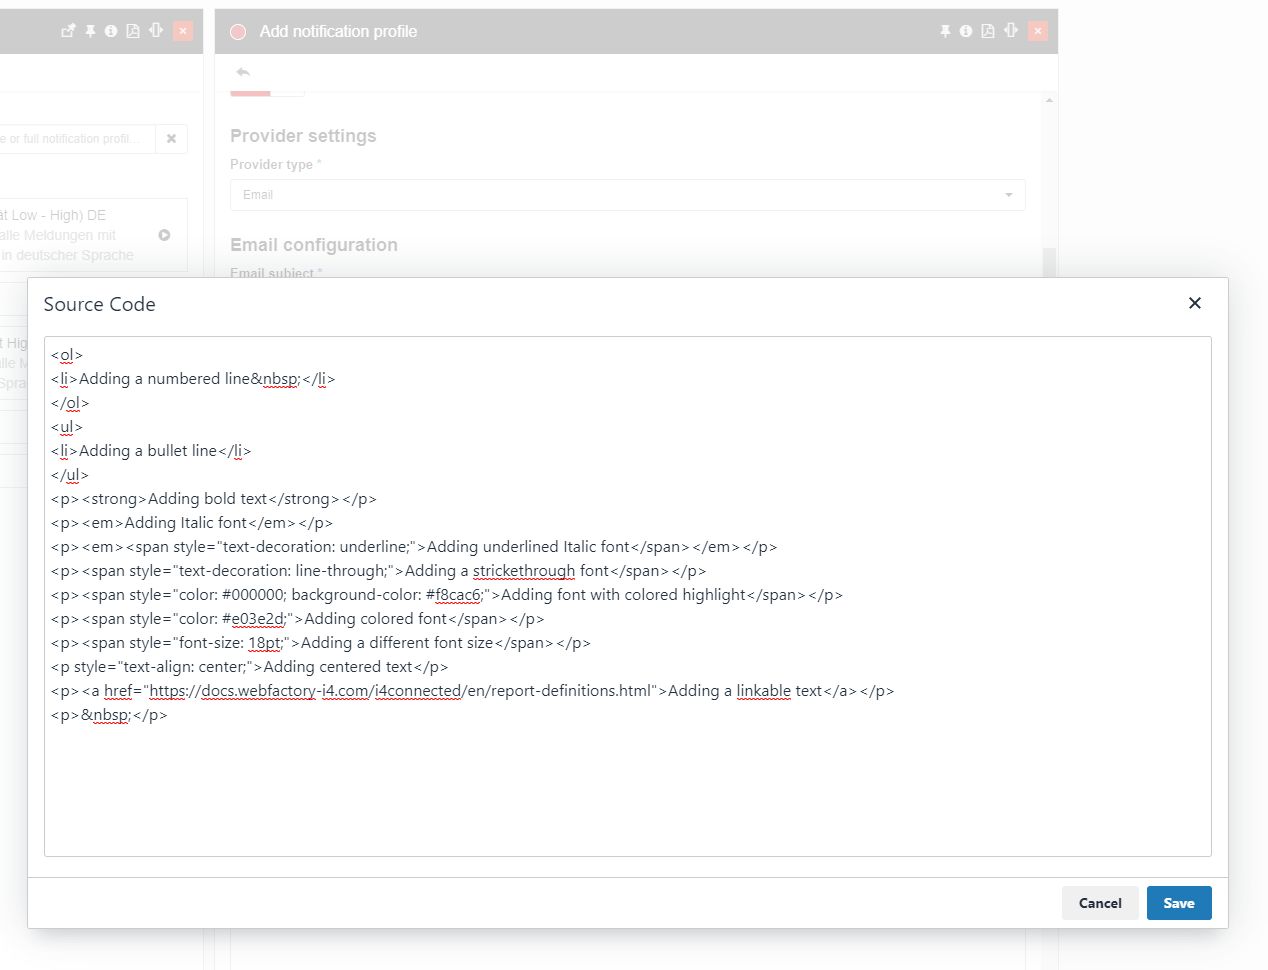
Source code editor
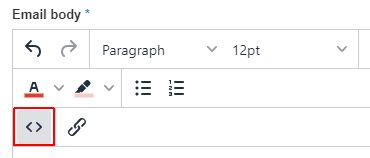
When clicking the Source code button, the Source code editor opens the Email body text in a separate window, allowing the user to edit the actual source XML.
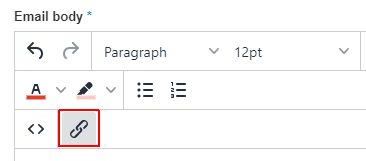
Insert / Edit Link selector
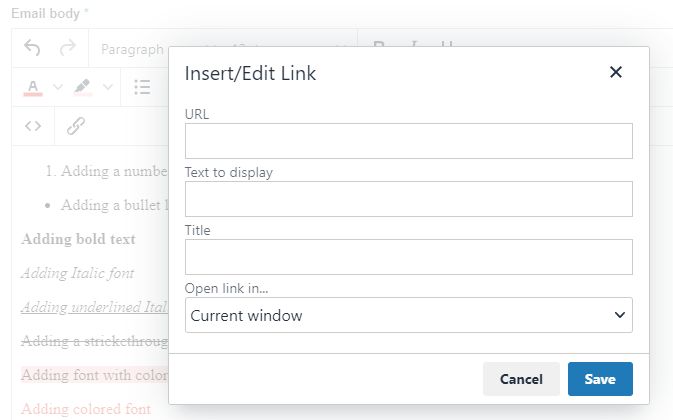
When clicking the Insert / Edit Link button a separate window is opened allowing the user to fill in the target URL, the text of a link that will be displayed by the Email notification, the Link title, and the opening behavior (open in the current window or open in new window).
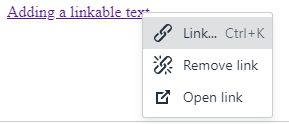
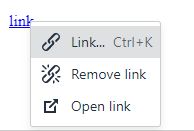
Existing hyperlinks can be managed by means of right-clicking and selecting the desired option from the pop-up modal window. The pop-up modal dialog allows the user to edit, remove or open the link.
possibility to resize the Email body field, in order to fit its contents, by pulling the lower right margin of the box.

possibility to use the complete Scriban template syntax, as well as the data model behind, consisting of a collection of occurrences {{ IEnumerable.occurrence }}.
Tip
Example with Scriban syntax:
{{ for occurrence in occurrences }}
A new alarm has been triggered.
With {{ occurrence.priority }} and {{ occurrence.eventName }}
Start: {{ occurrence.start }}
End: {{ occurrence.end }}
Ack: {{ occurrence.acknowledge }}
{{ end }}
Example output:

Further on, check out the list of available properties that can be used in the Scriban syntax.
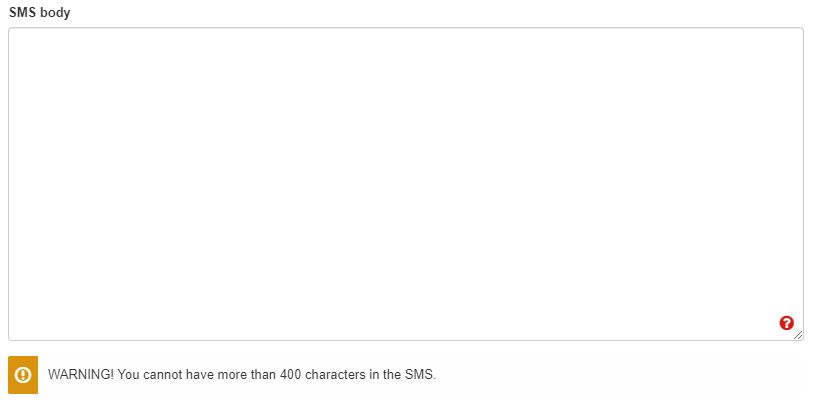
SMS body - the Short Message Service (SMS) is limited to a total of 400 characters. By this, the SMS Body field provides the following features:
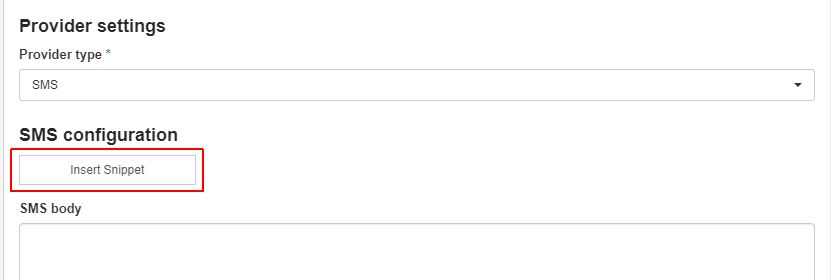
possibility to insert a text snippet. More details about the Text Snippets can be found in the upcoming article.
possibility to resize the SMS body field, in order to fit its contents, by pulling the lower right margin of the box.

possibility to use the complete Scriban template syntax, as well as the data model behind, consisting of a collection of occurrences {{ IEnumerable.occurrence }}, as long as the limit of 400 characters is considered.
Tip
Example with Scriban syntax
 {{ for occurrence in occurrences }}
A new alarm has been triggered.
With {{ occurrence.priority }} and {{ occurrence.eventName }}
Start Date: {{ occurrence.start }}
End Date: {{ occurrence.end }}
{{general.closeAllLink}}.
 {{ end }}
Example output
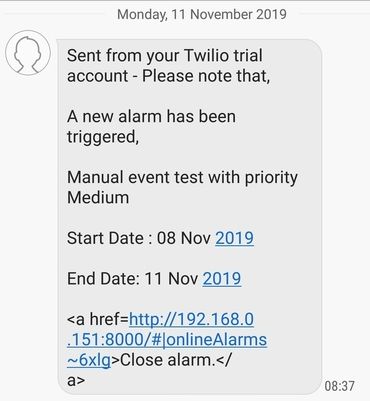
Further on, check out the list of available properties that can be used in the Scriban syntax.
Telegram body - the Telegram messages are limited to 4096 characters, therefore the Telegram body features the following options:

possibility to insert a Telegram snippet. Read more details about the Telegram snippets in the upcoming article.
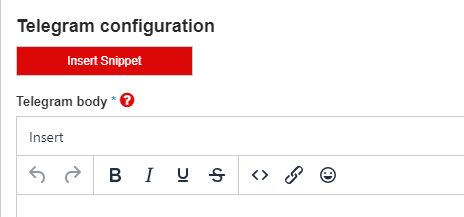
various text styling features.
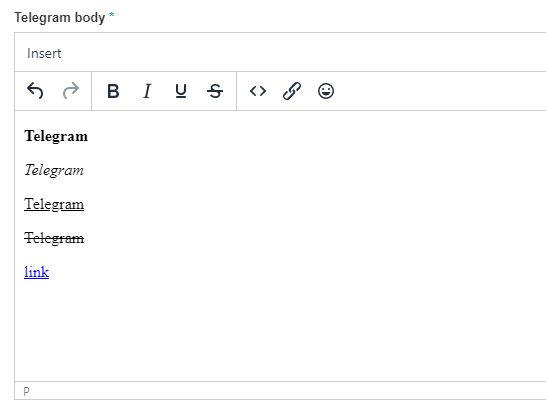
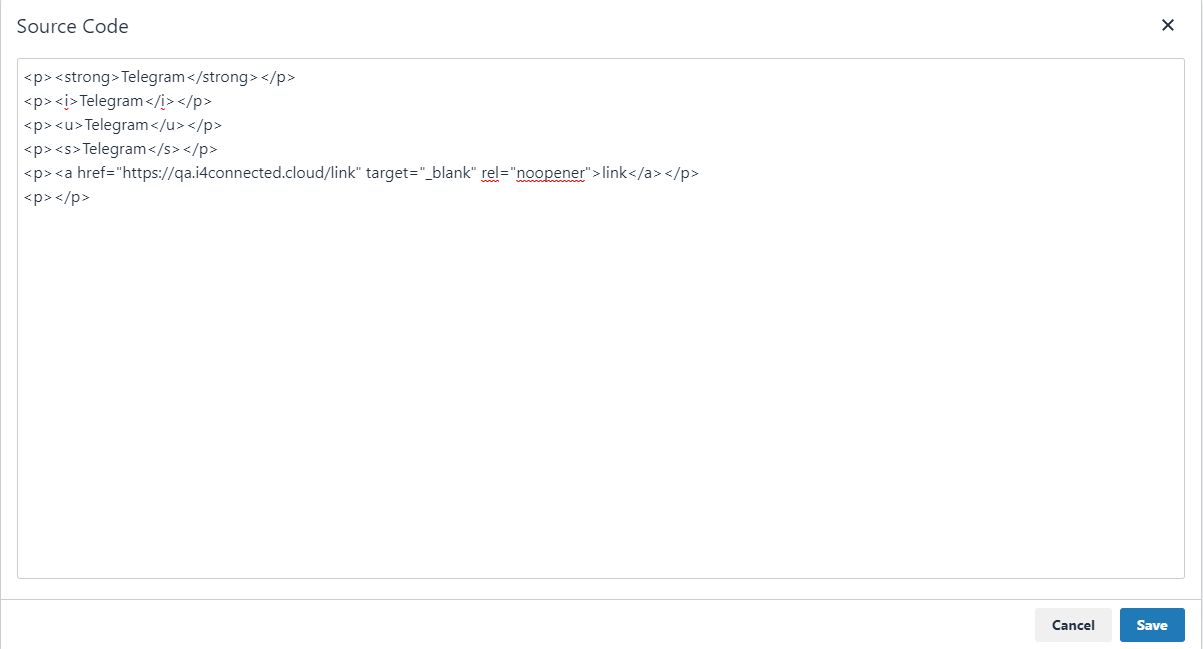
source code editor
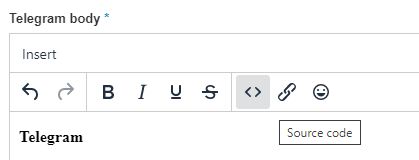
When clicking the Source code button, the Source code editor opens the Telegram body in a separate window, allowing the user to edit the actual source XML.
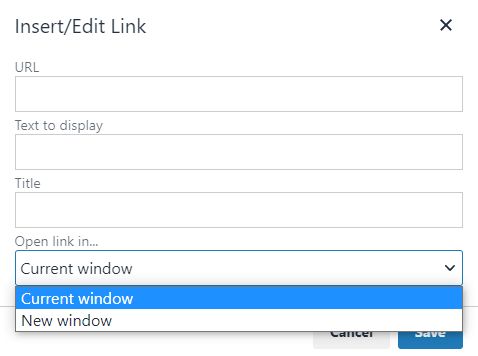
insert/Edit Link selector.

When clicking the Insert / Edit Link button a separate window is opened allowing the user to fill in the target URL, the text of a link that will be displayed by the Telegram notification, the Link title, and the opening behavior (open in the current window or open in new window).
Existing hyperlinks can be managed by means of right-clicking and selecting the desired option from the pop-up modal window. The pop-up modal dialog allows the user to edit, remove or open the link.
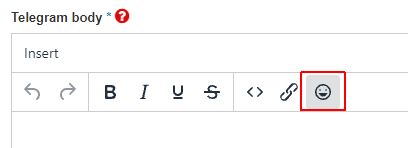
possibility to insert emoticons
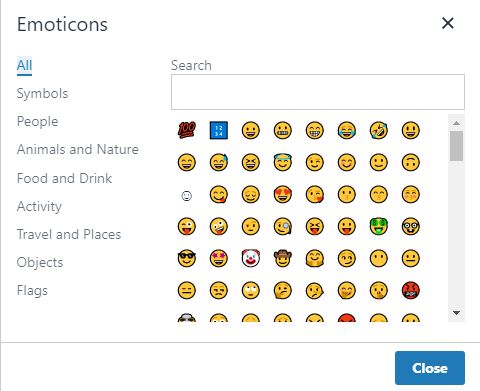
By clicking the Emoticons button a list of predefined emoticons is opened in a dedicated window, allowing the user to pick one or multiple emoticons, choosing from a wide range of categories.
possibility to resize the Telegram body field, in order to fit its contents, by pulling the lower right margin of the box.

possibility to use the Scriban template syntax, as well as the data model behind, consisting of a collection of occurrences {{ iEnumerable.occurrence }}.
Tip
Example with Scriban syntax:
{{ for occurrence in occurrences }}
A new alarm has been triggered, with {{ occurrence.priority }} and name {{ occurrence.eventName }}.
Start: {{ occurrence.start }}
End: {{ occurrence.end }}
Ack: {{ occurrence.acknowledge }}
{{ end }}
Example output:

Further on, check out the list of available properties that can be used in the Scriban syntax.
Subsequent message template toggle button - enables the delivery of a reminder in case the first notification did not lead to any action.
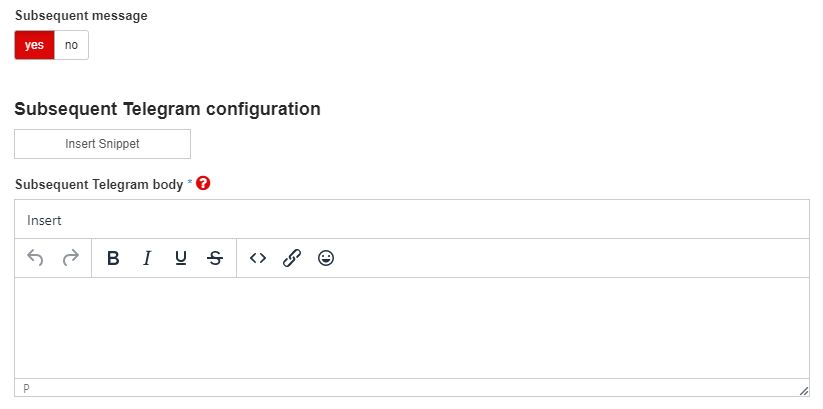
Subsequent email subject - allows the user with the possibility to add the subject of a subsequent Email.
Subsequent Email / SMS body - allows the user with the possibility to add the body of a subsequent email or SMS.
Last message before escalation template - the toggle button that enables the delivery of one last notification, before the escalation procedure is initiated.
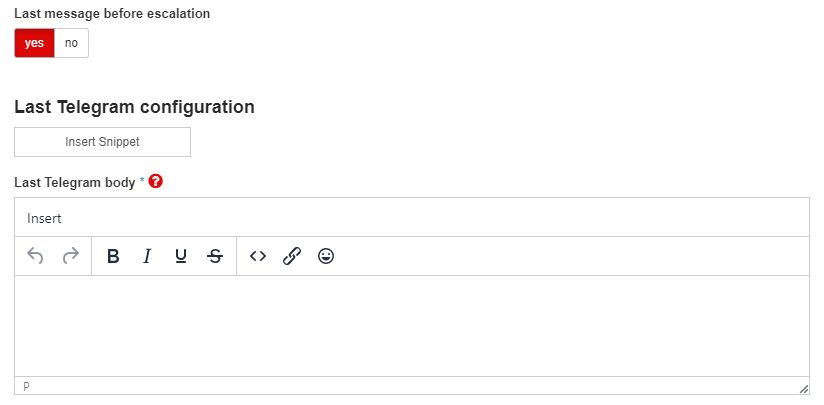
Last email subject - allows the user with the possibility to add the subject of the last Email.
Last Email / SMS body - allows the user with the possibility to add the body of a last Email or SMS.
Advanced settings - enable the selection of a priority filter for the notification delivery.

The Advanced priority settings
Optionally, the user can select the Priority From and the Priority To to establish advanced filtering, based on the event priorities, as follows:
From
To
Filter
Not set
Not set
All events will deliver notifications, regardless of their priority
Set
Not set
All events having priority ranging from the value selected in the field "From" to the highest value, will deliver notifications
Not set
Set
All events having priority ranging from the lowest value up to the value selected in the field "To", will deliver notifications
Set
Set
All events having priority From - To, inclusively
Enable notification for states - the selection of a set of states for which the notification will be sent. The role of the event states is to apply additional conditions to the Notification Profiles, allowing notifications delivery to use a particular profile when the event occurrence transitions into a certain state.
Warning
In order to allow the escalation flow, at least one of the following states should be enabled: Not Ack, Not Owned, Not Closed.
By default, the Event starts toggle button is enabled. The below-listed states are by default disabled, allowing the user to enable different behaviors, by customizing the selection of the state, as follows:
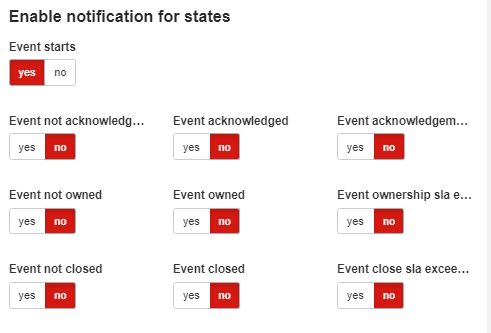
The notifications for states settings
State
Behaviour
Event starts
Send once when the condition matches
Event not acknowledged
Send on every retry when the condition matches
Event acknowledged
Send once when the condition matches
Event acknowledgment SLA exceeded
Send on every retry when the condition matches
Event not owned
Send on every retry when the condition matches
Event owned
Send once when the condition matches
Event ownership SLA exceeded
Send on every retry when the condition matches
Event not closed
Send on every retry when the condition matches
Event closed
Send once when the condition matches
Event close SLA exceeded
Send on every retry when the condition matches
User notification throttling - the role of the notification throttling mechanism is to limit the number of notifications that are delivered. The user can choose one of the three throttle options:

The User notification throttling settings
None - user notification throttle mechanism is turned off, hence the event occurrences are processed in real-time. All occurrences are processed as they come. Typically, this should be used only for high importance events with a low rate, otherwise, it can add stress to the system and can overflow the notification mechanisms.
Progressive - the server will wait until a certain time elapses since the last notification processing time, then it will send the occurrences to the notification system. In the case of long showers, multiple notifications can be sent at fixed intervals. The throttle interval is defined in seconds.
Wait All - the server will wait for occurrences to come in until a certain time elapses since the last occurrence, then it will send them to the notification system. In case of long showers, the notifications are postponed until the shower ends and the debounce interval elapses. The throttle interval is defined in seconds.
Note
If enabled, the throttle mechanism buffers the occurrences and flattens them before delivery. Hence, if multiple occurrences arrive, indicating multiple transitions of the same event, only the current status will be delivered.
Notification Profile Snippets
The Notification Profile Snippets are reusable texts supporting Scriban syntaxes, as well, that can be applied by the users as either SMS or Email bodies.
The Notification Profile Snippets are reusable texts supporting Scriban syntaxes, as well, that can be applied by the users as either SMS, Email or Telegram bodies. The i4connected application provides a set of default snippets, that can be at any point reused, updated, or deleted.
The Insert Snippet button is displayed when creating or updating Notification Profiles and are available in the following situations:
Email snippets
Insert Snippet for Email body
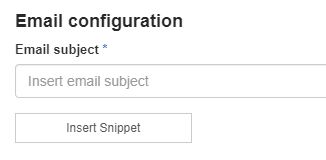
Insert Snippet for Subsequent Email message body
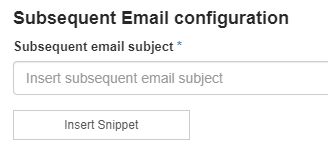
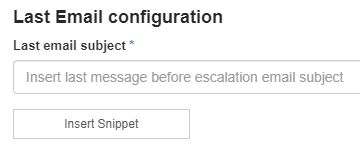
Insert Snippet for Last Email message body
SMS snippets
Insert Snippet for SMS body

Insert Snippet for Subsequent SMS message body

Insert Snippet for Last SMS message body

Telegram snippets
Insert Snippet for Telegram body

Insert Snippet for Subsequent Telegram message body

Insert Snippet for Last Telegram message body

Email snippets
The Email Snippets can be managed in the Snippets panel by clicking the Insert snippet button, available for either Email configuration, Subsequent Email configuration, or Last Email configuration sections, of the Add / Edit Notification profiles panel.
In the Email Snippets panel, all the default snippets are displayed. This view features the following options:
Viewing, filtering, and refreshing the Email Snippets list
The Email Snippets list displays all the snippets available for the Email Notification Profiles, regardless if they are the default ones or new snippets added by the system administrator user(s).
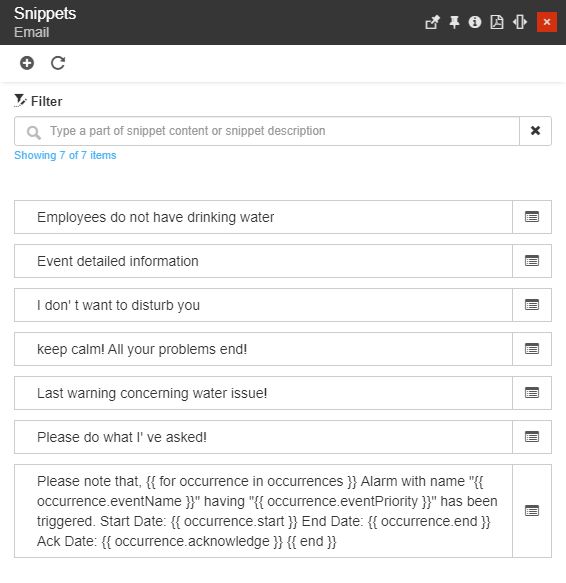
The List of Email Snippets
The Email snippets are displayed as cards in a scrollable list, displaying the Snippet description.
The list of Email Snippets features a filtering mechanism, allowing the user to easily pinpoint the desired snippet.
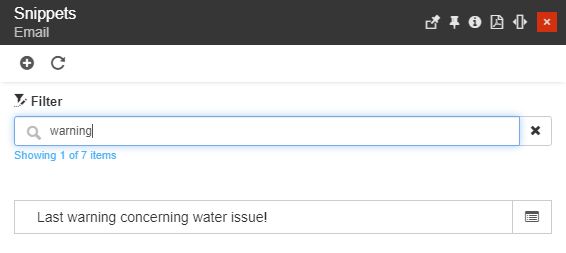
Example of filter applied to the list view
Tip
For a detailed description of the simple filtering mechanism, please also visit the Simple Filter article.
By clicking the Refresh toolbar button the list of Email snippets is reloaded to display the latest version of its contents.
The Refresh button
Adding new Email snippets
The Add toolbar button from the Email Snippets panel provides access to the Add snippet panel, to all users having the Manage configuration permission enabled.
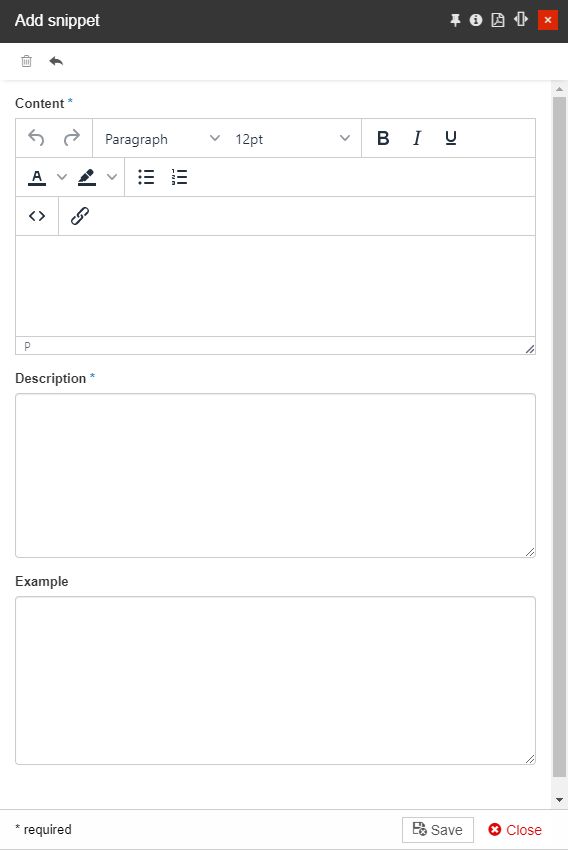
The Add snippet panel
To add a new Email snippet the user is required to fill in at least the mandatory fields, marked with an asterisk. By default, the user is notified about the missing mandatory information.
An Email snippet consists in:
Content - is the actual Email body, that will be applied in the Notification Profile and consequently delivered as an email, to the Response Teams. The Snippet Content fields feature the same text editing options provided by the Email body field as described in the Adding new Notification Profiles article.
Description - a friendly description of the Email snippet.
Example - an optional example of the Email output.
To preserve the changes made, the user can click the Save bottom button. To remove all the changes organized before saving the snippet, the user can click the Reset toolbar button. To leave the Add email snippet panel without saving any of the changes, the user can click the Close bottom button.
Editing Email snippets
It is possible to update an Email snippet by clicking the Edit button in the list view. Editing Email snippets is an action allowed to all users having the Manage configuration permission enabled.
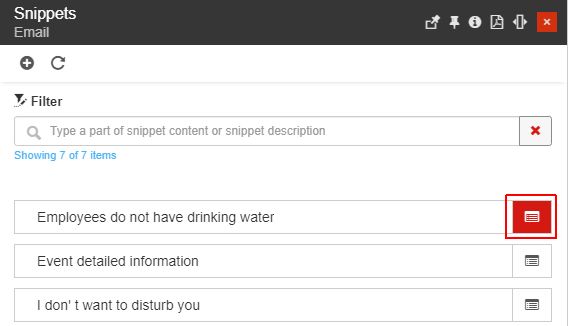
The Edit button
In the Edit snippet panel, the user can change the snippet content, description, and example.
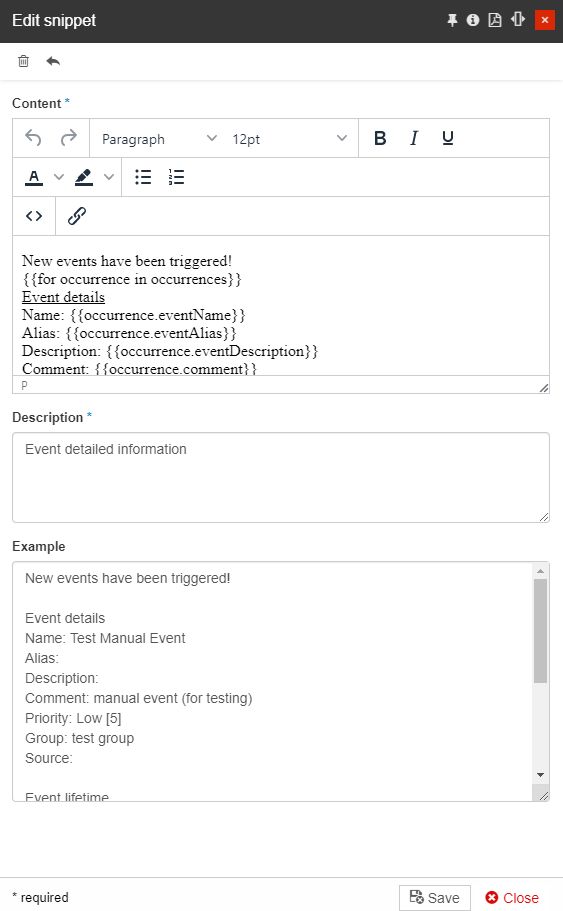
The Edit snippet panel
To preserve the changes made the user can click the bottom Save button. Otherwise, if the Edit snippet panel should be closed without saving, the Close bottom button can be selected.
Deleting Email snippets
The Edit snippet panel provides the user with the possibility to remove a snippet, by clicking the Delete toolbar button.
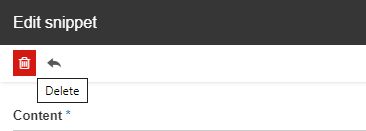
The Delete button
The Delete snippet panel asks the user to manually fill in a deletion confirmation code
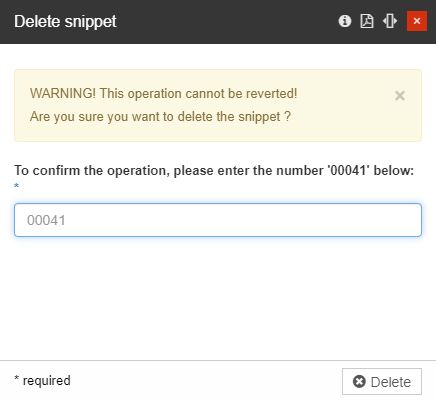
The Delete snippet panel
To proceed with the delete operation the user can click the Delete bottom button. Deletion will be processed and the involved snippet will no longer be visible in the list view.
SMS snippets
Management of the SMS snippets can be processed in the Text Snippets panel by clicking the Insert snippet button, available in the configuration areas for SMS notification, Subsequent SMS notification, and Last SMS notification, in the Add / Edit Notification profile panels.
In the SMS Snippets panel, all the user-added snippets are displayed. This view features the following options:
Viewing, filtering, and refreshing the SMS Snippets list
By clicking the Insert Snippet button for SMS configuration, the Snippets Text panel is opened. In this view all the available snippets are displayed as scroll-able cards, providing the user with information about the Snippet description and example.
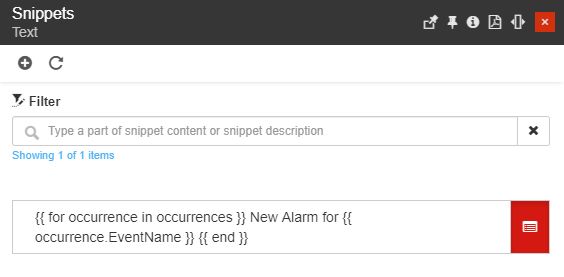
The SMS Snippets list
The simple filtering mechanism allows the user to easily find the desired snippets, in the list view.
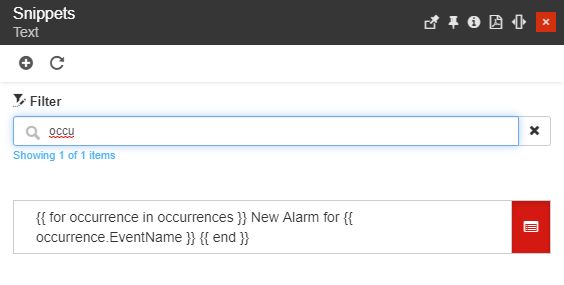
Example of SMS Snippets filtering
Tip
For a detailed description of the simple filtering mechanism, please also visit the Simple Filter article.
To update the list of SMS Snippets to its latest version the user can click the Refresh toolbar button.

The Refresh button
Adding new SMS snippets
The Snippets Text panel provides the user with the possibility to create new Snippets by clicking the Add toolbar button. Adding new SMS Snippets is a function allowed to all users having the Manage configuration permission enabled.

The Add toolbar button
In the Add snippet panel, the user can fill in the snippet content, description, and optionally an example. To keep the defined snippet, the user can click the bottom Save button. To discard the changes and close the panel, the user can click the bottom Close button.
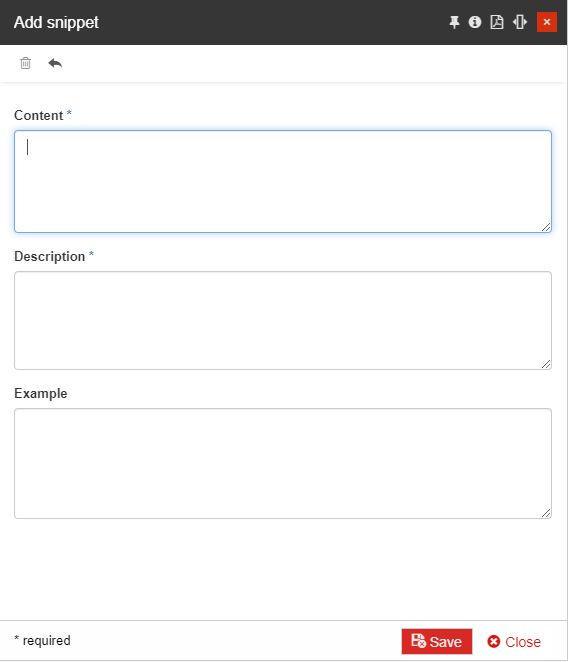
The Add snippet panel
Editing SMS snippets
All the listed SMS snippets can be updated by clicking the Edit snippet button. Editing SMS Snippets is a function allowed to all users having the Manage configuration permission enabled.
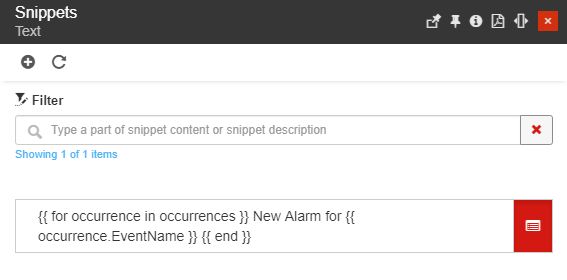
The Edit SMS Snippets button
In the Edit snippet panel, the user can update the snippet content, description, and example. To preserve the organized changes the user can click the bottom Save button. By clicking the bottom Close button, the panel is closed and no changes are applied.
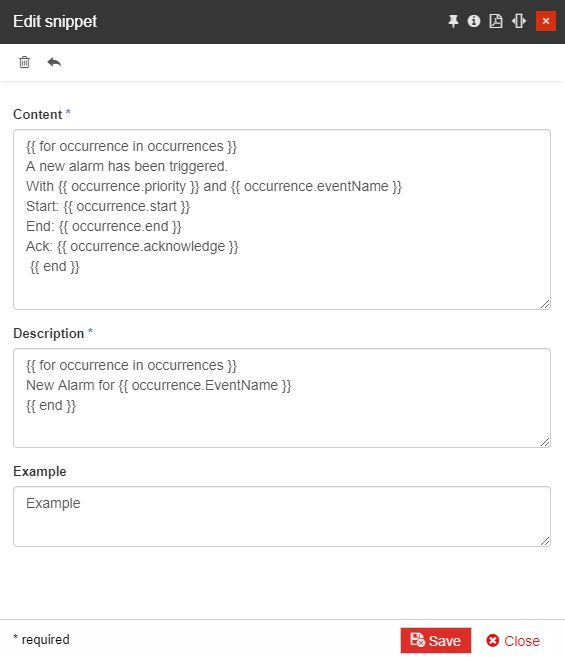
The Edit snippet panel
Deleting SMS snippets
To permanently remove an SMS Snippet, the user can select the Delete button, located in the toolbar of the Edit snippet panel.
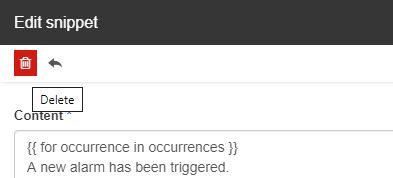
The Delete button
The Delete snippet panel asks the user to manually type in the deletion confirmation code.
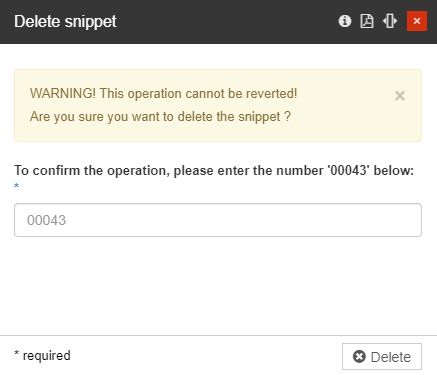
The Delete snippet panel
To proceed with the deletion operation, the user can click the bottom Delete button. The system confirms the deletion by displaying a toast message.
Telegram snippets
Management of the Telegram snippets can be processed in the Telegram Snippets panel by clicking the Insert snippet button, available in the configuration areas for Telegram notification, Subsequent Telegram notification, and Last Telegram notification, in the Add / Edit Notification profile panels.
In the Telegram Snippets panel, all the user-added snippets are displayed. This view features the following options:
Viewing, filtering, and refreshing the Telegram Snippets list
By clicking the Insert Snippet button for Telegram configuration, the Snippets Text panel is opened. In this view all the available snippets are displayed as scroll-able cards, providing the user with information about the Snippet description and example.
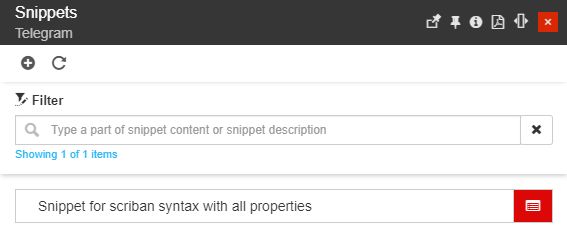
The Telegram Snippets list
The simple filtering mechanism allows the user to easily find the desired snippets, in the list view.
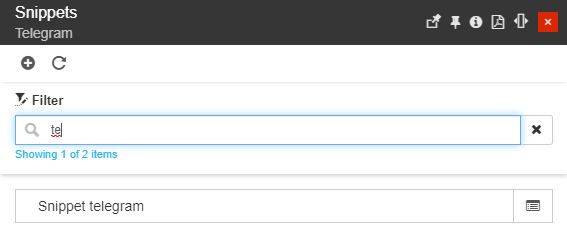
Example of Telegram Snippets filtering
Tip
For a detailed description of the simple filtering mechanism, please also visit the Simple Filter article.
To update the list of Telegram Snippets to its latest version the user can click the Refresh toolbar button.

The Refresh button
Adding new Telegram snippets
The Snippets Text panel provides the user with the possibility to create new Snippets by clicking the Add toolbar button. Adding new Telegram Snippets is a function allowed to all users having the Manage configuration permission enabled.
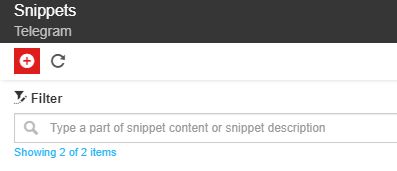
The Add toolbar button
In the Add snippet panel, the user can fill in the snippet content, description, and optionally an example. To keep the defined snippet, the user can click the bottom Save button. To discard the changes and close the panel, the user can click the bottom Close button.
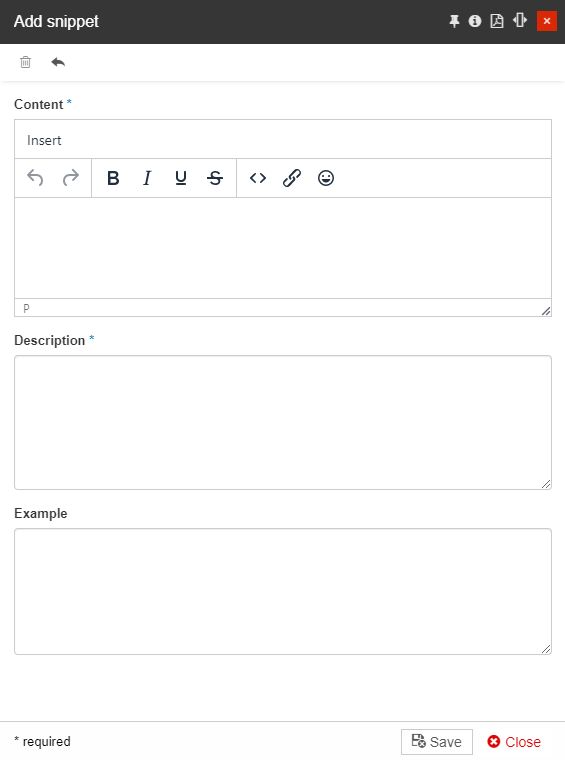
The Add Telegram snippet panel
Editing Telegram snippets
All the listed Telegram snippets can be updated by clicking the Edit snippet button. Editing Telegram Snippets is a function allowed to all users having the Manage configuration permission enabled.
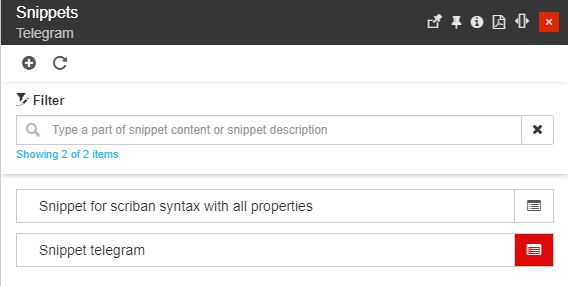
The Edit Telegram Snippets button
In the Edit snippet panel, the user can update the snippet content, description, and example. To preserve the organized changes the user can click the bottom Save button. By clicking the bottom Close button, the panel is closed and no changes are applied.
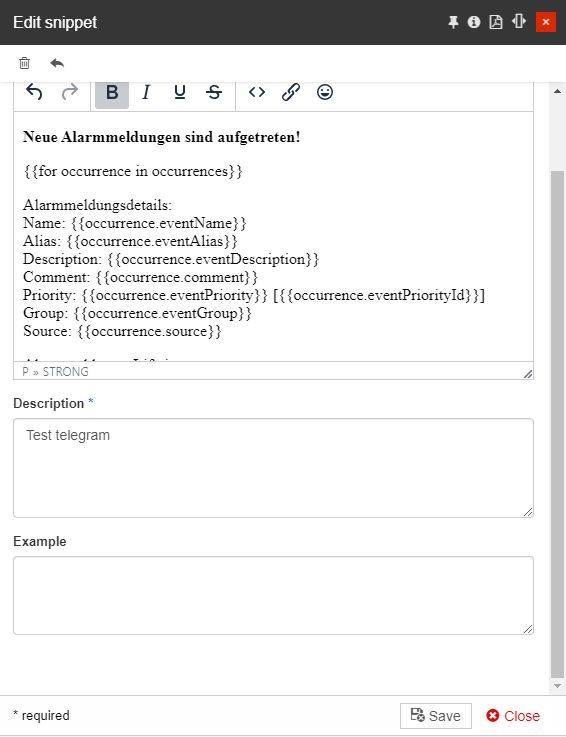
The Edit Telegram snippet panel
Deleting Telegram snippets
To permanently remove a Telegram Snippet, the user can select the Delete button, located in the toolbar of the Edit snippet panel.

The Delete button
The Delete snippet panel asks the user to manually type in the deletion confirmation code.

The Delete snippet panel
To proceed with the deletion operation, the user can click the bottom Delete button. The system confirms the deletion by displaying a toast message.
Writing the syntax for the Email/SMS/Telegram body
The scope of the present article is to describe the steps for writing a Scriban syntax and use it in your Notification Profile.
The scope of the present article is to describe the steps for writing a Scriban syntax. The Scriban syntax is a set of rules defining various combinations available in the i4connected server.
All the default.NET properties are available within the Scriban views (Email subject, Email body, SMS body, Telegram body) using the Scriban template syntax properties.
The syntax property can be accessed by setting the "IEnumerable.occurrence" between double curly-braces "{{ }}". The properties between double curly braces will be extracted from the server. The syntax sentence {{ for occurrence in occurrences }} marks the start of the database list of occurrence properties.
In the below example, the Event Name will be extracted from the database.
{{ for occurrence in occurrences }}
{{ occurence.EventName }}
To facilitate the Event processing workflow, the SMS, Email, and Telegram notifications can contain Links, that open the i4connected portal. The user can introduce Acknowledge Event links, Take Event Ownership links, and Close Event links, directly in the syntax.
The bold element in the below syntax sentence writes a Link, opening the Online Alarms panel.
{{ for occurrence in occurrences }}
A new alarm has been triggered for {{ occurrence.eventName }} with priority {{occurrence.eventPriority }} / {{occurence.eventPriorityId}}.
{{occurrence.closeLink}}
{{ end }}
To mark the end of the notification template, the element {{ end }} needs to be included in the Email subject, Email body, SMS body, and Telegram body.
In the below example, the {{ end }} element marks the end of the template.
{{ for occurrence in occurrences }}
New Alarm for {{ occurrence.EventName }}
{{ end }}
The Email notification can also contain Links positioned outside of the syntax, introduced by a different type of sentence: e.g. {{general.closeAllLink}}.
The bold element in the below syntax writes a Link, opening the Online Alarms panel.
{{ for occurrence in occurrences }}
A new alarm has been triggered for {{ occurrence.eventName }} with priority {{ occurrence.eventPriority }} / {{ occurrence.eventPriorityId }}.
{{ end }}
{{general.closeAllLink}}
Tip
Check out all the Event occurrence properties and links in the syntax's collection of occurrences article.
Properties available to the Scriban syntax
Here is the full list of the properties available to write the Scriban syntax and apply it in your Notification Profile.
Property | Type | Description |
|---|---|---|
start | DateTime | The start date and time of the event occurrence. |
end | DateTime | The end date and time of the event occurrence. |
acknowledge | DateTime | The date and time when the event occurrence has been acknowledged. |
comment | String | The comment of the event occurrence. |
owner | String | The event occurrence owner. |
source | String | The source of the event occurrence. |
deviceAlias | String | The alias of the Event occurrence Source. As the Source can be a Device, the Device alias will be filled in this field, if the Device has an alias set. |
area | String | The area name of the Event occurrence Source. As the Occurrence Source can be a Device, the Area where the Device is assigned will be displayed in this field. |
site | String | The site name of the Event occurrence Source. As the Occurrence Source can be a Device, the Site where the Device is assigned will be displayed in this field. |
organizationalUnit | String | The OrgUnit name of the Event occurrence Source. As the Occurrence Source can be a Device, the OrgUnit where the Device is assigned will be displayed in this field. |
metadata | iDictionary | The metadata of the event occurrence. The "Metadata" property is a list of key-value pairs which are handled differently by the Scribban syntax. All the key-value pairs found in the server will be parsed in the notification as a list. |
partId | String | The ID of the part for which the event occurrence was triggered. |
eventName | String | The name of the event occurrence. |
eventAlias | String | The alias name of the event occurrence. |
eventDescription | String | The description of the event occurrence. |
cause | String | The cause for the event occurrence. |
effect | String | The effect of the event occurrence. |
repair | String | The repair method of the event occurrence. |
helpLink | String | The Help link for the event occurrence. |
eventPriorityId | Int | The ID of the event priority. |
eventPriority | String | The priority of the event occurrence. |
eventGroup | String | The group of the event occurrence. |
eventType | String | The type of the event occurrence. |
takeOwnership | DateTime | The date and time when the event has been owned. |
acknowledgedBy | String | The user who has acknowledged the event. |
closedBy | String | The user who has closed the event. |
acknowledgeLink | Link | The URL opening the i4connected portal, based on the URL set as Server Root. |
takeOwnershipLink | Link | The URL opening the i4connected portal, based on the URL set as Server Root. |
closeLink | Link | The URL opening the i4connected portal, based on the URL set as Server Root. |
acknowledgeAllFromNotificationLink | Link | The URL opening the i4connected portal focused on the Online Alarms panel. NoteThis Property refers to the entire Events in the Email, so it can be placed outside of the "classical" template construction. Hence, it's should be formulated as follows:{{ general.acknowledgeAllFromNotificationLink }}. |
acknowledgeAllLink | Link | The URL opening the i4connected portal focused on the Online Alarms panel. NoteThis Property refers to the entire Events in the Email, so it can be placed outside of the "classical" template construction. it's should be formulated as follows: {{ general.acknowledgeAllLink }}. |
takeOwnershipAllFromNotificationLink | Link | The URL opening the i4connected portal focused on the Online Alarms panel. NoteThis Property refers to the entire Events in the Email, so it can be placed outside of the "classical" template construction. it's should be formulated as follows: {{ general.takeOwnershipAllFromNotificationLink }}. |
takeOwnershipAllLink | Link | The URL opening the i4connected portal focused on the Online Alarms panel. NoteThis Property refers to the entire Events in the Email, so it can be placed outside of the "classical" template construction. Hence, it's should be formulated as follows: {{ general.takeOwnershipAllLink }}. |
closeAllFromNotificationLink | Link | The URL opening the i4connected portal focused on the Online Alarms panel. NoteThis Property refers to the entire Events in the Email, so it can be placed outside of the "classical" template construction. Hence, it's should be formulated as follows: {{ general.closeAllFromNotificationLink }}. |
closeAllLink | Link | The URL opening the i4connected portal focused on the Online Alarms panel. NoteThis Property refers to the entire Events in the Email, so it can be placed outside of the "classical" template construction. Hence, it's should be formulated as follows: {{ general.closeAllLink }}. |
Editing Notification Profiles
It is possible to update the settings of your Notification Profiles at any point in time. Learn how to open them in edit mode.
All the listed Notification Profiles can be updated by users having the Manage notification profiles permission enabled. By clicking a Notification profile in the list view, the Edit notification profile panel is opened.
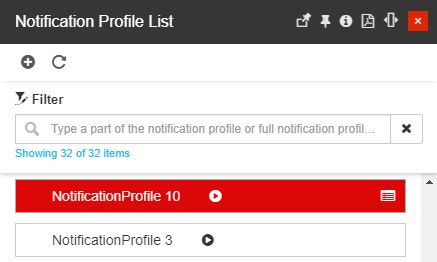
Selecting Notification Profile in the list view
In this view, the user can change all the settings described in the Add Profile Notification article.
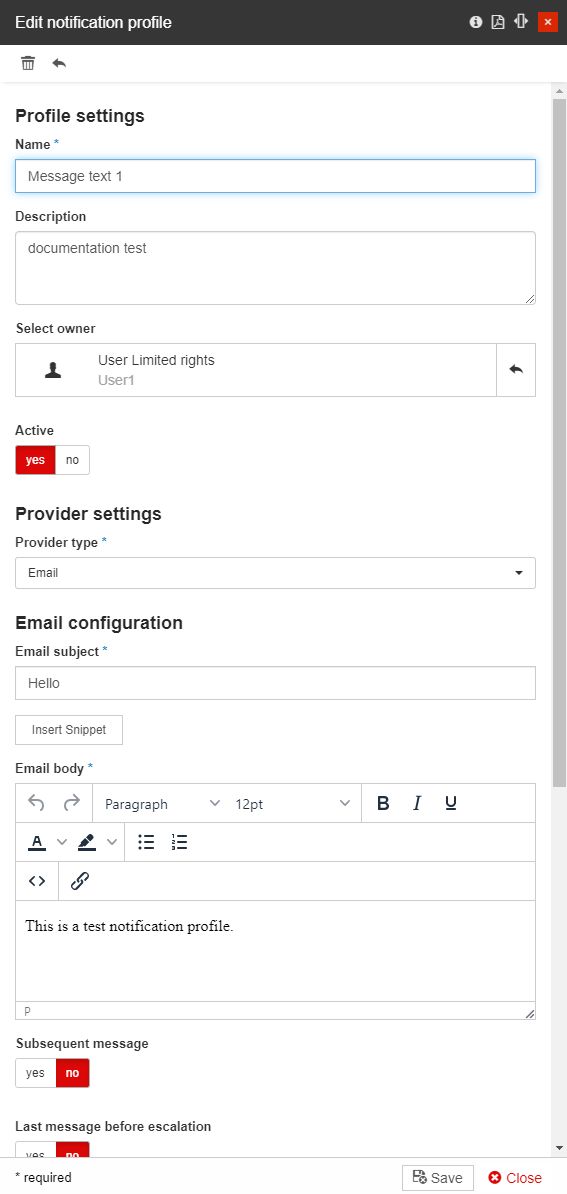
The Edit notification profile panel
In order to preserve the changes made, the user can select the Save button. Otherwise, clicking the Close button will close the panel without preserving any changes.
Users having at least the View users permission enabled can also access the Notification Profile Entity role assignments panel, by clicking the Users toolbar button of the Edit notification profile panel.
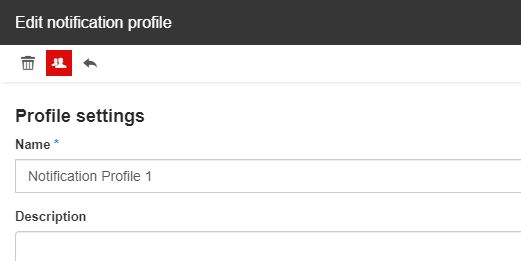
The Users button
Tip
For more details about the Entity role assignments feature, please also visit the dedicated article here.
Deleting Notification Profiles
The unnecessary Notification Profiles can be removed by the system administrator, at any point. Check out this article to learn how.
The Edit notification profile panel gives the user the possibility to permanently remove a Notification Profile, by clicking the Delete toolbar button.
Since this operation is available from the Edit notification profile panel, only users having the Manage notification profiles permission enabled can remove Notification profiles.
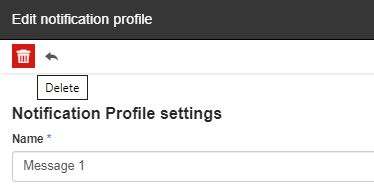
The Delete button
The Delete Notification Profile panel provides the user with information concerning the impact of the deletion operation if any is involved. To confirm the deletion, the user is required to manually type in the provided code and press the Delete button.
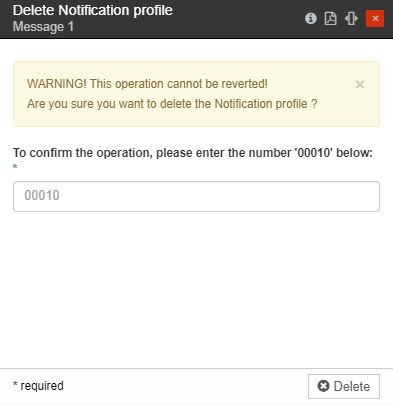
The Delete Notification Profile panel