Response Teams
A Response Team is a group of users that can handle event occurrences for which certain actions are required. Check out this article for more details!
A Response Team is a group of users that can handle event occurrences, for which certain actions are required. The scope of the present article is to describe how to configure a Response Team in the context of the i4messenger component.
The list of Response Teams is available via the dedicated tile, for users having at least the View response teams permission enabled. In this view, the user can only see Response Teams if one of the following conditions is met:
the user is the owner of a Response Team;
the user has been explicitly assigned to a Response Team, as described by the Edit response teams article.
the user has the View all response teams permission enabled.
Important
Users having the View all response teams permission enabled can see all the Response Teams available in the system.
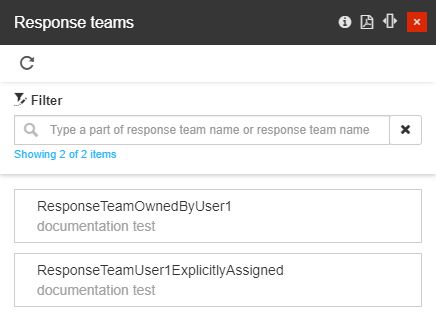
The Response Teams panel
By clicking on a listed Response Team the details panel is opened. In this view all the relevant Response Team information is displayed, as follows:
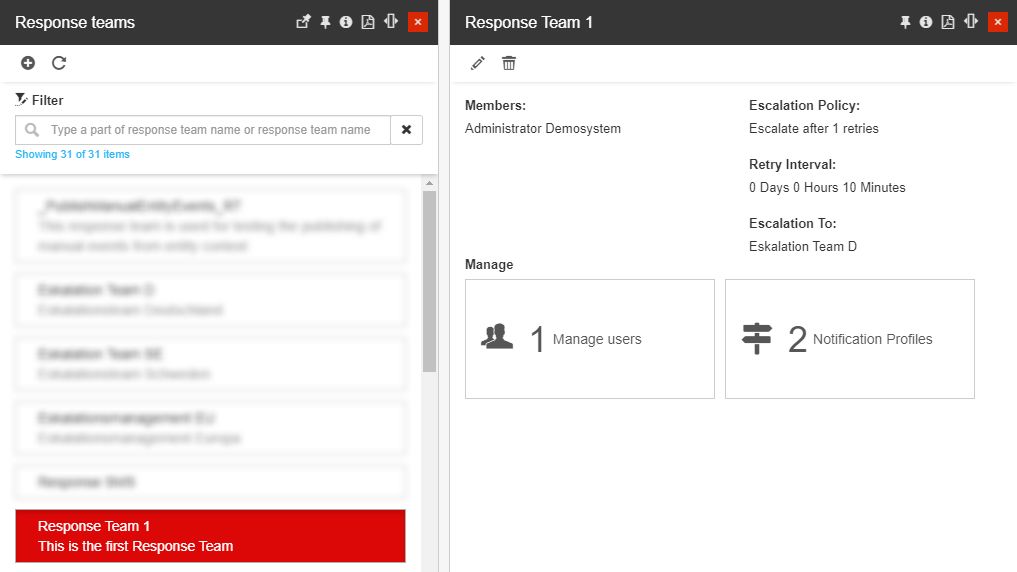
Example of a Response Team opened in detailed view mode
the name of the selected Response team is displayed as the panel title.
the Response Team members are listed on the left side of the panel.
the defined Escalation Policy is displayed on the right side of the panel. If no Escalation Policy is set, the value "None" will be displayed.
In conjunction with the Retry Count Escalation Policy, the defined Retry Interval is also displayed.
In conjunction with the Priority Escalation Policy, the defined Priority Escalation Threshold is also displayed.
In conjunction with any type of Escalation Policy, the Escalation Team is displayed here, as well.
the Management area is displayed at the bottom of the panel, allowing the user to perform further actions, by using the management tiles:
the Manage Users tile
the Manage Notification Profiles tile
The Response Teams panel provides a filtering mechanism that helps the user to easily pinpoint the searched Response Team. The user can search for Response Team by typing in the name or a part of the name.
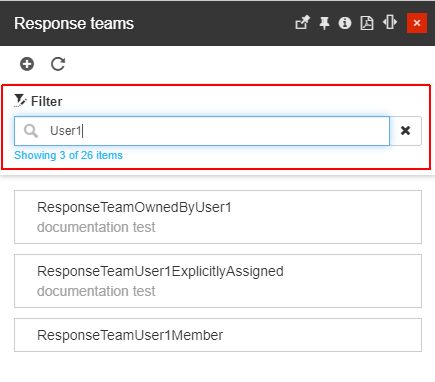
The Response Teams filter
Tip
For more details concerning the Filtering mechanism, please read the ??? article.
Furthermore, the user can manually reload the Response Teams list, by clicking the Refresh toolbar button.
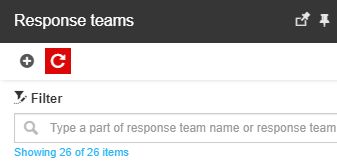
The Refresh button
The Response Teams panel opened by this tile, lists all existing teams, allowing the user to perform the following actions:
Managing Members
Learn all that you need to know about the relationship between i4connected Users and i4messenger Response Teams.
The Manage Users tile is displayed in the detailed view panel of a Response Team. In the center of the tile, the amount of assigned members is displayed.
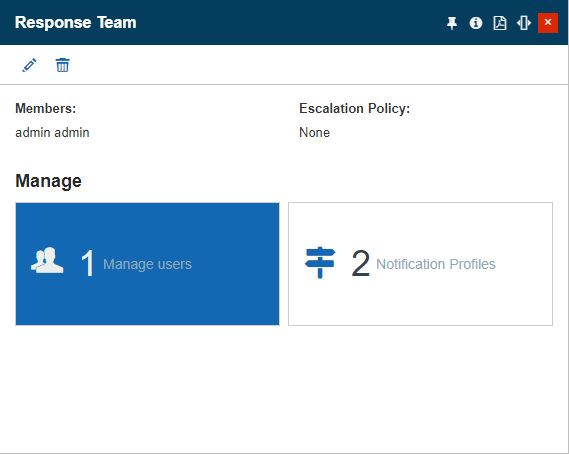
The Manage Users tile
Clicking this tile opens the Users panel, where it is possible to filter or refresh the listed items. The Users are displayed as cards in a scrollable list.
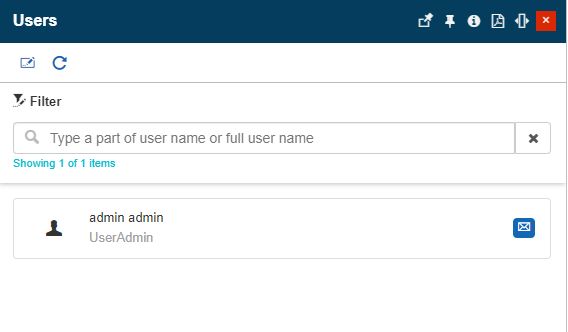
The Users panel
Each user card displays the following details:
the addressing title
the first and last name
the username
the permissions set (Full)
the type - Assigned user or Inherited user
Email - by hovering the
 button, the user's email address is displayed. By clicking this button, the email application is opened allowing the user to send an email to the respective user.
If desired, the user can remove or add users to the Response Team, by clicking the Change toolbar button. This action opens the Select Users panel where the toolbar options allow one to Select All, Unselect All, and Refresh the list view. The already assigned users can be easily distinguished due to the red highlight.
Note
The list of users displayed in this view reflects the currently logged-in user permissions set. For more details about security at the level of user management, please also visit the Security section under the list of permissions.

The Select Users panel
Clicking the Select bottom button will apply the selection and the Select Users panel will be closed. The list of Response Teams Users will be immediately updated to reflect the latest changes.
Note
One user can belong to multiple Response Teams, fulfilling different roles in each.
Managing Notification Profiles
Learn how to establish a relation between Notification Profiles and your i4messenger Response Teams, by reading this article.
The Manage Notification Profiles tile is displayed in the detailed view panel of a Response Team. In the center of the tile, the amount of assigned Notification Profiles is displayed.
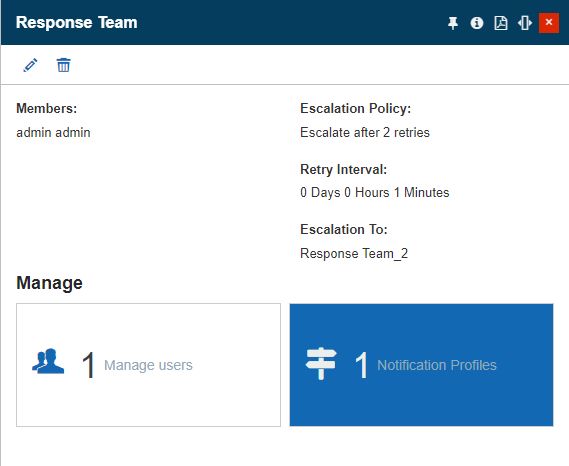
The Manage Notification Profiles
Clicking this tile will open the Notification Profile List where all the assigned entities are listed. The user can filter or refresh the listed Items. The Notification Profiles are displayed as cards in a scrollable list.
Each Notification Profile card displays the following information:

The Notification Profile List
Notification profile name
Notification profile description
Notification profile status (Active or Inactive)
If desired, the user can remove or add Notification Profiles to the Response Team, by clicking the Change toolbar button. This action opens the Select Notification Profiles panel where the toolbar options allow one to Select All, Unselect All , and Refresh the list view. The already assigned notification profiles can be easily distinguished due to the red highlight.
Note
The list of Notification Profiles displayed in this view reflects the currently logged-in user permissions set. For more details about security at the level of the notification profile, please also visit the Messenger section under the list of permissions.
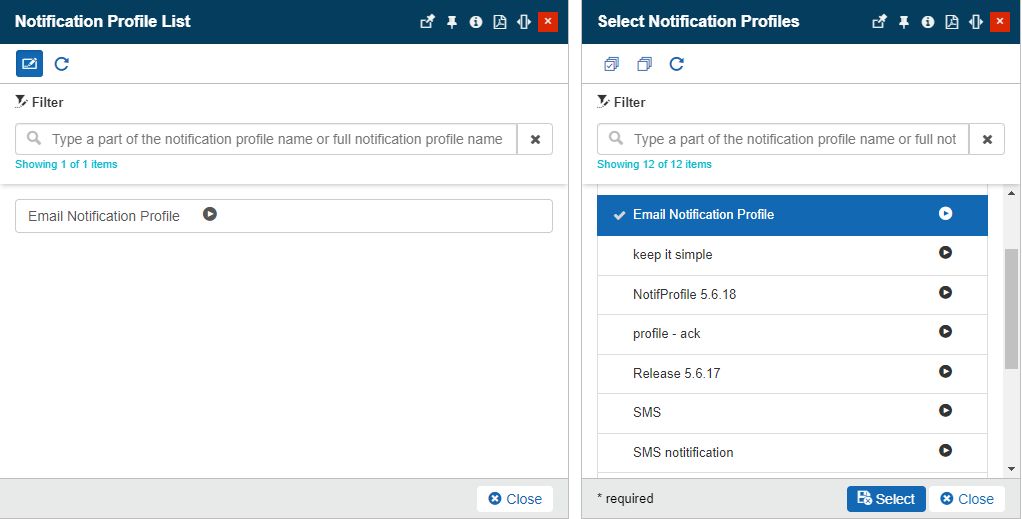
The Select Notification Profiles panel
Clicking the Select bottom button will apply the selection and the Select Notification Profiles panel will be closed. The list of Response Teams Notification Profiles will be immediately updated to reflect the latest changes.
Adding a new Response Team
Learn how to add a new Response Team and how to define the desired particularities for it. Check out this article for more details!
The Add toolbar button from the Response Team panel provides access to the Add response team panel. The Add Response Team panel will be however accessible only for users having at least the Manage response teams permission enabled.
To add a new Response Team, the user must fill in at least the mandatory details (marked with an asterisk in the Add response team panel). By default, the user is notified about the missing mandatory information.
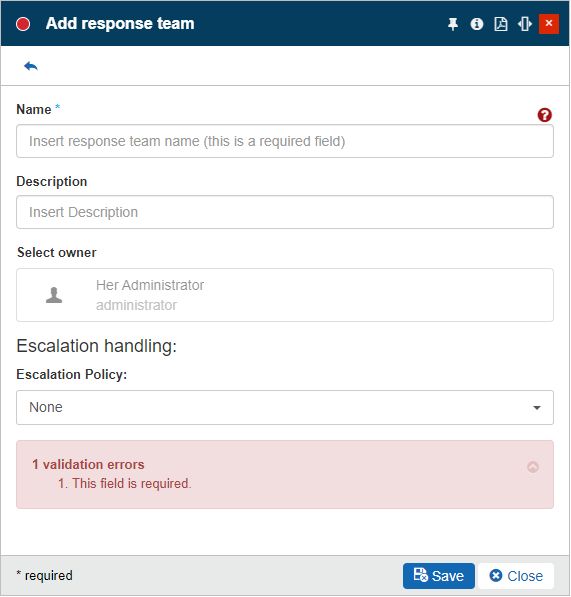
The Add response team panel
The following settings should be done, to add a new Response Team:
Name - the name of the new Response Team
Description - a friendly description of the Response Team
Select owner - the owner of the Response Team. When adding a new Response Team the creator user is by default set as the owner.
Note
The owner can be changed after the Response Team is saved, by all users having the Manage Response Teams permission enabled.

Response Team owner selector
By clicking on the owner selector, the Select Users panel is opened allowing the user to choose another owner for the Response Team. The list displayed by the Select Users panel will also reflect the currently logged-in user permissions set.

Select Users panel
Escalation handling - When a Response Team is used in an escalation use case, the escalation policy type must be defined.
Escalation policy - the following escalation policy types can be set:
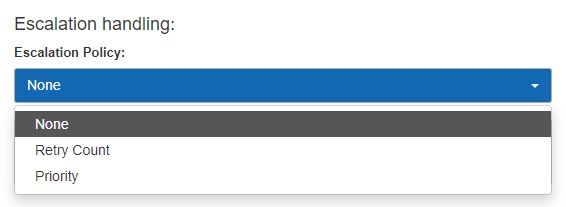
Escalation policy
Retry count - The Retry count policy will escalate after a certain number of retries are performed. The initial notification is also counted as a retry. When this policy type is set, the number of retries must be configured.
Therefore, if the value is set to "1", the escalation will be performed after the initial notification is sent. If the value is set to "2", the escalation will be performed after the two retries.
In this view, the user is required to select another Response Team to which the escalation will be done. By this, all the users belonging to the Escalation Response Team will receive the escalation notification(s).
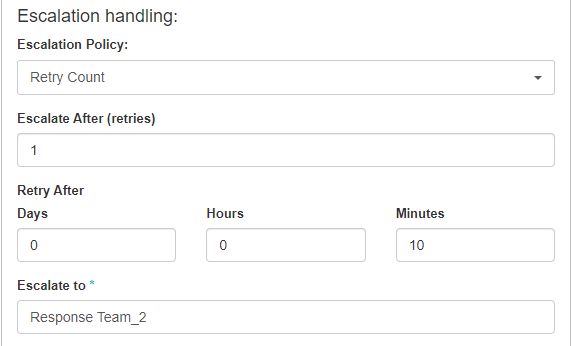
Retry count escalation policy
Priority - The Priority policy will perform an escalation if the priority of an occurrence is equal to or higher than the threshold.
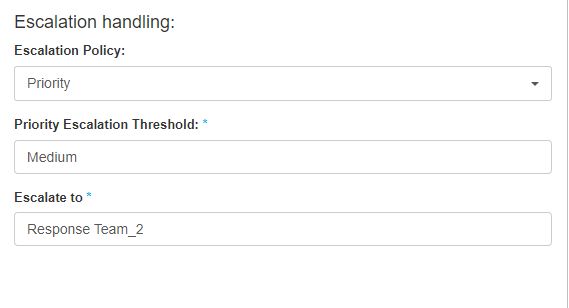
Priority escalation policy
Tip
By convention, a higher priority is indicated by a lower number (ex. Priority 2 is higher than priority 4).
For a better understanding of the Priority Escalation Policy, let's imagine that we have a system where 5 priorities are defined: Highest (P1), High (P2), Medium (P3), Low (P4), and Lowest (P5).
When setting the Priority Escalation Threshold To Medium (P3), all Event occurrences having priority Medium (P3), High (P2), and Highest (P1) will automatically generate a notification directly to the users of the Escalation Response Team. All the Event occurrences triggered with priority Low (P4) and Lowest (P5) will only generate a notification to the users of the current Response Team.
Optionally, using customized queries, the events can be set up in such a way that after every notification is sent out, their priority is raised by subtracting 1 from the priority number. Alternatively, each i4connected adapter or event trigger can override the default priority and raise it. This mechanism, in combination with the priority-based escalation policy, allows the immediate escalation to another response team.
Editing Response Teams
Open this article and read more details about the possibility of updating your i4messenger Response Teams.
By opening a Response Team in detailed view mode, the toolbar of the opened panel allows the user the possibility to update the selected Response Team. The Edit Response Team panel is available only for users having at least the Manage Response Teams permissions enabled.
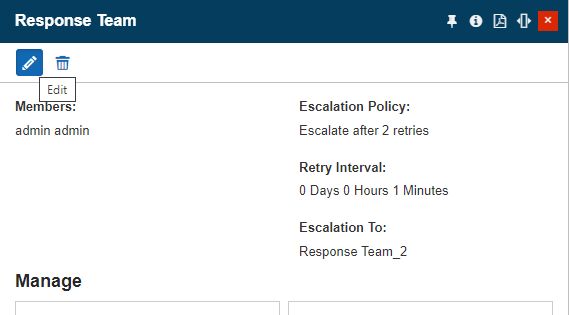
The Edit button
In the Edit response team panel, the user can update all the settings described under the Add a new Response Team article.
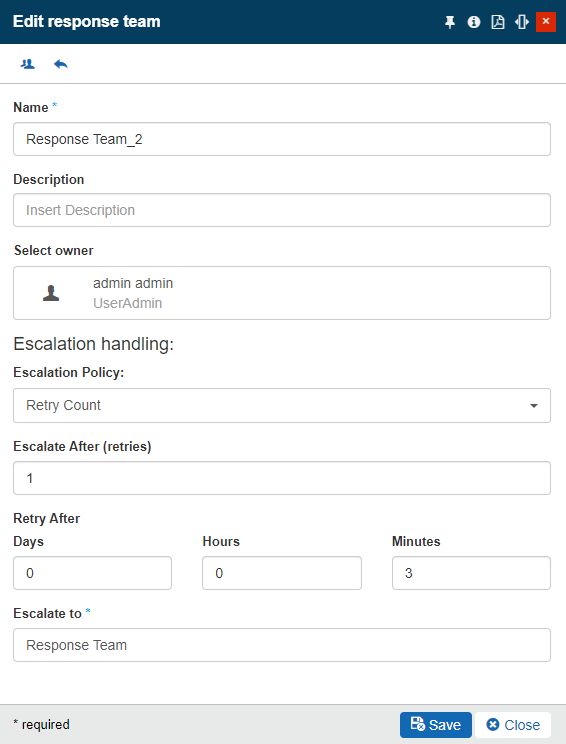
The Edit Response Team panel
To preserve the changes made, the user can select the Save button. Otherwise, clicking the Close button will close the panel without preserving any changes.
Users having at least the View users permissions enabled can also access the Response Teams Entity role assignments panel, by clicking the Users toolbar button of the Edit response team panel.
The Users button
Tip
For more details about the Entity role assignments feature, please also visit the dedicated article here.
Deleting Response Teams
Learn how to remove the obsolete Response Teams. Do not keep such entities if they have become unnecessary!
The Response Team detailed view panel allows the user the possibility to remove the selected Response Team, by clicking the Delete toolbar button. The Delete response team panel can be opened by users having at least the Manage response teams permission enabled.
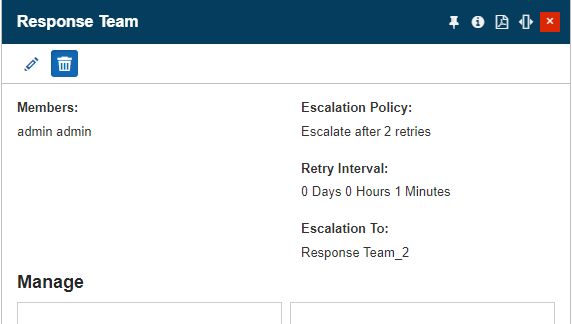
The Delete button
In the Delete response team panel, the user is provided with information about the impact of the deletion on the whole system. To acknowledge the consequences and proceed with the deletion, the user has to type in the designated field, the displayed confirmation code. To proceed with the deletion, the user can press the Delete button, located at the bottom of the panel. Deletion is immediately visible, in the Response Team panel.
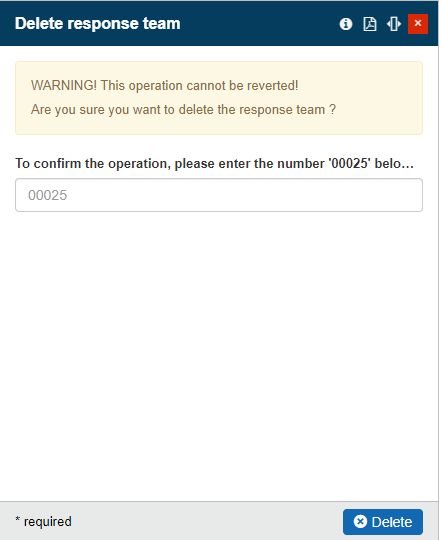
The Delete Response Team panel
Mapping Response Teams to hierarchical entities
Check out this article and learn more details on how to assign Response Teams to hierarchical entities such as Sites, Areas, Organizational Units, and Devices.
Response Teams can be mapped to other entities, such as Sites, Areas, Organizational Units, and Devices, with the scope to enforce a set of filters and rules, that identify the events to be processed through the notification system.
Users having the necessary management rights for these entities can perform the Response Teams mapping operation, in the detailed view panel of a Site, an Area, an Organizational Unit, or a Device.
Tip
For more details about Response Teams mappings, please visit the dedicated articles as follows:
Site Response Teams Mapping
Check out this article and learn more details about Site Response Teams Mappings and how to perform such an operation.
Response Team Mappings are unique entities that can be managed in the context of a Site, with the scope to enforce a set of rules, filtering the events in the context of the i4connected notification system.
The availability of Site Response Team Mappings is guarded by the Manage site response teams permission. Therefore, all the users having this permission enabled either on a global or hierarchical level, are allowed to:
see the Site Response Teams tile in a Site's details panel;
open the list of Site Response Team mappings;
add new Site Response Team mappings;
edit listed Site Response Team mappings;
delete redundant Site Response Team mapping.
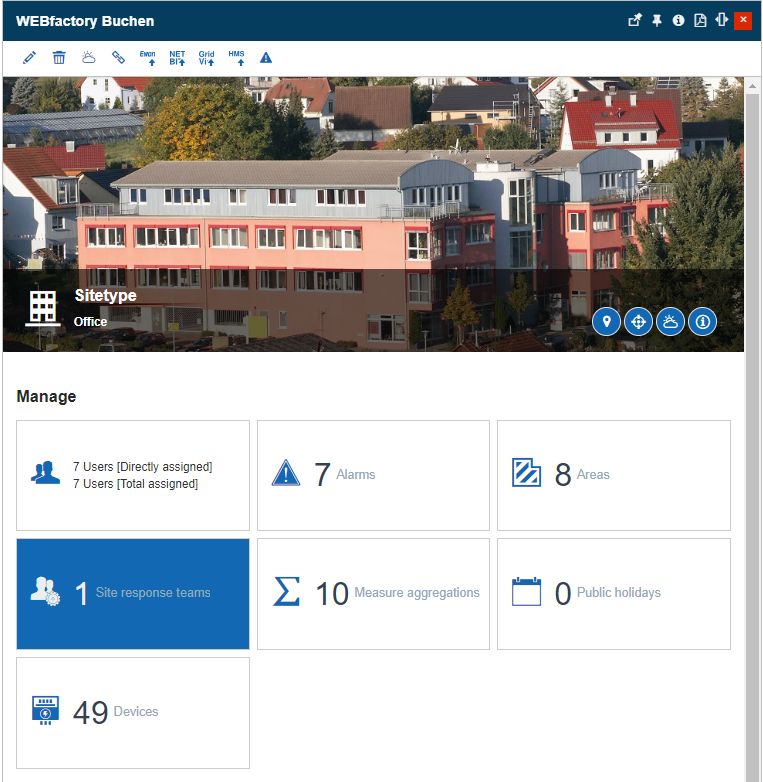
The Site Response Teams tile
By clicking this tile, the Site Response Team List panel is opened. In this view, all the existing Site Response Team mappings are listed. Site Response Team mappings are displayed as cards, distributed in a scrollable list view. Each card displays the name and description of the Site Response Team mapping.
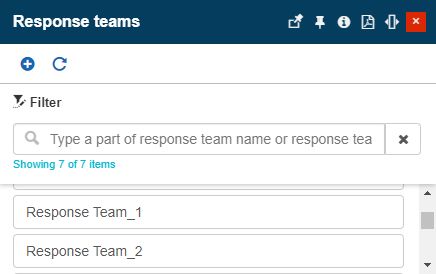
The Site Response Team List panel
Regardless of the user's permission level, the list of Site Response Team mappings features a simple filtering mechanism allowing the users to easily pinpoint the desired Site Response Team mapping.
Tip
For more details about the simple filtering mechanism please also check this article.
The Refresh toolbar button allows the user to manually update the list contents.
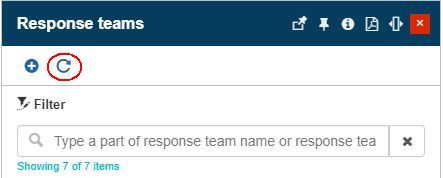
The Refresh button
It is possible to create new Site Response Team mappings, by clicking the Add toolbar button.
The Add button
In the Add Entity Response Team panel, the user is provided with the following settings:
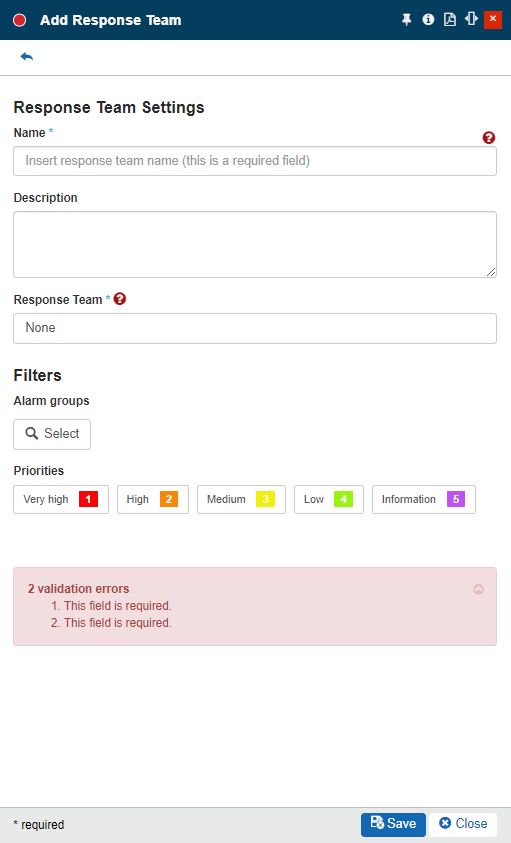
The Add Entity Response Team panel
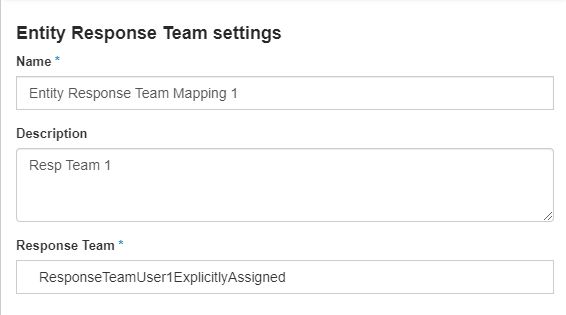
Entity Response Team settings
Entity Response Team settings
Name - the name of the new Site Response Team mapping.
Description - the friendly description of the new Site Response Team mapping.
Response Team - enables the selection of a Response Team, from the dedicated panel. The selected entity is the initial Response Team that will process an Event after the occurrence passes through the applied filter(s).
Note
A Response Team can be associated with multiple Response Team mappings. However, if a response team is delegated both as regular and escalation teams, the users may receive unnecessary notifications (some from the own Response Team mapping and others from the Escalation Response Team mapping).
Hence, the recommendation is that an Escalation Team has no associated Response Team mappings.
The Response Team can be selected from the Response Teams panel. The Response Teams are available for assignment, depending on the rights of the currently logged-in user.
Tip
For more details about the Response Team list, please also read the dedicated article here.
Filters - allows the user the possibility to apply Events and Priority filters. As the filters are not mandatory, a Response Team mapping with no selected filters will be considered and all Event occurrences will be able to pass through it. On the other hand, if an event does not pass the below-described filter settings, it will not go further to the event notification processing pipeline.
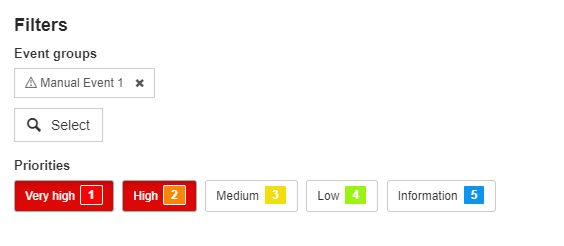
The filter selectors
Event groups - open the Events filter panel, where all the i4connected Events are listed. Adding an Event filter will allow the Publish Set to filter event occurrences by the event’s group, type, and event definition.
Besides the Manage messenger permission, the Event filters also require the View events permission to be enabled.
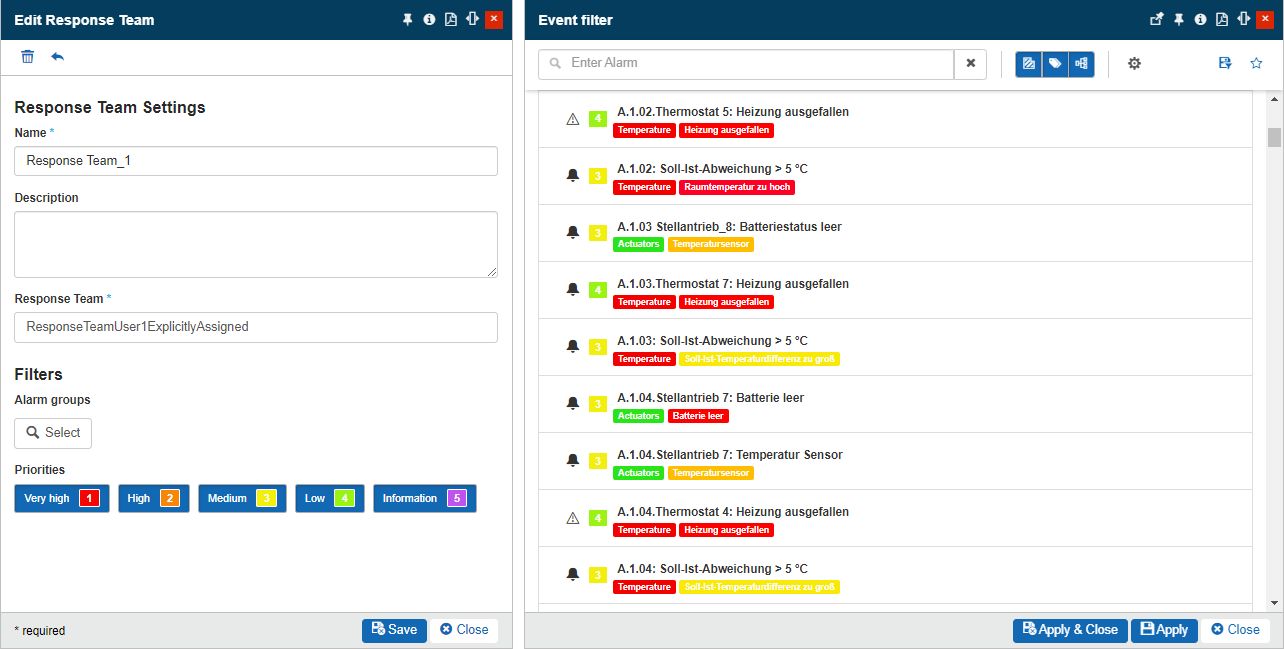
The Event filters panel
Tip
For more details concerning the Events filters panel, please also visit the dedicated article here.
Priorities - enables the selection of one or multiple Priorities, by clicking the priority labels displayed in the panel. Adding a Priority filter will allow the Response Team mapping to filter event occurrences based on their priority,
Besides the Manage messenger permission, the Priorities filters also require the View events permission to be enabled.
After filling in all the required settings the user can click the Save button to add the new Site Response Team mapping to the list, or the Close button to close the panel without saving the new entity.
To edit a listed Site Response Team mapping, the user can select it from the list view. The Edit Entity Response Team panel allows the user the possibility to change all the entity settings.

The Edit Site Response Team mapping panel
After processing all the necessary changes, the user can click the Save button to update the selected Site Response Team mapping, or the Close button to close the panel without saving any changes.
Redundant Site Response Team mappings can be deleted while in edit mode, by clicking the Delete toolbar button.
The Delete button
The Delete Entity Response Team panel displays a confirmation code that the user is required to manually fill in, to proceed with the delete operation.
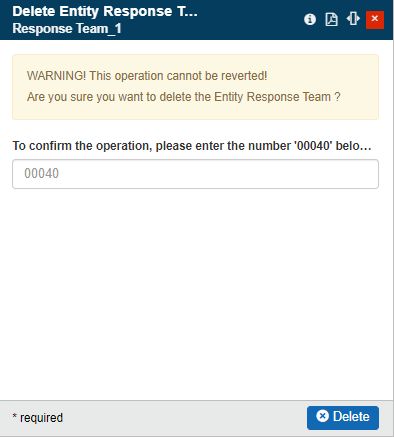
The Delete Site Response Team mapping panel
In case the typed deletion code is incorrect, the system will warn the user and prevent the deletion operation. If the correct deletion code has been typed, pressing the Delete button will permanently remove the selected Site Response Team mapping.
Area Response Teams Mappings
Check out this article and learn more details about Area Response Teams Mappings and how to perform such an operation.
Response Team Mappings are unique entities that can be managed in the context of an Area, with the scope to enforce a set of rules, filtering the events in the context of the i4connected notification system.
The availability of Area Response Team Mappings is guarded by the Manage area response teams' permission. Hence, all the users having this permission enabled either on a global or hierarchical level, are allowed to:
see the Area Response Teams tile in an Area's details panel;
open the list of Area Response Team mappings;
add new Area Response Team mappings;
edit listed Area Response Team mappings;
delete redundant Area Response Team mappings.
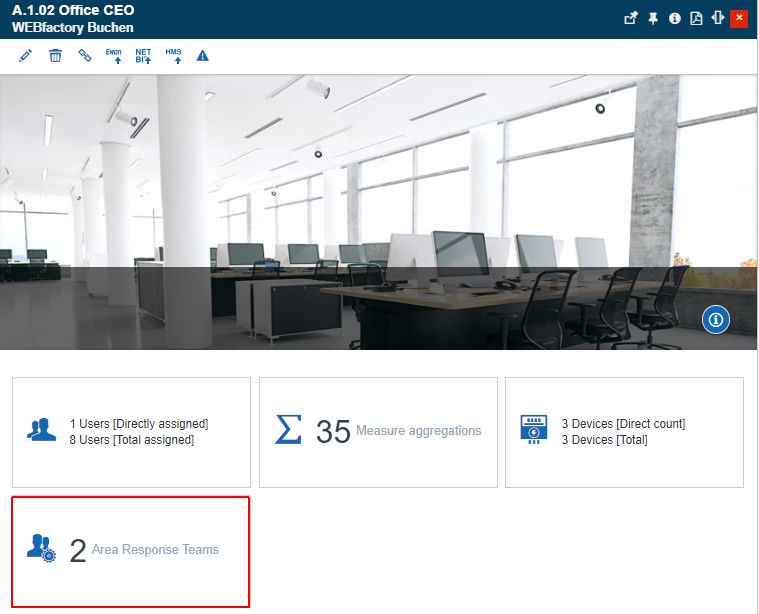
The Area Response Teams tile
By clicking this tile, the Area Response Team List panel is opened. In this view, all the directly assigned and inherited Area Response Team mappings are listed. Area Response Team mappings are displayed as cards, distributed in a scrollable list view. Each card displays the name and description of the Area Response Team mapping.
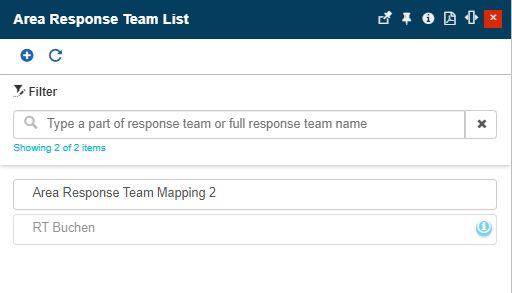
The Area Response Team List panel
Tip
Response Teams assigned higher in the hierarchy are propagated to entities positioned on a lower level. Therefore, an Area will inherit all the Response Teams that were directly assigned to the parent Site.
Besides the inherited Response Teams, the user can define further Area Response Teams.
Regardless of the user's permission level, the list of Area Response Team mappings features a simple filtering mechanism allowing the users to easily pinpoint the desired Area Response Team mapping.
Tip
For more details about the simple filtering mechanism please also check this article.
The Refresh toolbar button allows the user to manually update the list contents.
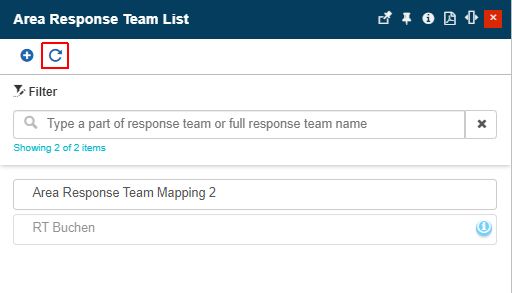
The Refresh button
It is possible to create new Area Response Team mappings, by clicking the Add toolbar button.
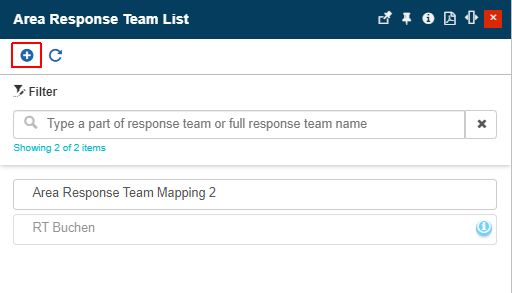
The Add button
In the Add Response Team panel the user is provided with the following settings:
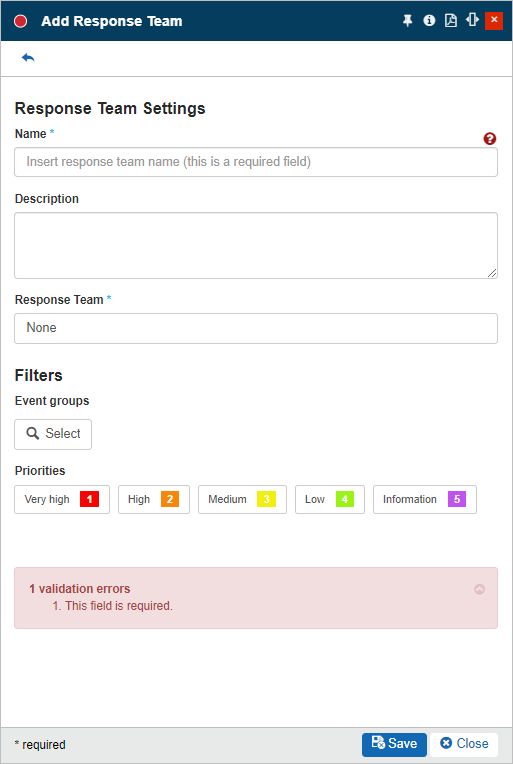
The Add Response Team panel
Response Team settings
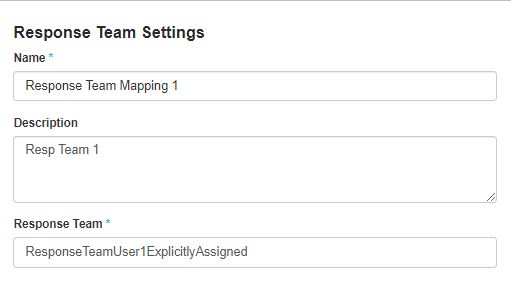
Response Team settings
Name - the name of the new Area Response Team mapping. The name of an Area Response Team mapping needs to be unique.
Description - the friendly description of the new Area Response Team mapping.
Response Team - enables the selection of a Response Team, from the dedicated panel. The selected entity is the initial Response Team that will process an Event after the occurrence passes through the applied filter(s).
Note
A Response Team can be associated with multiple Response Team mappings. However, if a response team is delegated both as regular and escalation teams, the users may receive unnecessary notifications (some from the own Response Team mapping and others from the Escalation Response Team mapping).
Hence, the recommendation is that an Escalation Team has no associated Response Team mappings.
The Response Team can be selected from the Response Teams panel. The Response Teams are available for assignment, depending on the rights of the currently logged-in user.
Tip
For more details about the Response Team list, please also read the dedicated article here.
Filters - allows the user the possibility to apply Events and Priority filters. As the filters are not mandatory, a Response Team mapping with no selected filters will be considered and all Event occurrences will be able to pass through it. On the other hand, if an event does not pass the below-described filter settings, it will not go further to the event notification processing pipeline.

The filter selectors
Event groups - open the Events filter panel, where all the i4connected Events are listed. Adding an Event filter will allow the Publish Set to filter event occurrences by the event’s group, type, and event definition.
Besides the Manage messenger permission, the Event filters also require the View events permission to be enabled.
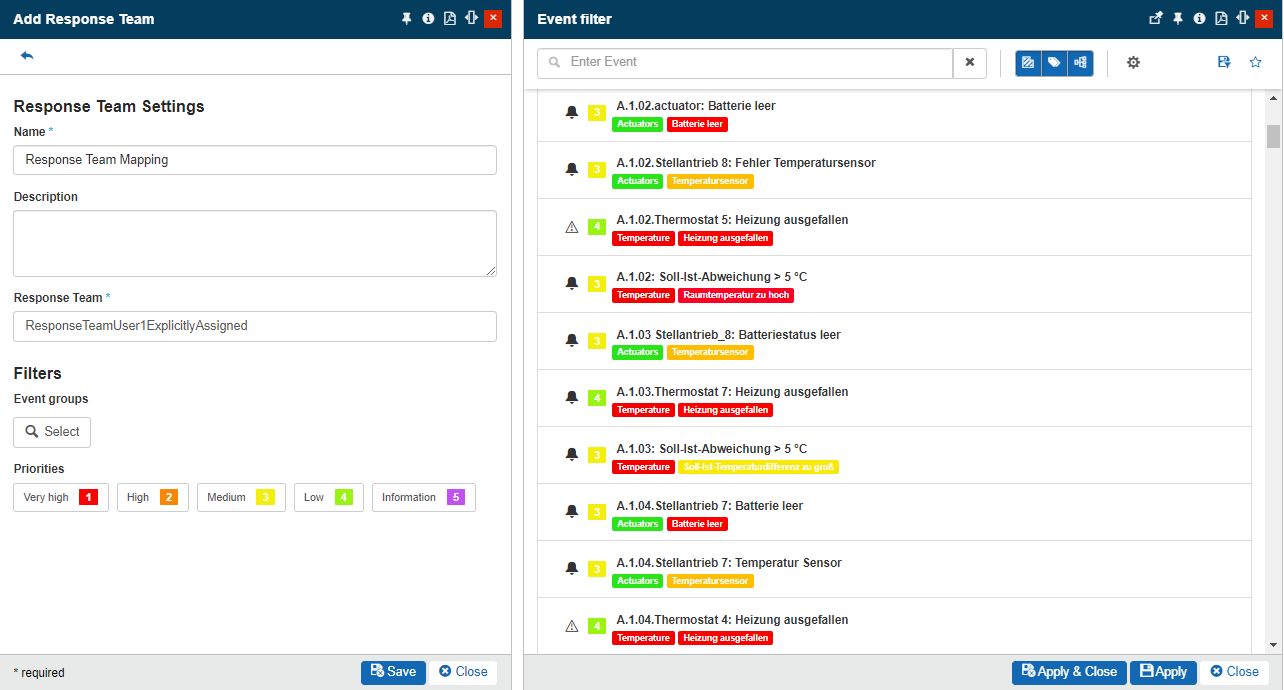
The Event filters panel
Tip
For more details concerning the Events filters panel, please also visit the dedicated article here.
Priorities - enables the selection of one or multiple Priorities, by clicking the priority labels displayed in the panel. Adding a Priority filter will allow the Response Team mapping to filter event occurrences based on their priority,
Besides the Manage messenger permission, the Priorities filters also require the View events permission to be enabled.
After filling in all the required settings the user can click the Save button to add the new Area Response Team mapping to the list, or the Close button to close the panel without saving the new entity.
To edit a listed Area Response Team mapping, the user can select it from the list view. The Edit Response Team panel allows the user the possibility to change all the entity settings.
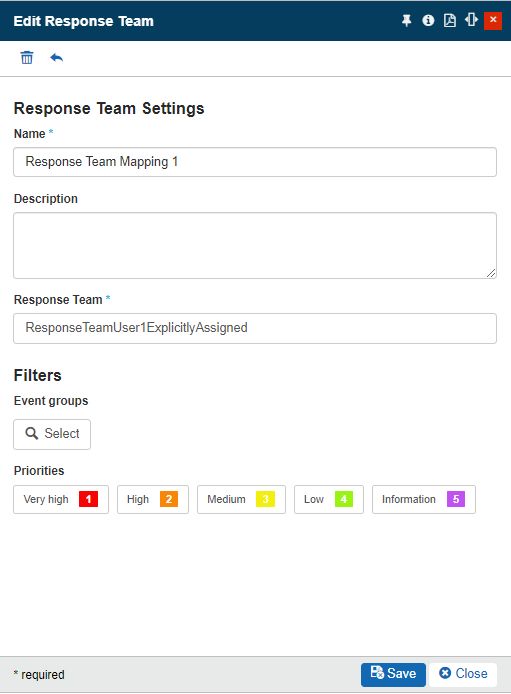
The Edit Area Response Team mapping panel
After processing all the necessary changes, the user can click the Save button to update the selected Area Response Team mapping, or the Close button to close the panel without saving any changes.
Redundant Area Response Team mappings can be deleted while in edit mode, by clicking the Delete toolbar button.
The Delete button
The Delete Entity Response Team panel displays a confirmation code that the user is required to manually fill in, in order to proceed with the delete operation.
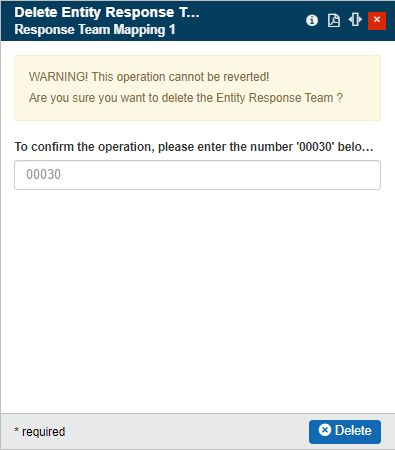
The Delete Area Response Team mapping panel
In case the typed deletion code is incorrect, the system will warn the user and prevent the deletion operation. If the correct deletion code has been typed, pressing the Delete button will permanently remove the selected Area Response Team mapping.
Organizational Unit Response Teams Mappings
Check out this article and learn more details about Organizational Unit Response Teams Mappings and how to perform such an operation.
Response Team Mappings are unique entities that can be managed in the context of an Organizational Unit, with the scope to enforce a set of rules, filtering the events in the context of the i4connected notification system.
The availability of Organizational Units Response Team Mappings is guarded by the Manage area response teams' permission. Hence, all the users having this permission enabled either on a global or hierarchical level, are allowed to:
see the Organizational Unit Response Teams tile in an Organizational Unit's details panel;
open the list of Organizational Unit Response Team mappings;
add new Organizational Unit Response Team mappings;
edit listed Organizational Unit Response Team mappings;
delete redundant Organizational Unit Response Team mappings.
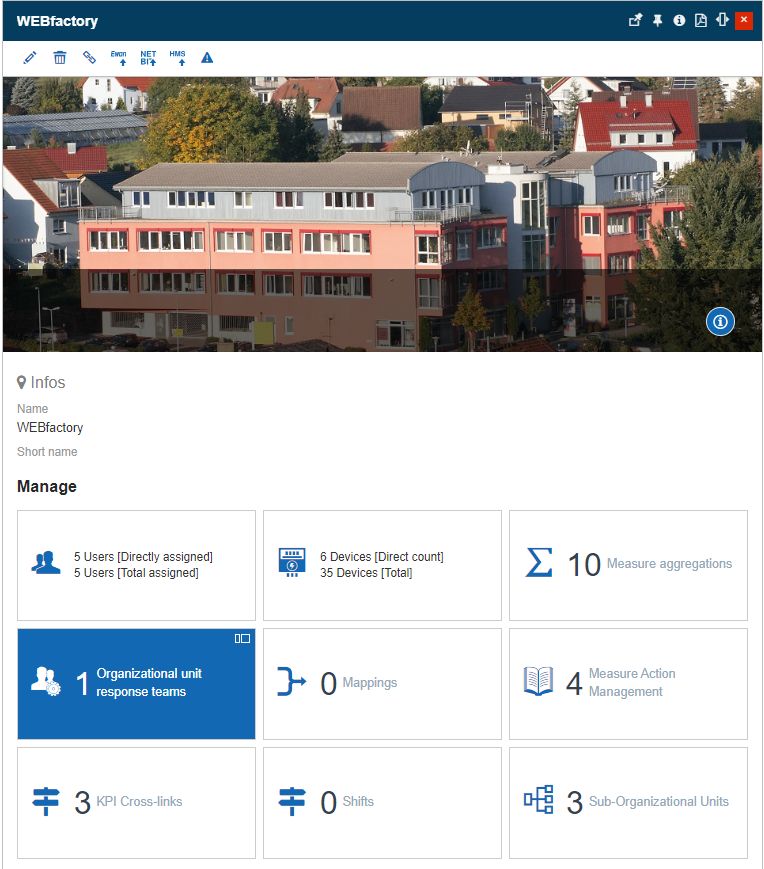
The Organizational Unit panel
By clicking this tile, the Organizational Unit Response Team List panel is opened. In this view, all the directly assigned and inherited Organizational Unit Response Team mappings are listed. Organizational Unit Response Team mappings are displayed as cards, distributed in a scroll-able list view. Each card displays the name and description of the Organizational Unit Response Team mapping.
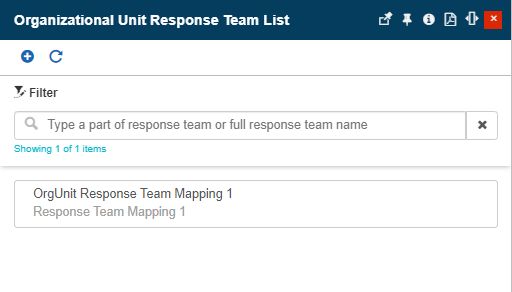
The Organizational Unit Response Team List panel
Tip
Response Teams assigned higher in the hierarchy are propagated to entities positioned on a lower level. Therefore, a Sub-Organizational Unit will inherit all the Response Teams that were directly assigned to the parent Organizational Unit.
Besides the inherited Response Teams, the user can define further Organizational Unit Response Teams.
Regardless of the user's permission level, the list of Organizational Unit Response Team mappings features a simple filtering mechanism allowing the users to easily pinpoint the desired Organizational Unit Response Team mapping.
Tip
For more details about the simple filtering mechanism please also check this article.
The Refresh toolbar button allows the user to manually update the list contents.
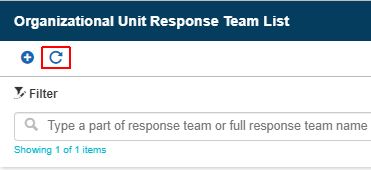
The Refresh button
It is possible to create new Organizational Unit Response Team mappings, by clicking the Add toolbar button.
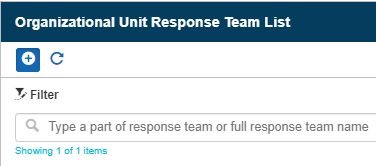
The Add button
In the Add Response Team panel the user is provided with the following settings:

The Add Response Team panel
Response Team settings

Response Team settings
Name - the name of the new Organizational Unit Response Team mapping. The name of an Organizational Unit Response Team mapping needs to be unique.
Description - the friendly description of the new Organizational Unit Response Team mapping.
Response Team - enables the selection of a Response Team, from the dedicated panel. The selected entity is the initial Response Team that will process an Event after the occurrence passes through the applied filter(s).
Note
A Response Team can be associated with multiple Response Team mappings. However, if a response team is delegated both as regular and escalation teams, the users may receive unnecessary notifications (some from the own Response Team mapping and others from the Escalation Response Team mapping).
Hence, the recommendation is that an Escalation Team has no associated Response Team mappings.
The Response Team can be selected from the Response Teams panel. The Response Teams are available for assignment, depending on the rights of the currently logged-in user.
Tip
For more details about the Response Team list, please also read the dedicated article here.
Filters - allows the user the possibility to apply Events and Priority filters. As the filters are not mandatory, a Response Team mapping with no selected filters will be considered and all Event occurrences will be able to pass through it. On the other hand, if an event does not pass the below-described filter settings, it will not go further to the event notification processing pipeline.

The filter selectors
Event groups - open the Events filter panel, where all the i4connected Events are listed. Adding an Event filter will allow the Publish Set to filter event occurrences by the event’s group, type, and event definition.
Besides the Manage messenger permission, the Event filters also require the View events permission to be enabled.

The Event filters panel
Tip
For more details concerning the Events filters panel, please also visit the dedicated article here.
Priorities - enables the selection of one or multiple Priorities, by clicking the priority labels displayed in the panel. Adding a Priority filter will allow the Response Team mapping to filter event occurrences based on their priority,
Besides the Manage messenger permission, the Priorities filters also require the View events permission to be enabled.
After filling in all the required settings the user can click the Save button to add the new Organizational Unit Response Team mapping to the list, or the Close button to close the panel without saving the new entity.
To edit a listed Organizational Unit Response Team mapping, the user can select it from the list view. The Edit Response Team panel allows the user the possibility to change all the entity settings.

The Edit Organizational Unit Response Team mapping panel
After processing all the necessary changes, the user can click the Save button to update the selected Organizational Unit Response Team mapping, or the Close button to close the panel without saving any changes.
Redundant Organizational Unit Response Team mappings can be deleted while in edit mode, by clicking the Delete toolbar button.
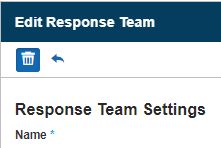
The Delete button
The Delete Entity Response Team panel displays a confirmation code that the user is required to manually fill in, in order to proceed with the delete operation.
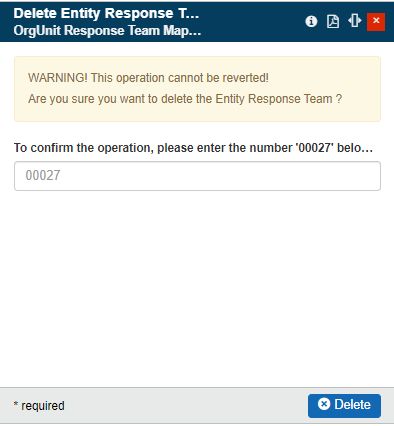
The Delete Organizational Unit Response Team mapping panel
In case the typed deletion code is incorrect, the system will warn the user and prevent the deletion operation. If the correct deletion code has been typed, pressing the Delete button will permanently remove the selected Organizational Unit Response Team mapping.
Device Response Team Mapping
Check out this article and learn more details about Device Response Teams Mappings and how to perform such an operation.
Response Team Mappings are unique entities that can be managed in the context of a Device, with the scope to enforce a set of rules, filtering the events in the context of the i4connected notification system.
The availability of Device Response Team Mappings is guarded by the Manage device response teams permission. Hence, all the users having this permission enabled either on a global or hierarchical level, are allowed to:
see the Device Response Teams tile in a Device's details panel;
open the list of Device Response Team mappings;
add new Device Response Team mappings;
edit listed Device Response Team mappings;
delete redundant Device Response Team mappings.
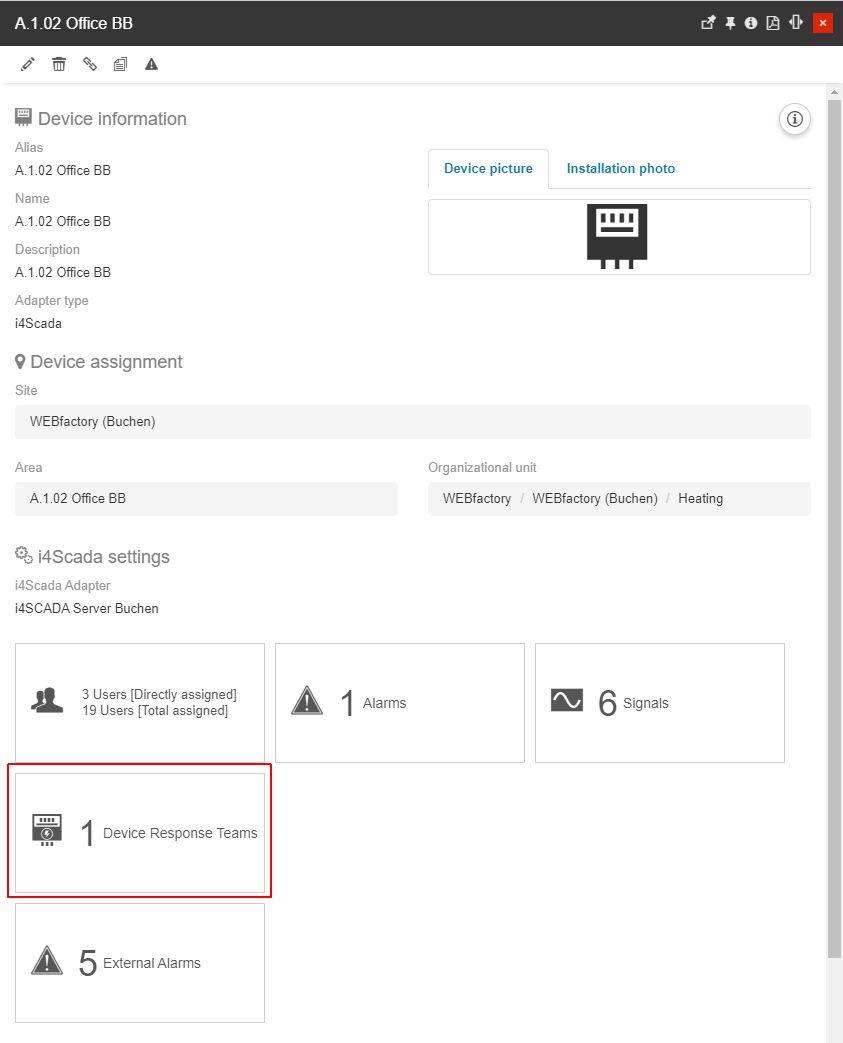
The Device Response Teams tile
By clicking this tile, the Device Response Team List panel is opened. In this view, all the directly assigned and inherited Device Response Team mappings are listed. Device Response Team mappings are displayed as cards, distributed in a scroll-able list view. Each card displays the name and description of the Device Response Team mapping.
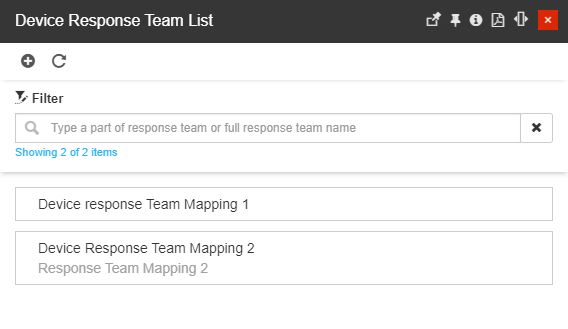
The Device Response Team List panel
Tip
Response Teams assigned higher in the hierarchy are propagated to entities positioned on a lower level. Therefore, a Device will inherit all the Response Teams that were directly assigned to its parents (Site / Organizational Units / Area).
Besides the inherited Response Teams, the user can define further Device Response Teams.
Regardless of the user's permission level, the list of Device Response Team mappings features a simple filtering mechanism allowing the users to easily pinpoint the desired Device Response Team mapping.
Tip
For more details about the simple filtering mechanism please also check this article.
The Refresh toolbar button allows the user to manually update the list contents.
The Refresh button
It is possible to create new Device Response Team mappings, by clicking the Add toolbar button.
The Add button
In the Add Entity Response Team panel the user is provided with the following settings:
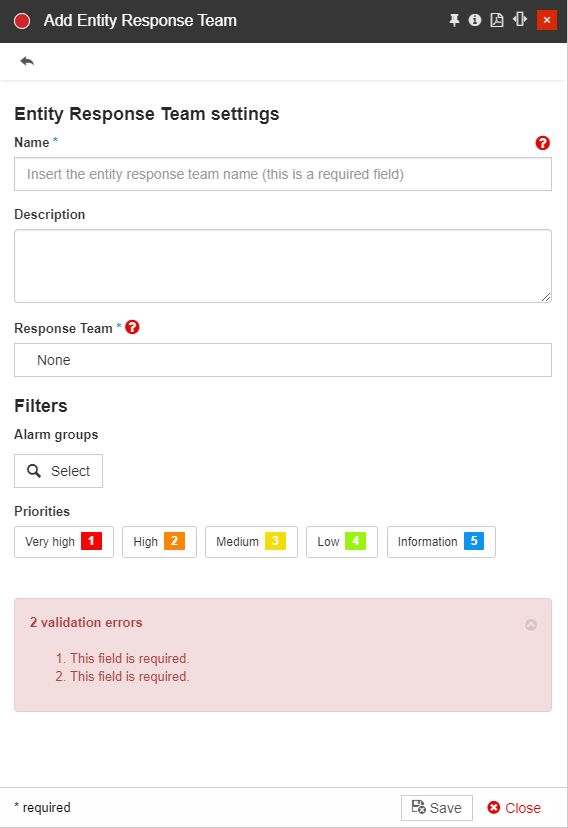
The Add Entity Response Team panel
Entity Response Team settings

Entity Response Team settings
Name - the name of the new Device Response Team mapping. The name of a Device Response Team mapping needs to be unique.
Description - the friendly description of the new Device Response Team mapping.
Response Team - enables the selection of a Response Team, from the dedicated panel. The selected entity is the initial Response Team that will process an Event after the occurrence passes through the applied filter(s).
Note
A Response Team can be associated with multiple Response Team mappings. However, if a response team is delegated both as regular and escalation teams, the users may receive unnecessary notifications (some from the own Response Team mapping and others from the Escalation Response Team mapping).
Hence, the recommendation is that an Escalation Team has no associated Response Team mappings.
The Response Team can be selected from the Response Teams panel. The Response Teams are available for assignment, depending on the rights of the currently logged-in user.
Tip
For more details about the Response Team list, please also read the dedicated article here.
Filters - allows the user the possibility to apply Events and Priority filters. As the filters are not mandatory, a Response Team mapping with no selected filters will be considered and all Event occurrences will be able to pass through it. On the other hand, if an event does not pass the below-described filter settings, it will not go further to the event notification processing pipeline.
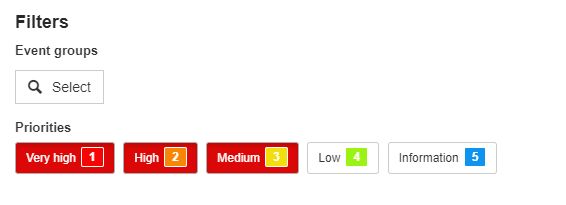
The filter selectors
Event groups - open the Events filter panel, where all the i4connected Events are listed. Adding an Event filter will allow the Publish Set to filter event occurrences by the event’s group, type, and event definition.
Besides the Manage messenger permission, the Event filters also require the View events permission to be enabled.

The Event filters panel
Tip
For more details concerning the Events filters panel, please also visit the dedicated article here.
Priorities - enables the selection of one or multiple Priorities, by clicking the priority labels displayed in the panel. Adding a Priority filter will allow the Response Team mapping to filter event occurrences based on their priority,
Besides the Manage messenger permission, the Priorities filters also require the View events permission to be enabled.
After filling in all the required settings the user can click the Save button to add the new Device Response Team mapping to the list, or the Close button to close the panel without saving the new entity.
To edit a listed Device Response Team mapping, the user can select it from the list view. The Edit Entity Response Team panel allows the user the possibility to change all the entity settings.
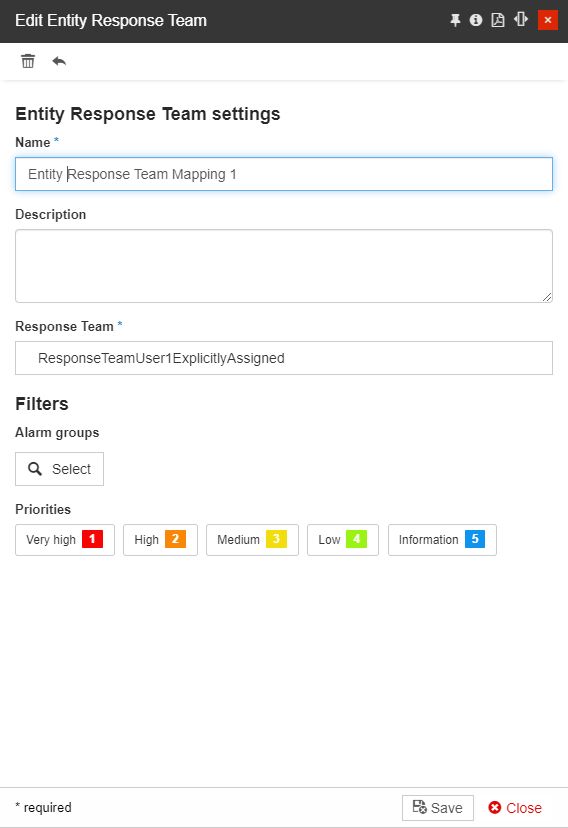
The Edit Device Response Team mapping panel
After processing all the necessary changes, the user can click the Save button to update the selected Device Response Team mapping, or the Close button to close the panel without saving any changes.
Redundant Device Response Team mappings can be deleted while in edit mode, by clicking the Delete toolbar button.
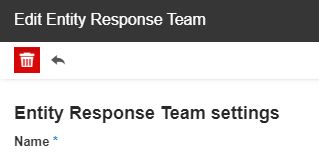
The Delete button
The Delete Entity Response Team panel displays a confirmation code that the user is required to manually fill in, in order to proceed with the delete operation.
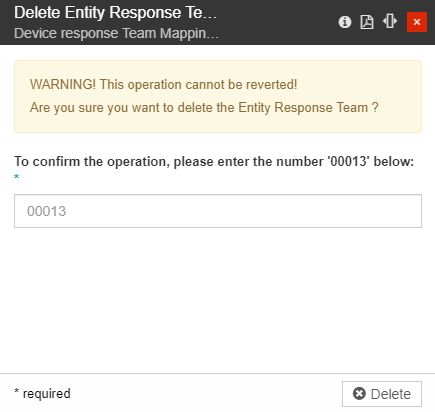
The Delete Device Response Team mapping panel
In case the typed deletion code is incorrect, the system will warn the user and prevent the deletion operation. If the correct deletion code has been typed, pressing the Delete button will permanently remove the selected Device Response Team mapping.