Backup and restore a WEBfactory 2010 project database
Check ou this tutorial and learn how to backup and restore a WEBfactory 2010 Studio project database.
There are three methods of backing up and restoring databases in WEBfactory 2010 :
Backup and restore from Ewon by HMS NetworksStudio - only the main project database can be backed up. This method does not do Logs, Events and AlarmLogs databases backup.
Backup and restore from Microsoft SQL Server Management Studio - can create backups for Logs, Events and AlarmLogs databases too. This method can be further simplified by using scripts to automate a predefined backup or restore.
Using the backup and restore scripts - backup and restore scripts can be exported from the Microsoft SQL Server Management Studio. Along with the WFRunScripts.cmd file, the scripts can automate the backup and restore processes and can help less advanced users.
Backup and restore from Ewon by HMS NetworksStudio
Backup
To backup a project database using Ewon by HMS Networks Sudio:
Open the desired project in Ewon by HMS NetworksStudio.
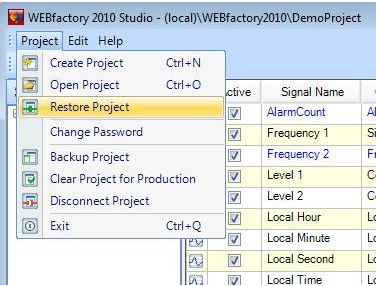
Go to the Project menu and select Backup project.
Backup project option in Ewon by HMS NetworksStudio

Select a name for the backup file and a place to store it.

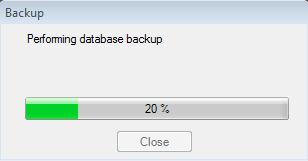
Click OK and wait for the backup process to finish.
Restore
To restore a backup using Ewon by HMS NetworksStudio:
Open the desired project in Ewon by HMS NetworksStudio.
Go to the Project menu and select Restore project.
Browse for the backup file, and name it in the Database name field. The path should be the default one.

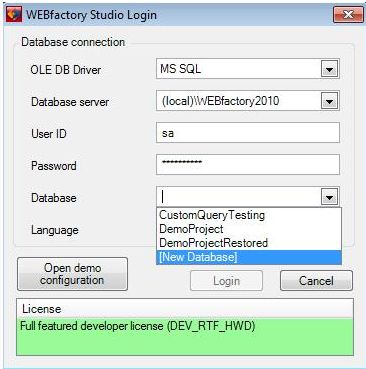
Alternatively, a backup can be restored from the Ewon by HMS NetworksStudio login screen:
Select Connect and wait until the process is complete.
Alternatively, a backup can be restored from the Ewon by HMS NetworksStudio login screen:
Select [New Database] from the Database option.
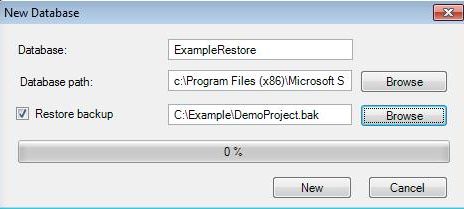
In the New Database window, name the database and make sure to select the Restore backup option. Browse for the backup file and click New.
The new project will have the database from the backup file.
Backup and restore from Microsoft SQL Server Management Studio
Backup
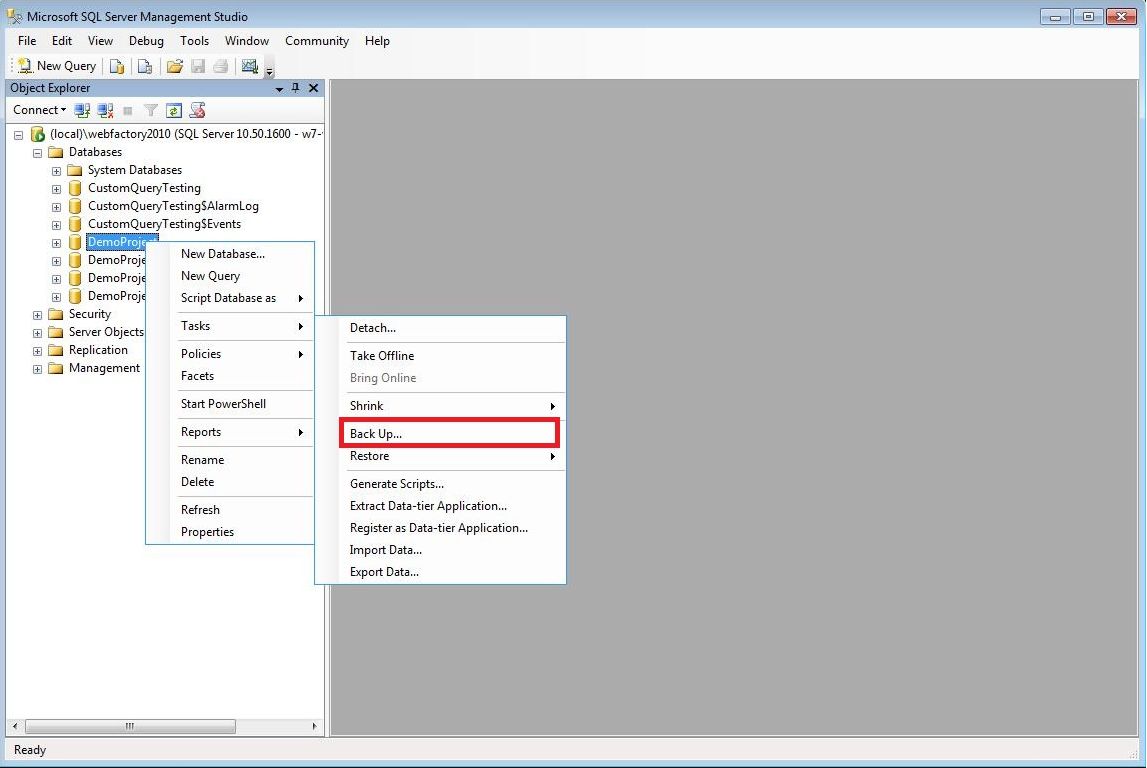
To backup project database from Microsoft SQL Server Management Studio, login to Microsoft SQL Server Management Studio and browse the Databases folder structure to locate the desired database for backup.
Microsoft SQL Server Management Studio allows the user to back up the AlarmLog, Events and Logs databases, besides the main database of the project. Each database needs to be backed up individually.
Right-click on the desired database and go to Tasks > Back Up....
Database backup from Microsoft SQL Server Management
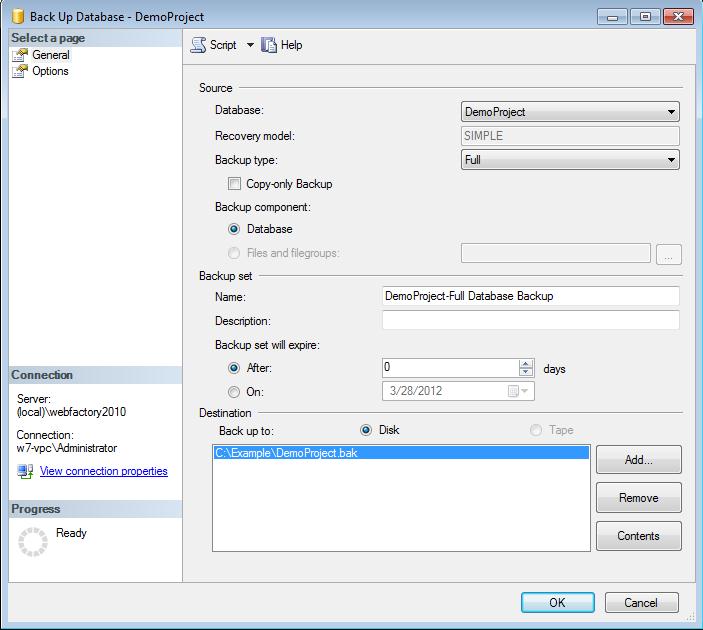
In the Back Up Database window, select a Destination for the backup.
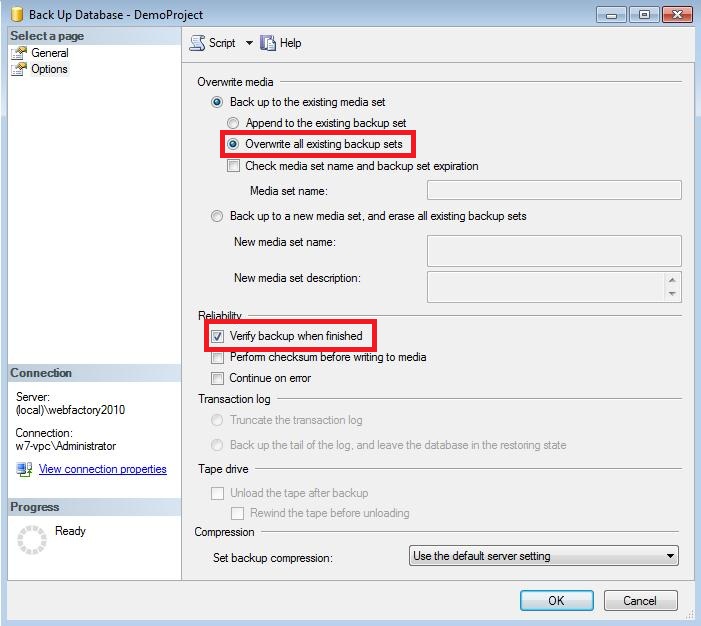
Select the Options page from the Select a page panel (upper-right side). It is recommended to have Overwrite all existing backup sets and Verify backup when finished selected.
Note
Optionally, before clicking the OK button, this settings can be exported to a script for easier use later on. To export the backup settings, select the Script option from the top of the window.
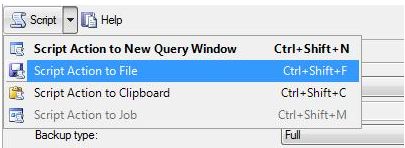
Exporting the configuration
Select the location and the name of the .sql script file.
If dragged and dropped over a command file, this script will automatically backup the database as set in the options above. This is useful when dealing with users with no SQL Server Management Studio knowledge.
Click OK to start the backup process.
The same process is required for backing up additional databases like Logs, AlarmLogs and Events databases.
Restore
To restore a backup using Microsoft SQL Server Management Studio:
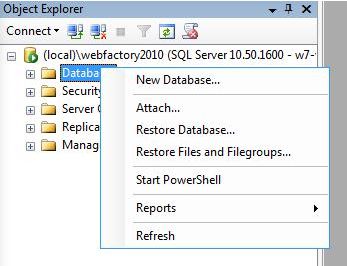
Right-click on the Databases entry from the Object Explorer panel. Select Restore Database....
Restoring a backup database
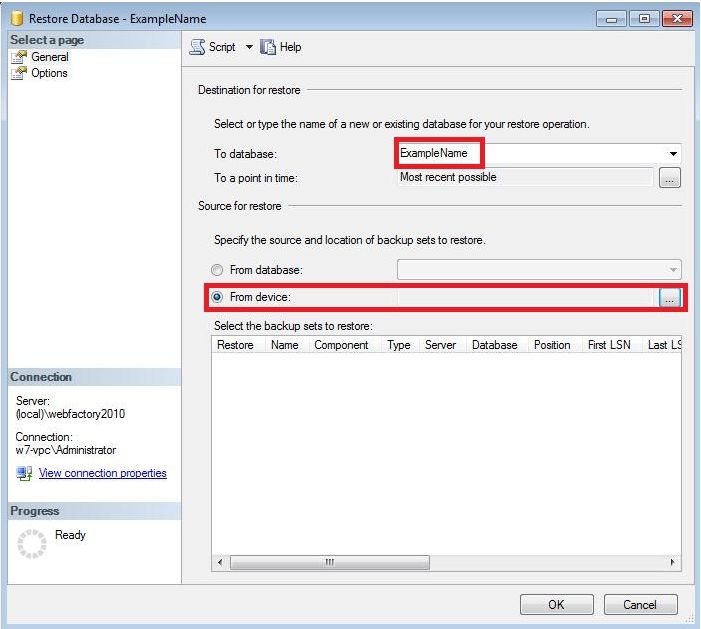
In the Restore Database window, enter a name for the new database. Select the option to select the source From device.
Restore database options
Click on the button corresponding to the From device option. The Specify Backup window will open. Use the Add button to select your backup from the disk.

Selecting the backup file
Click OK to return to the Restore Database window. Notice that the selected backup file is listed in the Select the backup sets to restore area.
Make sure the Restore button is checked

Restore button is checked
Note
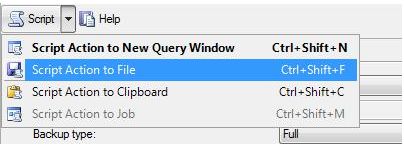
Before clicking the OK button, this settings can be exported to a script for easier use later on. To export the restore settings, select the Script option from the top of the window.
Exporting the configuration
Select the location and the name of the .sql script file.
If dragged and dropped over a command file, this script will automatically restore the database as set in the options above. This is useful when dealing with users with no SQL Server Management Studio knowledge.
Check the Restore option and select OK to restore the backup database.
Using the backup and restore scripts
Download the WFRunScript.cmd file here.
The WFRunScript.cmd file needs to be edited before using. Open the file with any text editor and replace the path and the name with the path and name of your database.
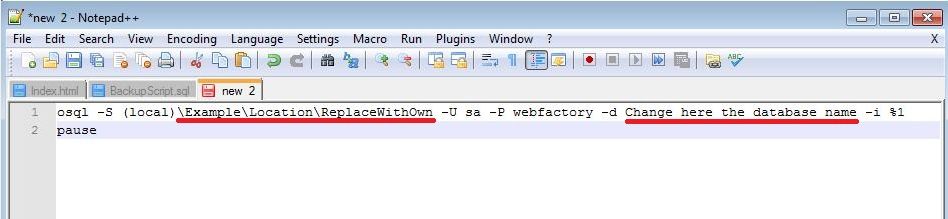
Edit the .cmd file to fit your project
To use the previously created backup and/or restore scripts, select the script and drop it on the WFRunScript.cmd command file.
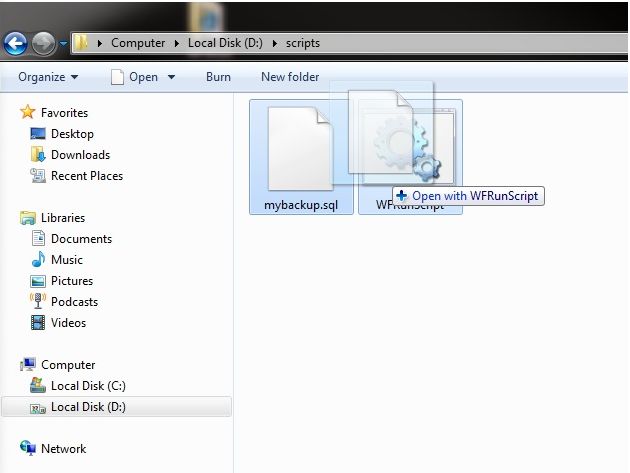
Drag and drop the scripts on the .cmd file to execute them