WEBfactory 2010 Setup
The WEBfactory 2010 installer package can be set up by following these easy steps in order to install the software suite.
Note
Before installing WEBfactory 2010, make sure that you've read the compatibility articles for your operating system!
After installing SQL Server 2014, the WEBfactory 2010 Setup will display a green icon before the SQL Server 2014 option in the WEBfactory 2010 bootstraper window. The green icon indicates that the installation of SQL Server 2014 was successfully completed.
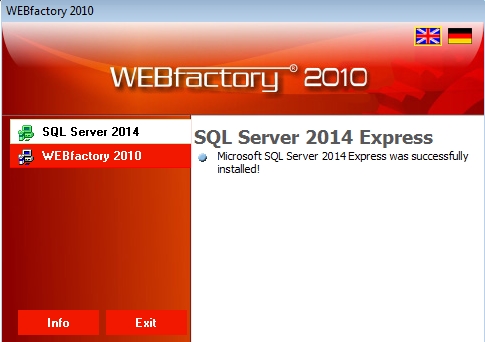
SQL Server 2014 installation completed
If the icon of the SQL Server 2014 is other than green when installed on the same machine, the SQL Server 2014 installation may have been compromised or may not be complete yet.
If the SQL Server 2014 is installed on a different machine, the WEBfactory 2010 can continue without it.
Click here to return to the SQL Server 2014 installation guide.
Select WEBfactory 2010 from the left menu and click Install to start the WEBfactory 2010 setup.

WEBfactory 2010 installation
If the prerequisites are not installed at this point, WEBfactory 2010 Setup, will install the required software now:
Microsoft .NET Framework 4.7
Microsoft Silverlight 5 SDK
The WEBfactory 2010 Setup, will resume after the required software is installed.
If Microsoft SQL Server 2014 is not installed on the same machine on which WEBfactory 2010 is installing, the Setup Assistant will ask for confirmation for continuing the installation.
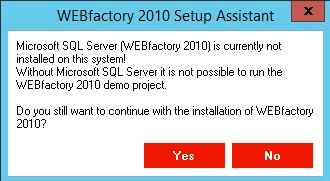
If you're planning on connecting WEBfactory 2010 to an SQL Server 2014 installed on a different machine, click Yes to continue the installation. If not, make sure that Microsoft SQL Server 2014 is installed on your machine before installing WEBfactory 2010.
Click Next at the Welcome screen to continue to the License Agreement screen.
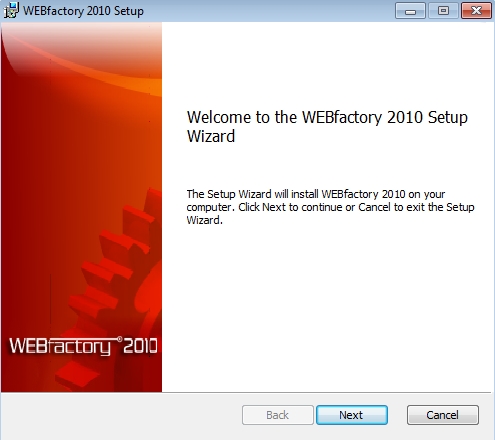
Welcome screen
Read the License Agreement and accept it to continue. The License Agreement can be printed using the Print button.
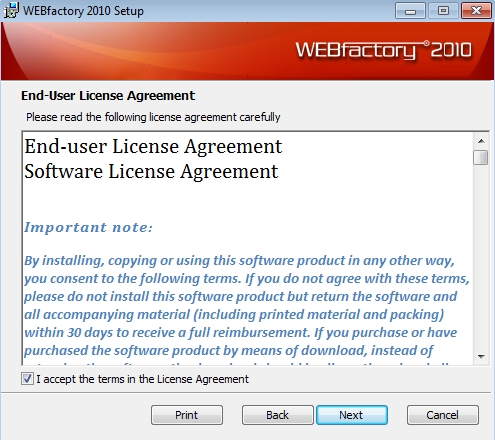
License Agreement
In the Destination Folder screen, you can change the installation folder of WEBfactory 2010. Change the path according to your preference or leave it default. Click Next to continue.

Destination Folder
The Product Features screen allows you to select the features to be installed. By default, all features are selected for installation.
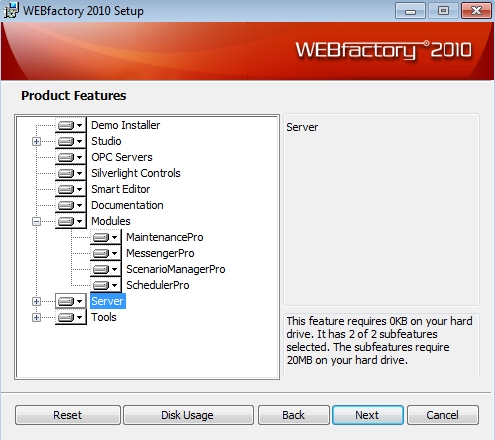
Product Features
Clicking on the Features icon will open a menu containing the following options:
Will be installed on local hard drive - installs the feature normally, on the hard drive.
Entire feature will be installed on local hard drive - if the feature has other sub features, this option enables the installation of the sub features along with the installation of the main feature.
Will be installed to run from network - it will install the feature on a network location. The installed feature will be accessible via network.
Entire feature will be installed to run from network - if the feature has other sub features, it will install the feature and all the sub features on a network location. The installed features will be accessible via network.

Features installation options
The Disk Usage button allows you to see the Disk Size, Available space and Required space for the installation.
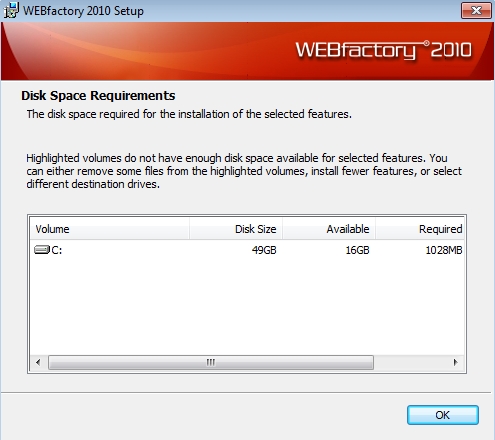
Disk Usage
The Reset button will restore the default settings for the Product Features screen.
After the Features have been selected or excluded from the installation, click on the Install button from the Ready to install WEBfactory 2010 screen.
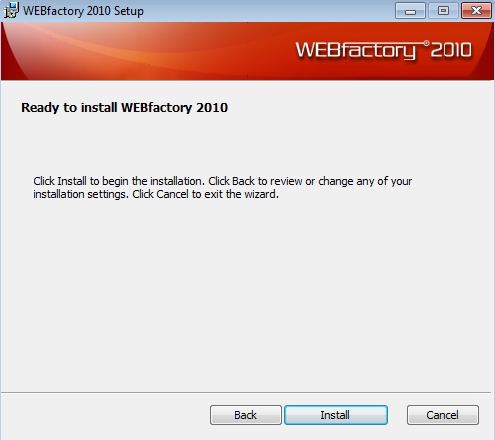
Final installation screen
This is the final point where the Back button allows you to go back and change the installation settings.
Wait while WEBfactory 2010 is installed.
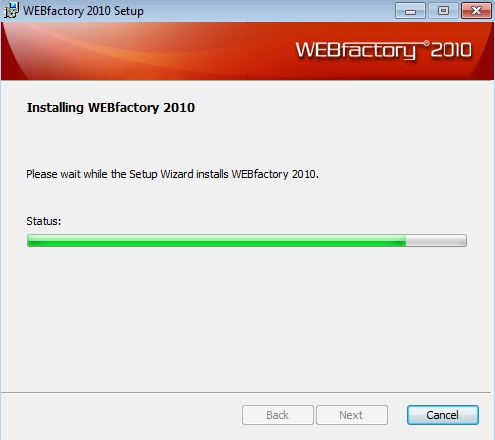
Installing the product
The MachineConfig will be automatically launched. Wait until the MachineConfig ends the setup.
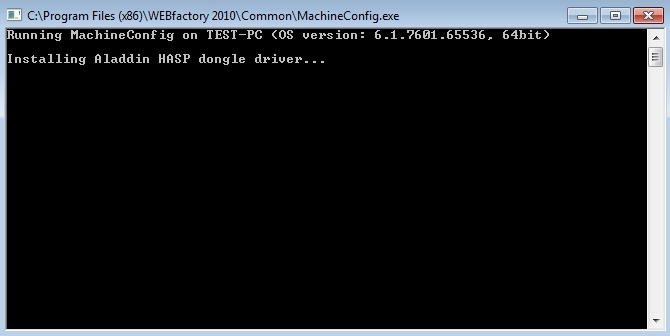
MachineConfig
Congratulations! You have installed WEBfactory 2010. Click the Finish button to close the setup.

Installation completed
Back in the main setup window, the WEBfactory 2010 green icon indicates that the product is successfully installed.
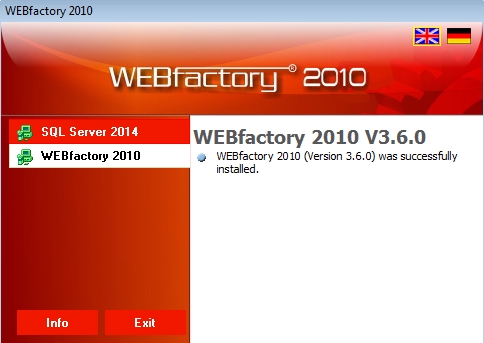
The product is successfully installed
Important
The last step of the setup is to manually install the SQL Server 2008 Native Client, which is required in order to make the SQL Server 2014 backwards compatible. The SQL Server 2008 Native Client installer can be found on the WEBfactory 2010 installation disc, inside the Tools folder.
Select the appropriate platform version for your system and run the sqlncli.msi.
Once the SQL Server 2008 Native Client is installed, WEBfactory 2010 can be used without any compatibility issues.