Enabling Dynamic Content Compression in Internet Information Services (IIS) Manager
Check out this article and learn how to enable dynamic content compression in Internet Information Services Manager.
Windows 7
Open Programs and Features: Control Panel > Programs and Features.
Select Turn Windows features on or off. Navigate to Internet Information Services > World Wide Web Services > Performance Features > Dynamic Content Compression. Mark the checkbox corresponding to the Dynamic Content Compression and lick OK.
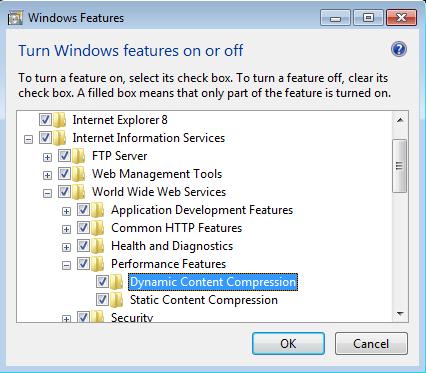
Adding the Dynamic Content Compression feature
Wait until the installation is complete. Reboot the machine if required.
Open Internet Information Services (IIS) Manager: Control Panel > Administrative Tools > Internet Information Services (IIS) Manager.
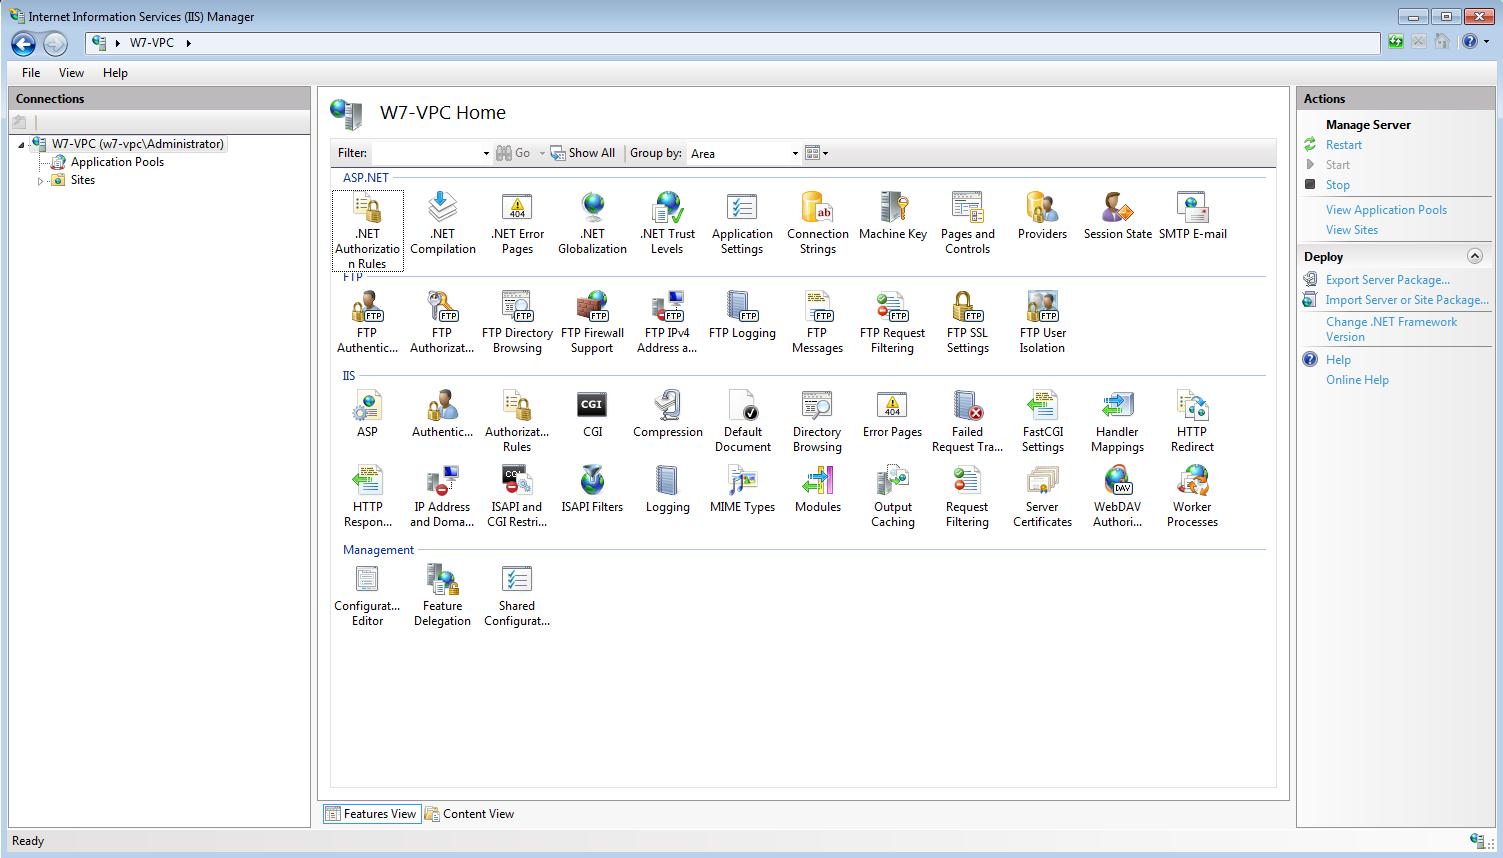
Internet Information Services (IIS) Manager
Select the desired Site from the Connection panel (the Site for which the Dynamic Compression will be enabled).
From the Home panel (the main view) select Compression, under the IIS category.
Open the Compression options and check the box corresponding to the Enable dynamic content compression option.

Enabling the dynamic content compression
Windows Server 2008 R2
Open the Server Manager and navigate to Roles > Web Server (IIS).
Locate the Role Services under Summary, and click Add Role Services.
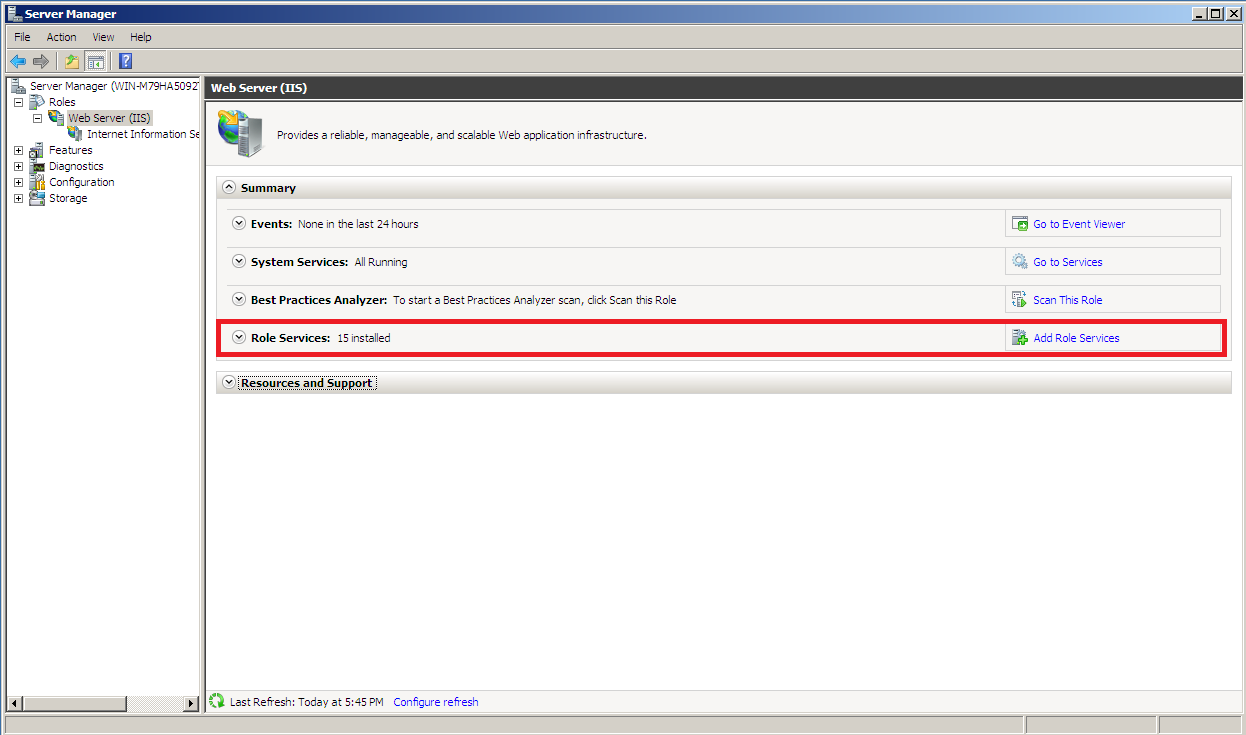
Adding the Role services to IIS
More information about Roles can be found here.
In the Add Role Services window, locate the Dynamic Content Compression service under the Performance category.
Select the Dynamic Content Compression and click Next to proceed. Select Install at the second step, and Close after the installation is complete.
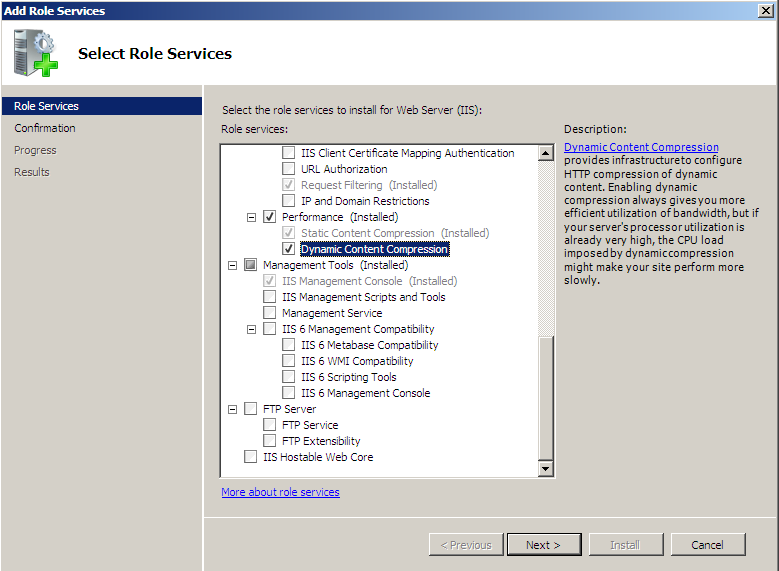
Adding the Dynamic Content Compression to IIS in Windows Server 2008
Select the Internet Information Services (IIS) Manager under Roles > Web Server (IIS). In the IIS Manager, select the desired Site and open the Compression option (Features View).
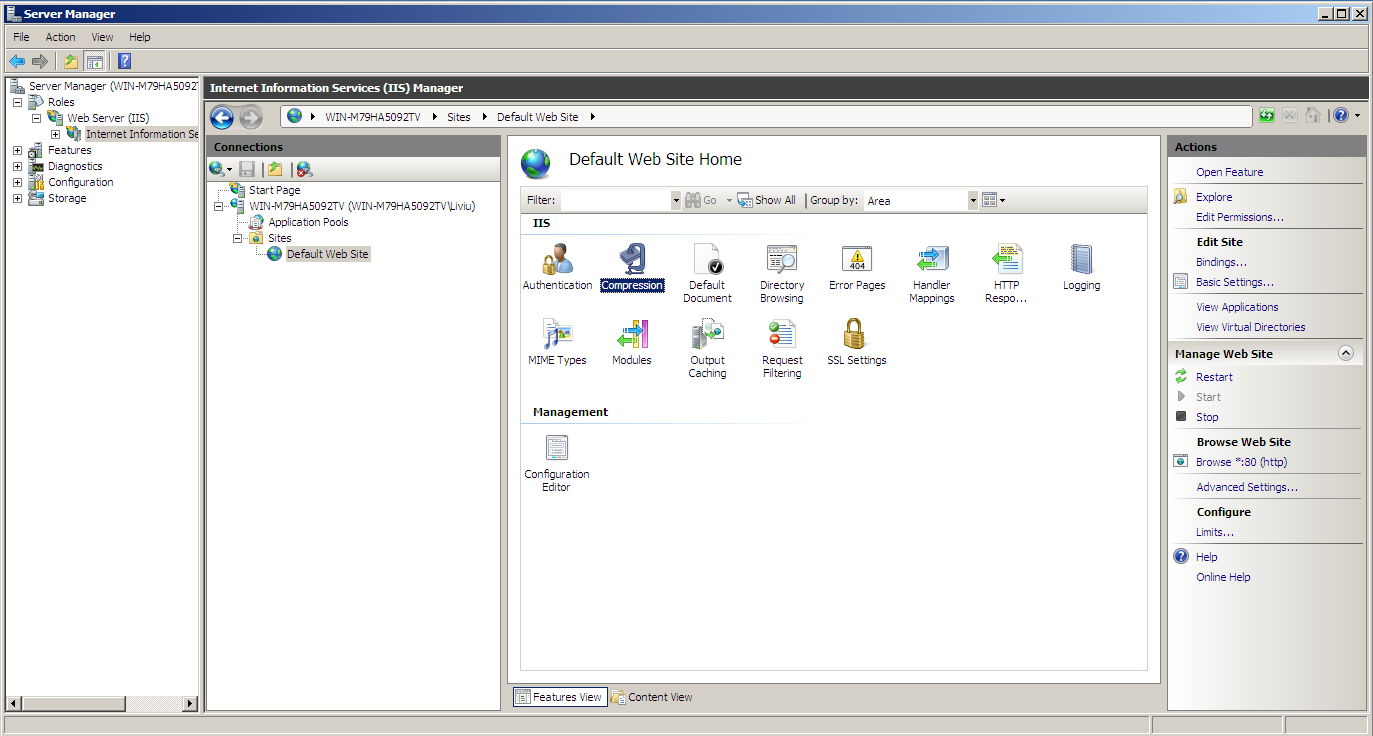
The Compression option under the IIS Manager
In the Compression window, mark the check box corresponding to the Enable dynamic content compression option.
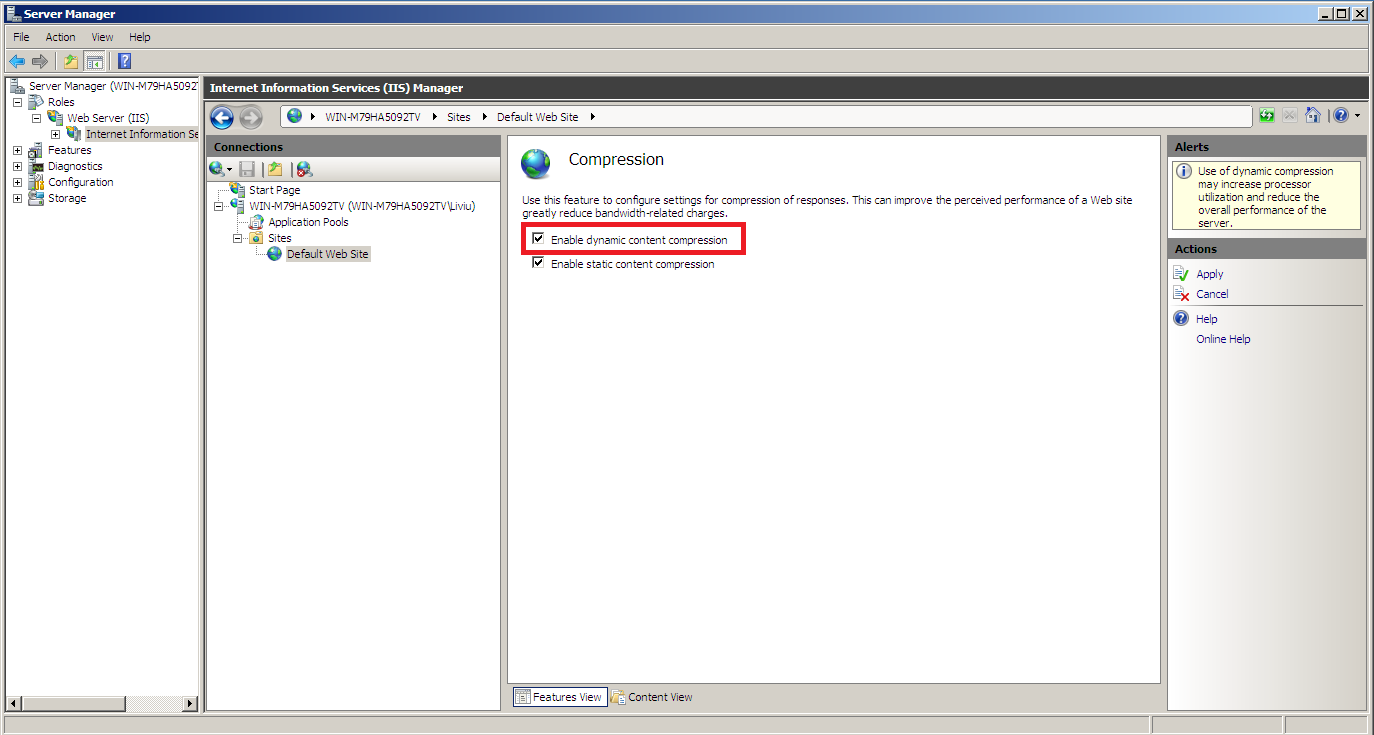
Enabling the Dynamic content compression