Installing the SQL Server
Read these articles and learn how to install the SQL Server for multiple versions, in order to start using WEBfactory 2010.
Installing Microsoft SQL Server 2014
Read these articles and learn how to install the SQL Server 2014 in order to start using WEBfactory 2010.
The installation of SQL Server 2014 must be performed from the WEBfactory 2010 bootstrapper window. This way, the proper database instance is installed.
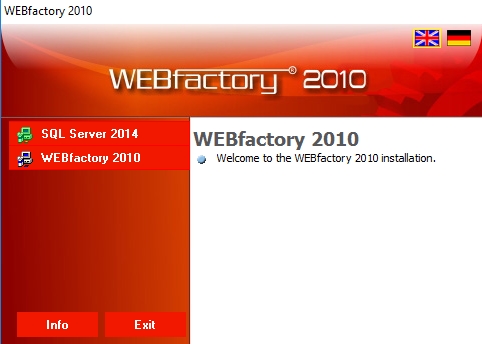
To access the Ewon by HMS Networks bootstrapper, double-click on the Setup Application in your Ewon by HMS Networks CD-ROM.
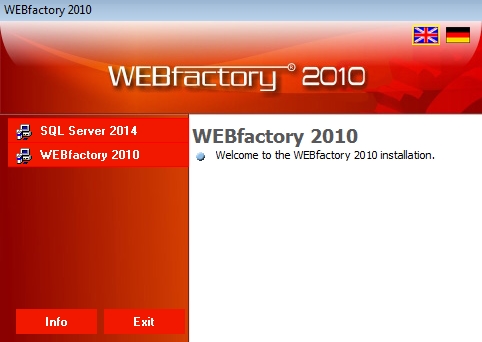
Ewon by HMS Networks setup window
Ewon by HMS Networks Setup window can be displayed in two languages: English and German. To choose the display language click on the corresponding flag button located in the top-right section of the window.
The left section of the Ewon by HMS Networks Setup window displays two setup options:
SQL Server 2014 for installing the SQL Server
Ewon by HMS Networks for installing the WEBfactory software
The bottom-left section of the Ewon by HMS Networks Setup window displays the Info button and the Exit button.
Info button opens the WEBfactory web page for more information
Exit button closes the Ewon by HMS Networks Setup window
To proceed with the SQL Server 2014 installation, click on the SQL Server 2014 option in the left side of the WEBfactory 2010 Setup window.
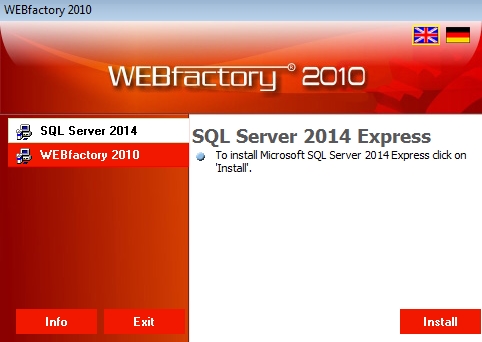
Installing SQL Server from Ewon by HMS Networks setup window
Click the Install button located in the bottom-right section of the WEBfactory 2010 Setup window.
Select one of the two options from the WEBfactory 2010 Setup Assistant window:

SQL Server 2014 installation options
Click Ok to proceed with the SQL Server 2014 Express installation.
Once the Microsoft SQL Server 2014 is installed, you can continue with installing WEBfactory 2010.
Microsoft SQL Server 2014 Express
Read these articles and learn how to install the SQL Server 2014 Express in order to start using WEBfactory 2010.
Select Microsoft SQL Server 2014 Express from the WEBfactory 2010 Setup Assistant window and press Ok.
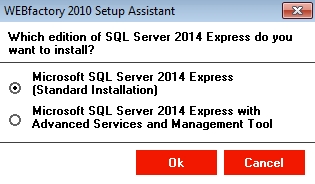
SQL Server 2014 Express options
In the Choose Directory For Extracted Files dialog, confirm the temporary directory or choose another one to proceed. The SQL Server 2014 files will be extracted in the selected directory and the setup will continue.
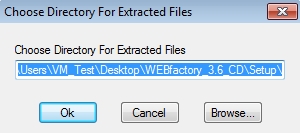
Choose temporary directory
Wait for Microsoft SQL Server 2014 Express to finish the setup.
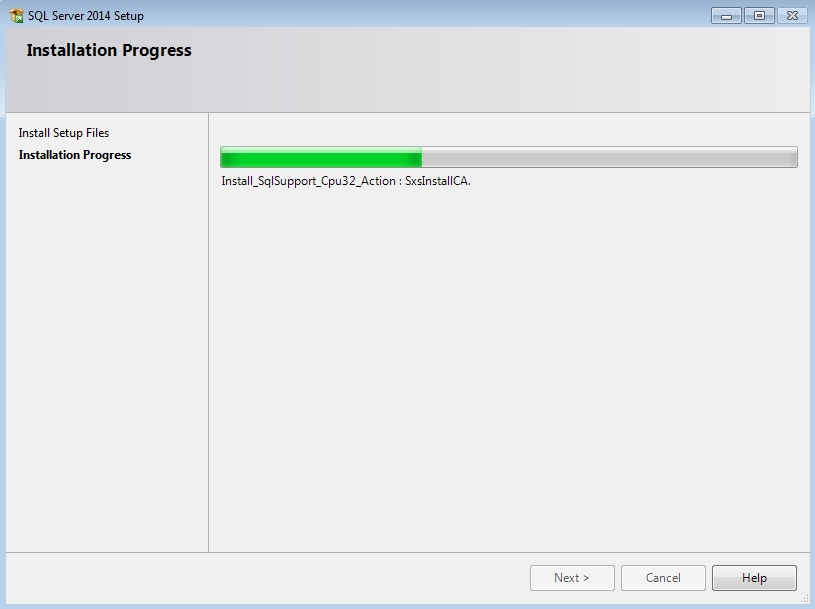
Microsoft SQL Server 2014 Express installation progress
The Microsoft SQL Server 2014 Express setup window will close once the installation is complete.
Once the Microsoft SQL Server 2014 is installed, you can continue with installing WEBfactory 2010.
Microsoft SQL Server 2014 Express with Advanced Services and Management Tools
Read these articles and learn how to install the SQL Server 2014 Express with Advanced Services and Management Tools.
Select Microsoft SQL Server 2014 Express from the WEBfactory 2010 Setup Assistant window and press Ok.

SQL Server 2014 Express option
In the Choose Directory For Extracted Files dialog, confirm the temporary directory or choose another one to proceed. The SQL Server 2014 files will be extracted in the selected directory and the setup will continue.
Choose temporary directory
Wait for the SQL Server 2014 Setup to load. SQL Server 2014 Setup will guide you through the setup.
Note
The SQL Server 2014 Setup window is divided in three main sections:
the header section located at the top. This section provides basic information about the current installation process.
the status section located in the left side of the SQL Server 2014 Setup window. The steps needed for installing SQL Server 2014 are displayed here.
the main section of the SQL Server 2014 Setup window. All the settings and options are in the main section.
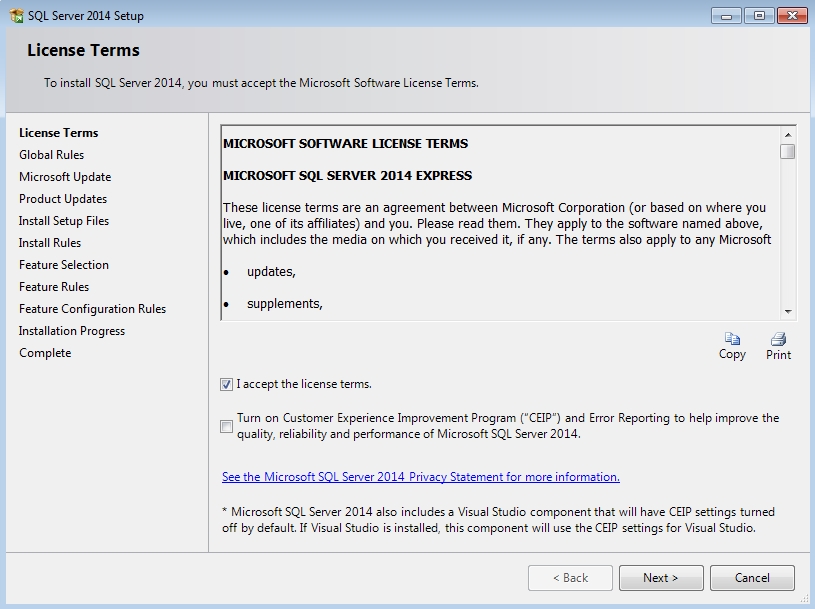
The License Terms
The first step in installing up SQL Server 2014 is the licence agreement. All the licence details for SQL Server 2014 can be read, copied and printed from the main section of the SQL Server 2014 Setup License Terms window.
To read the entire license information, drag the scroll bar at the right side of the main section of the SQL Server 2014 Setup License Terms window.
To copy the license terms displayed in the top part of the main section, click on the Copy button located on the right side, below the license terms.
To print the license information, click on the Print button located on the right side, below the license terms, next to the Copy button.
The SQL Server 2014 Setup License Terms window displays two options at the bottom of the main section:
I accept the license terms option confirms that you have read and agreed all the license terms displayed above.
Send feature usage data to Microsoft option enables your machine to automatically send feedback to Microsoft. The information send by your machine regards only the hardware configuration and the usage of SQL Server 2014 and its components. Click on the link below this option for more information about the Microsoft SQL 2008 R2 Privacy Statement.
Accept the license terms by checking the box corresponding to the I accept the license terms option.
Click Next to proceed to the next step of the installation.
In the Microsoft Update window, check the Use Microsoft Update to check for updates (recommended) option to automatically receive updates for SQL Server 2014.
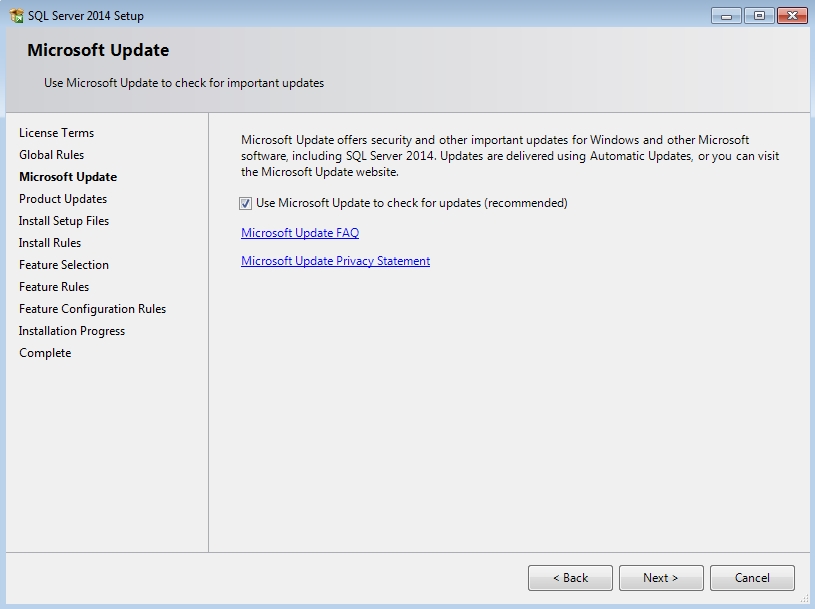
Microsoft Update option
Wait for the Setup Support Files to be installed. After the installation of the Setup Support Files is complete, the Feature Selection window will open.
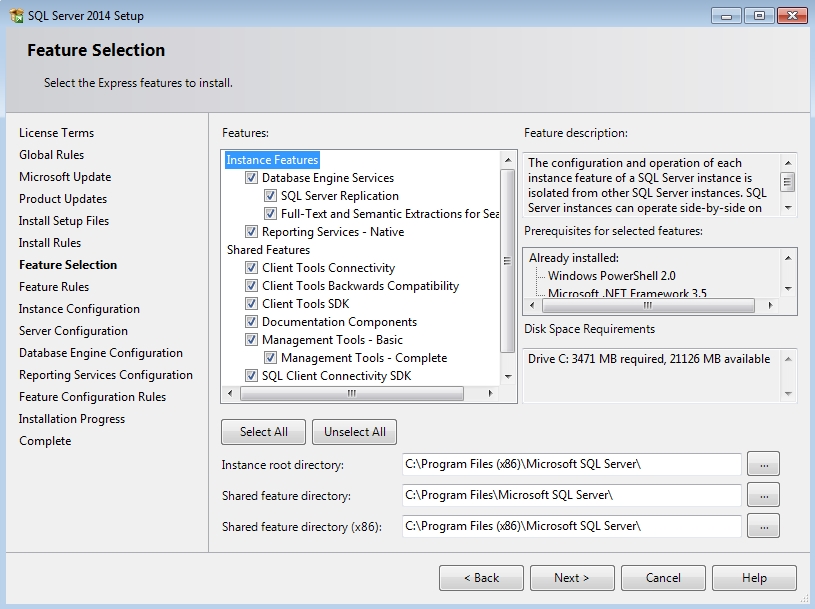
Feature Selection window
The Feature Selection window allows the user to select which of the SQL Server 2014 features are installed. By default, all the features are selected.
The features are listed in the left side of the main section and can be selected or deselected for installation by checking the corresponding boxes. SQL Server 2014 provides three types of features:
Instance Features (Database Engine Services, Reporting Services).
Shared Features (Business Intelligence Development Studio Management Tools - Basic, SQL Client Connectivity SDK, Microsoft Sync Framework).
Redistributable Features.
A short description of each feature is available on the right side of the main section. Select a feature by clicking on it and the corresponding description will be displayed on the right side of the main window.
Select all and Unselect All options are available in the bottom-left side of the main section, below the features.
Clicking on the Select All button will automatically select all the features available.
Clicking on the Unselect All button will automatically unselect all the features available.
The Shared Feature Directory option at the bottom of the main section allows the user to select the folder in which the shared features of SQL Server 2014 will be installed. This is helpful when more SQL Server distributions on the local machine have the same shared features. By default, the shared features will be installed in the Microsoft SQL Server directory.
Select the folder for Shared Features by typing the complete path into the text field or by clicking the … (browse) button next to the text field.
Remember that you can always check the progress of SQL Server 2014 installation in the status section, in the left side of the setup window.
Select the desired features and click Next to proceed.
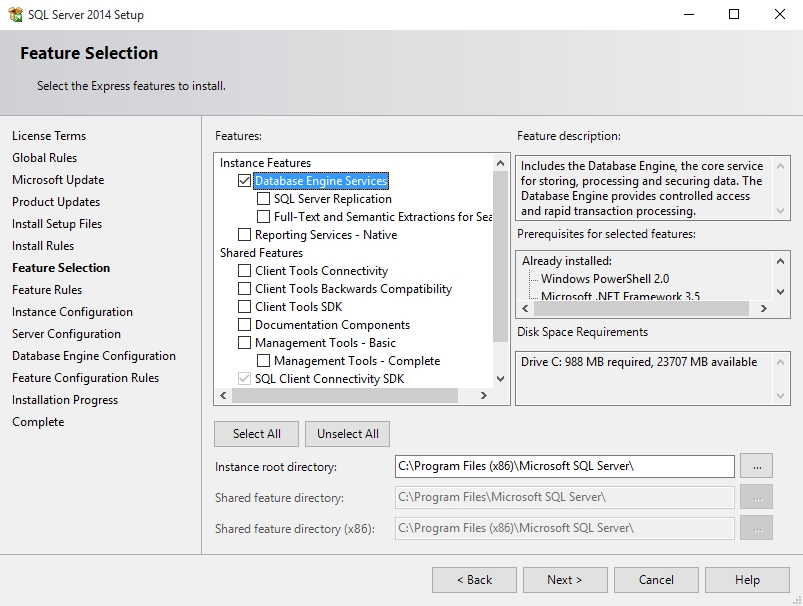
Minimal SQL Server 2014 feature installation
If desired, a minimal features installation of the SQL Server 2014 can be achieved by marking for installation only the Database Engine Services feature, which is absolutely required by Ewon by HMS Networks. The SQL Client Connectivity SDK is also required but this feature is installed by default and cannot be left out of the initial installation.
Feature Selection
The next step of the installation of SQL Server 2014 is the Instance Configuration.
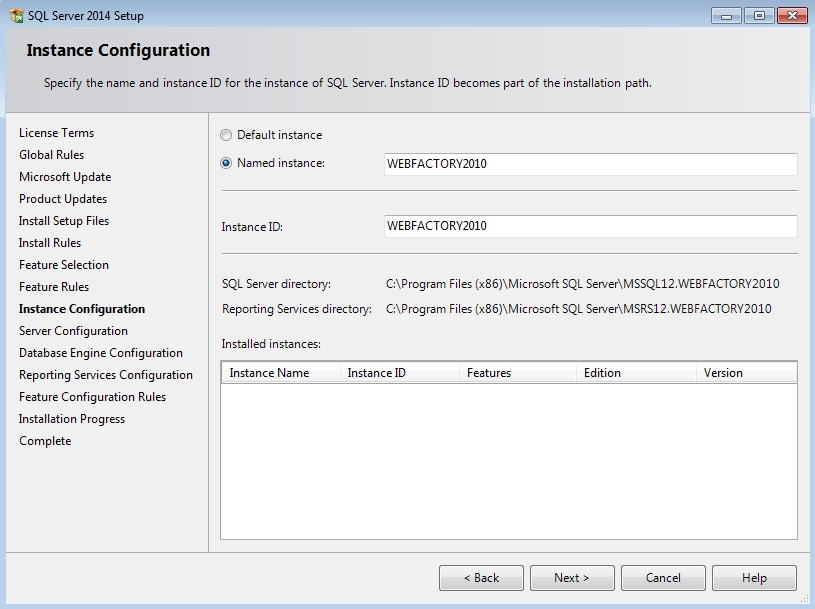
Instance Configuration window
The Instance Configuration window allows the user to create an instance of SQL Server 2014 deployment.
This options should not be changed, as Ewon by HMS Networks Setup already configured this SQL Server 2014 instance.
The instance options can be selected in the main section of the setup window:
Default instance - installs SQL Server 2014 with the default names and locations.
Named instance - allows the user to create a new instance name. This option is important when setting up SQL Server 2014 to interact with other software. This option should not be changed!
Instance ID - allows the user to assign and id to the named instance. This option should not be changed!
Instance root directory - allows the user to select the directory in which the instance will be deployed. This option should not be changed!
SQL Server directory - displays the directory of the SQL Server for this instance setup.
Reporting Services directory - displays the directory of the Reporting Services for this instance setup.
Installed instances - displays the instances that are already installed on the machine.
Click Next to proceed. The next step of the installation of SQL Server 2014 is the Server Configuration.
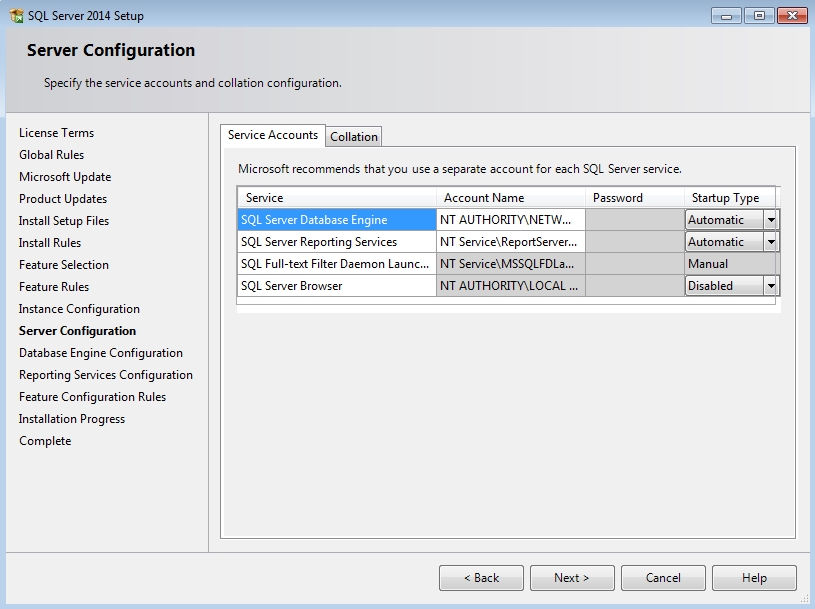
Server Configuration window, Service Accounts tab
The Server Configuration window enables the user to specify the Service Accounts and configure the Collation.
The Service Accounts tab is selected by default. It enables the user to change the accounts settings for SQL Server 2014.
The Collation tab enables the user to choose the collation of the database engine. While this is an option, we recommend using the default collation!
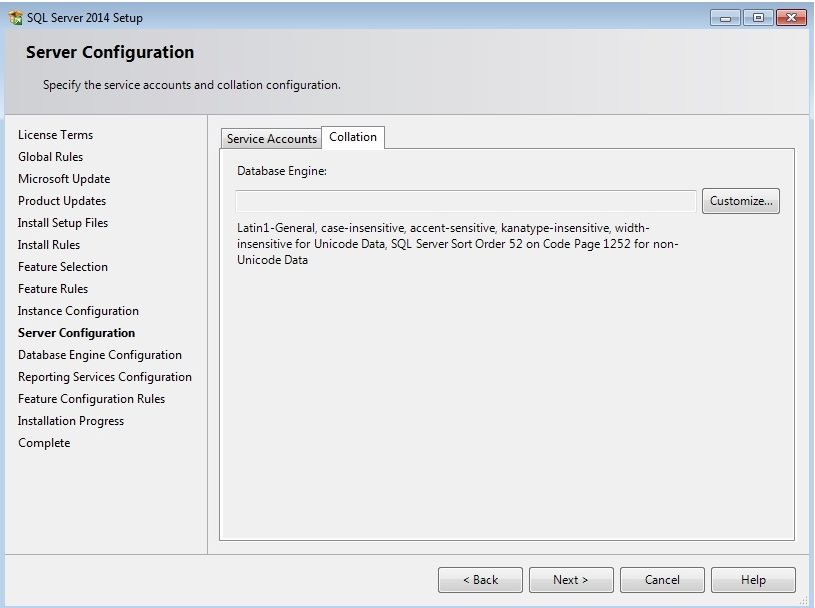
Server Configuration window - Collation tab
IMPORTANT
Unless a specific setting is required, the collation of the database engine should be left default, to avoid any further script errors.
Configure the service accounts and the collation and press Next to proceed. The next step in installing SQL Server 2014 is the Database Engine Configuration.
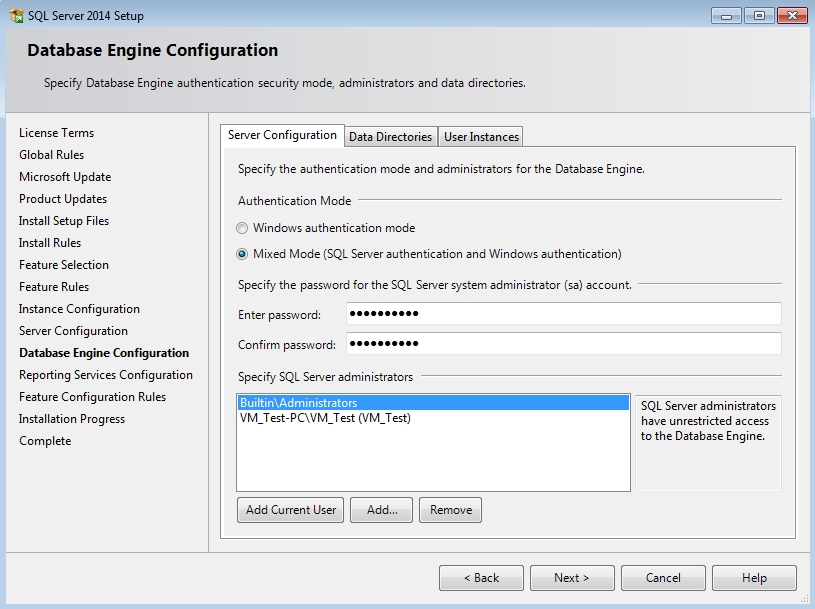
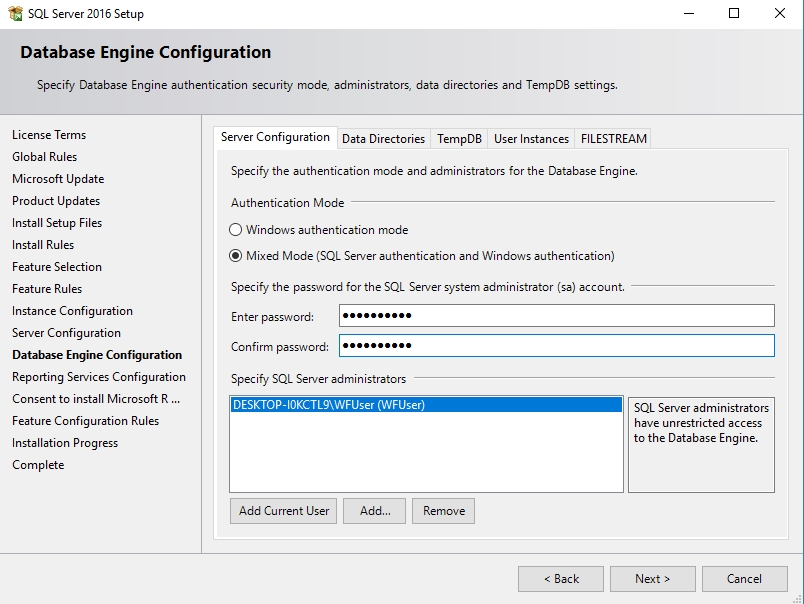
Database Engine Configuration - Server Configuration
The Database Engine Configuration window enables the user to specify the database engine authentication security mode, the administrators and the data directories.
Server Configuration tab located in the top-left part of the main section lists the following options:
Authentication Mode
Windows Authentication mode - uses the Windows credentials to authenticate in the database;
Mixed Mode - uses both SQL Server authentication and Windows authentication;
Specify the password for the SQL Server system administrator (sa) account
Enter password - use the text field to enter the SQL Server system administrator password;
Confirm password - use the text field to confirm the SQL Server system administrator password;
Specify SQL Server administrators - lists the SQL Server administrators.
Add Current User - adds the user that is logged on in this running session as SQL Server administrator;
Add... - enables the user to select other user accounts and add them as SQL Server administrators;
Remove - removes an user from the SQL Server administrators list;
NOTE
SQL Server administrators have unrestricted access to the Database Engine.
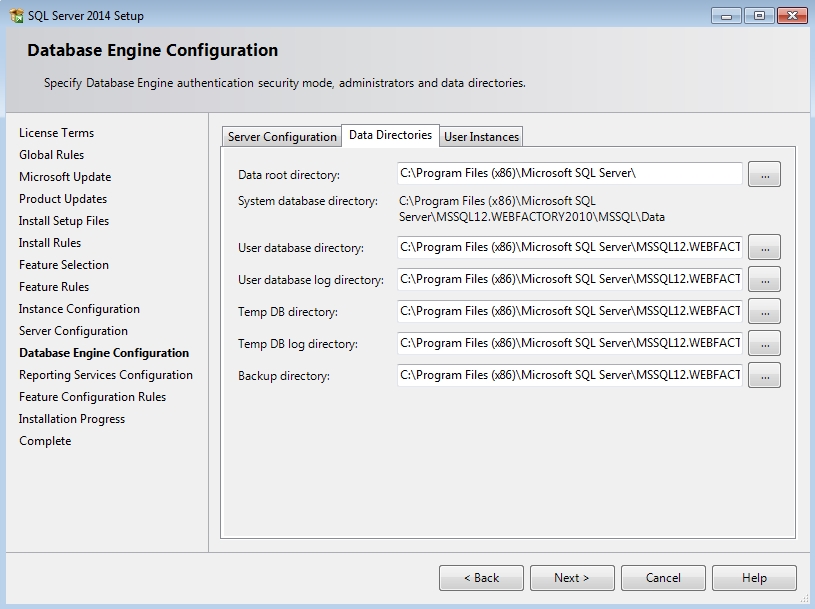
Database Engine Configuration - Data Directories
The Data Directories tab enables the user to select the directories for:
Data root directory
User database directory
User database log directory
Temp DB directory
Temp DB log directory
Backup directory
To change any of the above directories, click on the ... (browse) button and navigate to the desired directory.
The System database directory is also displayed below the Data rood directory.
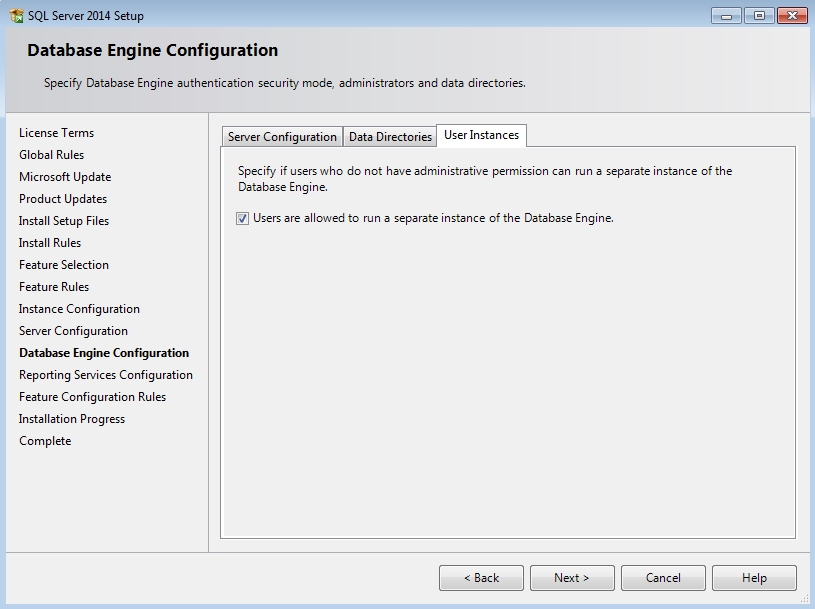
Database Engine Configuration - User Instances
The User Instances tab allows the user to select whether the users are or not allowed to run separate instances of the Database Engine.
Set up the SQL Server authentication and password and click Next to continue. The next step in installing SQL Server 2014 is the Reporting Services Configuration.
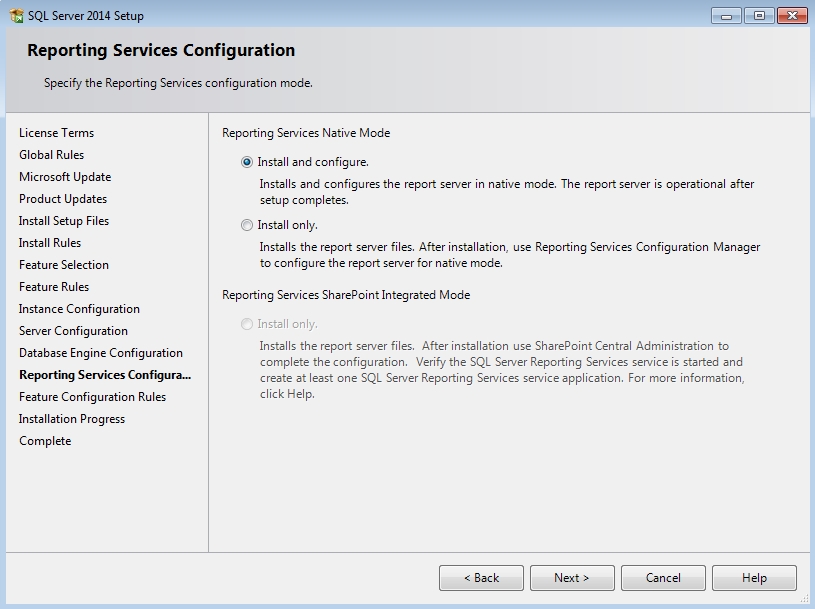
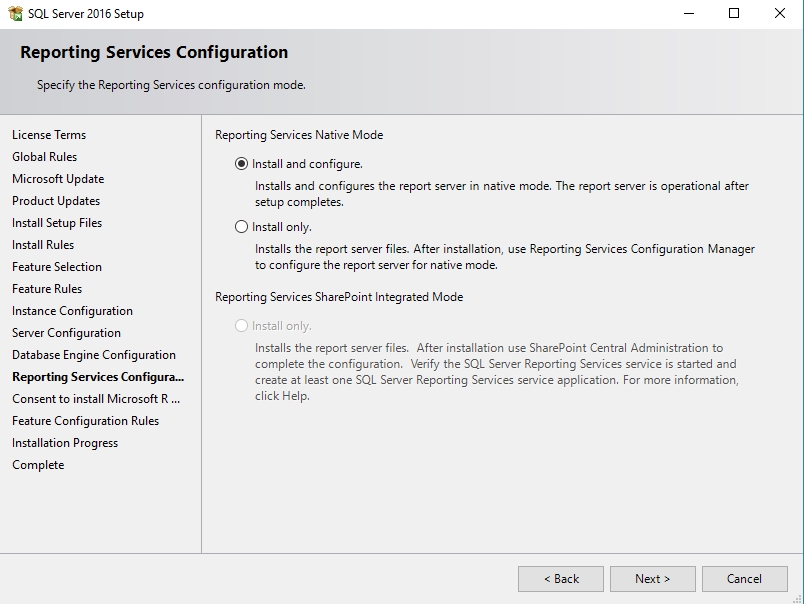
Reporting Services Configuration
The Reporting Services Configuration window allows the user to setup the reporting services of SQL Server 2014. There are three options for configuring the reporting services:
Install the native mode default configuration - the report server will be configured in the Native mode, using default values. This native report server is usable without further setup.
Install the SharePoint integrated mode default configuration - created the report server database in SharePoint and configure the report server with the default values. By choosing this method, the reporting server will not be available until SharePoint is installed on the machine, and the Reporting Services add-in for SharePoint Technologies is installed and configured in SharePoint.
Install but not configure the report server - the report server will be available only after the user sets the options for the reporting server using the Reporting Services Configuration tool.
Select the desired option and click Next to continue.
Wait for the SQL Server 2014 Setup to run the SQL Server 2014 installation. You can check the progress in the main section of the window.
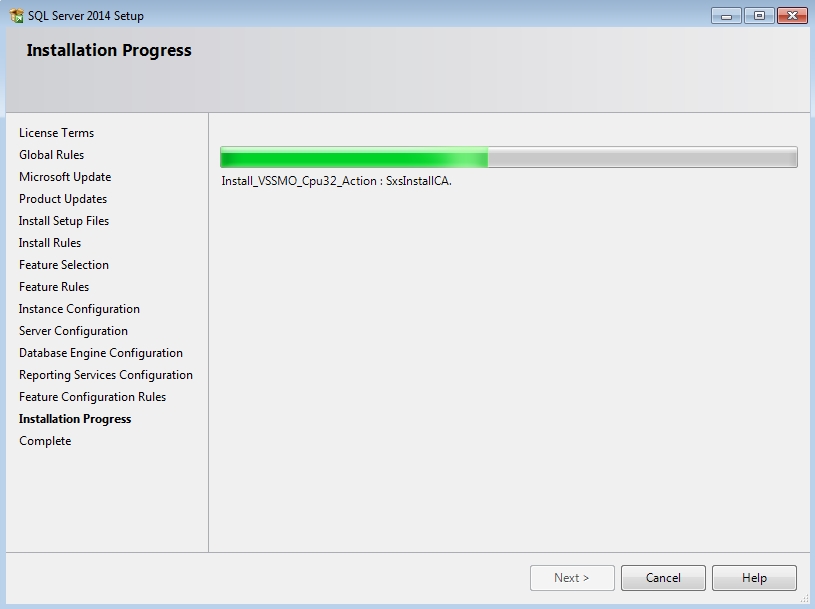
Installation Progress
After the installation is complete, a summary window will pop up and inform the user about the details of the completed installation. Click Close to finish the installation procedure and return to the WEBfactory 2010 Setup window.
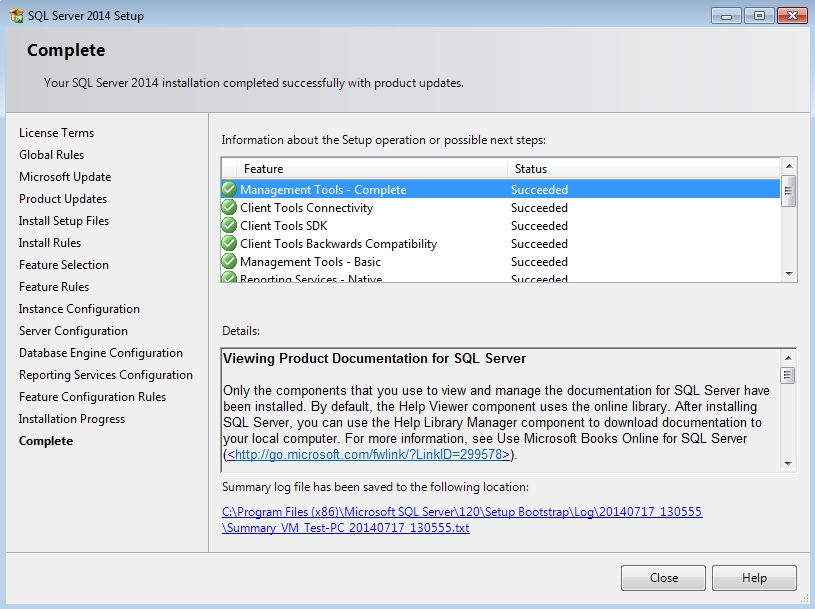
Installation complete
Once the Microsoft SQL Server 2014 is installed, you can continue with installing WEBfactory 2010.
Installing Microsoft SQL Server 2016 for WEBfactory 2010
Read these articles and learn how to install the SQL Server 2014 in order to start using WEBfactory 2010.
This article explains how to install and configure Microsoft SQL Server 2016 Express edition and WEBfactory 2010 version 3.6.0 with the latest Service Pack.
The Microsoft SQL Server 2016 is supported starting with WEBfactory 2010 version 3.6.0 with Service Pack 10 and above. Since the 2016 version of the SQL Server is not included in the WEBfactory 2010 setup, it must be installed individually, as a standalone software, and configured properly.
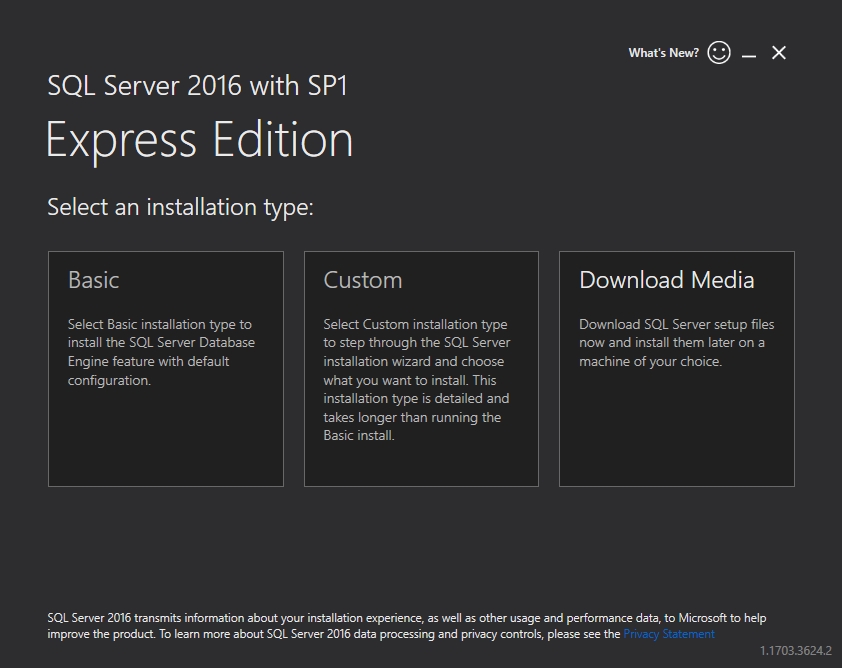
Launch the SQL Server 2016 setup as Administrator. Select the Custom installation type.
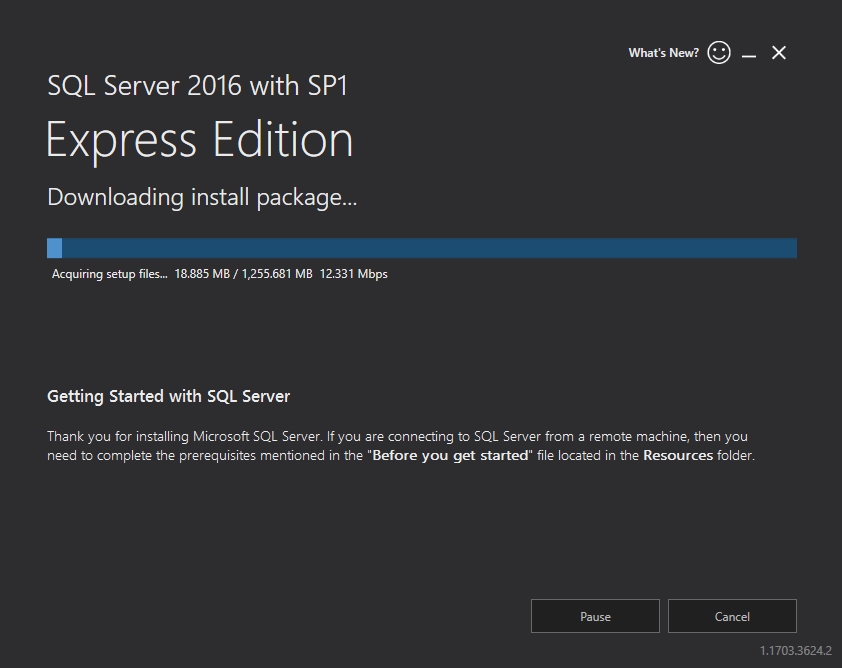
Confirm the location for downloading the installation package and wait until the download is complete.
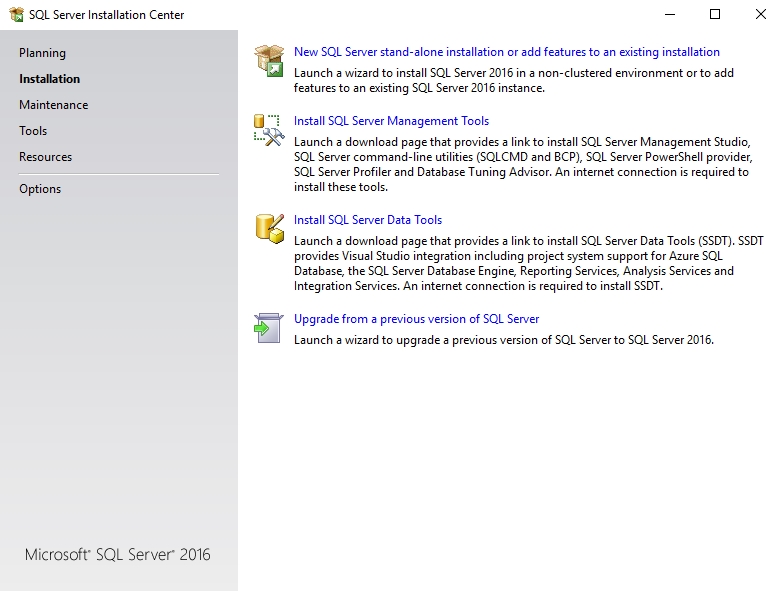
Once the installation package is downloaded, it will be automatically executed. Select the New SQL Server stand-alone installation or add features to an existing installation.
Accept the license terms and review the installation rules.
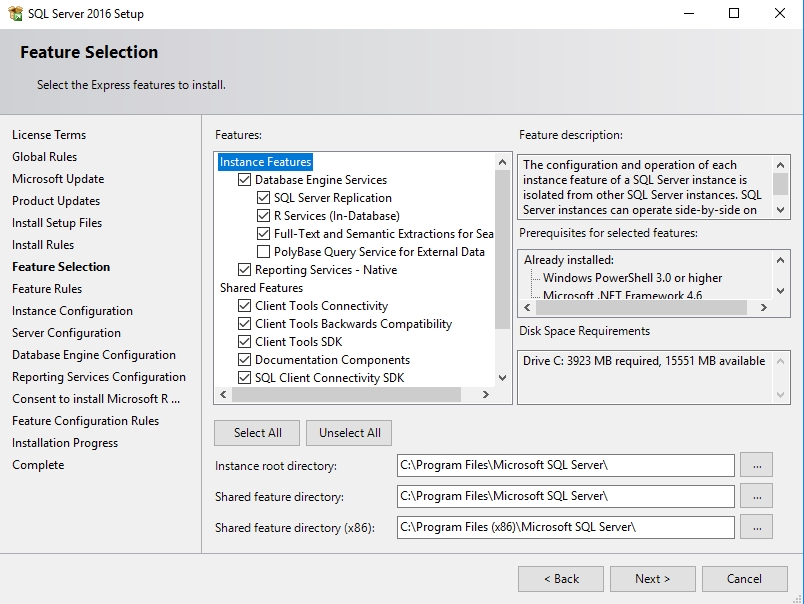
At the Feature Selection screen, proceed with the default selection.
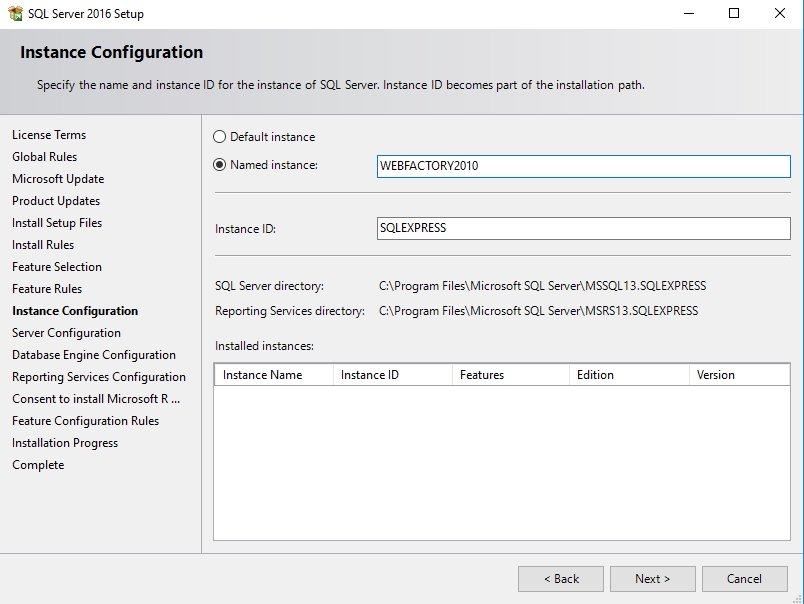
At the Instance Configuration screen, set the Named Instance to WEBFACTORY2010. The Instance ID will be automatically updated.
Accept the defaults for the Server Configuration screen.
At the Database Engine Configuration screen, select Mixed Mode for the authentication mode and enter webfactory for the password.
Select Install and configure Reporting Services.
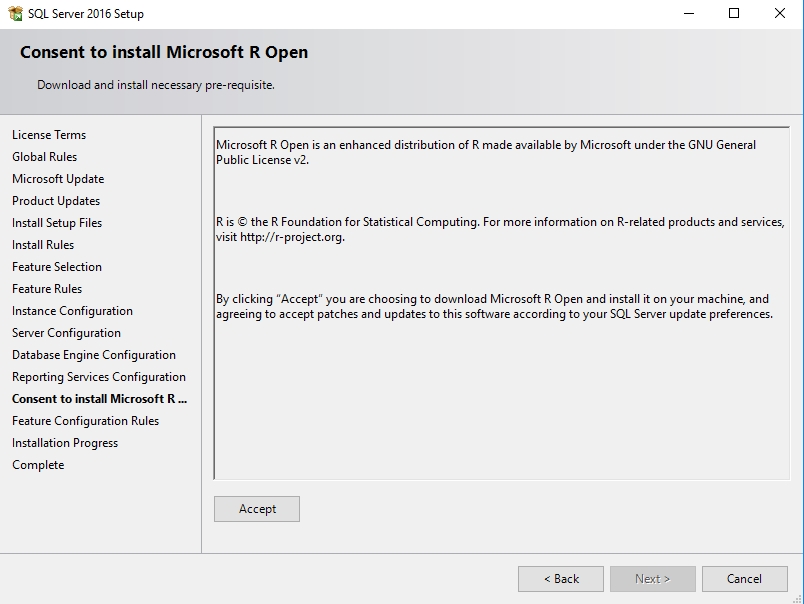
Agree with the installation of Microsoft R open and wait until the installation is done.
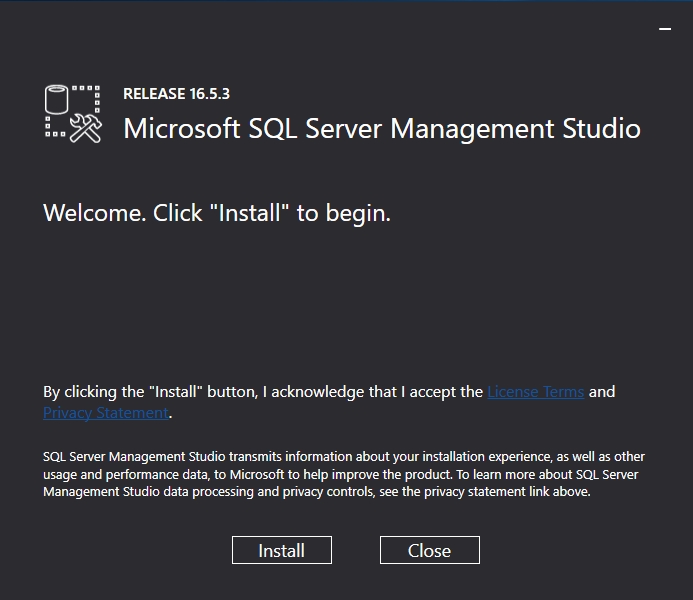
The Microsoft SQL Server 2016 is now installed and can be used, but with no management tool, any direct database operation is limited. So the next step is installing the Microsoft SQL Server Management Studio.
After the SQL Server 2016 is completely installed, you can continue with the standard installation. When opening the WEBfactory 2010 Setup, you will notice that the SQL Server is already present, albeit the Setup will report it as 2014. You can continue with the WEBfactory 2010 installation.